As a WooCommerce wholesale store owner, offering flexible payment options to your customers is essential. One such powerful tool that can elevate your online store’s efficiency and boost customer satisfaction is the WooCommerce Net 30 plugin.
In a general business context, “Net 30” refers to payment terms that allow customers to make payments within 30 days of the invoice date.
This is common in B2B (business-to-business) transactions where you as a wholesale seller can offer credit to your customers, giving them time to pay for products or services after 30 days of receiving them.
In today’s guide, I’ll explain the net 30 payment terms and how you can add them to your WooCommerce store. So, without any further ado, let’s jump into it.
On This Page
What is Meant By Net 30 Payments?
Net 30 payments refer to a specific payment term used in business transactions. When a company offers net 30 payment terms to their customers, it means that the customer has a period of 30 days from the date of receiving an invoice to make the full payment.
This allows customers a grace period of 30 days to settle their accounts and fulfill their financial obligation.
For example, if an invoice is issued on July 1 with Net 30 terms, the customer would have until July 31 to make the payment in full. It’s important to note that the 30-day period typically starts from the invoice date, not the date of delivery or product receipt.
How Net 30 Payments Work?
Here’s how it works:
- The customer purchases the product from the store and the seller delivers the products with an invoice for the full amount.
- The terms of payment are stated on the invoice, and the client has 30 days to pay the whole amount. This indicates that the payment is due 30 days after the invoice’s due date.
- The client may choose to use the vendor’s goods or services throughout these 30 days without making an instant payment. It functions as a sort of temporary credit extension.
- The customer is in charge of making sure that the payment is made in full on or before the 30th day after the invoice date. The vendor may impose late payment fees or take necessary legal action to recover the money if the payment is not received within this time frame and is subsequently deemed overdue.
However, net 30 is not the only payment term you can provide. Depending on your consumer base, it may make sense to offer net 7, 15, 60, or even 90 days. It all comes down to consumer loyalty and purchase quantity.
Best WooCommerce Net 30 Plugins
When it comes to implementing net 30 payment terms in your WooCommerce store, there are not many plugins available that can simplify the process and provide a seamless experience for both you and your customers.
Here are some of the best WooCommerce Net 30 plugins worth considering:
1. WC Net 30 Terms for WooCommerce
This plugin allows you to set up a cheque payment option at checkout, enabling you to offer Net 30 payment terms to your customers. It provides an easy way to implement this specific payment term within your WooCommerce store.
2. Invoice Gateway for WooCommerce

It is another plugin that was created to allow your customers to complete the checkout process without paying immediately.
It sends an invoice to the customer’s email after the purchase. This invoice permits payment via third-party services such as Xero, Quickbooks, etc.
The plugin lets you manually create invoices with net payment conditions in your accounting application and send them through WooCommerce. That lets you establish net payment terms and use a third-party payment processor.
How to Add Net 30 Payment Terms to WooCommerce?
To add Net 30 payment terms to WooCommerce, you can use any of the above-mentioned plugins. I’ll be using the ‘WC Net 30 Terms for WooCommerce’ plugin.
It gives you more customization options and allows you to enable the net 30 payment terms for specific users.
Note: If you want to use the ‘Invoice Gateway for WooCommerce’ plugin, you’ll need to enable the ‘Invoice Payments’ payment method by navigating to WooCommerce>>Settings>>Payments from your WordPress dashboard.
Once enabled, the customers can complete the checkout, an invoice will be sent to their email and they can pay you using third-party payment methods.
However, to configure the net 30 payment terms in WooCommerce using the ‘WC Net 30 Terms for WooCommerce’ plugin, follow the following steps.
1. Install and Activate the Plugin
The first step is to install and activate the plugin. You can do that by navigating to Plugins>>Add New from your WordPress dashboard and searching for the ‘net 30 payment terms’ in the search bar.
You can see a few different plugins, but you need to install the plugin by ‘Greg Bastianelli.’
Click the ‘Install Now’ button to install it and once installed, you’ll see the ‘Activate’ button instead of install now button. Click the ‘Activate’ button to activate the plugin.
Note: I have already installed and activated the plugin so I could see the ‘Active’ notice in front of the plugin.

2. Enable the Check Payments
Once the plugin is installed and activated, you need to enable the check payments to your store. To do so, navigate to WooCommerce>>Settings>>Payments from your WordPress dashboard.
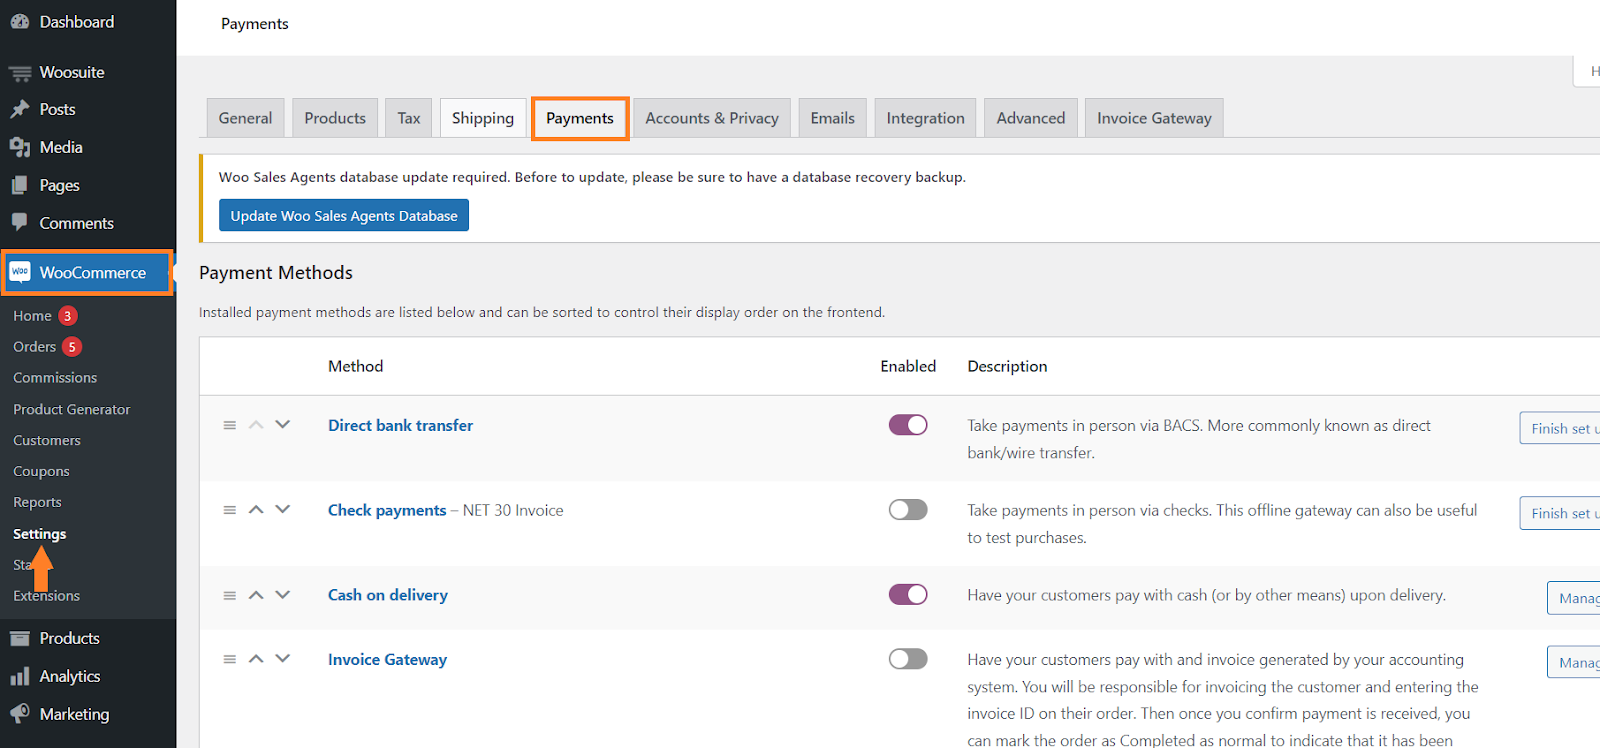
2.1. Enable the Check Payments
Click the ‘Finish Set up’ button in front of the ‘Check Payments’ payment method to enable and configure the check payments option.

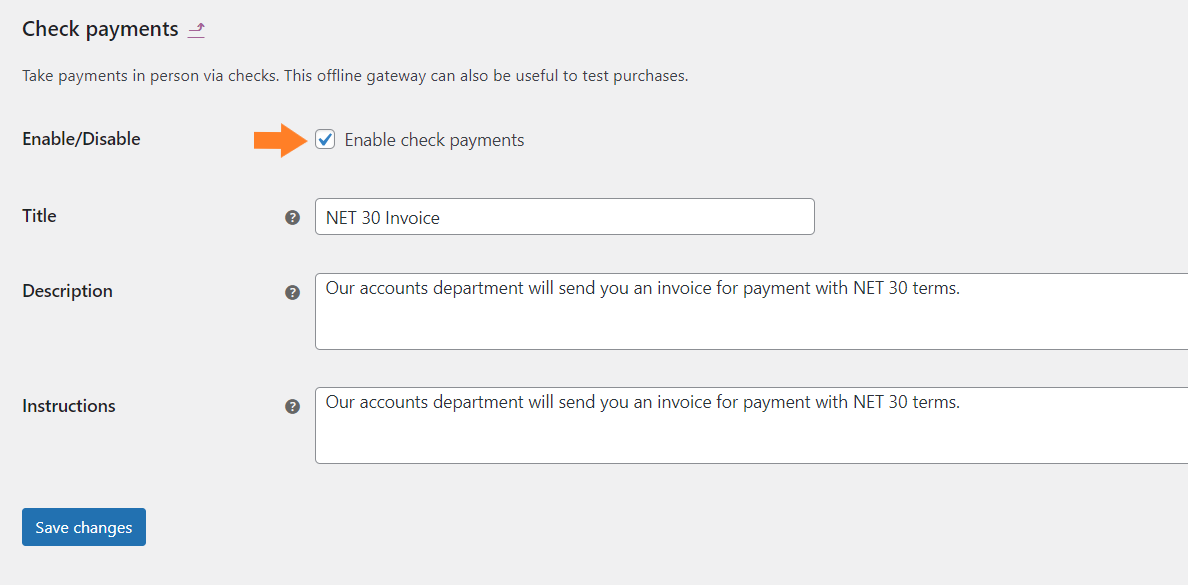
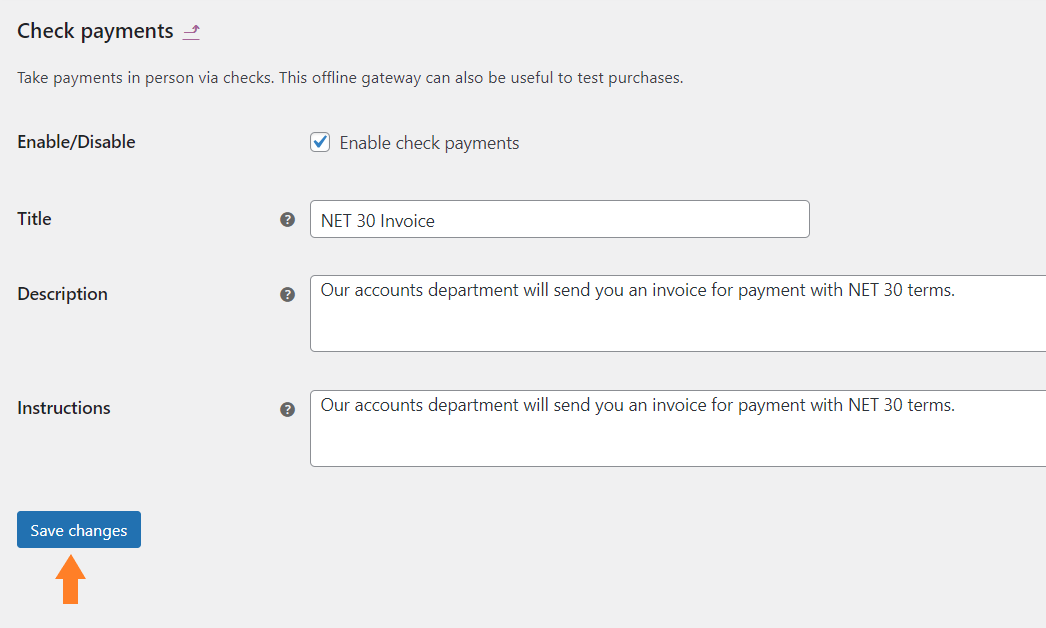
On the next screen, check the ‘Enable Check Payments’ checkbox to enable this offline payment method.
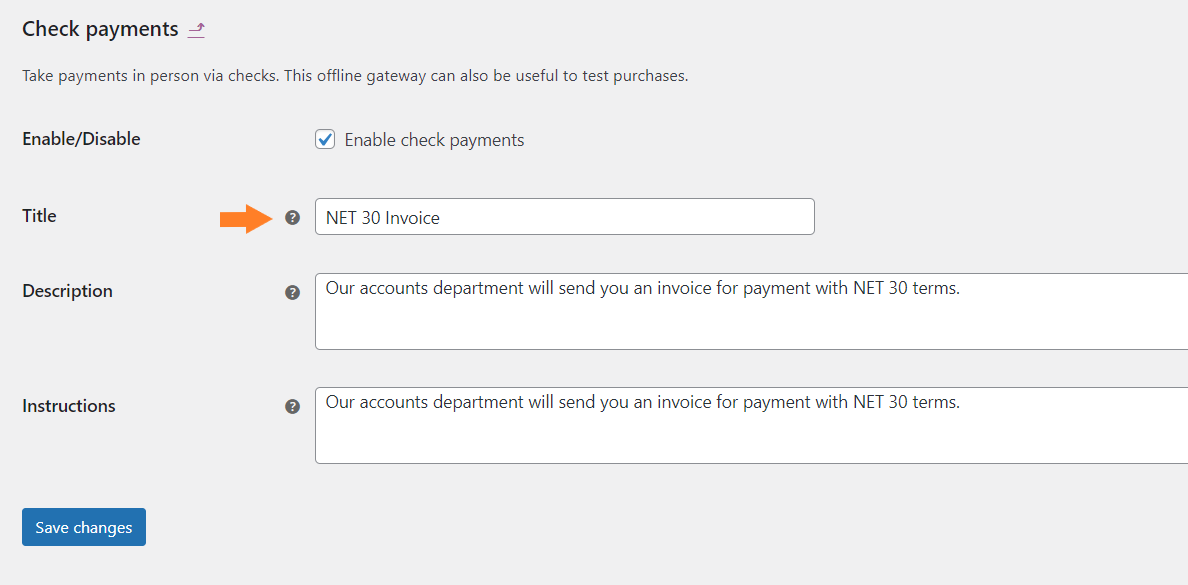
2.2. Change the Title
In the ‘Title’ field, you will need to replace the default ‘Check Payments’ title with the ‘NET 30 Invoice’ otherwise the plugin won’t work properly.
I had already changed it.
2.3. Add Description & Instructions
In the next fields, you can add the description and instructions to let customers what it means. You can also explain this payment method if someone doesn’t know about it.

2.4. Save Changes
Finally, don’t forget to click the ‘Save Changes’ button to save the settings.
The plugin allows you to enable the Net 30 payment method for specific users. You’ll need to edit each user and activate the net 30 payment terms.
First, you need to navigate to Users>>All Users from your WordPress dashboard.
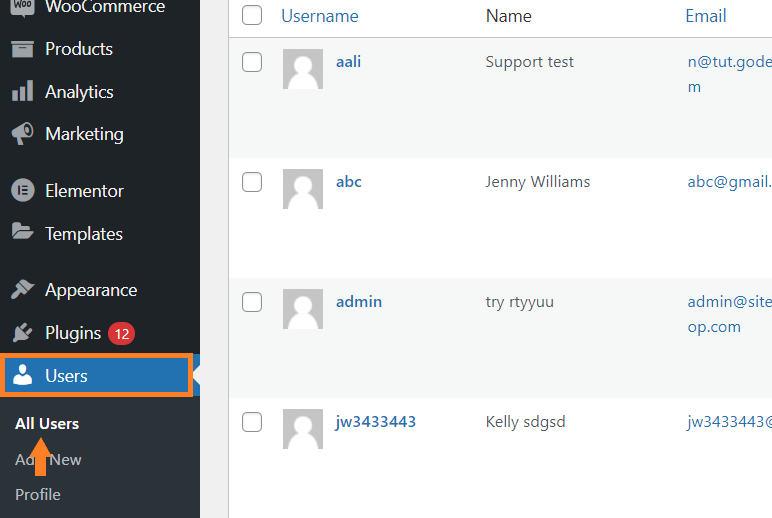
4. Edit the User
Next, you need to edit the user for whom you want to enable the net 30 payment terms. Hover over your mouse to the user you want to edit, and click the ‘Edit’ button.

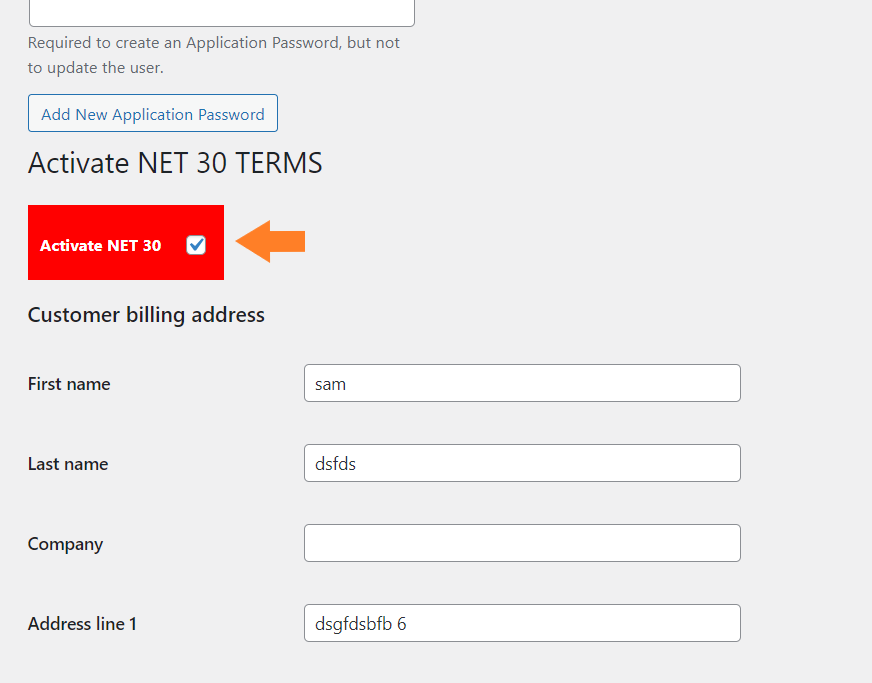
5. Activate the Net 30 Payment Terms
Once you click the edit button, you will be redirected to the user edit page where you can change the user’s details like name, email, password, address, and more.
Scroll down until you see a red checkbox that says ‘Activate the Net 30 Payment Terms.’ Check the checkbox to activate the net 30 payment terms for the user.
You can also add the customer’s billing details.
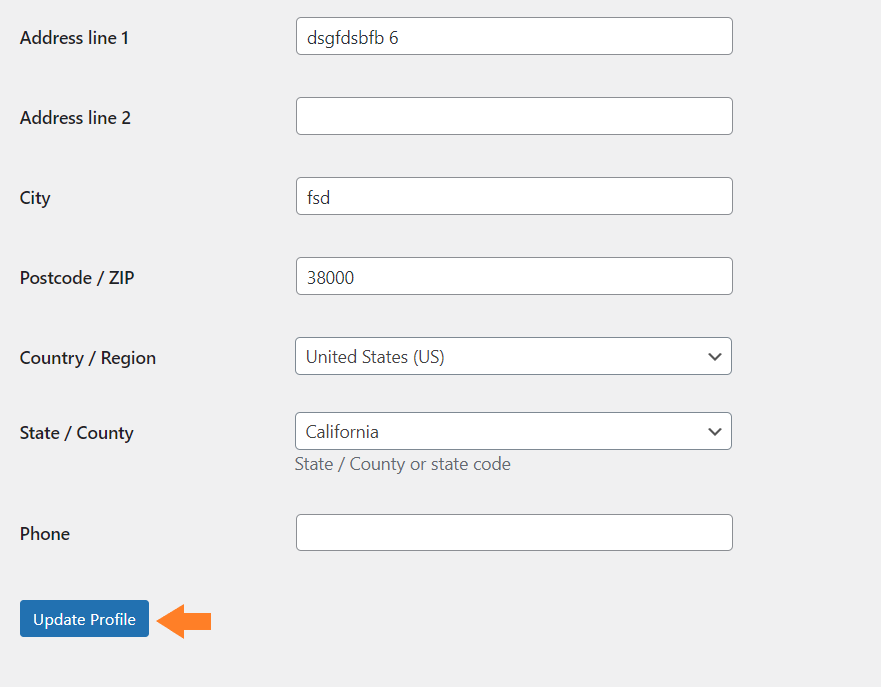
4.1. Update Profile
After activating the net 30 payment terms, scroll to the bottom of the page and click the ‘Update Profile’ button to save the settings.
6. Final Results
Now let’s test the settings.
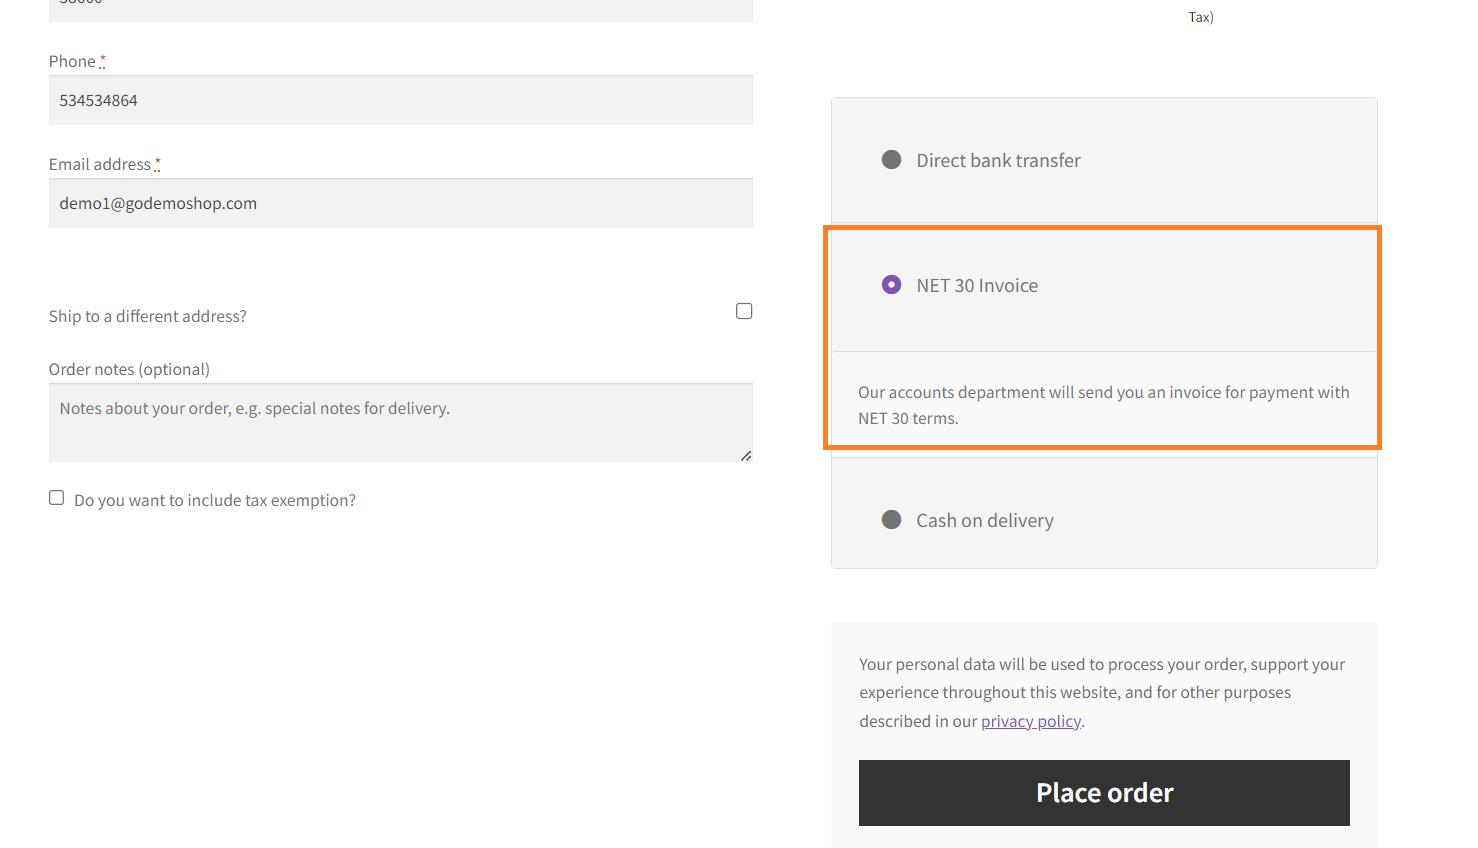
I logged in to my store using that user’s login details and added a product to my cart. When I visited the checkout page, I could complete the checkout using the ‘Net 30 Invoice’ method.
When I completed the checkout, I received an email with the invoice and net 30 payment term details.
Conclusion
That’s it for today’s guide. I hope it was helpful to you and you were able to add a Net 30 payment method to your store.
If you are selling as a retailer and a wholesaler, you need to ensure that you do not enable this method for all of your customers because it can cause you potential loss.
This method works based on trust so ensure you only allow the customers who are your regular customers and purchase the products or goods in bulk and you have a good relationship with them.
After 30 days of checkout, they can make you a check payment or send you the payment offline using any third-party payment method.


