Do you want to display all previously purchased products to logged-in users on a single page?
You have landed in the right place. In this tutorial, I’ll show you how to display all purchased products by users on a single page.
One of the main benefits of this feature is to encourage repeat purchases and help customers quickly find past orders. Ultimately, this will help you generate more sales and increase your WooCommerce store’s revenue.
I’ll be explaining each step in detail with screenshots to help you achieve the desired results efficiently and faster. So, continue reading ahead and check out how to display all products purchased by the logged-in user.
Note: In this tutorial, I’ll use the WooCommerce Product Table Plugin to display previously ordered products easily.
Also Read: How to Display Multiple WooCommerce Products On One Page
On This Page
- 1 How to Display All Products Purchased by Users?
- 1.1 1. Install the Product Table Plugin
- 1.2 2. Create Previously Ordered Products Table
- 1.3 3. Add Columns to Show in the Previously Purchased Products Table
- 1.4 4. Enable Bulk Add to Cart
- 1.5 5. Display Previously Bought Products
- 1.6 6. Enable Product Filters
- 1.7 7. Save the Changes
- 1.8 8. Publish the Previously Ordered Products Table
- 1.9 9. Display Previously Ordered Products On My Account Page (Optional)
- 1.10 Final Results
- 2 Conclusion
How to Display All Products Purchased by Users?
Follow the given steps to display all previously ordered products on a single page.
1. Install the Product Table Plugin
Note: You can skip this step if you have already installed and activated the WooCommerce Product Table Plugin.
To install WooCommerce Product Table Plugin, you will need to install the Woosuite Core plugin and activate your Woosuite license key. We have created a Quick Start Guide to walk you through the installation process.
2. Create Previously Ordered Products Table
In WordPress Admin Dashboard: Navigate to Woosuite > Product Table > Click on it.
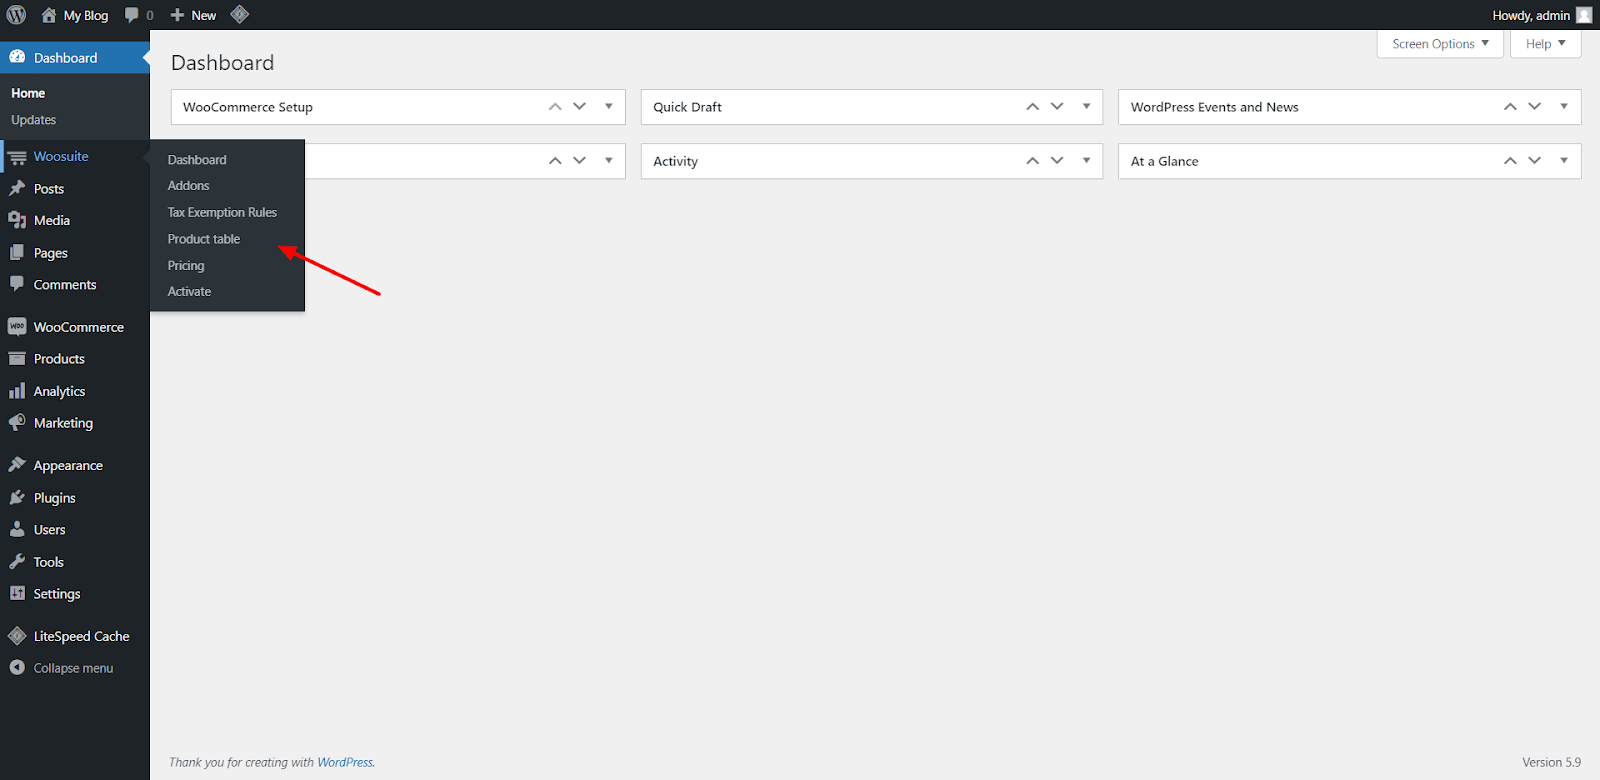
After clicking on the ‘Product Table,’ it will redirect you to the ‘General setting.’ Then, click on the ‘Add New Table’ button.
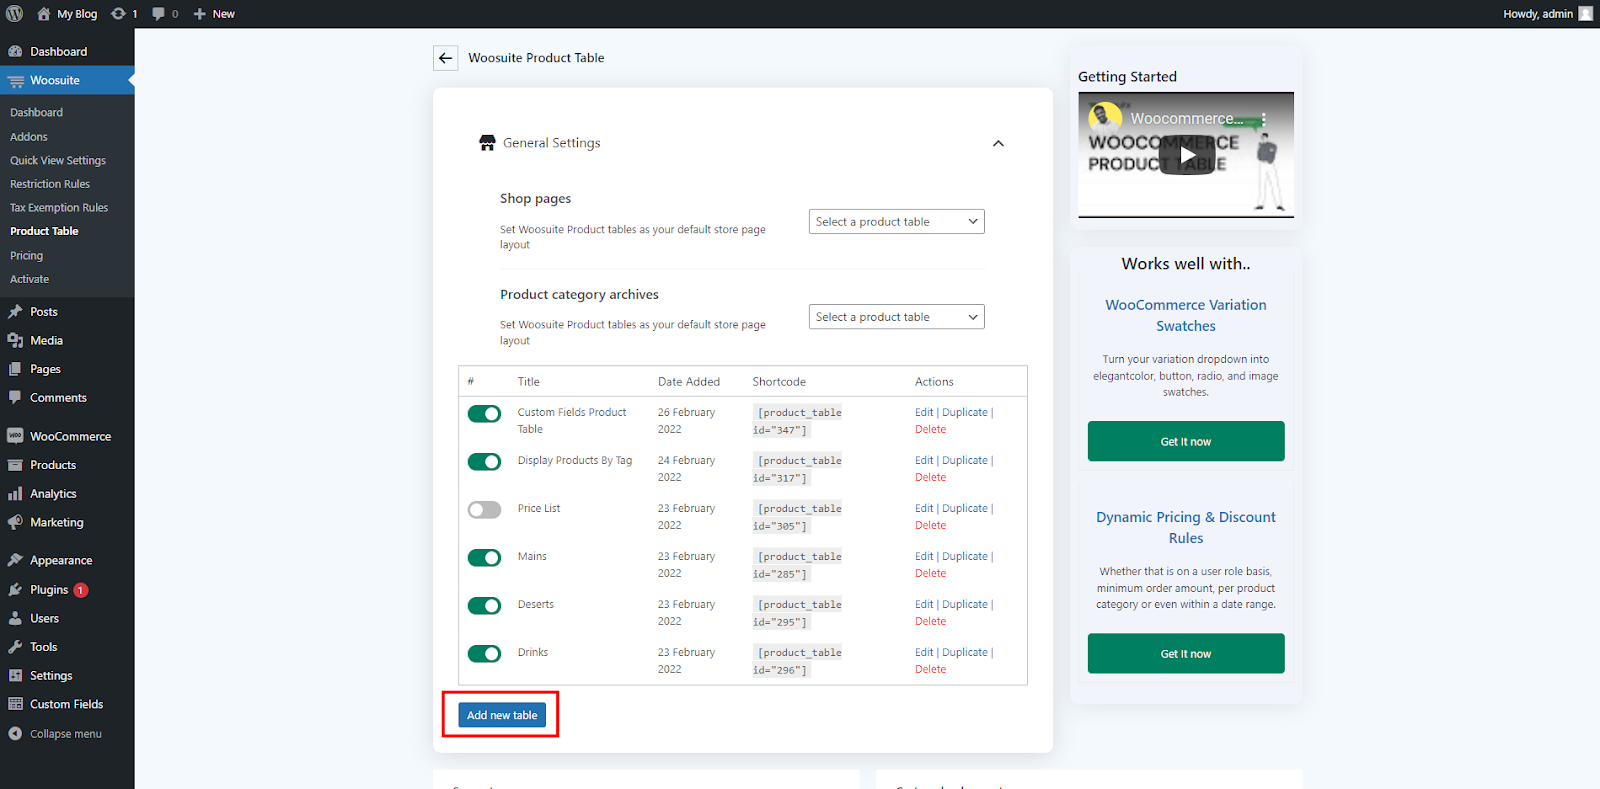
After clicking on the ‘Add New Table’ button, it will redirect you to a new page with additional settings sections, such as Order Form Display, Order Form Information, Bulk Add to Cart, and a few more.

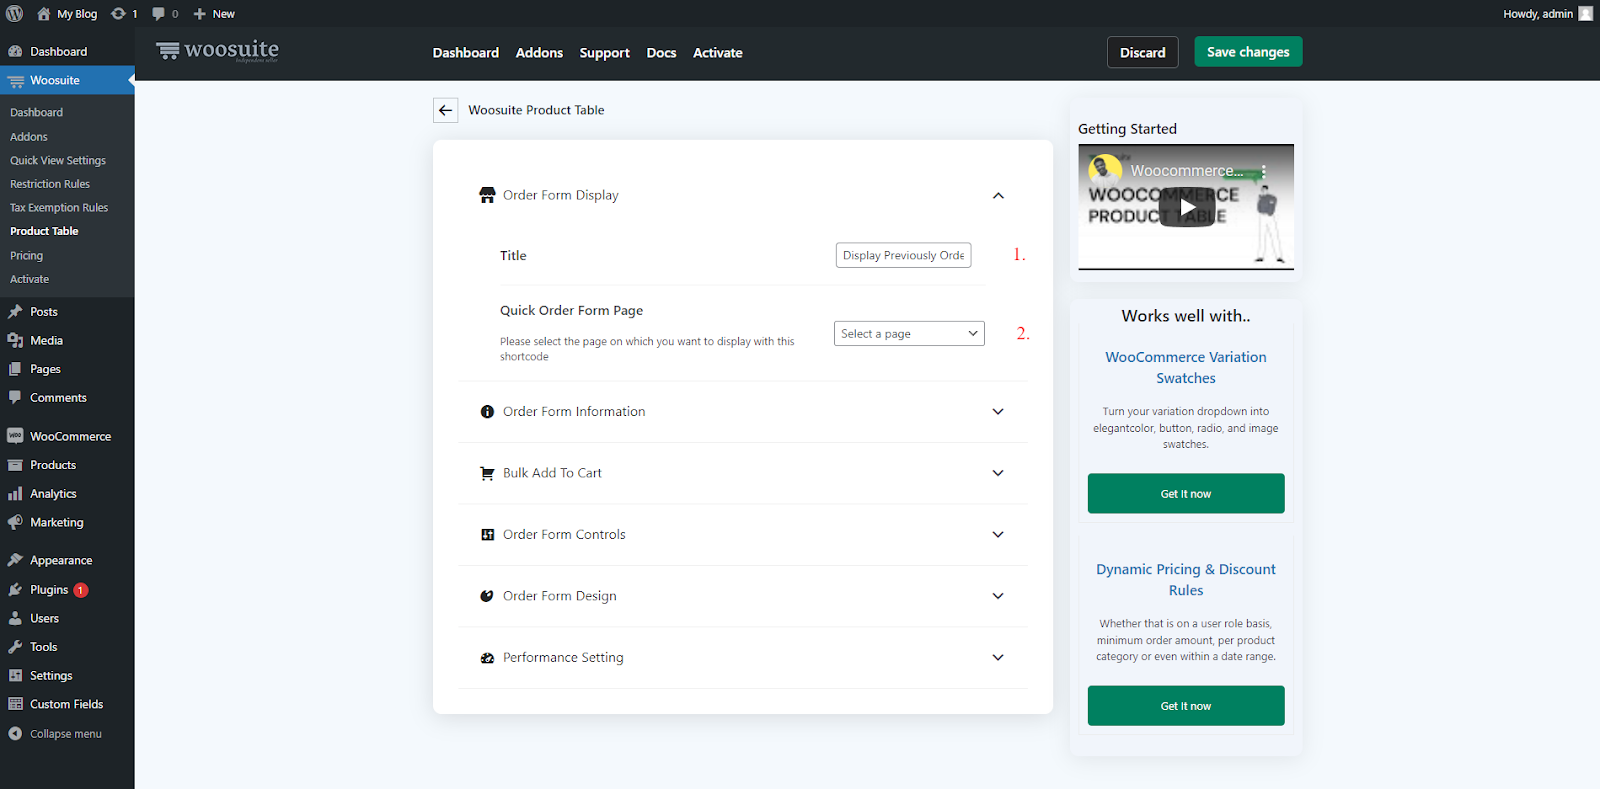
Head to the ‘Order Form Display’ setting, and follow the given instructions.
1. Title: In this field, give your new product table title. This is for internal purposes only. This won’t be visible on the front end. I’m naming it ‘Display Previously Ordered Products.’
2. Quick Order Form Page: From the given options, select the page on which you want to show the price list. Select the Quick Order Form page from the options.
Note: You can select any page you want, but I’ll advise you not to because I’ll use the shortcode method to display the products. I’ll show you that later in the article. So, keep reading.
3. Add Columns to Show in the Previously Purchased Products Table
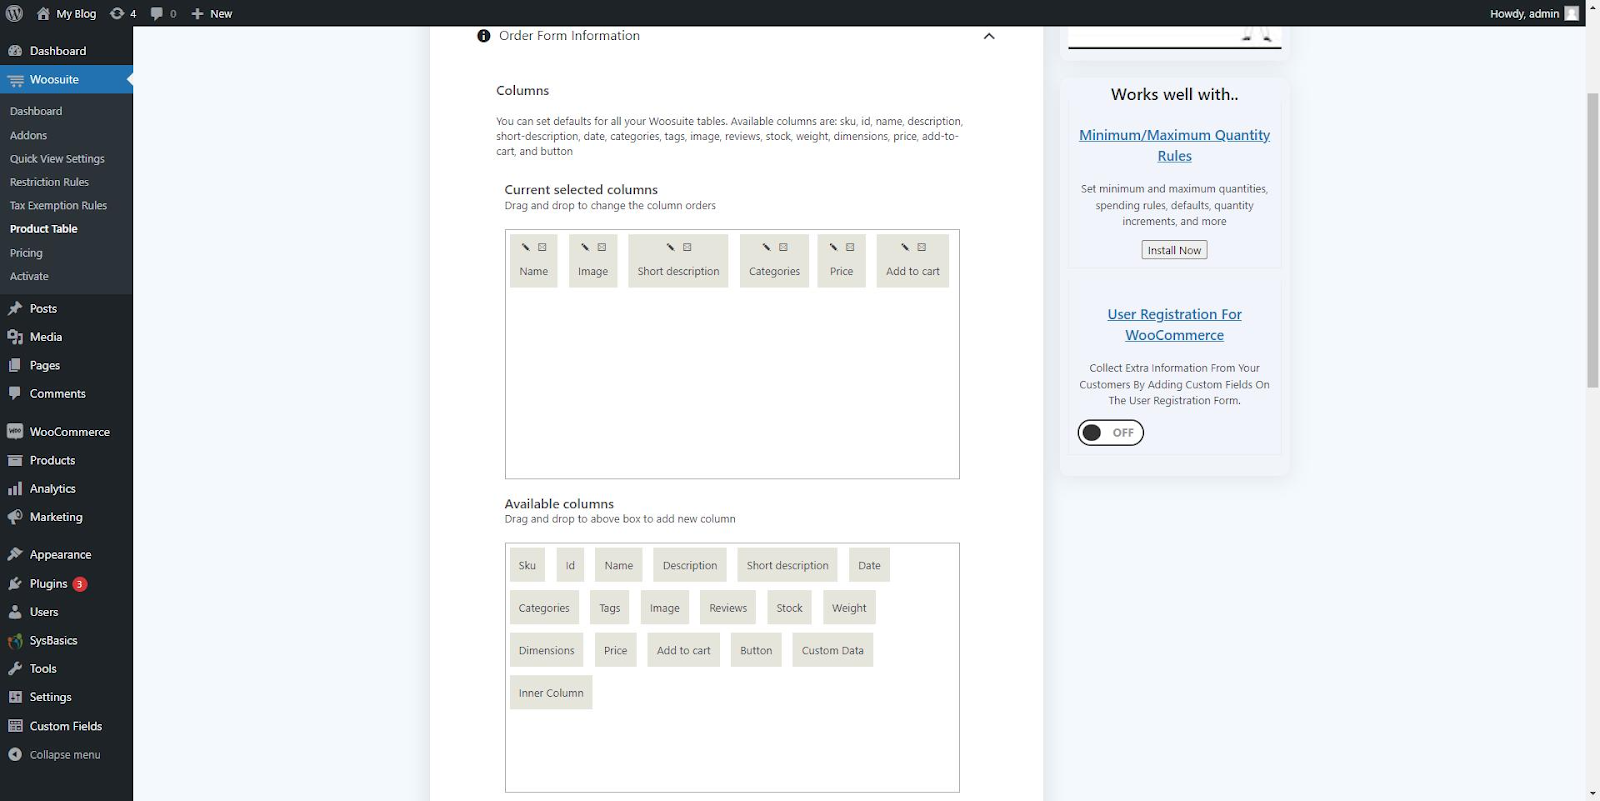
Head to the Product Table’s ‘Order Form Information’ setting.
To add columns to your product table, you have to drag the required columns from the ‘Available Columns’ box to the ‘Current Selected Columns’ box.
I’ll add six columns to the product table – Name, Image, Short Description, Category, Price, and Add to Cart. These are the essential columns. You can add more if you want. You can see the same in the attached video.
Video: https://drive.google.com/file/d/1A7zAczMJf8BeSvb3M2fsj-aFRdJdXisa/view?usp=sharing
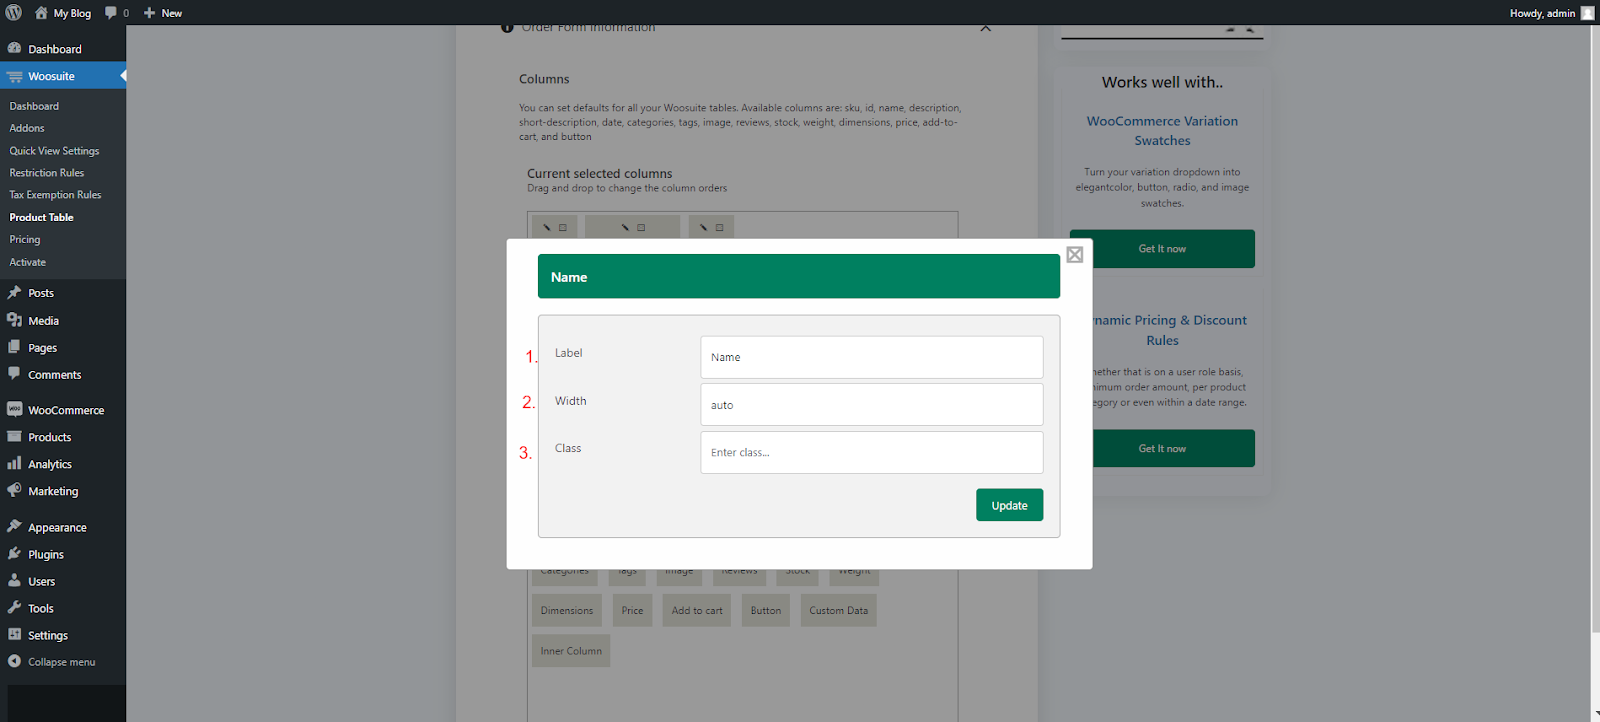
You can also edit the columns’ names and width by clicking on the ‘Pencil’ icon. After clicking on the Pencil icon, you will see three options. Those options will be Label, Width, and Class.
- Name: You can change the name of the column from this option.
- Width: By default, this will be set to Auto. You can add the preferred width in the Width field.
- Class: This field is here to let you customize the particular field with the help of CSS. You can enter your CSS code in this field.
4. Enable Bulk Add to Cart
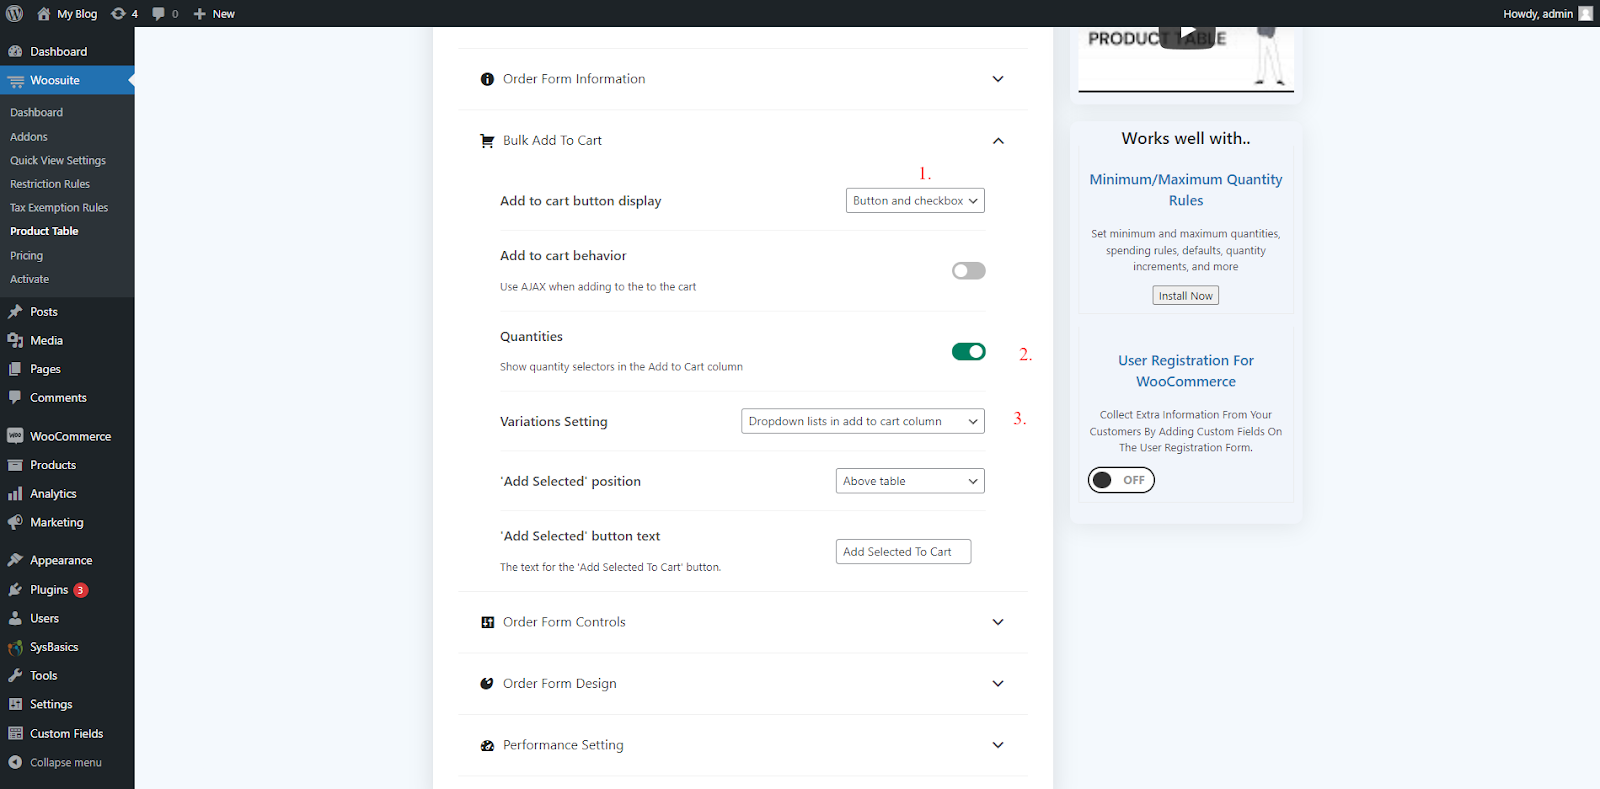
To enable the Bulk Add to Cart features, head over to the Bulk Add to Cart setting.
- Add to Cart Button Display: It would be ‘Button only’ by default. However, you have to select it for the ‘Button and Checkbox.’ It will now show the checkbox alongside all products in the product table. The position of the checkbox will depend on your theme design.
- Quantities: This option will allow users to change the quantity before adding the products to the shopping cart. If you want to offer this choice, you can toggle it on by clicking on it. However, if you turn off this option, users can only modify the quantity by going to the cart.
- Variation Settings: Select this option to ‘Dropdown Lists In Add to Cart Column.’
5. Display Previously Bought Products
Jump to the Order Form Control settings, and look for the ‘Product Conditions’ option.
Then, click on the ‘Add Rule’ button.

- Type: Select this option to ‘Recently Purchased.’
- Compare: Make sure this option is set to ‘IN.’
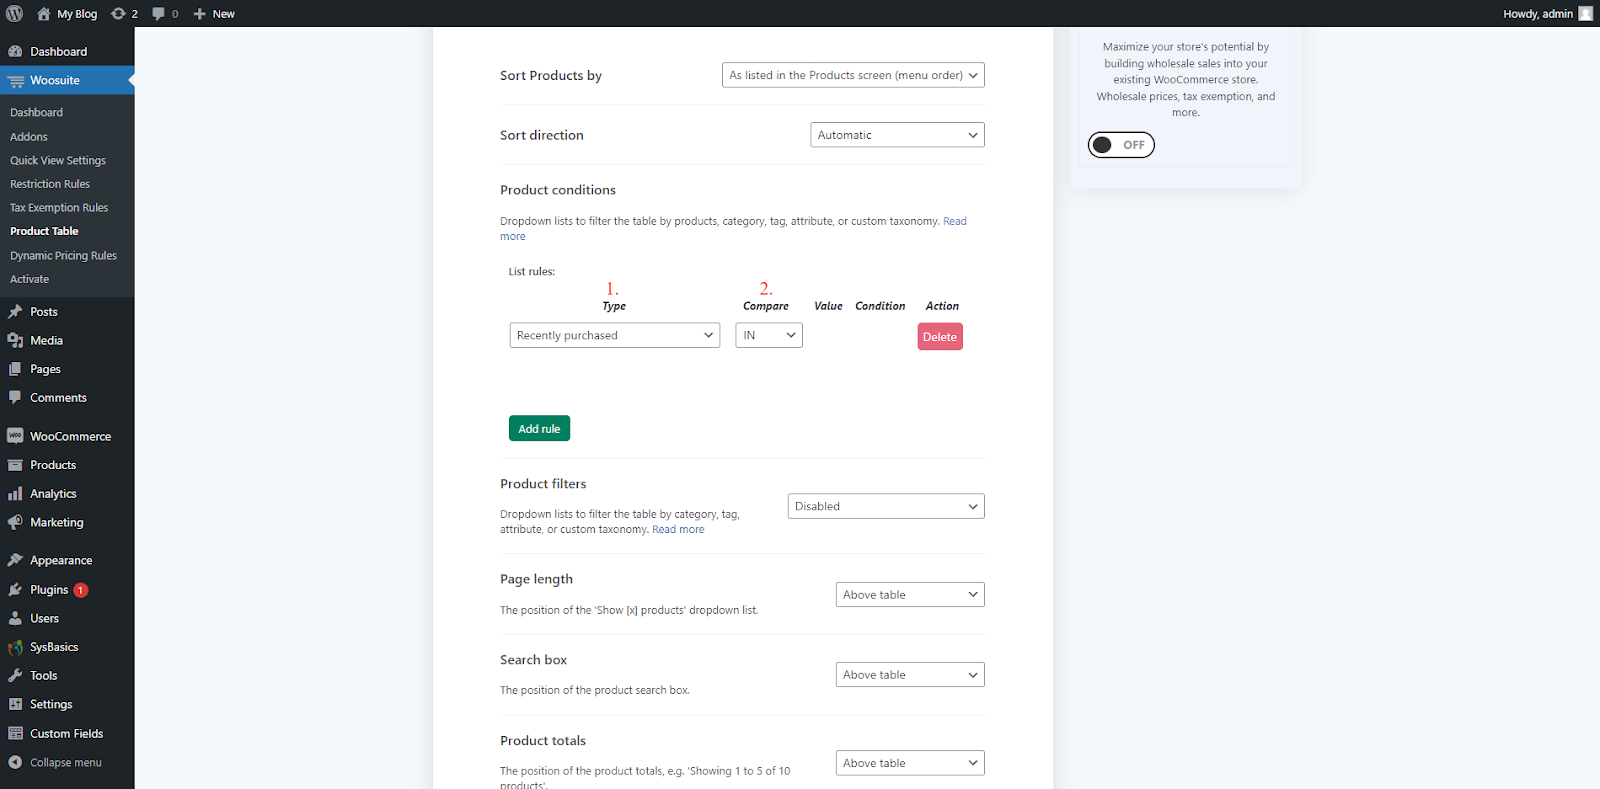
6. Enable Product Filters
If your customers have purchased many products, these options will help them sort. You can decide whether you want to add a filter to your product table or not.
By default, this setting will be ‘Disabled.’ Follow the mentioned steps to enable it.
- Product Filters: Select this setting to ‘Custom’ to enable the product filters.
- Custom Filters: Select the options you want to show in the product filters. For instance, you can add categories to let your customers find previously ordered products based on the categories. You can enter multiple filters separated by a comma.

7. Save the Changes
Now, it’s time to save the changes and publish the product table.
To save the changes, click on the ‘Save Changes’ button present at the top-right corner of your WordPress dashboard.

8. Publish the Previously Ordered Products Table
Click on the ‘Product Table’ option in the Woosuite sub-menu. It will show you all your product tables in one place along with their shortcodes.
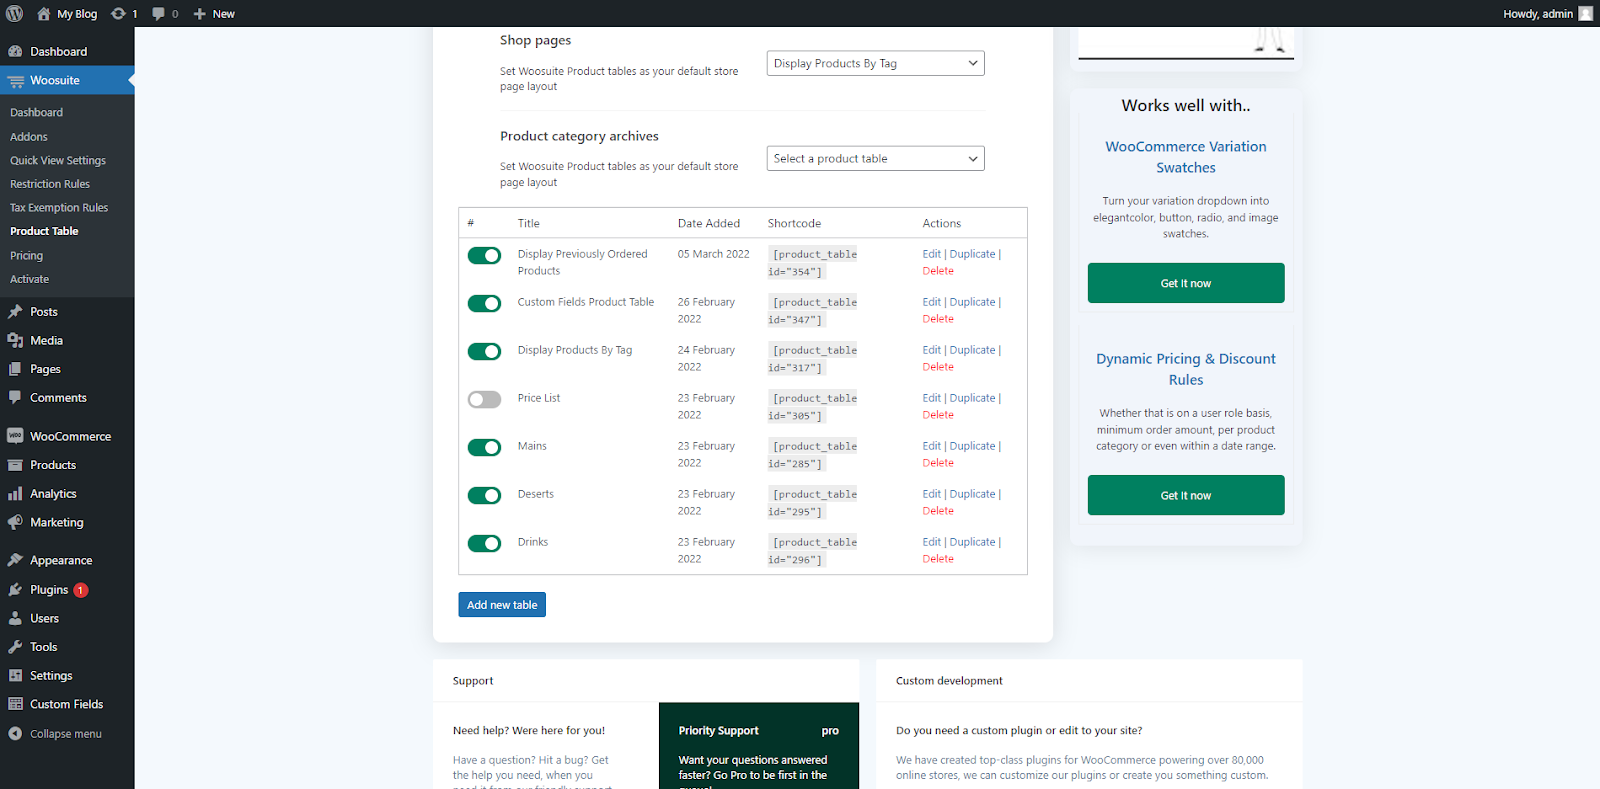
Copy the shortcode of the product table you just created to display previously ordered products.

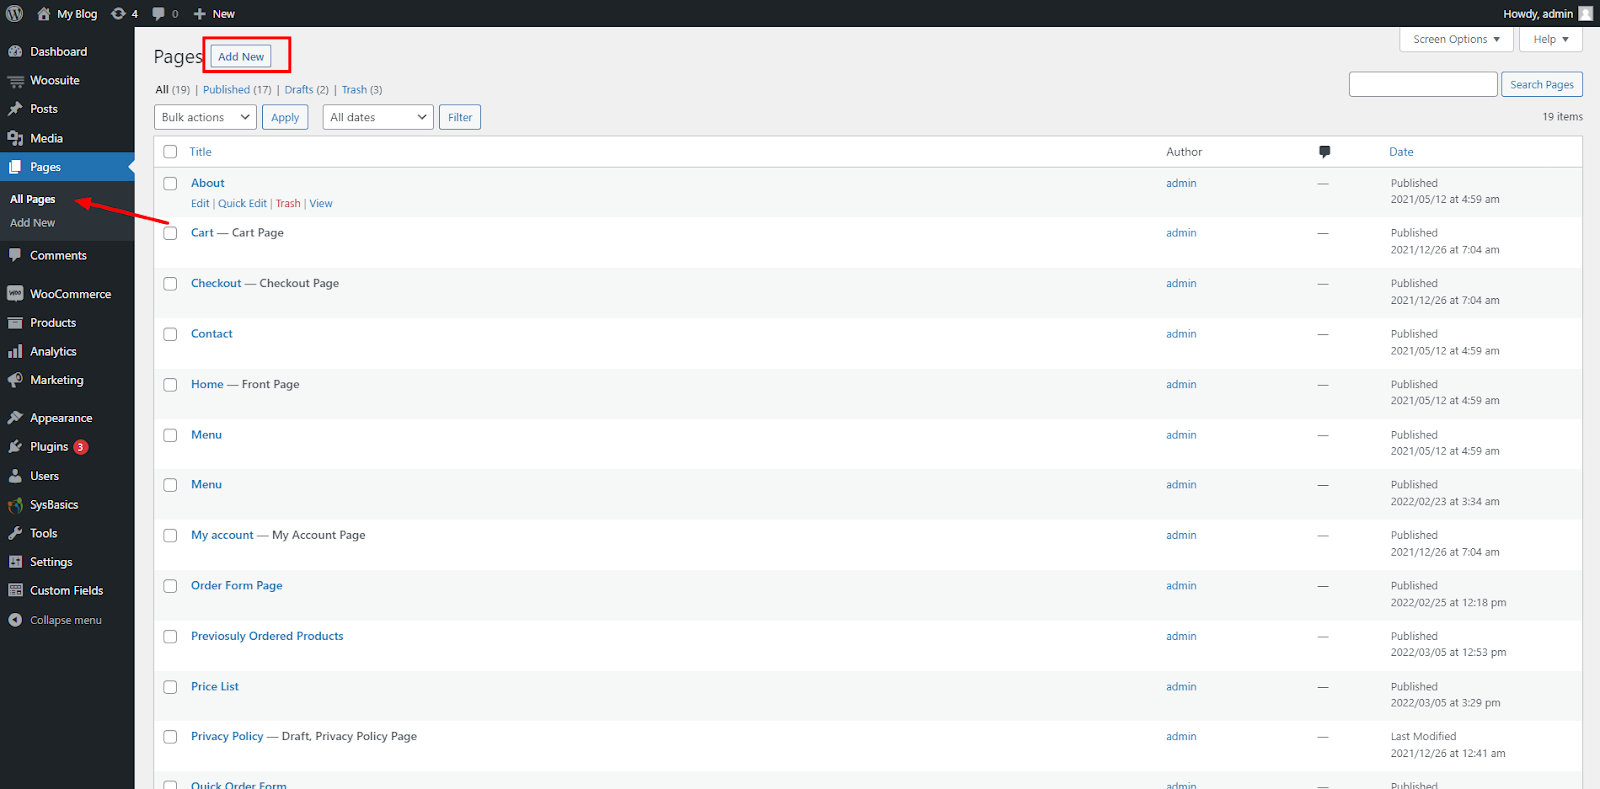
Now, head over to the Pages section, and create a new page.
In the WordPress Admin Dashboard: Pages > All Pages > Add New > Name the Page – Previously Ordered Products.
After that, rename the page with the Previously Ordered Products and paste the shortcode in the body of the page.

Click on the ‘Publish’ button.

9. Display Previously Ordered Products On My Account Page (Optional)
We created a page for users to check their previously ordered products. The final step is to add the Order Products Section to the My Account page. Follow the given steps to do it.
To add the Previously Ordered Products tab to the ‘My Account page,’ we will use the Customize My Account For WooCommerce Plugin. You can check this free WordPress plugin by clicking here.
So, install the plugin by following the quick steps.
In the WordPress Admin Dashboard: Plugins > Click on the Add New button > Customize My Account For WooCommerce.

Click on the ‘Install’ button.

Then click on the ‘Activate’ button to activate the plugin.

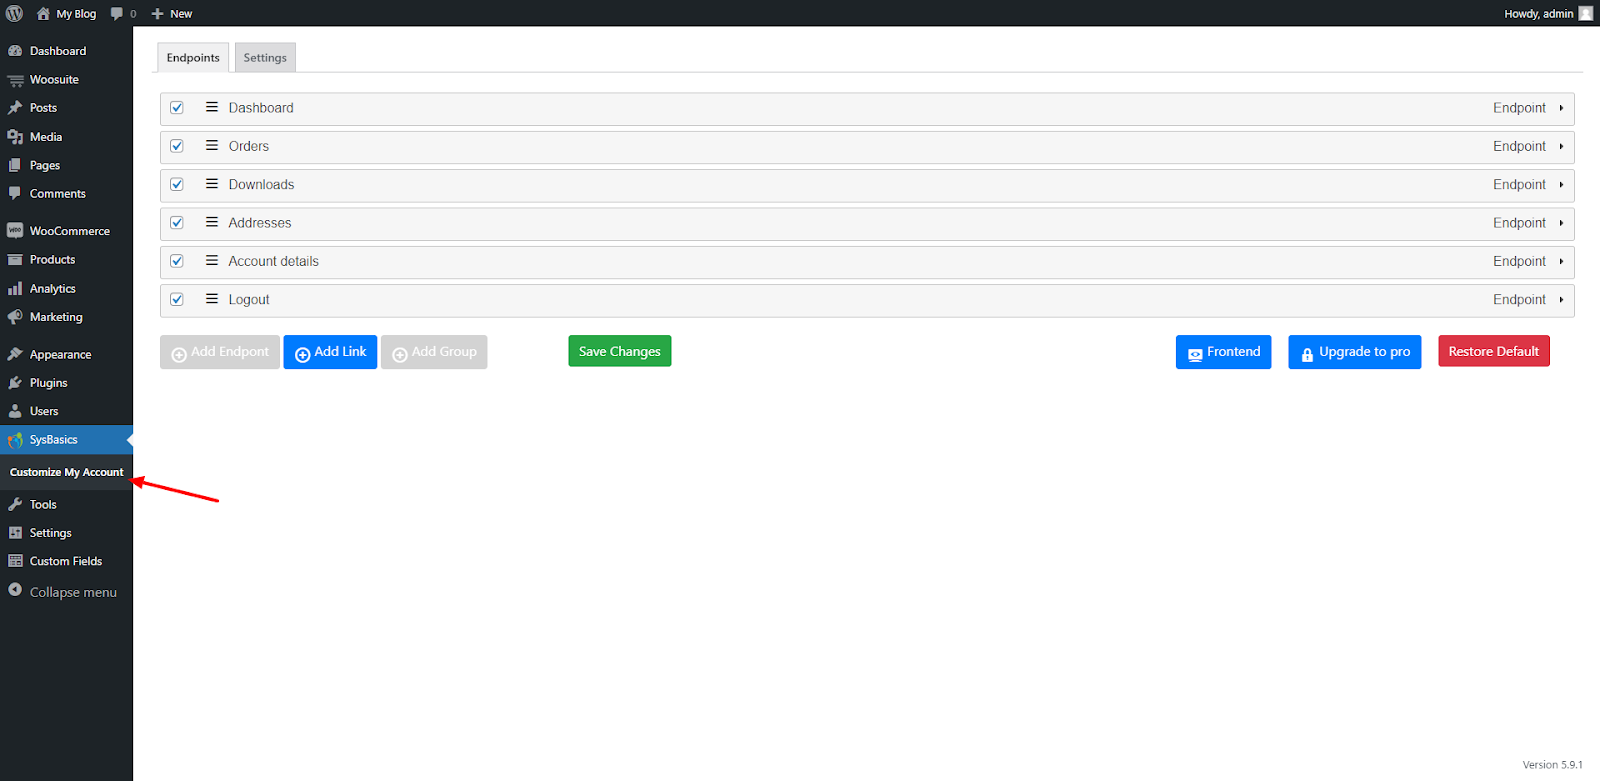
Look for the SysBasics option in the WordPress toolbar. Under the SysBasics option, click on ‘Customize My Account.’ Then, you will see a new screen with some options.
Click on the ‘Add New’ button.
Enter the ‘Label Name’ – Previously Ordered Products.

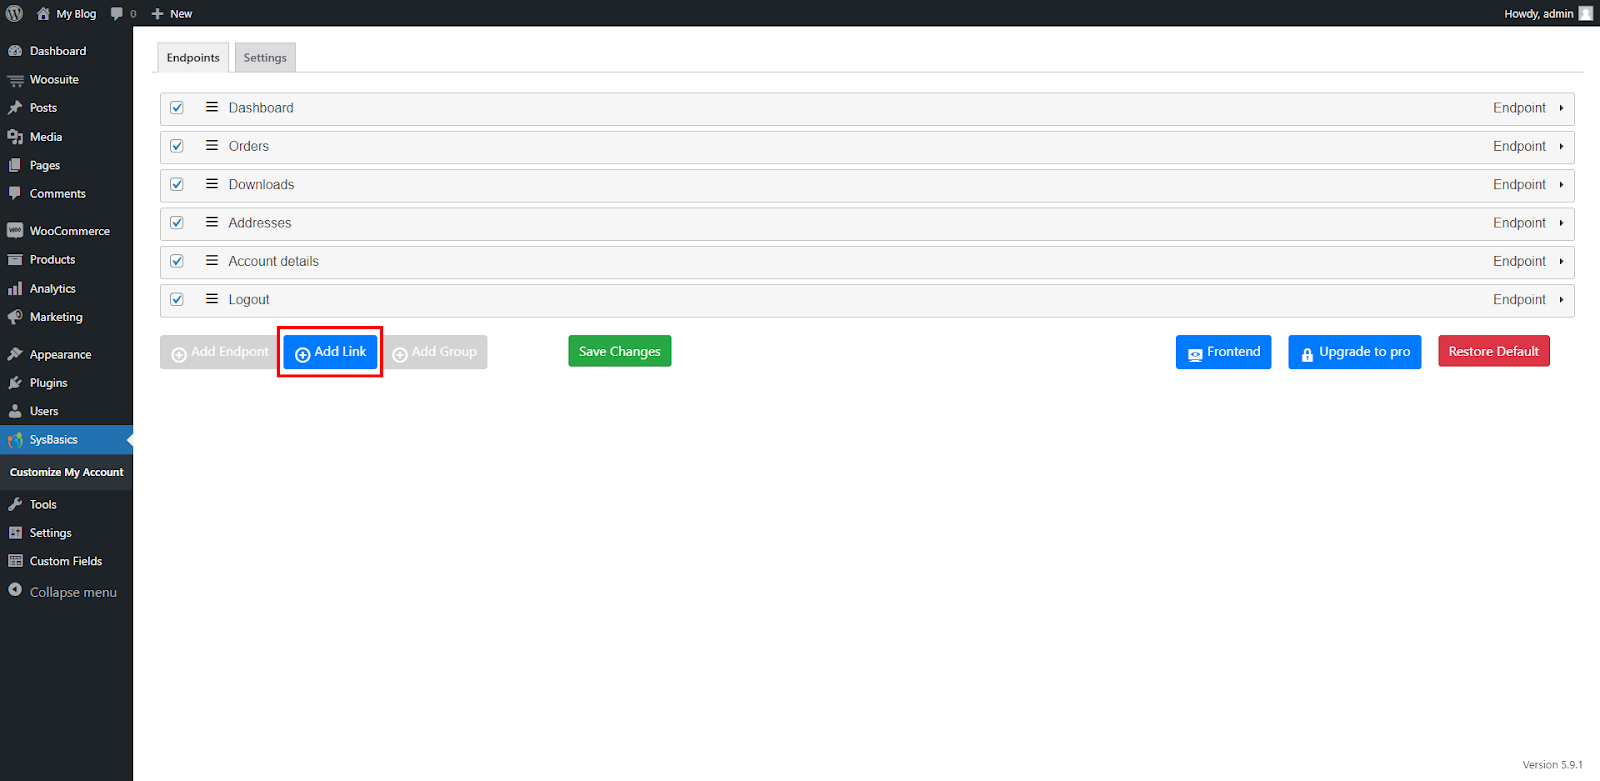
After that, click on the ‘Add Link’ button. Then, click on the ‘Link’ option.

In the ‘Link’ field, paste the link of the page on which you added the shortcode.

Then, click on the ‘Save Changes’ button.

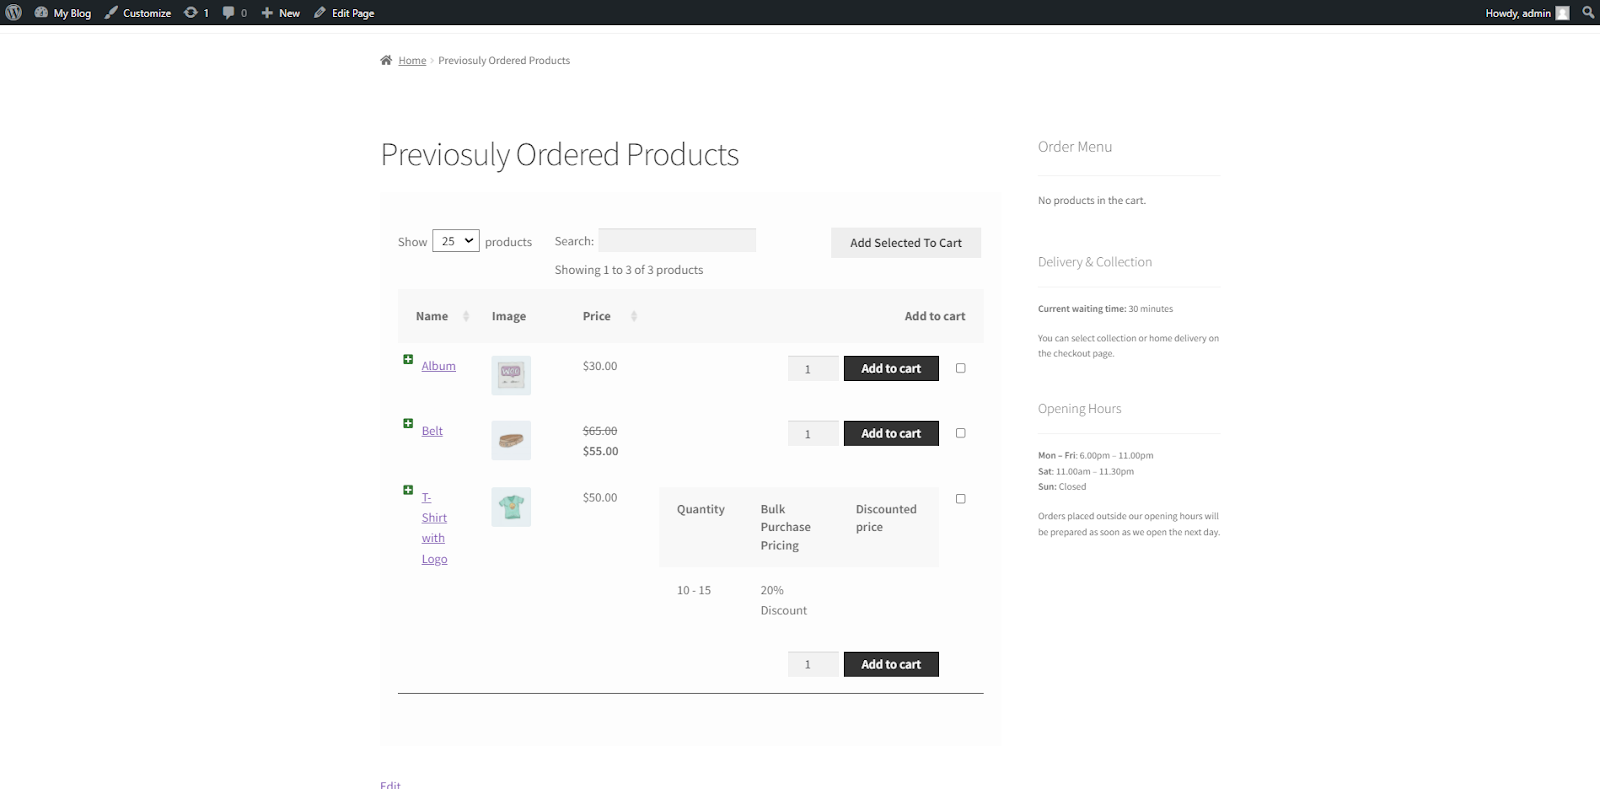
Final Results
Visit the My Account page, and you will see that the Previously Ordered Products section is there.

Conclusion
We finally checked out how to show all products purchased by users. I hope you understood the steps correctly and implemented the same on your WooCommerce store. If you face any issues while displaying previously ordered products, leave a comment or contact Woosuite customer support. Our dedicated customer support team typically replies within 48 hours.
Ready to Show All Products Purchased by Users?
Install the WooCommerce Product Table plugin today.


