There are different options available in the market to sell any type of course. Still, WooCommerce being one of the easiest-to-use eCommerce solutions allows you to sell courses easily.
You will have complete control over your course material and the site design. This is why it is getting popular for selling courses as well. Unlike other platforms like Udemy, you can completely customize the course’s design and other things.
This article will guide you through the step-by-step process of selling courses with WooCommerce. I’ll also show you how to create a custom layout for your shop page to let customers see more details without navigating to the single course page.
On This Page
- 1 Why Use WooCommerce to Sell Courses?
- 2 How to Sell Courses with WooCommerce?
- 2.1 1. Install and Activate Required Plugins
- 2.2 4. Create Your Course
- 2.3 5. Create Course Modules
- 2.4 6. Add Lesson Content
- 2.5 7. Link the Course to a WooCommerce Product
- 2.6 8. Add a Purchase Note
- 2.7 9. Allow Customers to Access the Course
- 2.8 9. Enable the Direct Checkout
- 2.9 10. Optimize Checkout Flow
- 2.10 11. Allow Guest Checkout (Optional)
- 2.11 12. Final Results
- 3 How to Display Courses in a List Layout (Optional)
- 4 Final Thoughts
Why Use WooCommerce to Sell Courses?
WooCommerce is a popular and flexible e-commerce platform for selling a wide range of products and services, including courses. Here are several reasons why you might consider using WooCommerce to sell courses:
1. Multiple Payment Methods
WooCommerce allows you to use different payment options, which stands out as one of its major strengths. LearnDash comes pre-integrated with PayPal, Razorpay, and Stripe.
But, if you want to use a different payment gateway, WooCommerce offers access to over 70 payment gateways. You can also add a custom payment method to it by creating a custom plugin.
2. Flexibility and Customization
WooCommerce is highly flexible and customizable. You can tailor the appearance, features, and functionality of your course-selling website to match your branding and specific needs. This flexibility allows you to create a unique and personalized online learning experience.
3. Security and Reliability
WooCommerce is known for its security and reliability. It benefits from regular updates and maintenance, ensuring that your courses and customer data are kept secure. This is especially important when handling sensitive information such as course content and payment details.
4. Ecosystem of Extensions
WooCommerce offers a vast ecosystem of extensions and plugins that can enhance your e-learning platform. You can integrate various payment gateways, add features like membership programs or recurring payments, and extend the functionality of your site with a wide range of available plugins, making it versatile for different business models and course types.
How to Sell Courses with WooCommerce?
To sell courses with WooCommerce, you’ll need an LMS plugin besides having a WordPress website. There are different LMS plugins available in the market but for this tutorial, I’ll be using the LearnDash plugin.
To integrate it with WooCommerce, they have an extension that we’ll see in the later steps. With the help of that extension, you’ll be able to use WooCommerce payments to accept the payments for your courses.
You can also customize the design of your shop page to display your courses in a list layout so customers can easily purchase and see the details of your courses from a single page. We’ll be diving into its details later in this tutorial but for now, let’s create a course on WooCommerce.
The following are the steps to sell courses with WooCommerce.
Note: I assume you already have installed and set up the WooCommerce plugin. If not, you first need to go to Plugins > Add New from your dashboard and install the WooCommerce plugin.
1. Install and Activate Required Plugins
1.1. LearnDash
First, you need to purchase and install the LearnDash LMS plugin on your WordPress website. You can purchase from their official website.
Once you have purchased it, you’ll get a zip file to download. You need to download it to your computer.
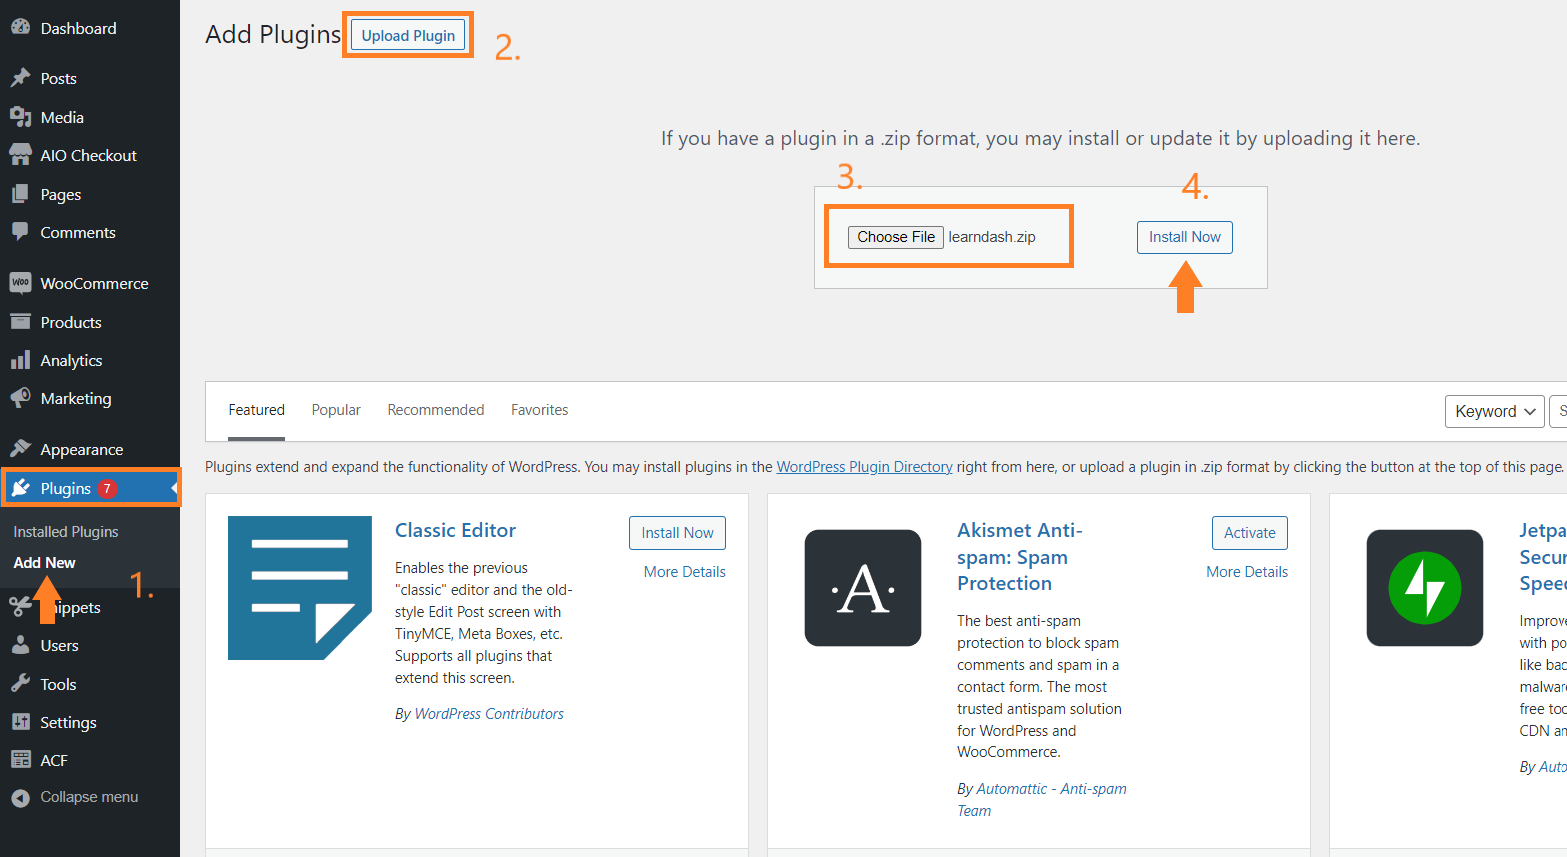
- After that, log in to your WordPress dashboard. Navigate to Plugins > Add New.
- Click the Upload button.
- Select the plugin’s downloaded file from your computer.
- Click the ‘Install Now’ button to install it. Once installed, you’ll be redirected to a new page from where you need to click the ‘Activate’ button to activate the plugin.
After activating the plugin, you will need to set it up to match your store. To do so, you can navigate to LearnDash LMS > Settings from your dashboard and configure the settings as you want.
1.2. LearnDash WooCommerce Integration
Once you have installed and activated the LearnDash LMS plugin, we need to install its WooCommerce extension to integrate WooCommerce with LearnDash.
To install the LearnDash WooCommerce extension, navigate to LearnDash LMS > Add Ons from your WordPress dashboard and look for the ‘WooCommerce for LearnDash’ extension/plugin.
Once found, install and activate it. I have already installed and activated it so I could see the ’Active’ right beside its name.

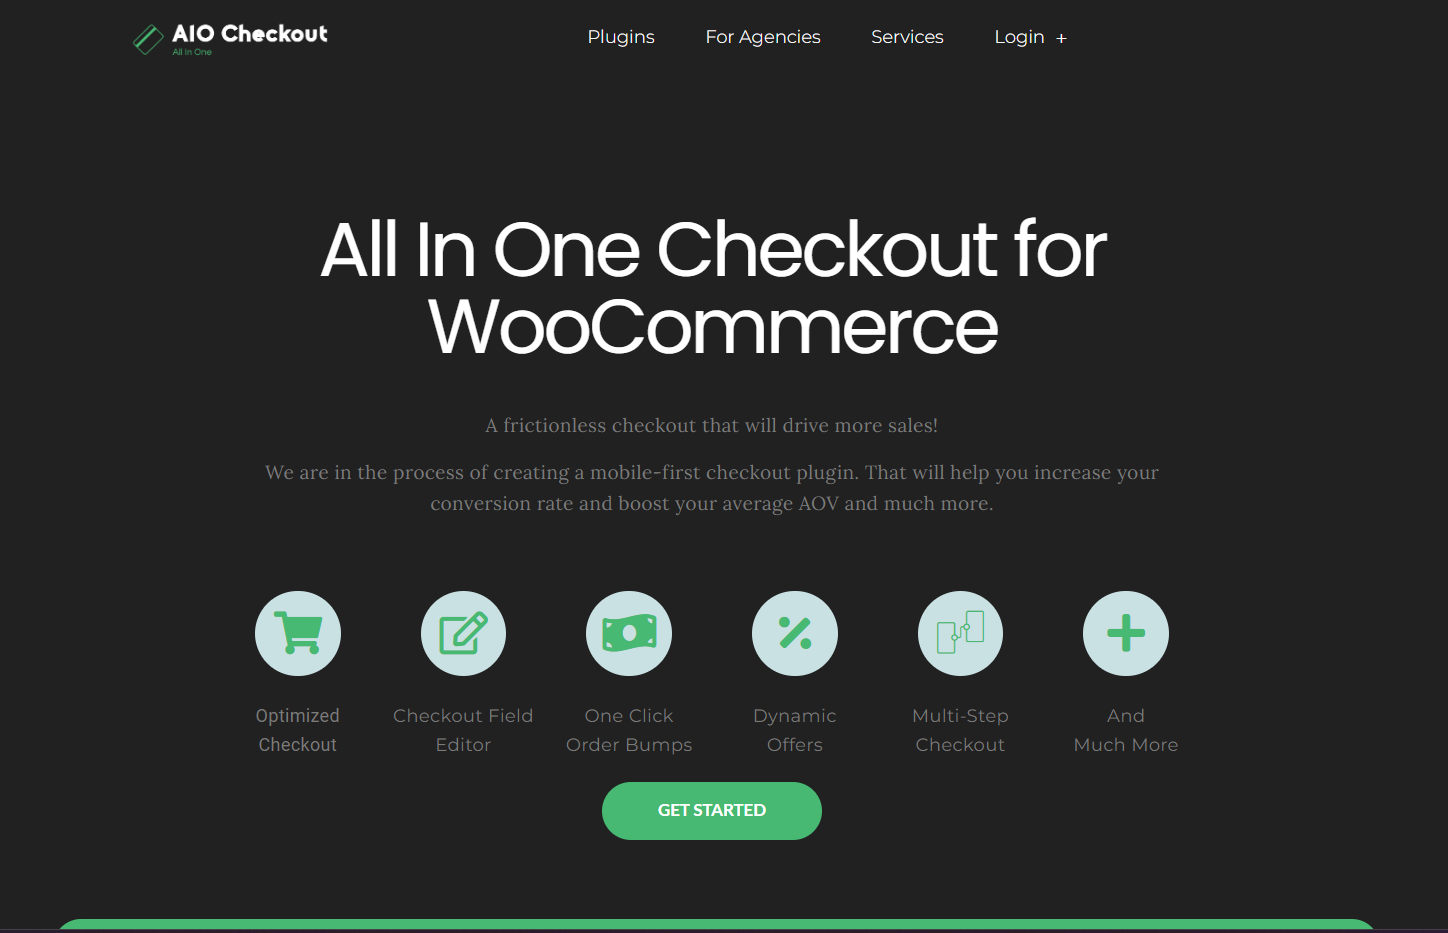
1.3. AIO Checkout Plugin
To improve the checkout experience, download the AIO Checkout plugin from the AovUp store.
4. Create Your Course
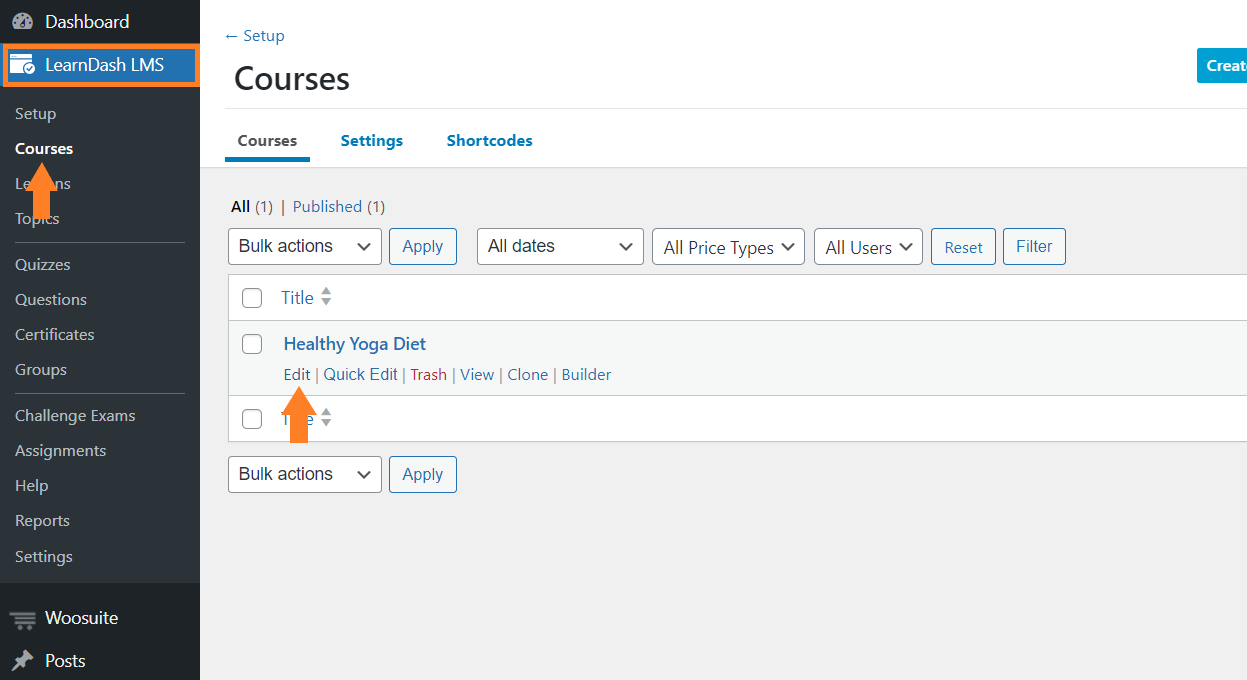
Once you have installed and configured the necessary plugins, let’s create our first course. To do so, navigate to LearnDash LMS > Courses from your dashboard, and click the ‘Add New’ button.
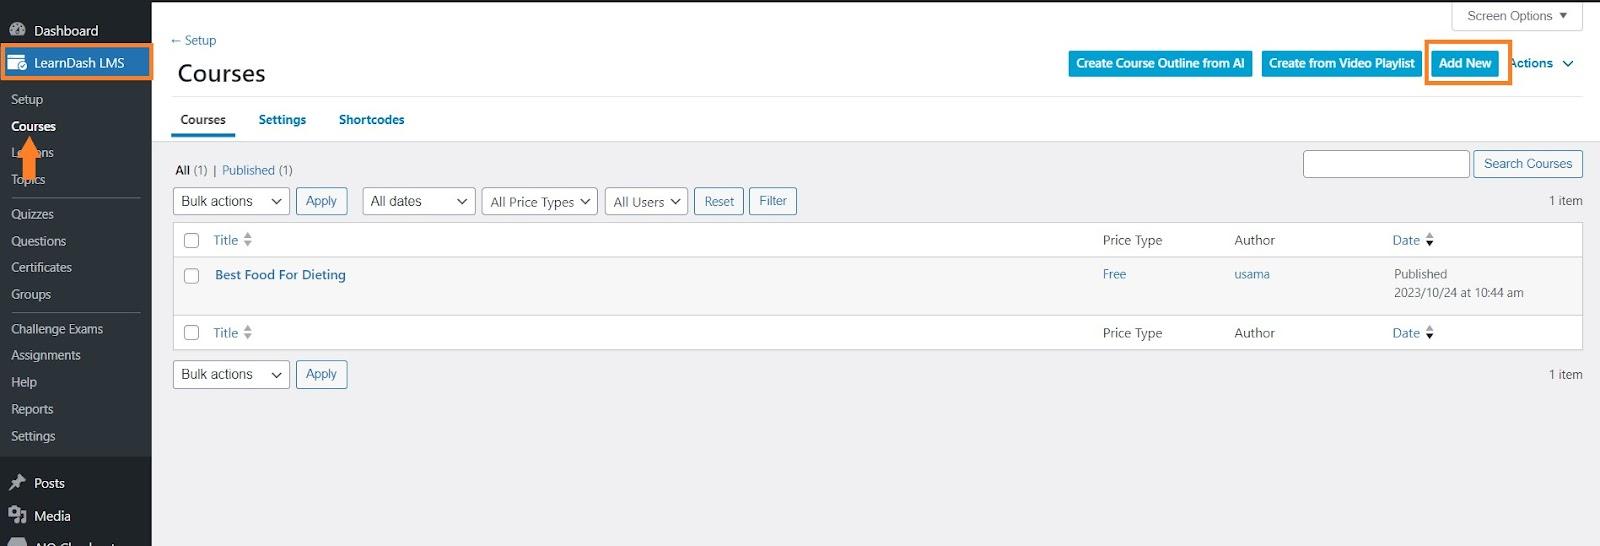
This will take you to the course edit page from where you can create the course page, build the course, and configure other advanced settings as per your requirements.
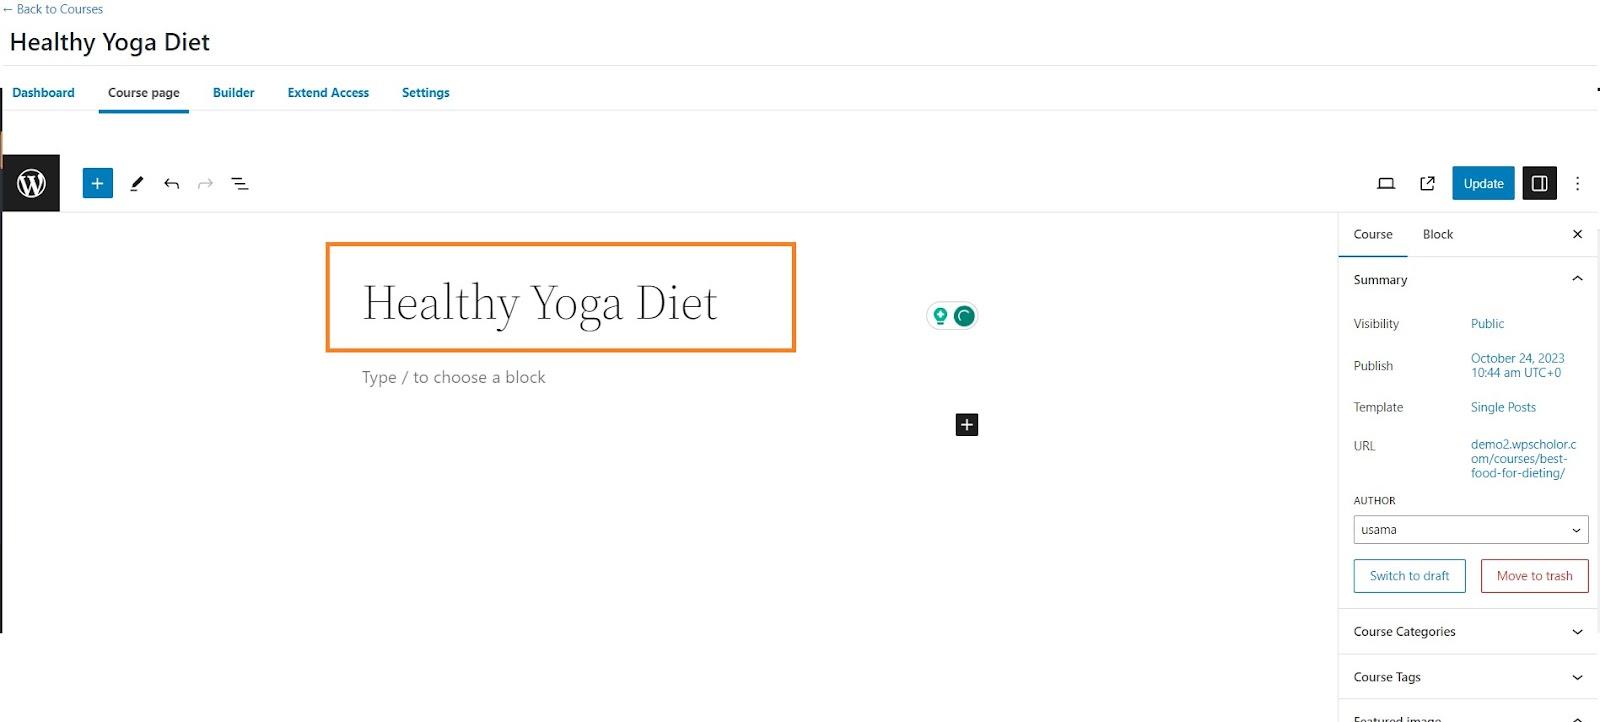
4.1. Add Course Title
First, you need to give a name to the course you want to sell, in the ‘Add Course Title’ field.
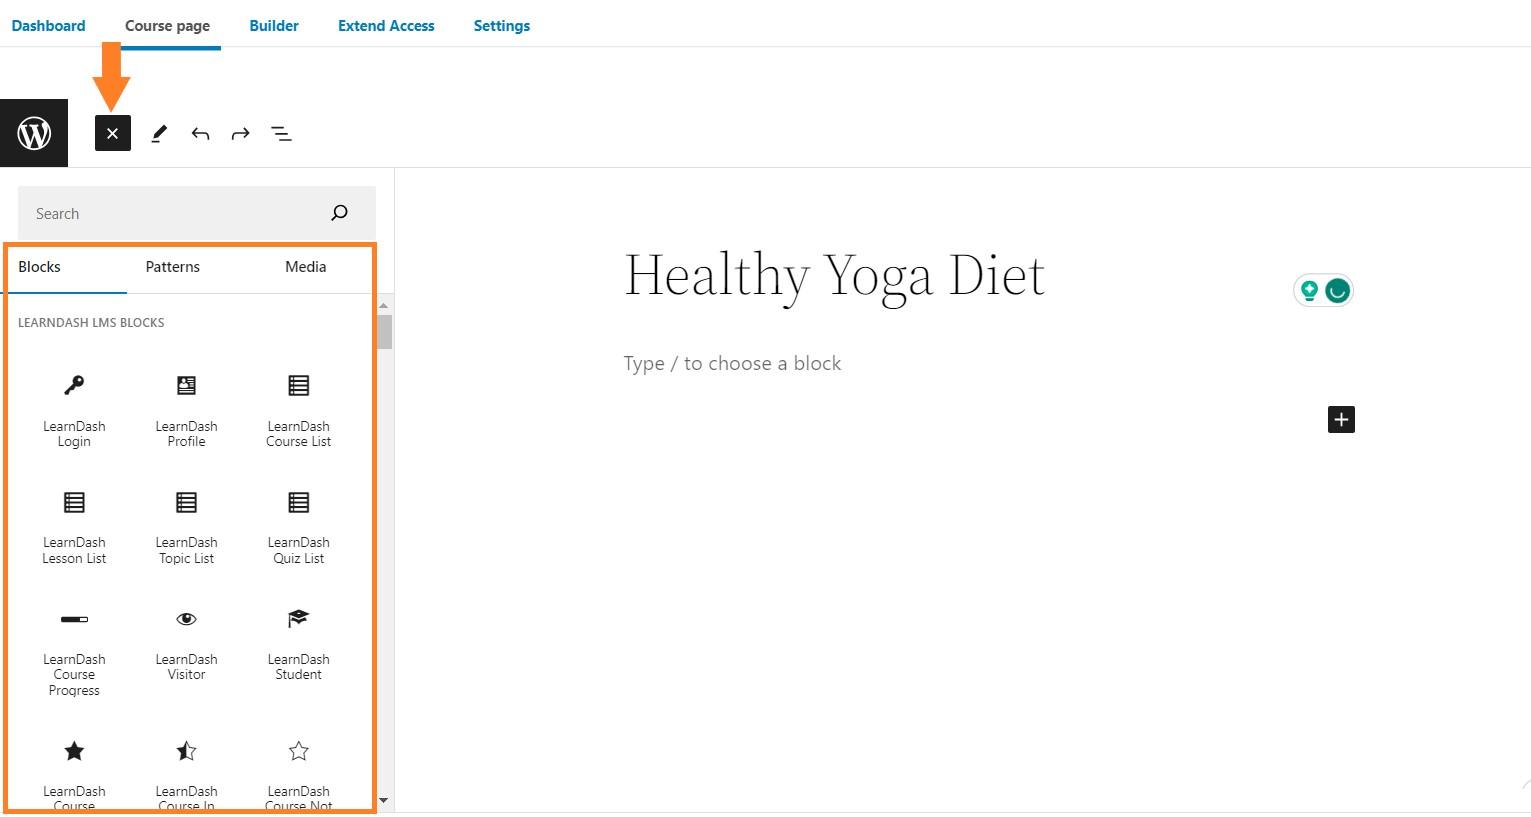
4.2. Create Course Page
Next, we need to create the course page. The course page editor is like the Gutenberg block editor. You will need to add the block to add any text, image, or more. LearnDash LMS plugin has added different blocks that you can use to build your course page.
To access the blocks, click the blue plus icon at the top left corner of the page. You’ll see a pop-up slide-in that will have all the blocks you can add to your page.
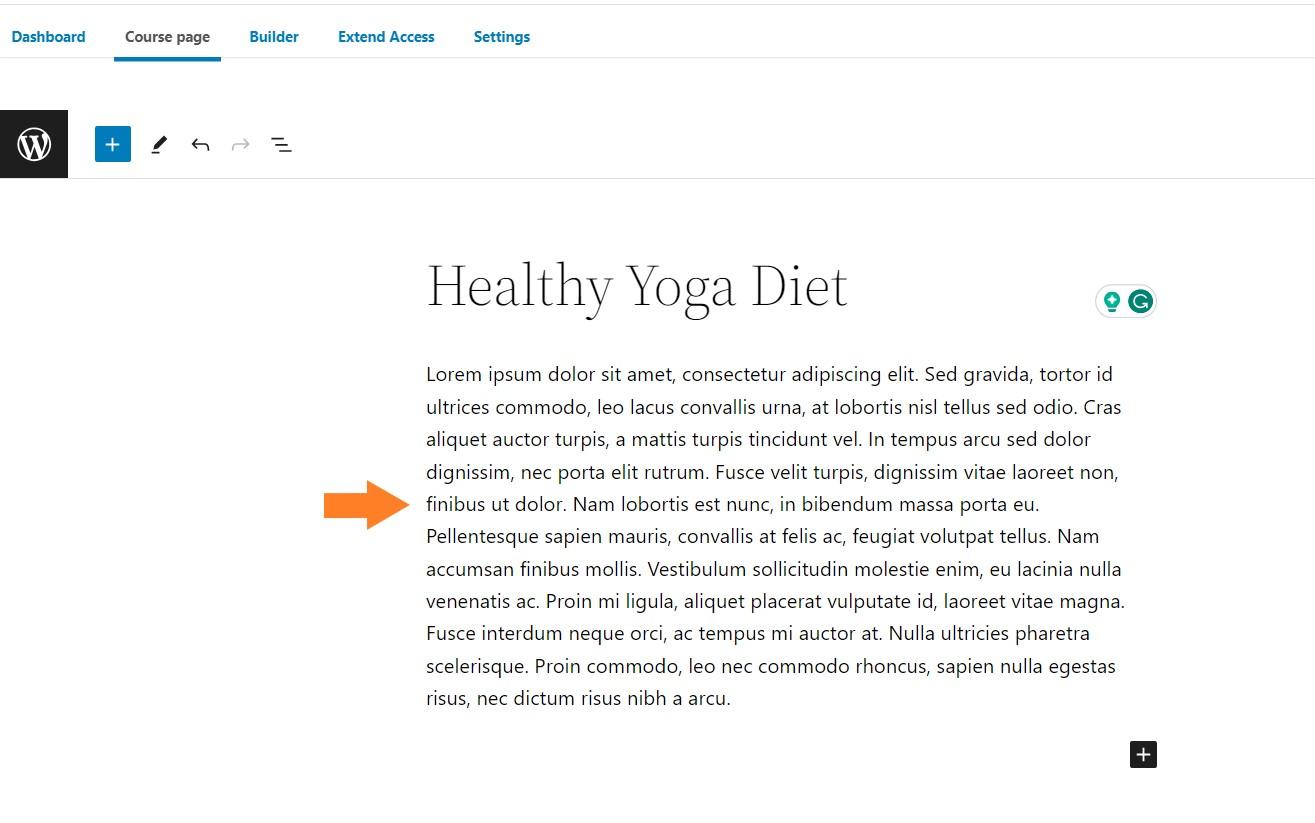
I will not go into the details of creating a course page as we won’t be using this design. We’ll use WooCommerce’s default design OR if you want you can use a page builder like Elementor to create a custom design.
That’s why I just added a paragraph block to add the course description.
4.3. Set the Course Featured Image
Now, we need to add a featured image. To add it, expand the ‘Featured Image’ tab from the right sidebar and select the image from your computer or your WordPress dashboard.

You can also add tags to this course and add this course into a category if you sell different types of courses. The customizations and configurations are limitless, and it depends on how you want to do it.
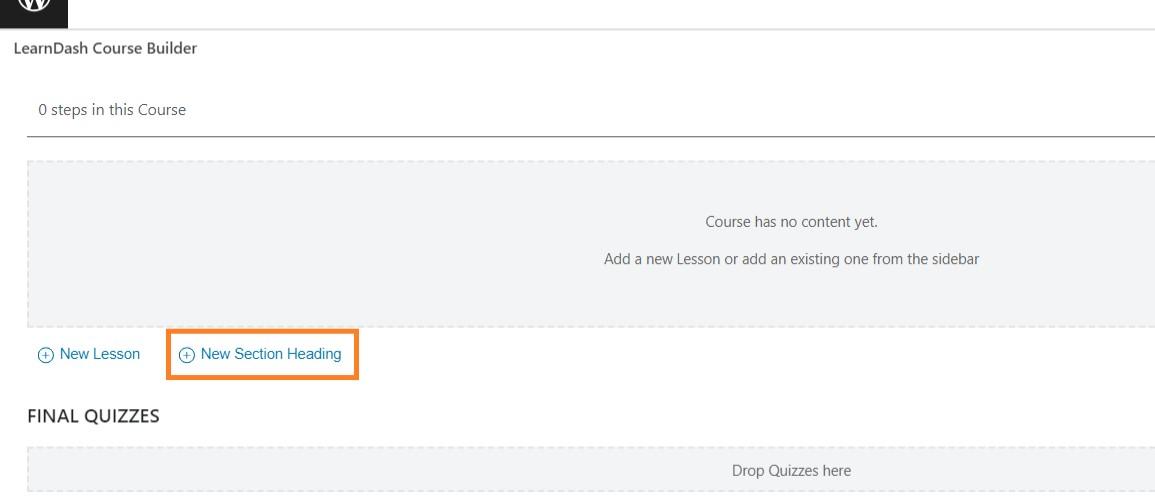
5. Create Course Modules
Once you have created the course page, let’s now build the course. To build it, click the ‘Build’ tab at the top. From there you can create your different course sections and add lessons to them.
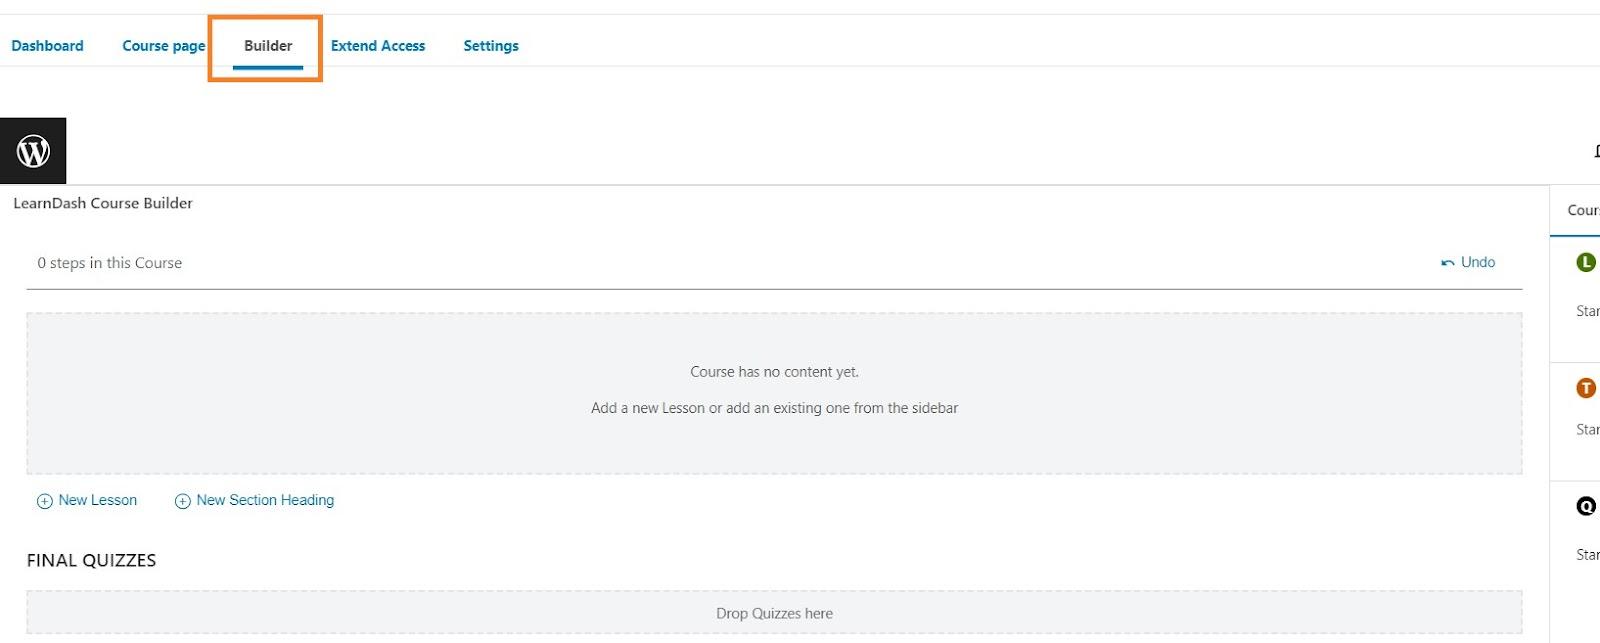
5.1. Create First Heading Section
To create the first section or heading of your course, click the ‘New Section Heading’ button.
After that, you’ll see a field where you can add the heading. Once added, click the ‘Add Section Heading’ button to create the section.

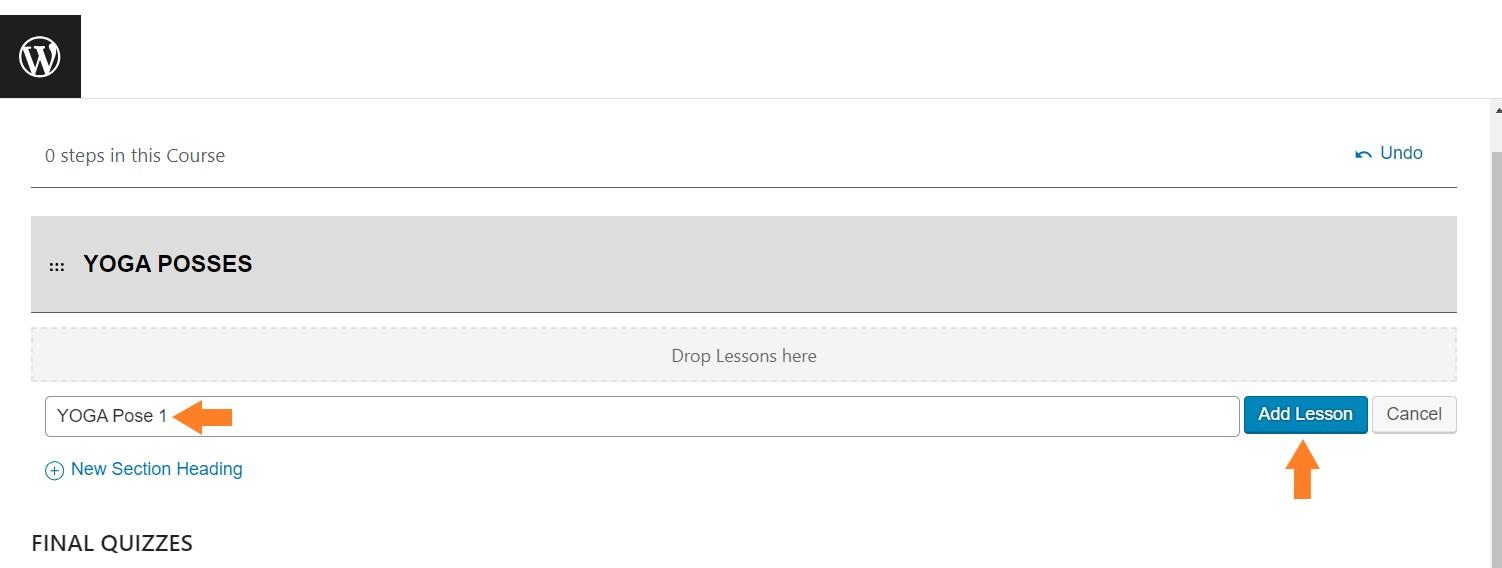
5.2. Create Lessons
Now, we need to add lessons to the section. To do so, click the ‘New Lesson’ button.

Once you click it, you’ll see a new field in which you can add the lesson title. After adding it, click the ‘Add Lesson’ button to add it.
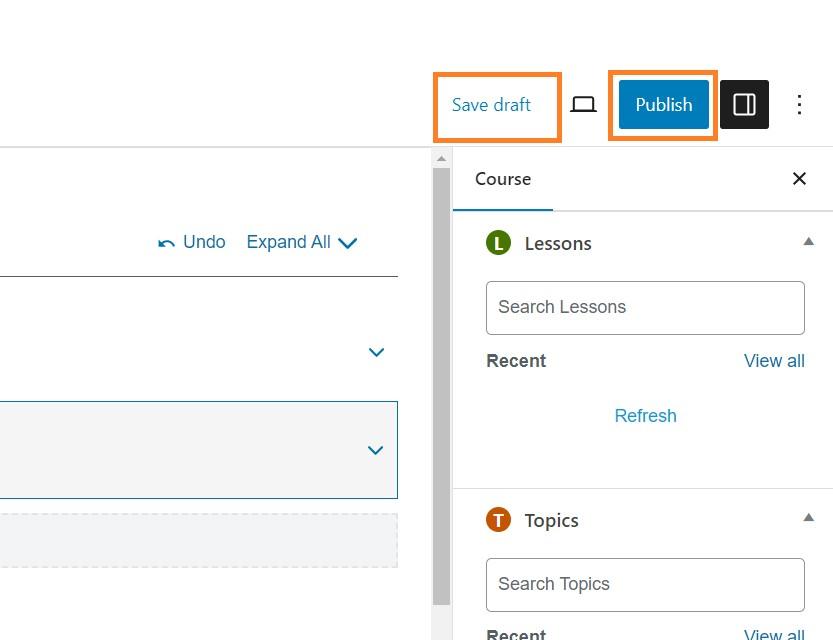
6. Add Lesson Content
Once you have added the lesson title, we need to add content to it. To do so, you need to edit the lesson but before that, you will need to save the course.
You can save it by clicking the ‘Save Draft’ button or you can publish it by clicking the ‘Publish’ button.
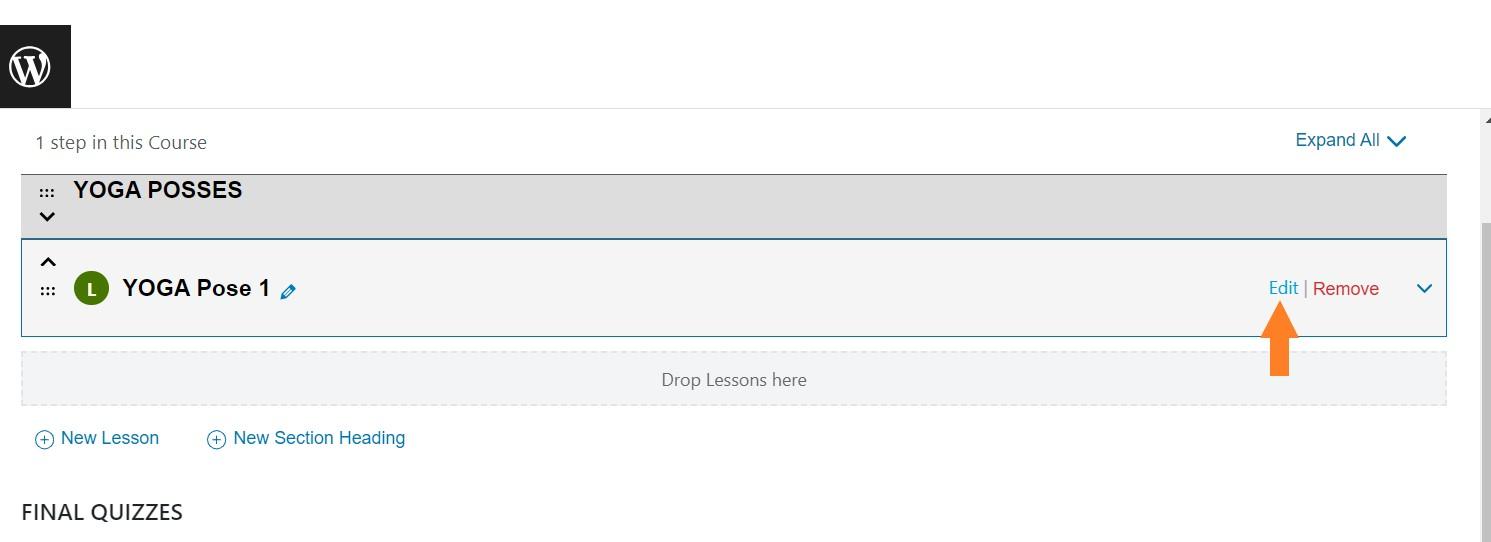
6.1. Edit the Lesson
To edit the lesson, hover your mouse over the lesson that you just added and click the ‘Edit’ button. It will take you to the lesson edit page.
6.2. Add the Lesson Content
Once you are on the edit lesson page, you will see the block editor that you can use to build your lesson’s content.
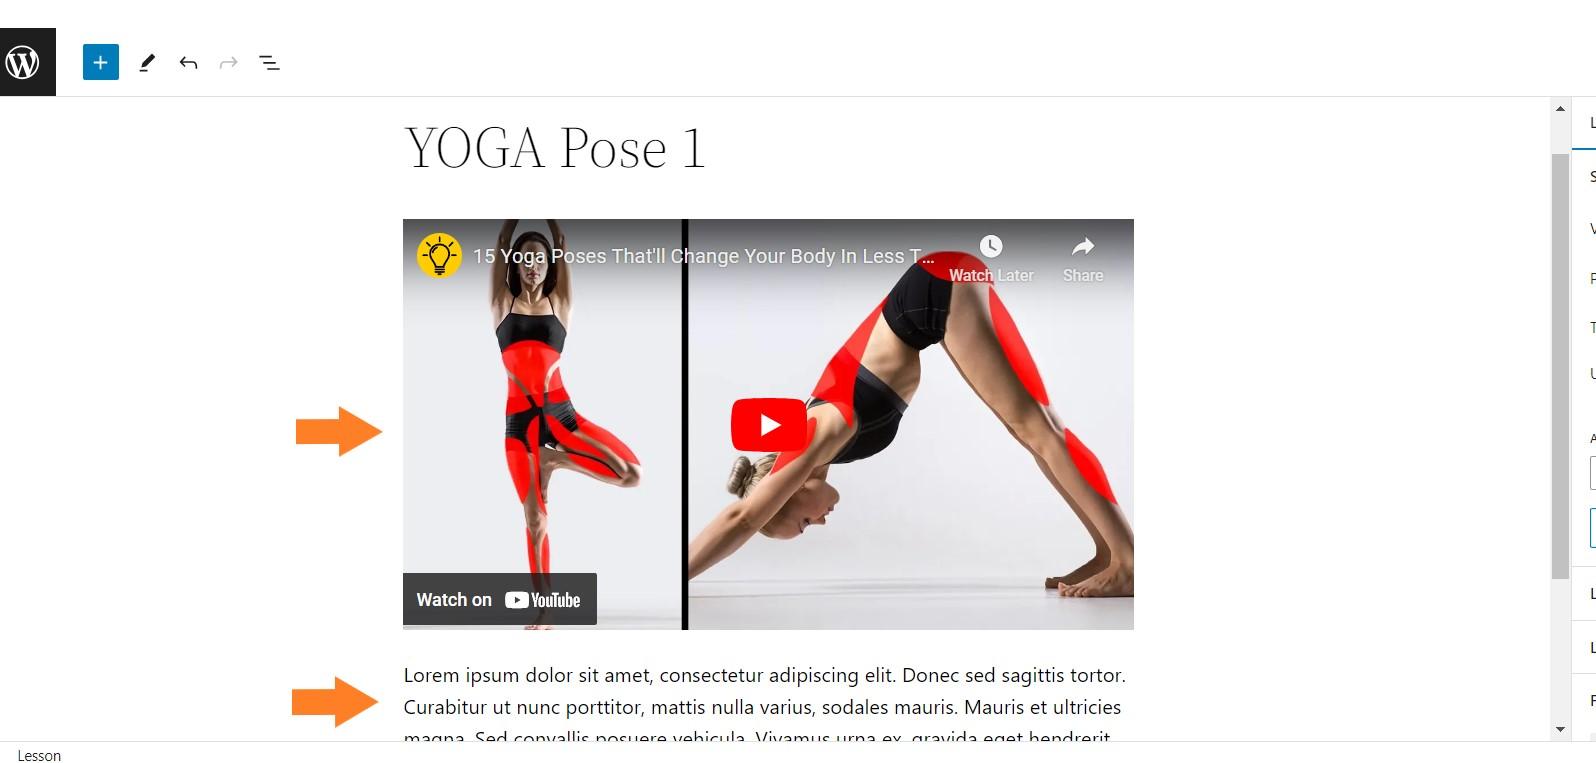
If you want to sell video courses, you will need to host the video lectures on an outside platform like YouTube or any other platform.
I have added a YouTube video and a description to show you an example.
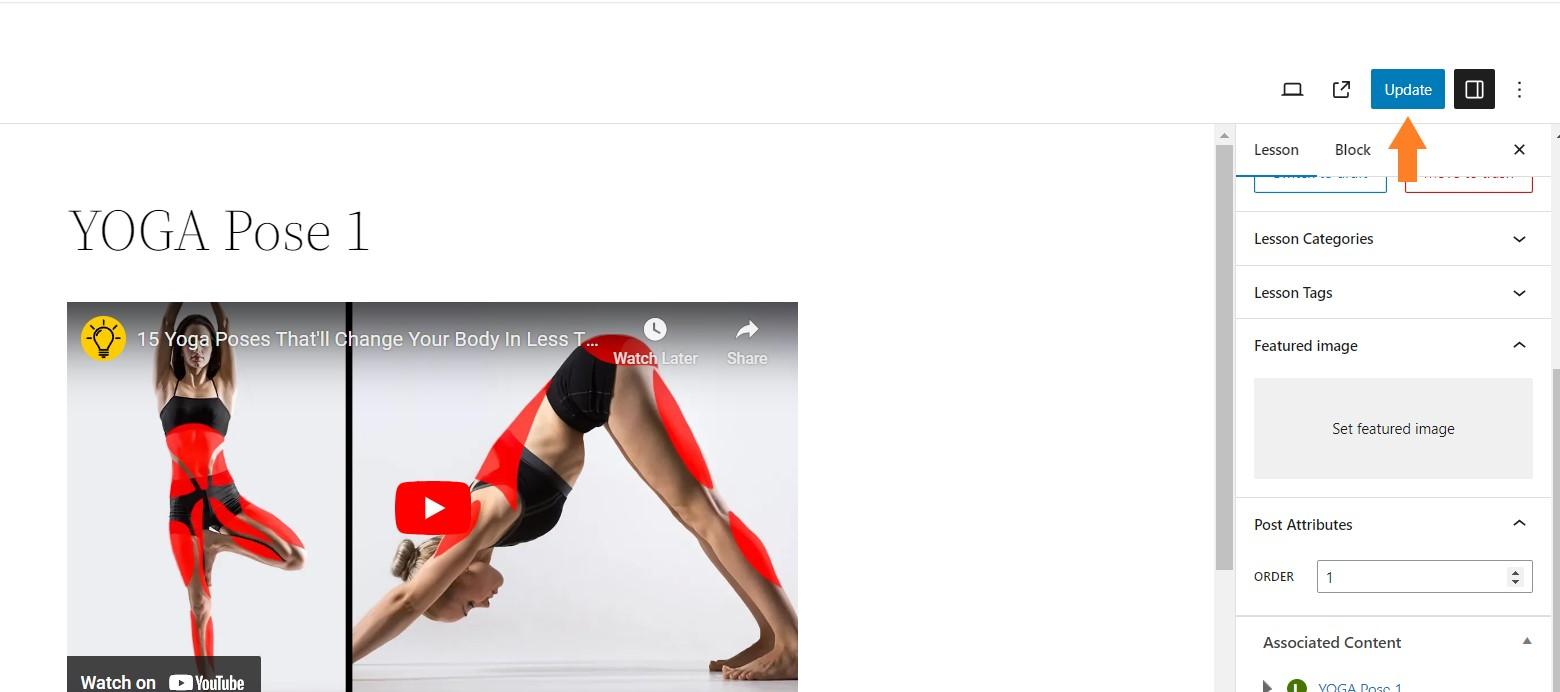
6.3. Update the Lesson
Once you have added the desired content, click the ‘Update’ button to save the settings.
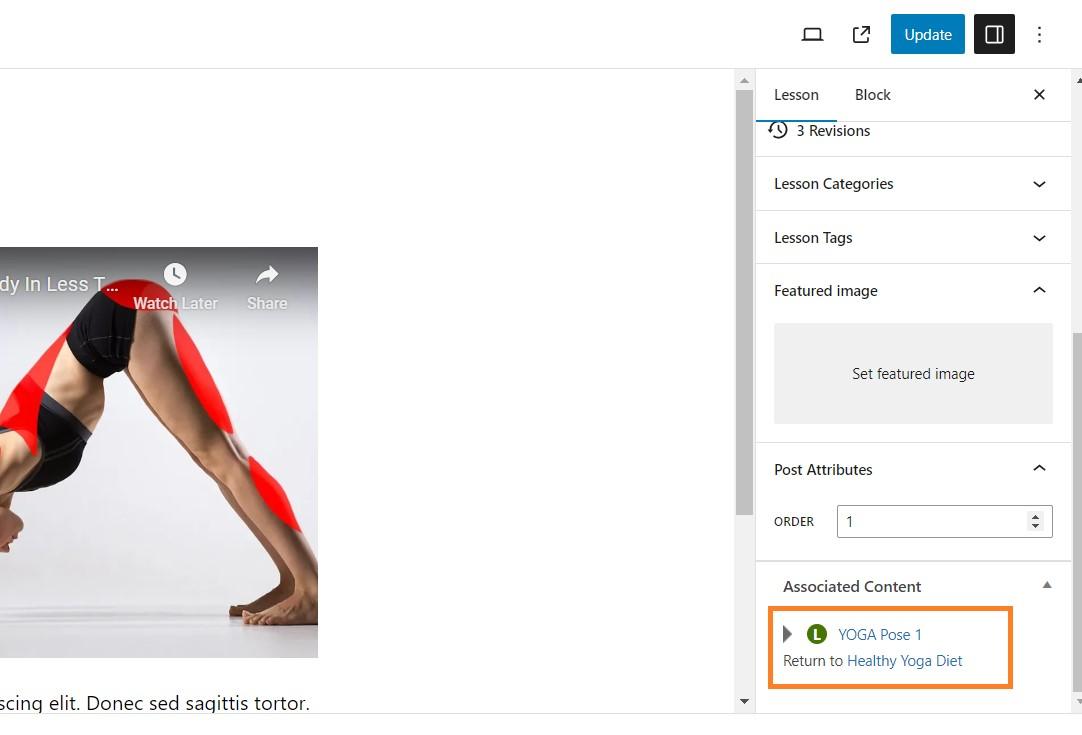
You can also add quizzes to individual lessons or create a separate section for quizzes and assignments. To do so, you will need to go back to the course edit page.
I will not be adding any quizzes, but it depends on the course you are selling.
To go back to the course, edit page, you can scroll down and click the course title under the ‘Associated Content’ tab from the right sidebar.
7. Link the Course to a WooCommerce Product
Once you have published the course, we need to link this course to a product so customers can purchase the course as a normal WooCommerce product by following the checkout flow you have in your store.
You can link it to an existing product or create a new product. I’ll create a new product and link the course to it.
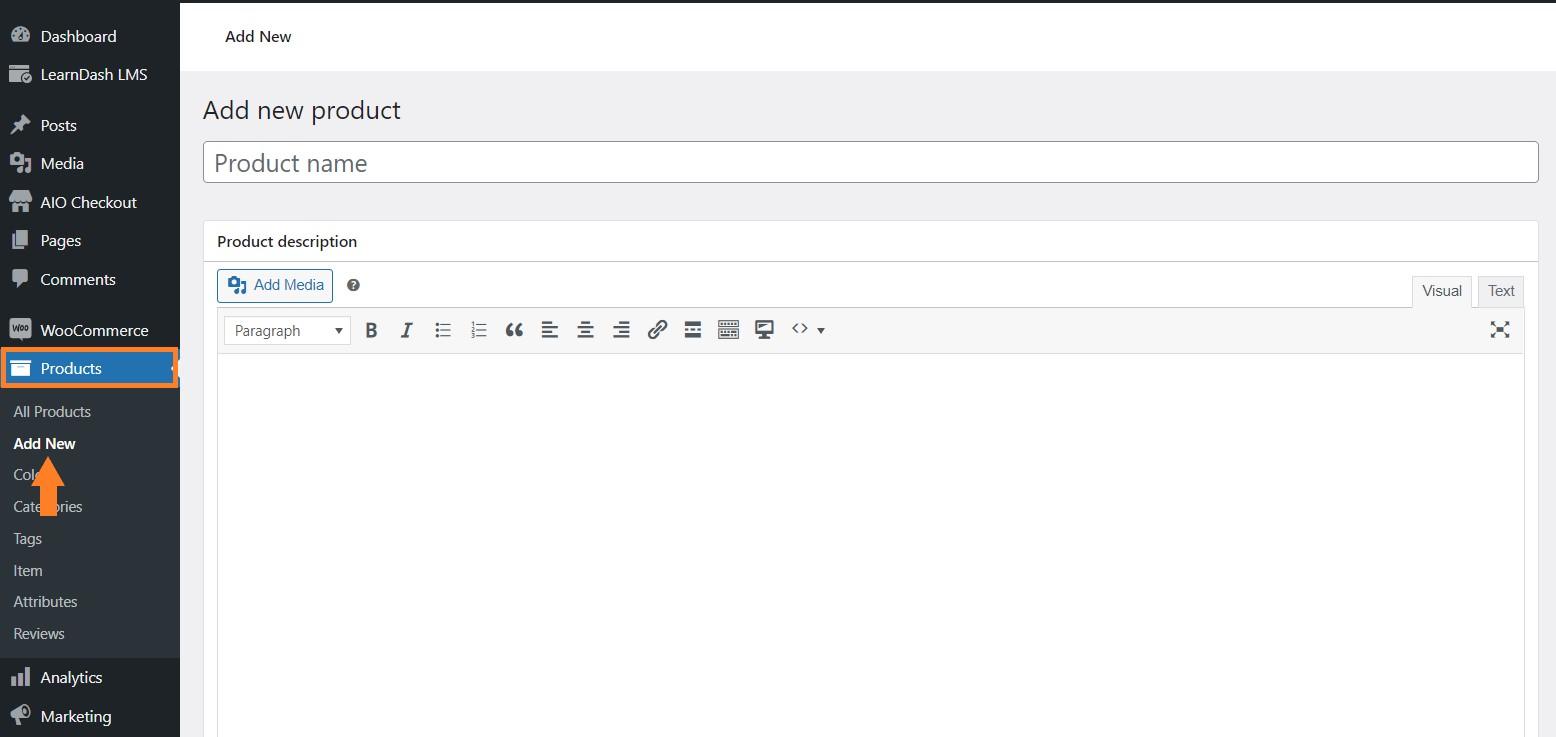
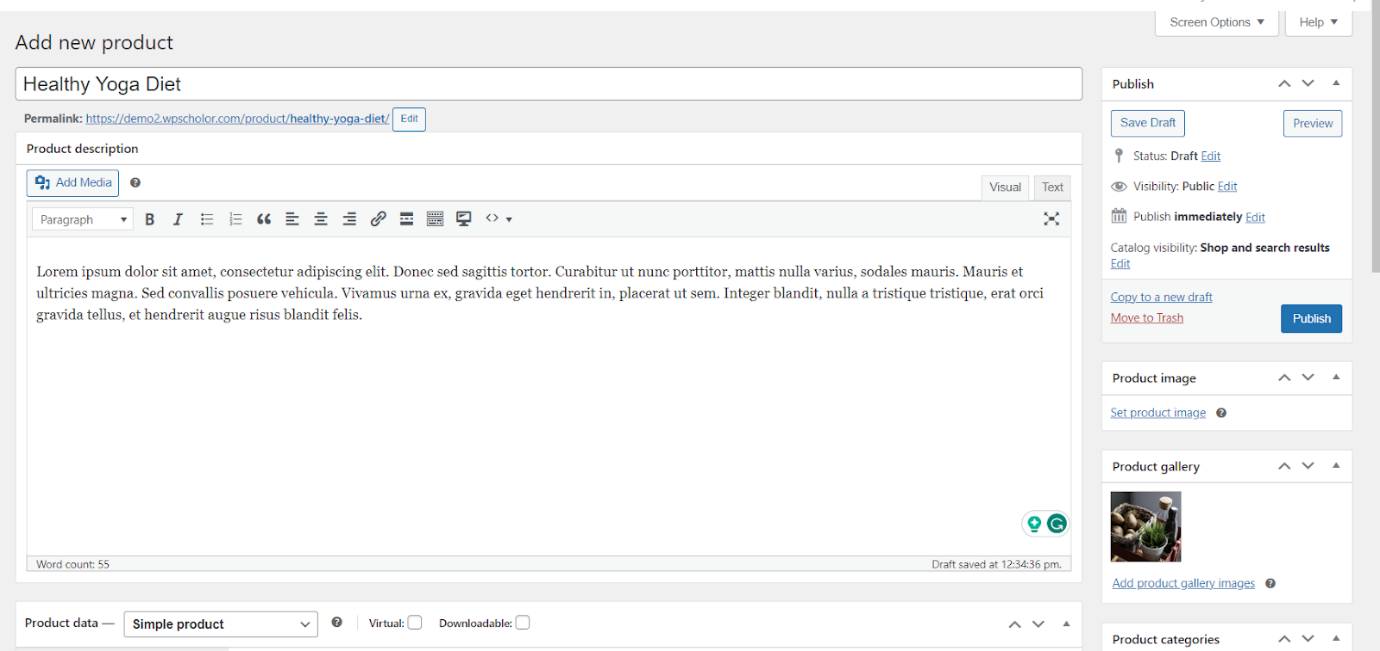
7.1. Create a New Product
Navigate to Products > Add New from your WordPress dashboard to create a new product.
7.2. Add Product Details
You need to add the product details like the title, description, image, etc. You can also add the image gallery and tags.
To keep everything organized in your store, you can assign this product to a category as well.
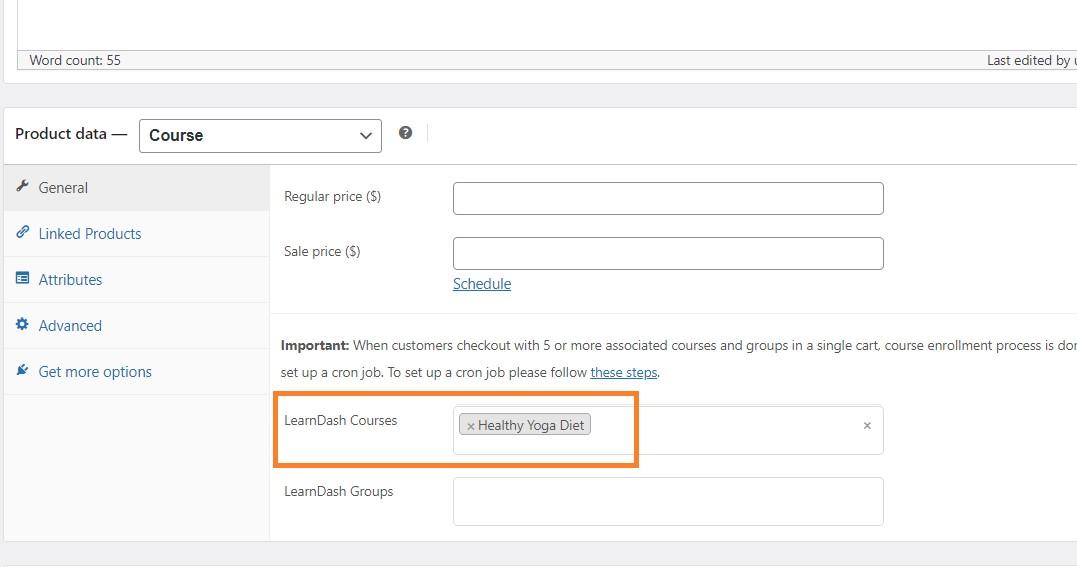
7.3. Link Product to the Course
Scroll to the ‘Product Data’ section and select ‘Course’ as the product type from the dropdown.
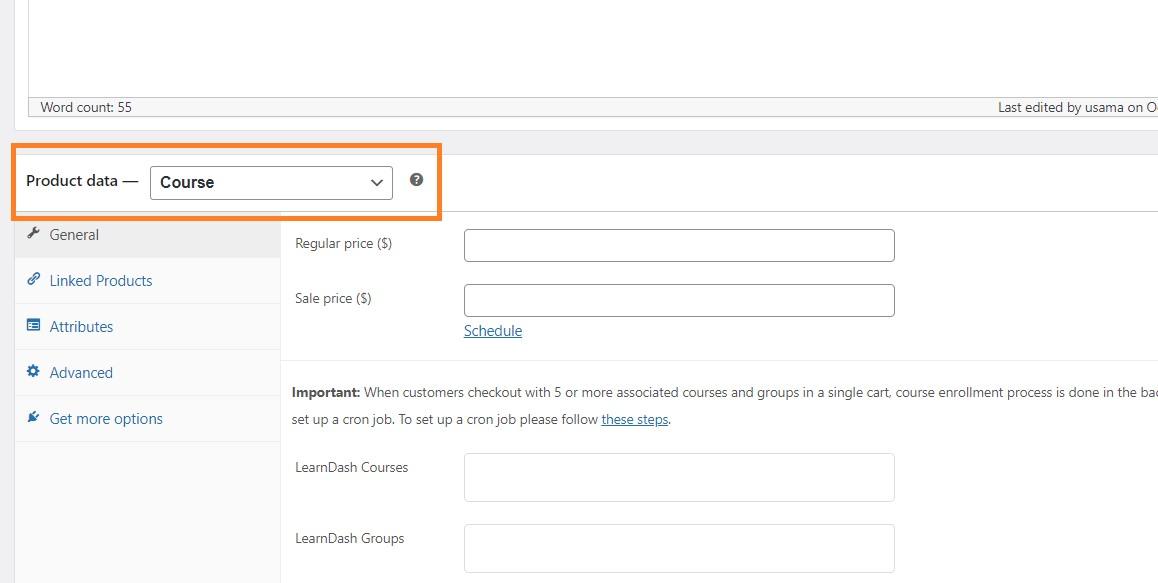
Next, you need to select the course that you want to link to this product from the ‘LearnDash Course’ dropdown. Your customers will be able to purchase the course as a normal product.
7.4. Set the Course Product Pricing
Now, in the ‘Regular Price’ field, add the price for the course. You can also set a sale price. However, if you are selling a subscription course, you’ll need to install another plugin from your dashboard to take recurring payments.

8. Add a Purchase Note
After that, you need to add a purchase note to let customers know how they can start the course. In the purchase note, you can create a button or a simple anchor tag to link to the course page.
To do so, click the ‘Advanced’ tab in the sidebar, and in the ‘Purchase Note’ field, add the note. Customers will see this link on the order details page and my account page.
I have created a link to point them directly to the course page by using the following HTML. If you want to add a link like I did, you can copy the following code and use it.
Make sure to replace the link with your course page link.
<a href=”https://yourstore.com/courses/course-name/”>Start This Course</a>

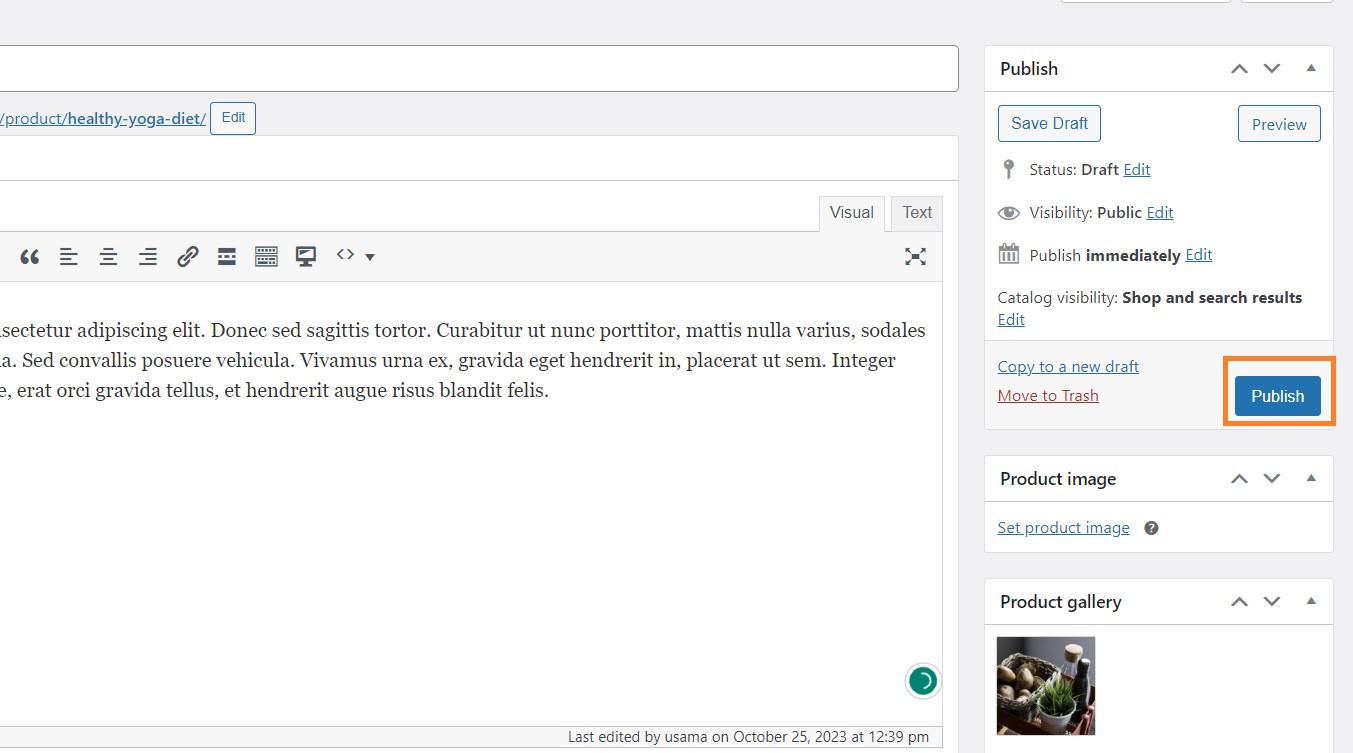
8.1. Publish the Product
After that, scroll to the top and click the blue ‘Publish’ button at the top right corner of your screen to publish the product.
9. Allow Customers to Access the Course
Once you have created the course product, we need to allow customers to access the course after purchasing the WooCommerce course product.
To do so, you need to go back to the course editing page by navigating to LearnDash LMS > Courses from your WordPress dashboard, hovering your mouse on the course, and clicking the ‘Edit’ button to edit the course.
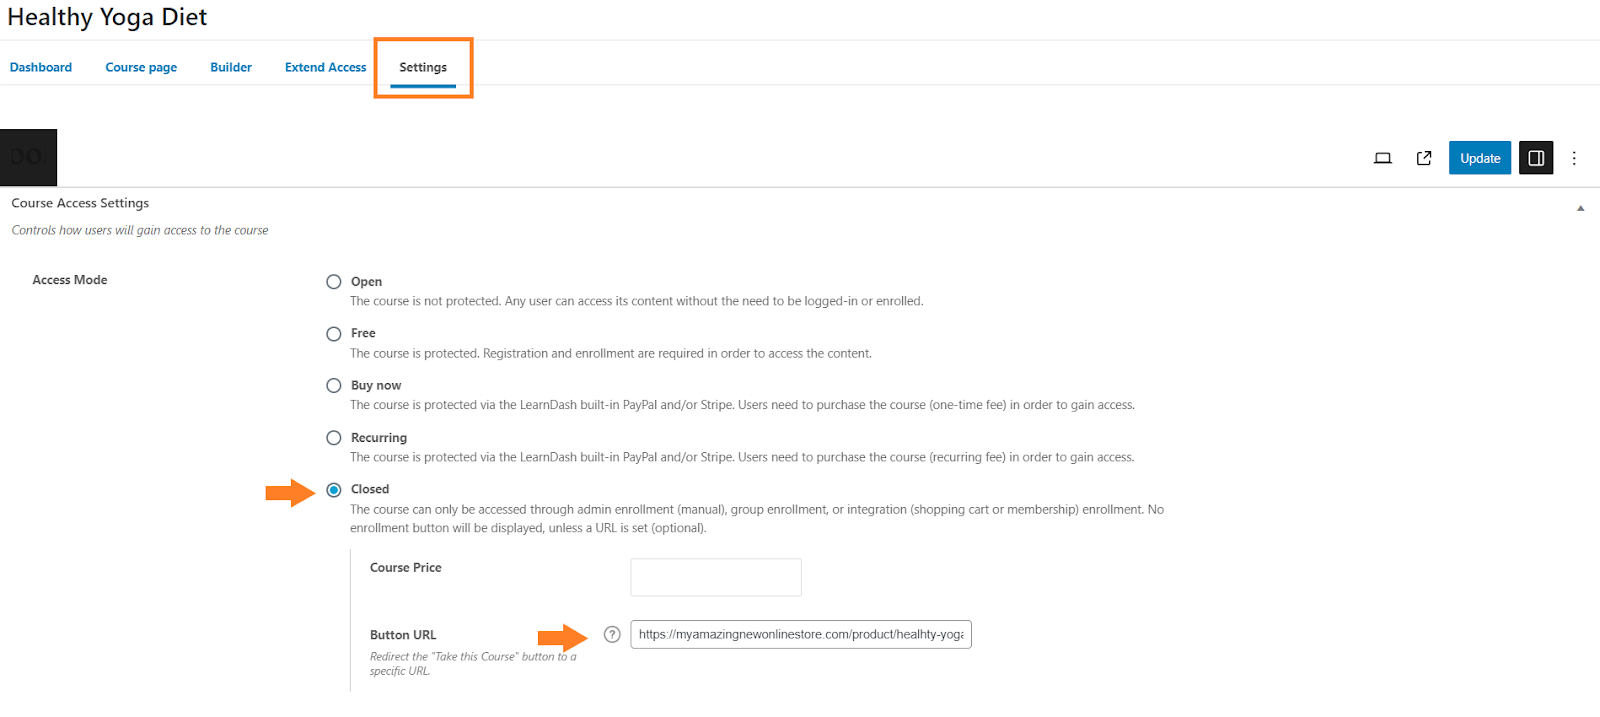
Once on the course edit page, click the ‘Settings’ tab at the top. The LearnDash LMS plugin allows you to set different types of pricing:
- Open
- Free
- Buy Now
- Recurring
- Closed
As we’ll be selling this course as a WooCommerce product, make sure to check the closed checkbox. Once you check it, two new fields will be added below it.
You need to add the WooCommerce course product URL in the ‘Button URL’ field to allow customers to get to this course and start it.
8.1. Update the Course
Finally, click the ‘Update/Publish’ button at the top right corner of your screen to update or publish the course.

9. Enable the Direct Checkout
After that, we need to enable the direct checkout to allow customers to redirect them directly to the checkout page skipping the add-to-cart page. We will also need to change the direct checkout button text to make it more understandable for users.
To do so, navigate to AIO Checkout from your WordPress dashboard hover your mouse on the ‘Direct Checkout’ and click it.
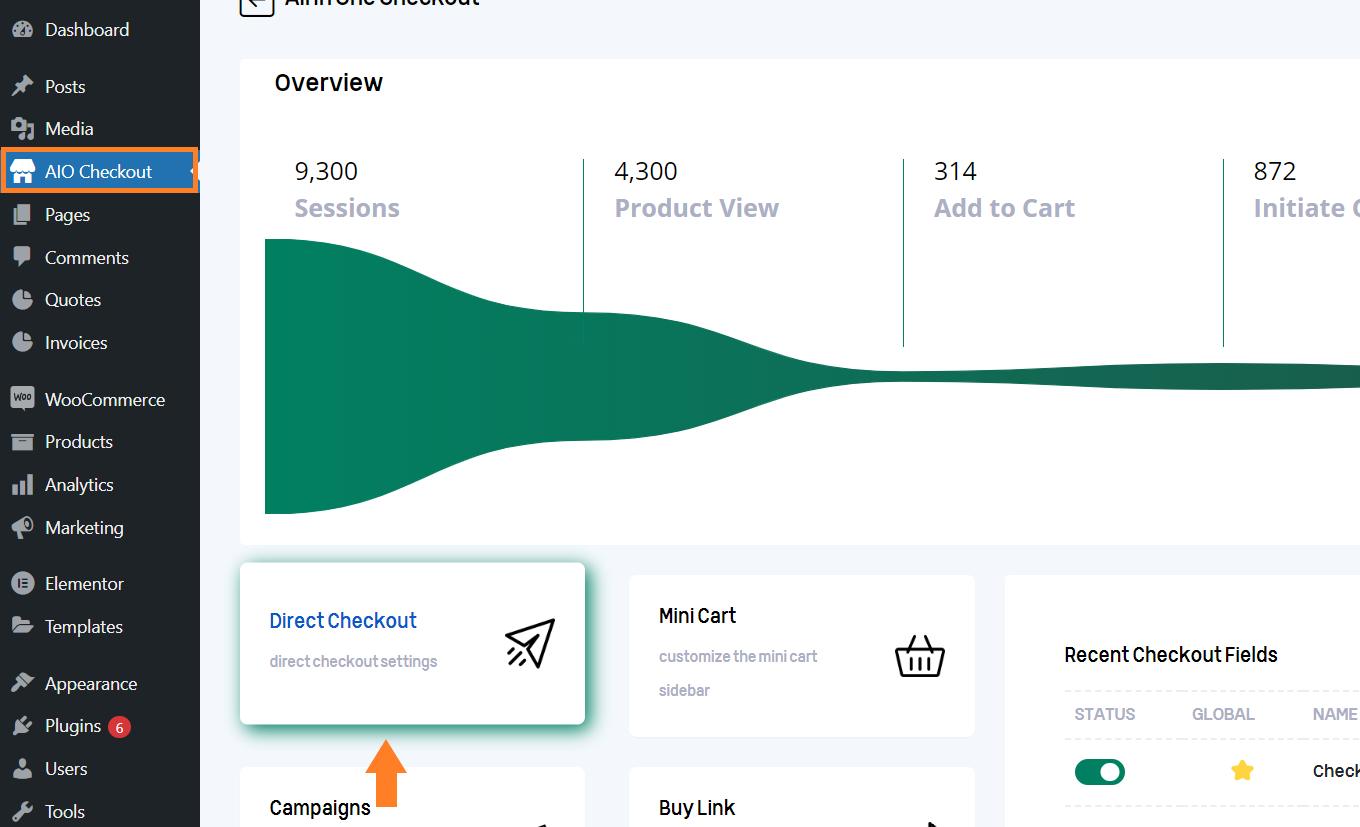
A pop-up will appear, you need to toggle the ‘Enable Direct Checkout’ button to enable it. You can also add custom text to give customers a more personalized experience.
I am adding ‘Enroll’ as the button text as it makes sense from the user’s POV. Don’t forget to click the ‘Save’ button in the popup window to save the settings.

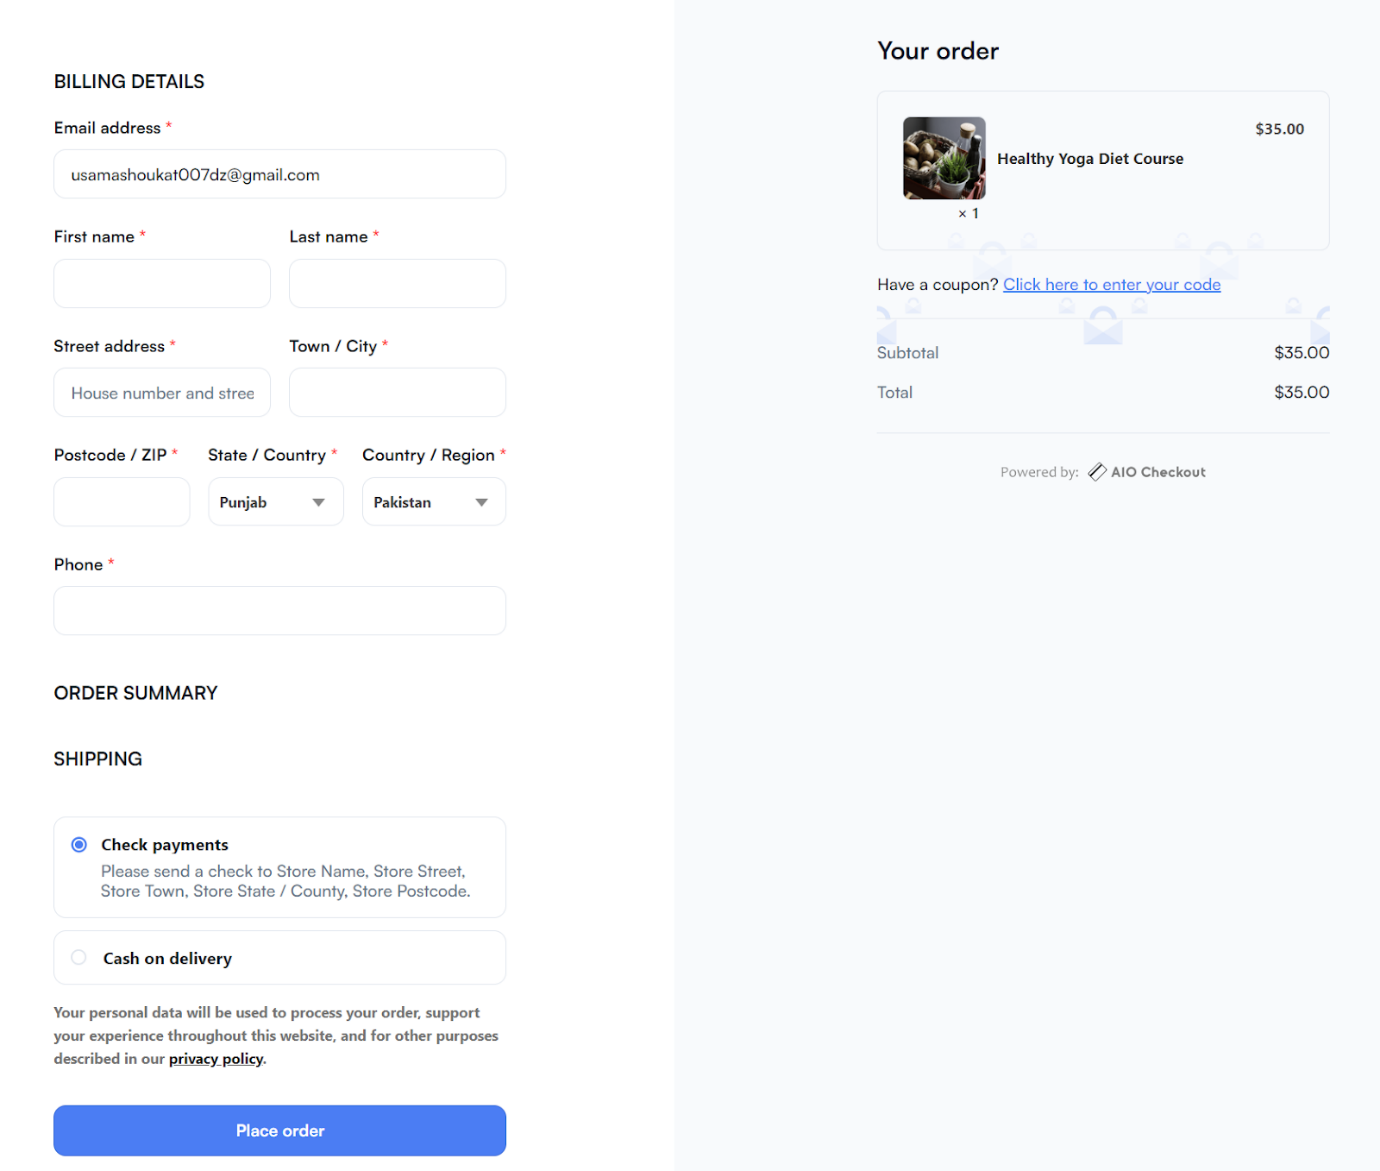
10. Optimize Checkout Flow
After enabling the direct checkout, you need to create a checkout form. The default checkout form can also do the job but to improve the customer experience, we need to create a custom and optimized checkout.
I have created a guide to help you create a checkout form that you can follow to create a checkout that looks like the following:
11. Allow Guest Checkout (Optional)
Next, you need to make sure that your customers can purchase your courses without creating an account on your WooCommerce store. As we are using WooCommerce to sell courses instead of LearnDash’s default behaviour, we need to enable guest checkouts.
There will be a few other settings as well that we need to enable, and we’ll be seeing them in a minute.
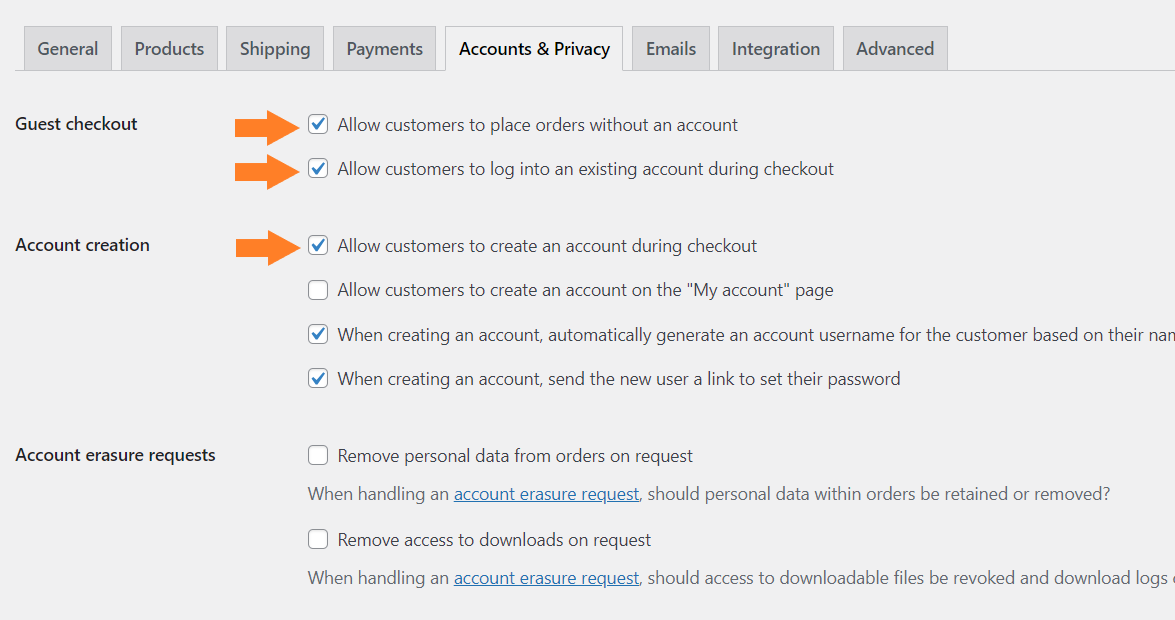
To enable the guest checkout, navigate to WooCommerce > Settings > Accounts & Privacy from your WordPress dashboard.
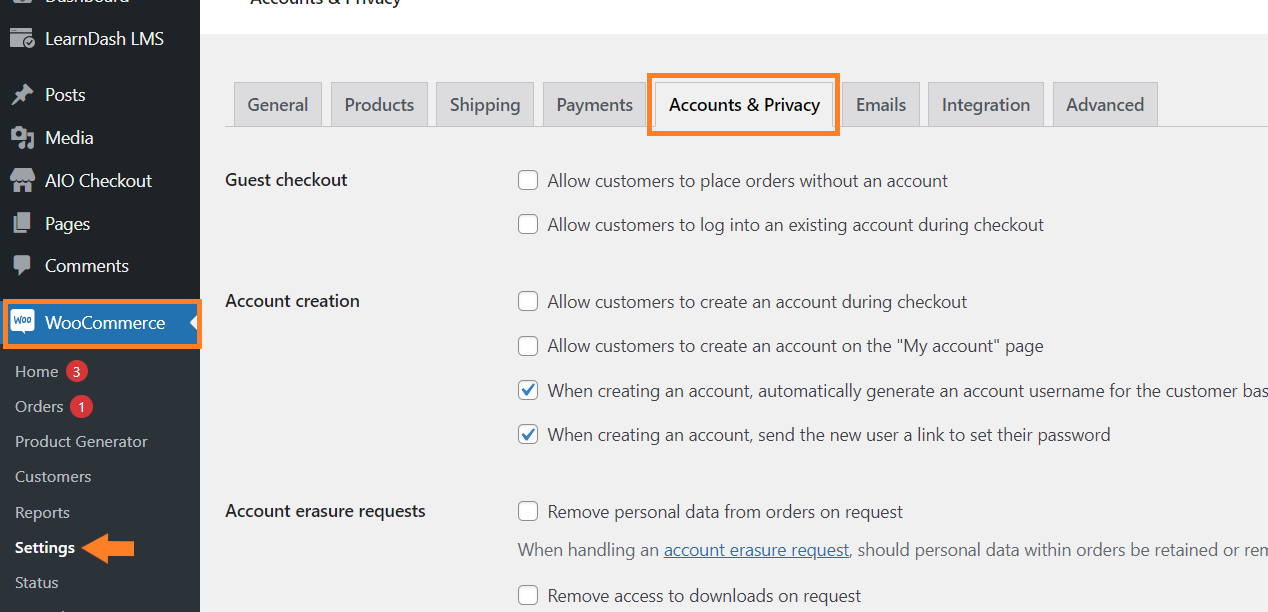
11.1. Enable the Settings
After that, you need to check the following three checkboxes:
- ‘Allow customers to place orders without an account’,
- ‘Allow customers to log into an existing account during checkout’,
- ‘Allow customers to create an account during checkout’.
It will allow customers to purchase without creating an account and once they purchase the course, their account will be created automatically, and they can easily access the courses they have purchased.
11.2. Save Settings
Once done, scroll to the bottom and click the ‘Save Changes’ button to save the settings.

12. Final Results
Now let’s test it by purchasing the course from the store.
To test it, I visited the course product page from my store, and I could see the course as a product in my store. An enroll button was also there to allow customers to purchase an enrolment on this course. It has a price that we specified in the WooCommerce product.
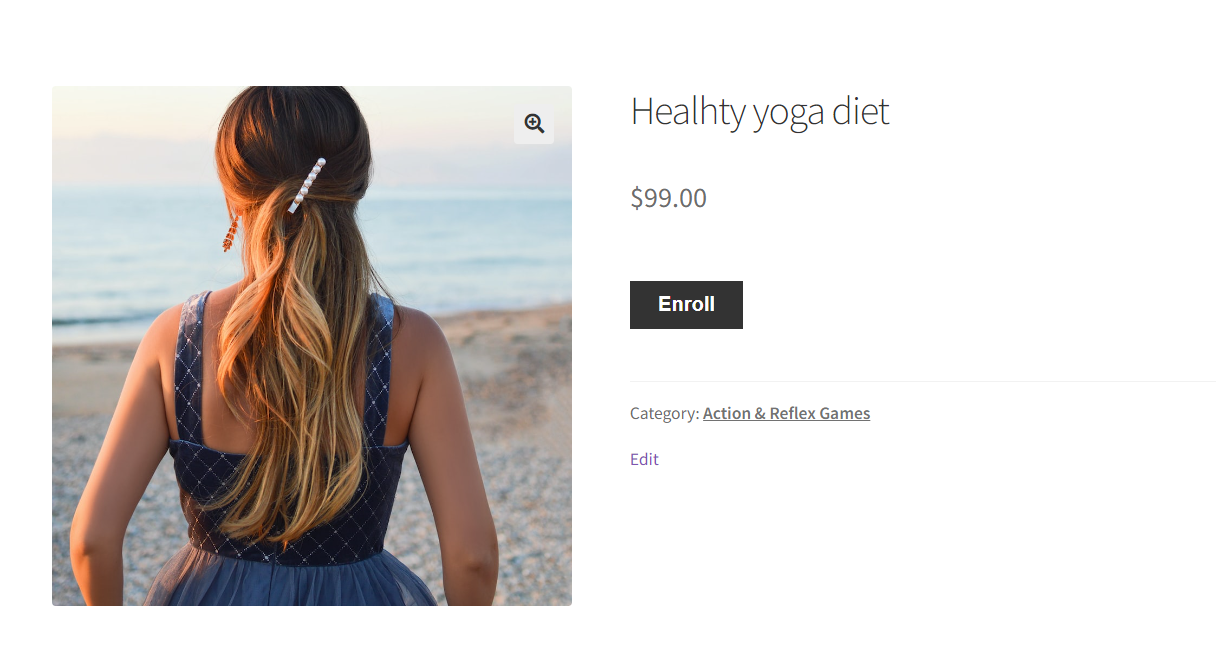
I could purchase it like other products in my store by clicking the enroll button and completing the checkout process.
It uses WooCommerce’s default layout instead of the LearnDash LMS plugin layout.
I have used the ‘Cheque Payments’ payment method to purchase the course so my order is ‘On Hold’ yet but in your case, you will have payment methods like Credit/Debit Cards, PayPal, Stripe, or any other method.
In that case, when a user purchases the course from your WooCommerce store, the order will be marked as ‘Processing’ and customers will be redirected to the ‘My Accounts’ page from where they can access their course.
They will be able to see the purchase note button on which they can click and start the course.
They will also be able to see ‘Enrolled’ mark above the courses they have purchased.
How to Display Courses in a List Layout (Optional)
The WooCommerce default shop page does the job for normal products but if you are also selling courses as WooCommerce products, you may want to display the products adequately so customers can easily get to know which one is a product and which one is a course.
To do so, you can display your products in a list layout, so customers don’t have to navigate to each product’s page to identify whether it’s a product or a course. They will also be able to see more details from there, which improves the customer experience.
Here’s an example of how the shop page of your store will look like.
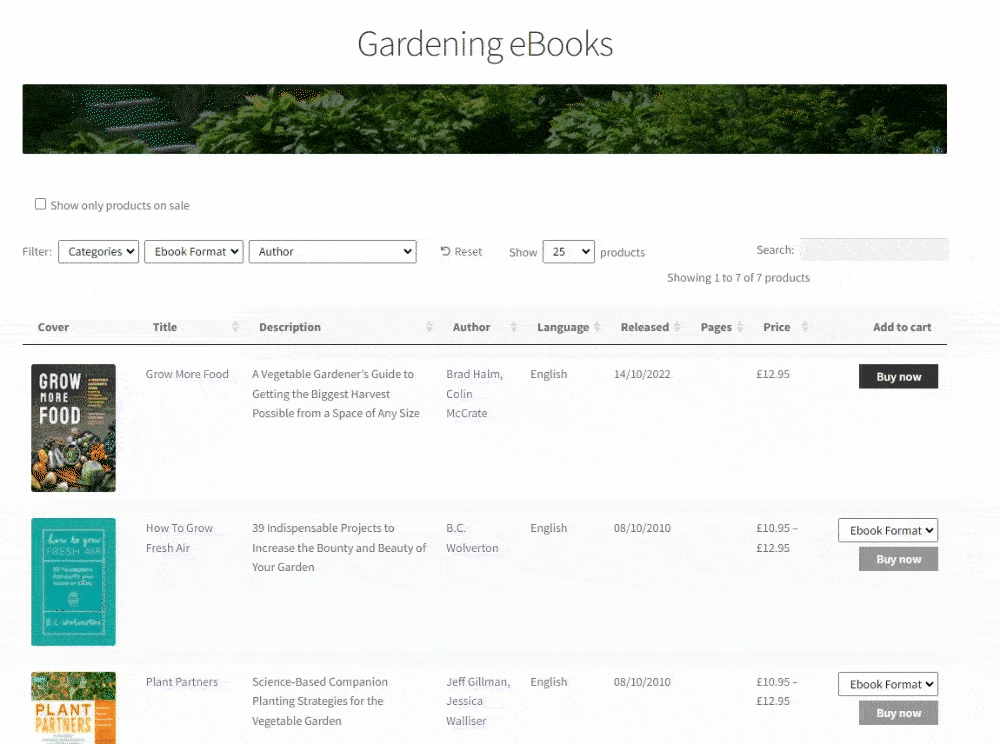
You can use the WooCommerce Product Table plugin to display your WooCommerce courses and products in a list layout. The following tutorial will help you do so.
Final Thoughts
That’s it for today’s guide.
I hope it was helpful to you and you were able to create and sell courses with WooCommerce without any difficulty.
Besides that, it gives you tons of flexibility and customization options to match your store as per your requirements.


