If you are looking for a video plugin to help you sell videos on your WooCommerce store, then I got you covered!
A video gallery plugin will help you to show a preview of the video to visitors before they buy the complete video. This plugin can also be used to add video previews to physical products to increase your conversion rate by encouraging customers to buy.
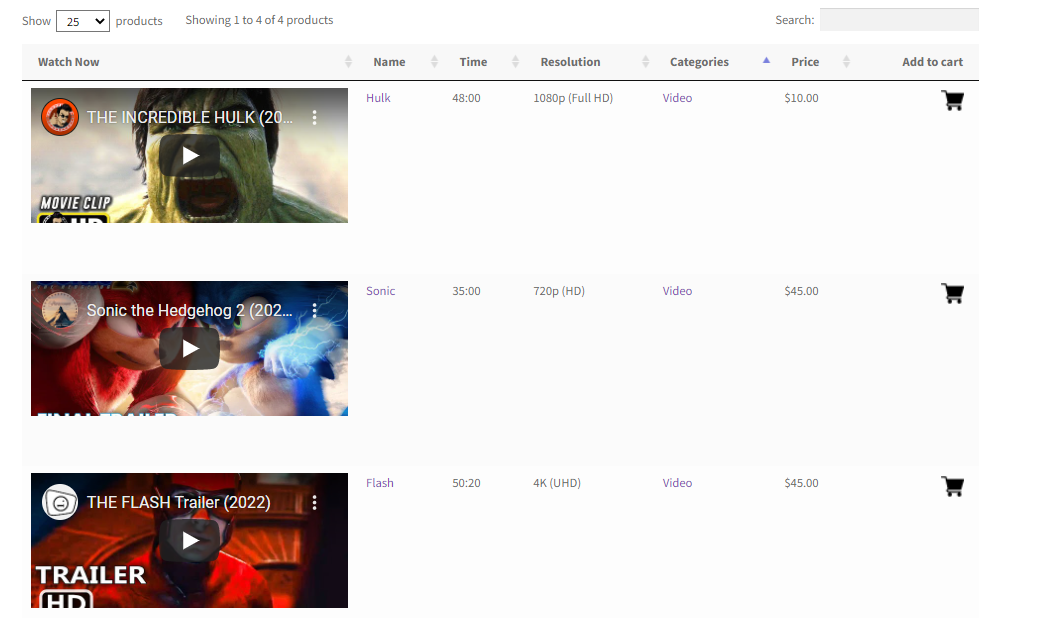
So, In today’s tutorial, I’ll give you a step by step guide on how to sell videos on your WooCommerce store with the help of a Product table plugin. Here’s a quick sneak peek of the final results we’ll be achieving today.

So, without further ado, let’s jump into the tutorial.
On This Page
- 1 How to Sell Videos With WooCommerce?
- 1.1 1. Install and Activate the WooCommerce Product Table Plugin
- 1.2 2. Add a Downloadable Video in WooCommerce
- 1.3 3. Create Custom Fields Using ACF Plugin
- 1.4 4. Navigate to Product Table Settings
- 1.5 5. Create a New Table
- 1.6 6. Add a Product Condition
- 1.7
- 1.8 7. Set Table as Default Shop Page Layout
- 1.9 8. Save Changes.
- 1.10 9. Final Results
- 2 Conclusion
How to Sell Videos With WooCommerce?
Here, I’ll show you how to create a video gallery with the help of WooCommerce Product Table plugin and sell videos with WooCommerce.
Follow the following steps to create a video gallery and sell videos with Woocommerce.
1. Install and Activate the WooCommerce Product Table Plugin
Note: You can skip this step if you have already installed and activated the WooCommerce Product Table plugin.
To install the WooCommerce Product Table plugin, you will need to install the Woosuite Core plugin and activate it with the help of a license key. We have created a Quick Start Guide for you to figure out how to install and activate the WooCommerce Product Table plugin.
2. Add a Downloadable Video in WooCommerce
Follow the following steps to create a downloadable product in WooCommerce.
1. From WordPress Admin Dashboard
To add a new product, navigate to WordPress Admin Dashboard, and click on the Products » Add New.

2. Enter Product Name
In the Product Name field, enter the name of the product.

3. Add Video URL in the Short Description
Scroll down a bit to the Short Description section and add the URL of the video in the short description to create a preview of the video.

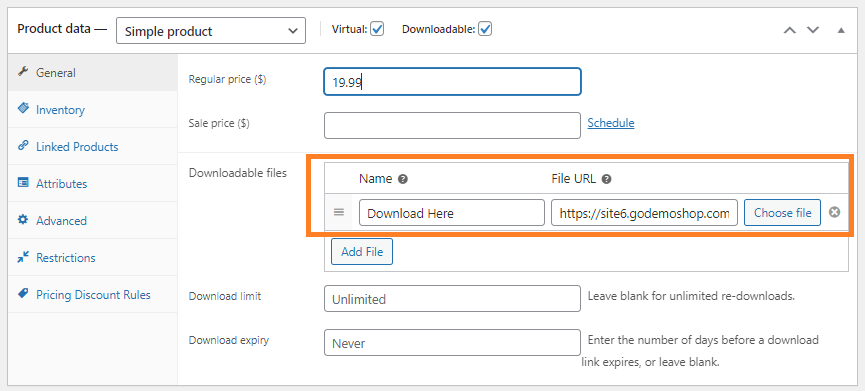
4. Create a Downloadable Product
To create a downloadable product, scroll down to the Product Data section and check the Virtual and Downloadable boxes.

5. Enter the Price of the Product
Now, in the Regular Price field, enter the price of the video product.

6. Add a Downloadable File
Now in the downloadable files, give a name to the file and add the file URL.
Note: You can upload the files on dropbox, drive or any other cloud storage and paste the link here. I have uploaded the video file on my WordPress and pasted the link here.
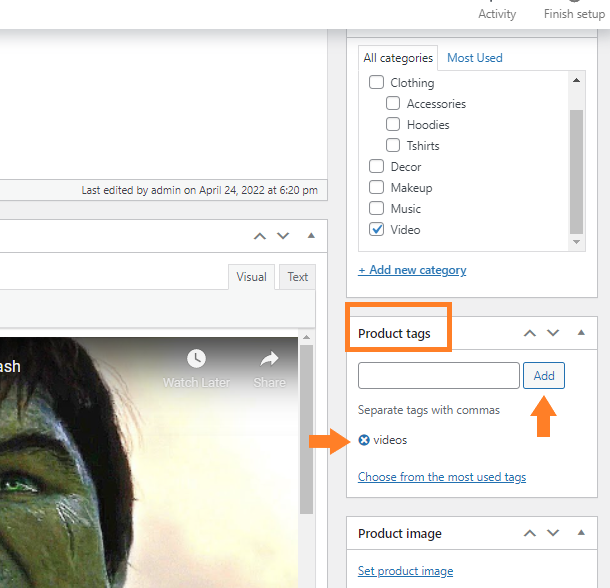
7. Add Product Tag
Now scroll a bit above to the Product Tag section. And add a tag by clicking on the Add button. I have added the “videos” tag.
Note: If you sell both physical and digital products on your store then to display both types of products on different pages, use two different tables and I am using tags to select the specific products.
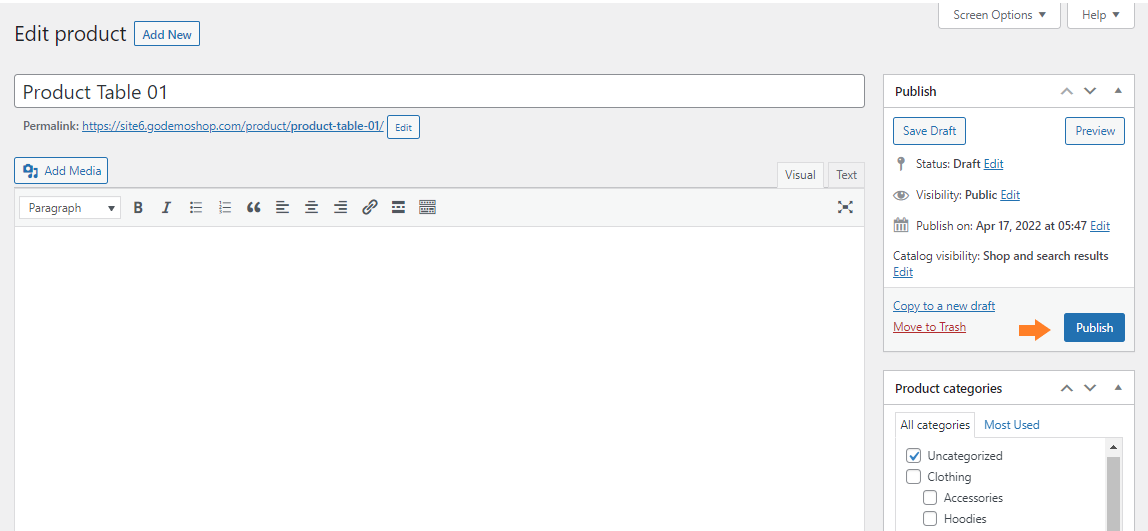
8. Publish Product
Now finally, click on the Publish button to publish the product.
3. Create Custom Fields Using ACF Plugin
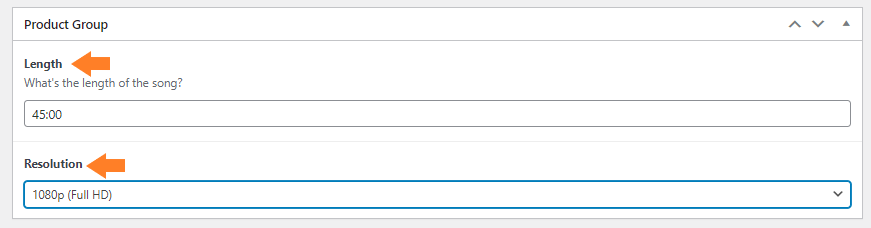
Now, to create some custom fields like the Resolution and length of the Video you need to use the Advanced Custom Fields plugin.
I have added the Resolution and Length of the music as custom fields.
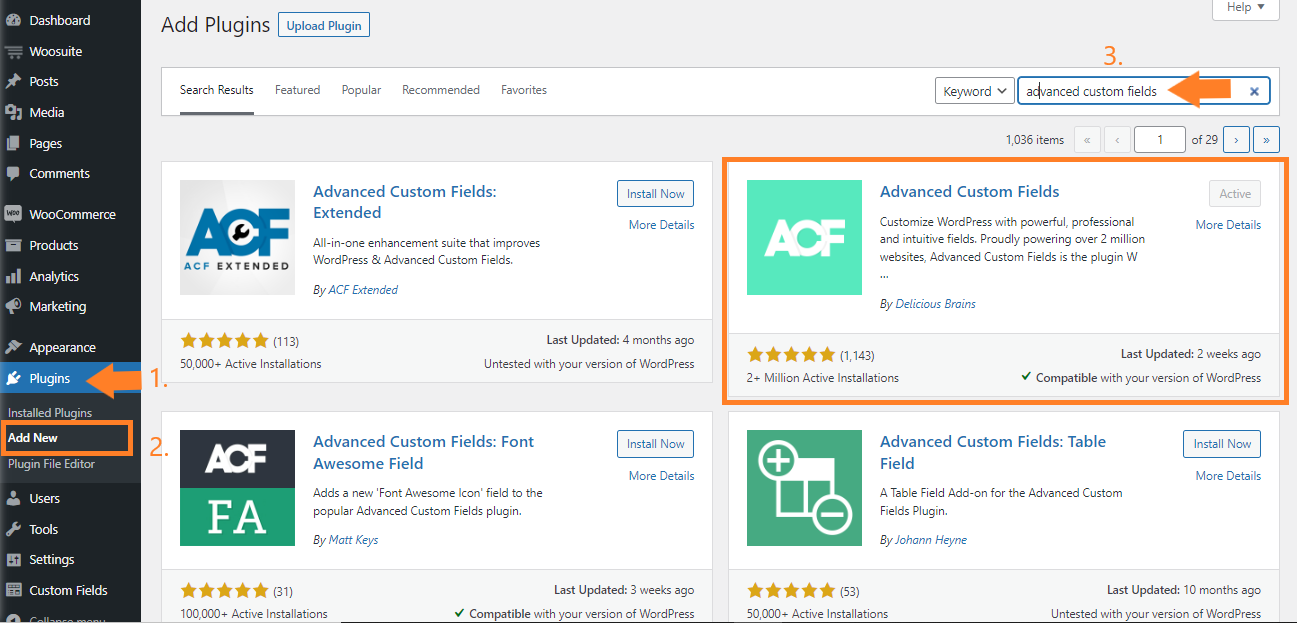
To create custom fields, install the plugin by navigating to Plugins » Add New and search for ‘advanced custom fields’.
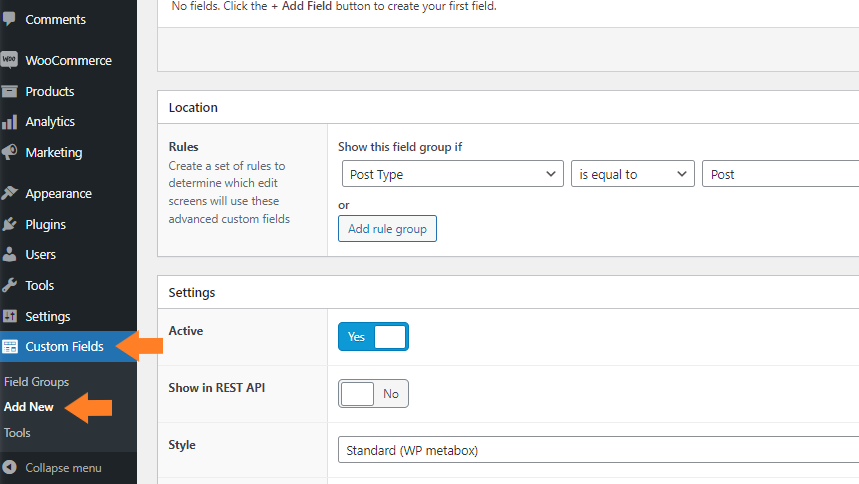
3.1. Once the plugin is installed and activated, now to create custom fields, navigate to Custom Fields » Add New.
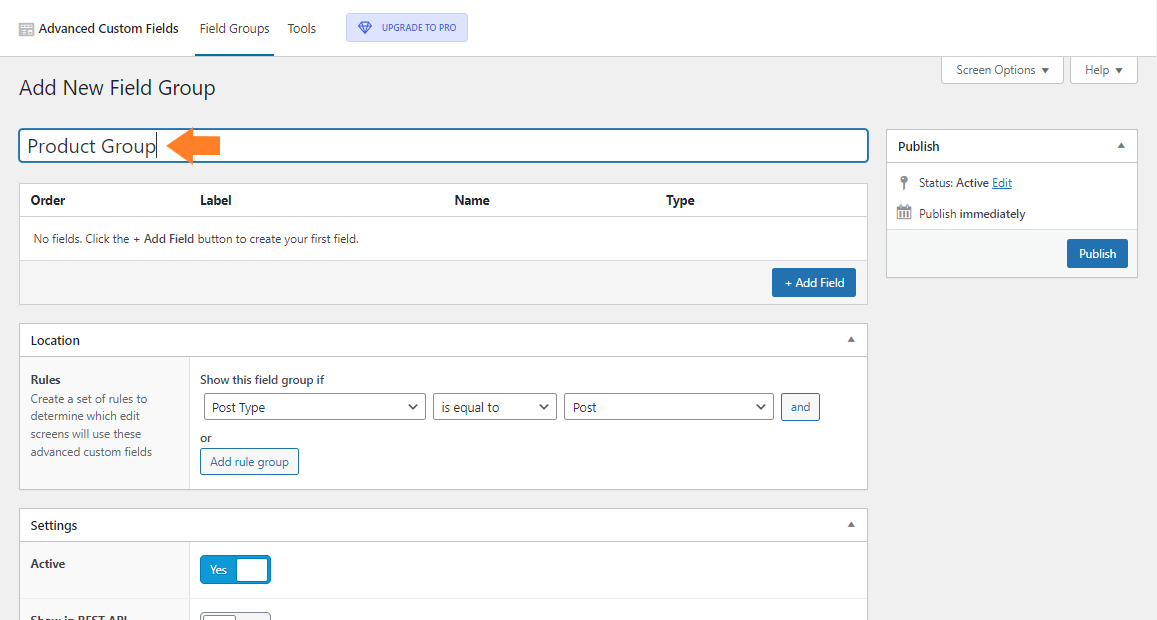
3.2. Now in the Add Title field, give a name to the field group.
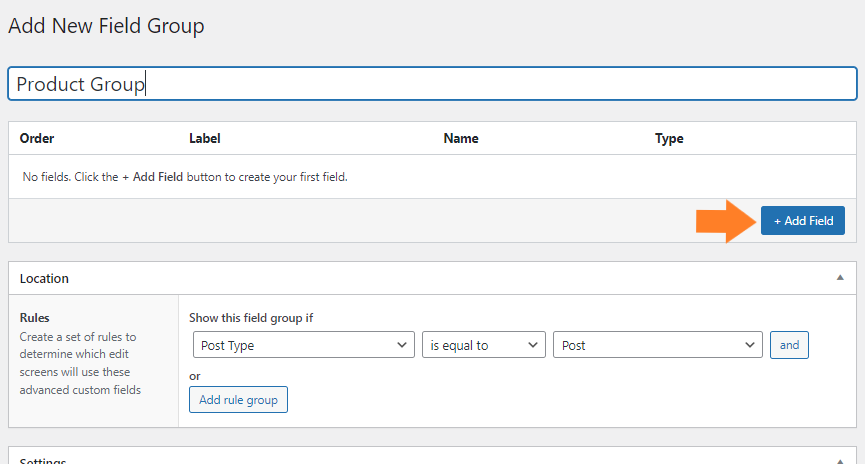
3.3. Now click on the Add Field button to add a field.
3.4. Once you click the button, you’ll see the field settings where you can set the field label and type. You can add as many custom fields as you want.

3.5. Now, scroll down to the Location section and select the position where you want to display the custom field.
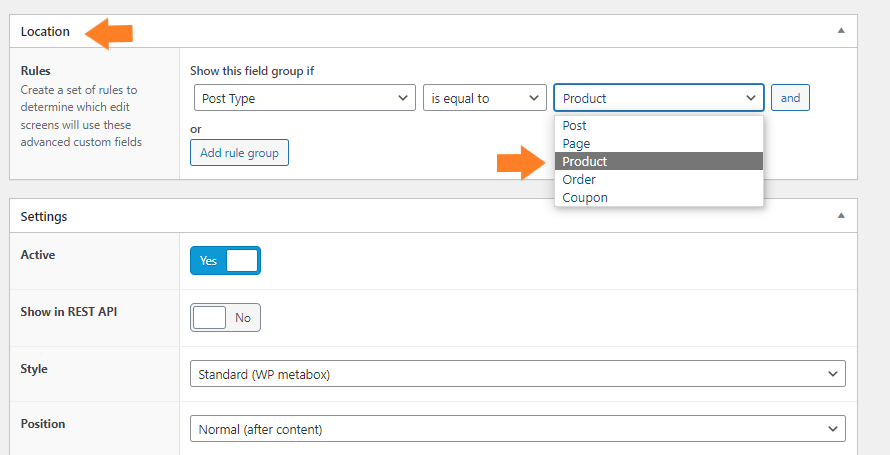
3.6. Now click on the Publish button to publish the field.

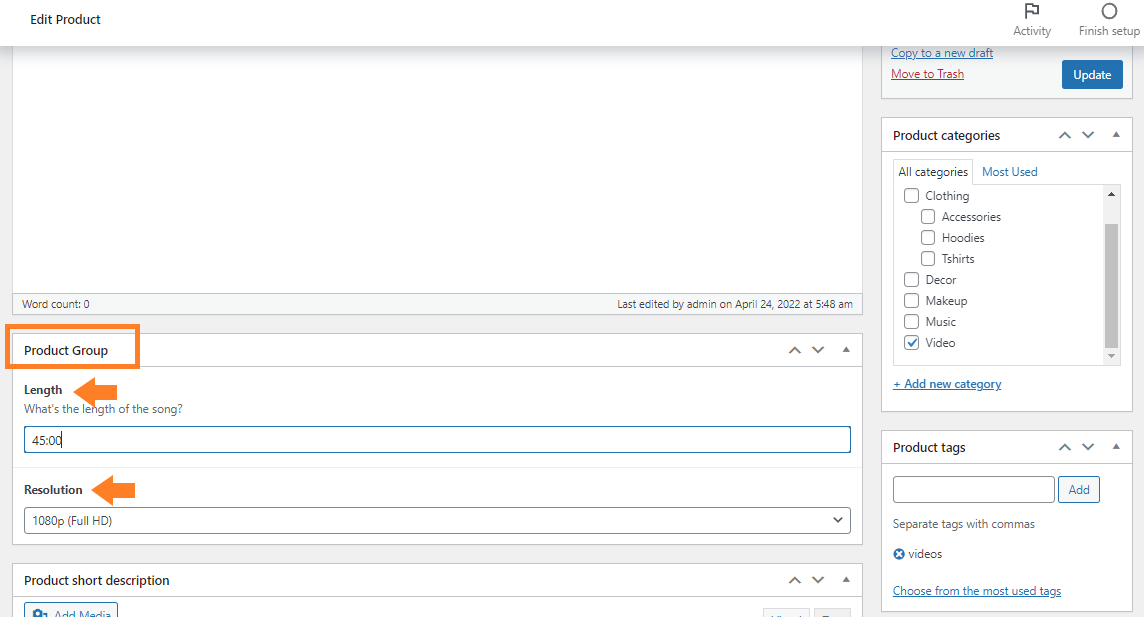
Now if you edit the product, you’ll see that the custom fields has been added and you can enter the value in the custom fields you want.
Once the product is created now navigate to Woosuite » Product Table from your WordPress dashboard.

5. Create a New Table
To create a new table, click on the Add New Table button.
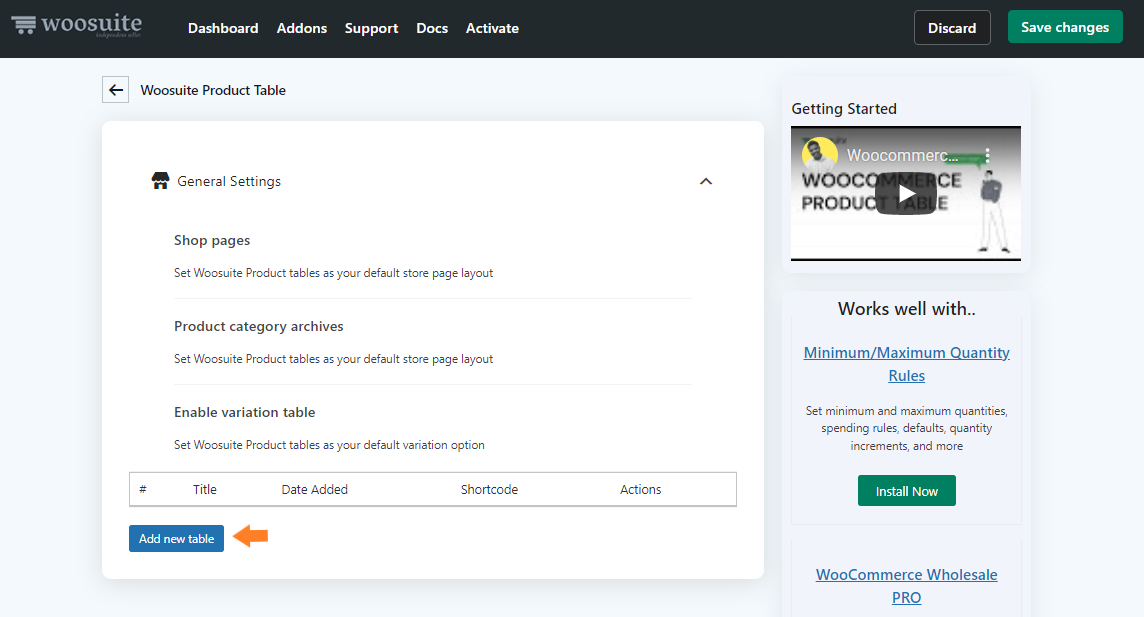
Once you click it, you’ll see a screen where you can create and control the different table settings.
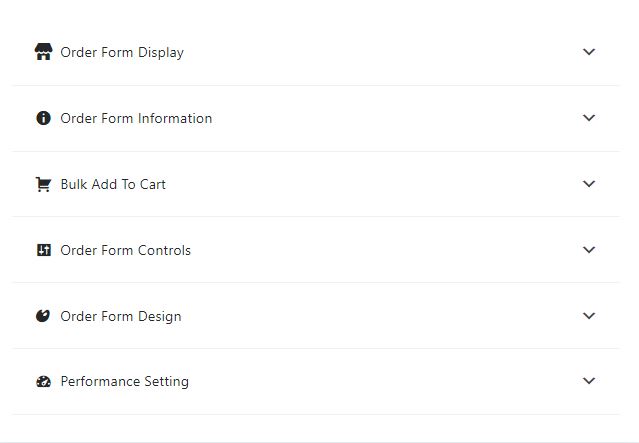
1. Order Form Display
Give an internal name to the table.

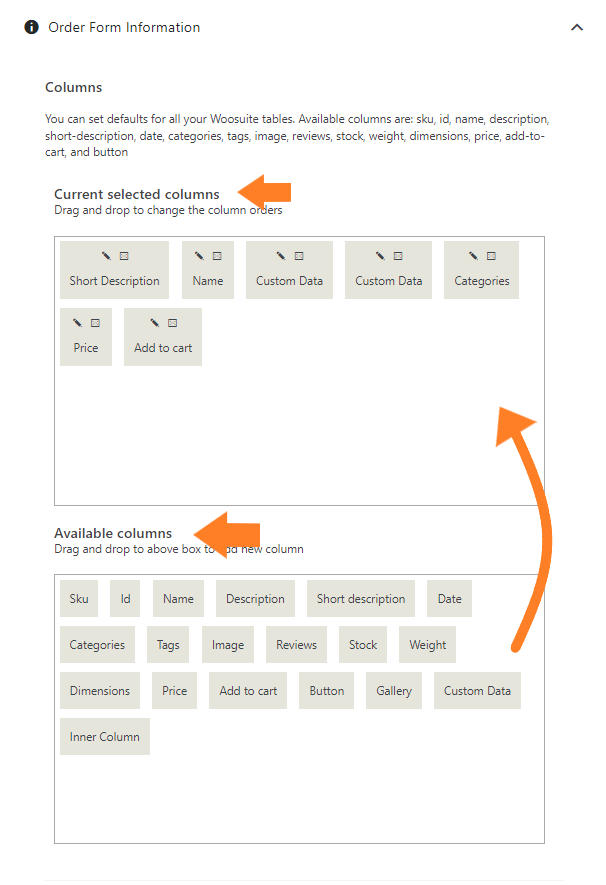
3. Order Form Information
Now expand the Order Form Information by clicking on the (▾)

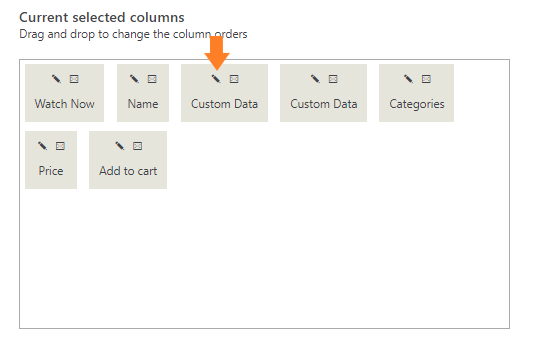
Now, specify the columns you want to add to the table. To add a column just drag the column from the Available columns section and drop it in the selected columns sections.
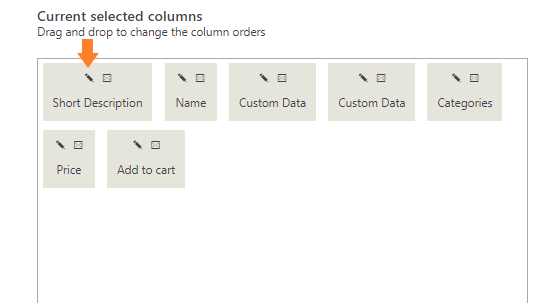
4. Change Column Names
4.1. To change the column names, click on the pencil icon on the column.
4.2. Once you click it, you’ll see a popup from where you can edit the column label. Once you edit it, click on the Update button.
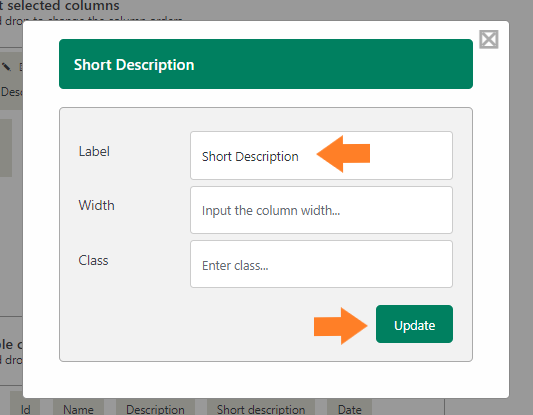
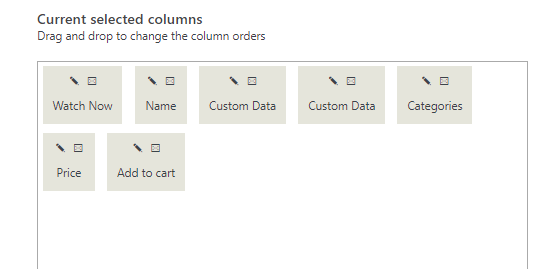
I have used the following labels for this tutorial.
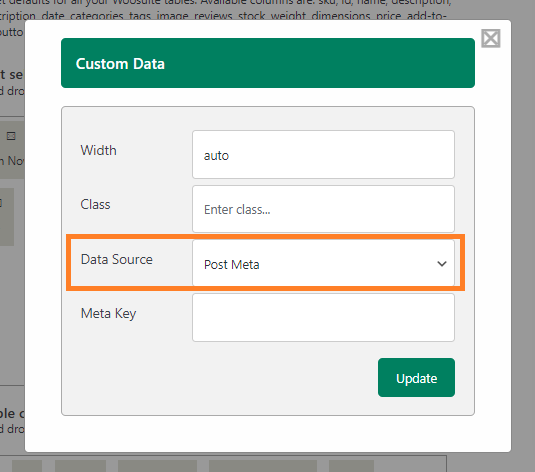
4.3. For the custom fields, click on the pencil icon on the column.
4.4. Now, from the Data Source dropdown, select Post Meta.
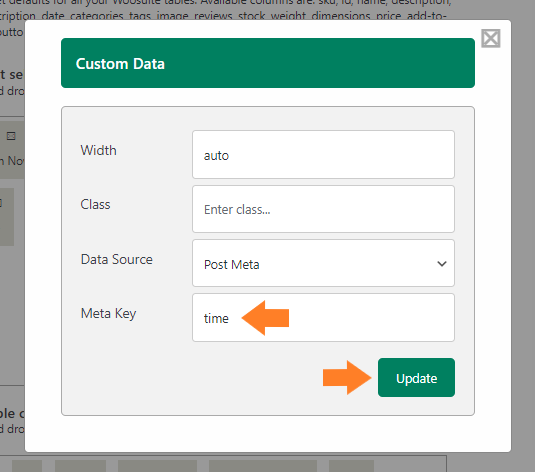
4.5. Now, in the Meta Key field, enter the custom field name, you created with the Advanced Custom Fields plugin and click on the Update plugin.
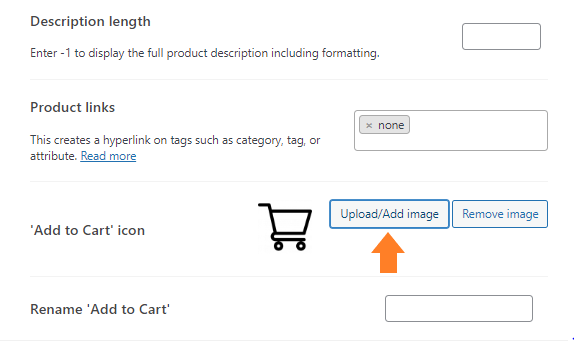
4.6. Now scroll down, until you see the Add to Cart Icon.

Now, upload the cart icon by clicking on the Add/Upload Image button. This will display the cart icon instead of the cart text in the table.
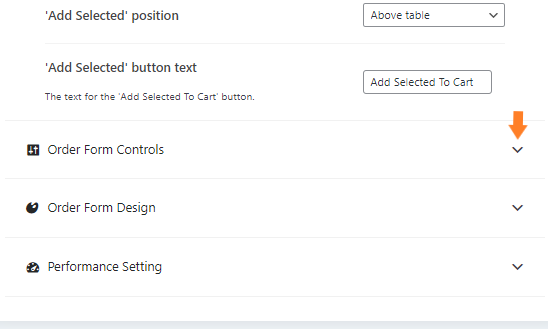
6. Add a Product Condition
Now expand the Order Form Controls by clicking on the (▾)
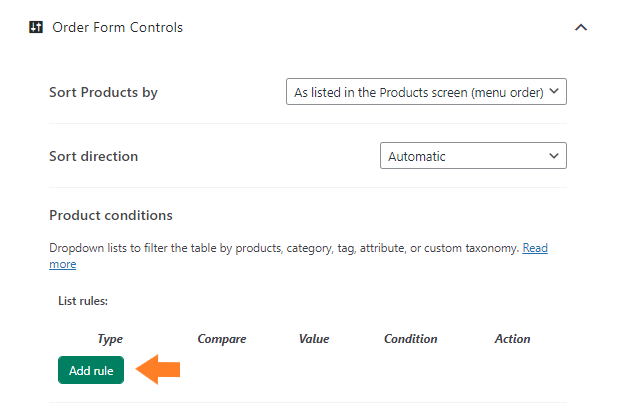
1. Add a Product Condition
To add a product condition, click on the Add Rule button.
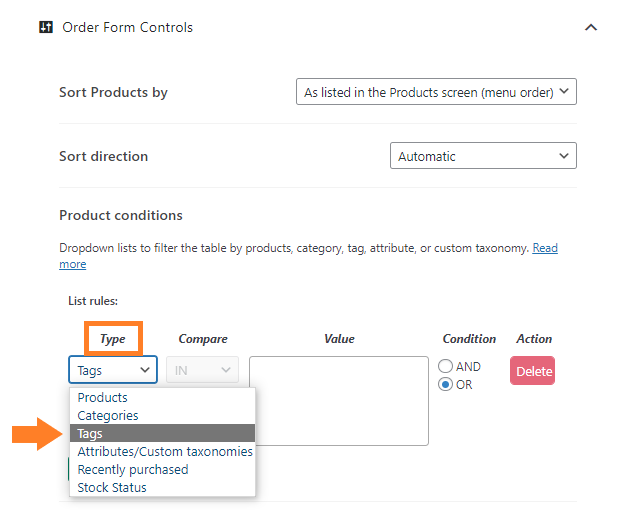
2. Select Type of the Rule
From the Type dropdown, select Tag.
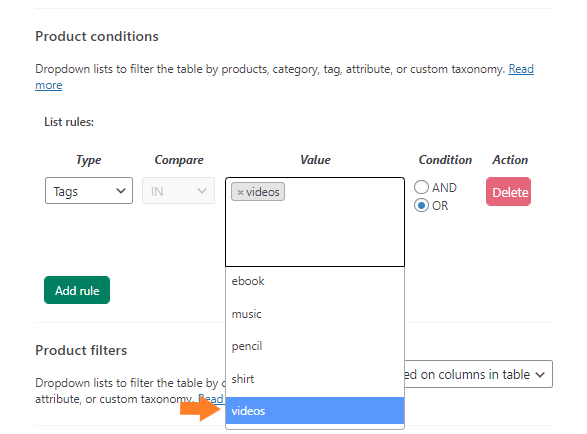
3. Add Value
Now, in the value field select the tag that we added to our video product.
4. Select Condition Type
Now, select the condition as AND.
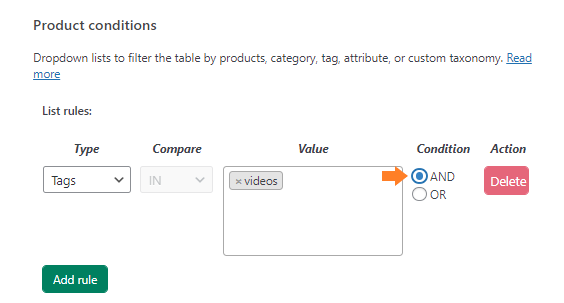
Note: By adding this condition, only the products having a ‘videos’ tag will be shown in the table.
5. Save Changes
Once you have created the table, now click on the Save Changes button on the top right corner to save the changes.
7. Set Table as Default Shop Page Layout
Now, go back to the General Settings of the plugin by clicking on the back arrow at the top.

Now, select the table from the Shop Page dropdown to set Woosuite Product table as your default store page layout.

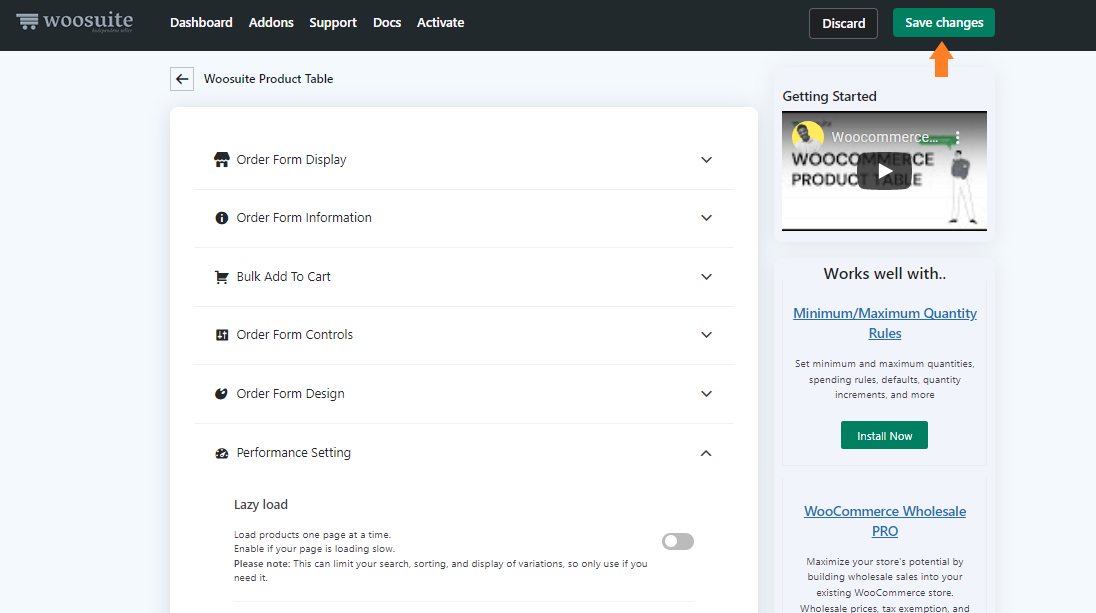
8. Save Changes.
Now click on the Save Changes button at the top right corner to save the changes.

9. Final Results
Now let’s test if it is working or not. To test it. view the shop page of your store and you’ll see that only the products with the “videos” tag are being displayed on the shop page in a table/grid.
Conclusion
That’s it you just created a video gallery in WooCommerce to sell videos. You can sell any digital product like audio files or pdf files using this same guide.
The visitors will be able to view all the videos from a single page and add multiple products to cart at once. Once they purchase it they’ll be able to download the videos.
Now it’s up to you to configure the settings as you want and create different product galleries. If you have any queries, you can ask them in the comments or contact our customer support. Our dedicated customer support team typically replies within 48 hours.
Download the WooCommerce Product Table plugin today and build something great at your store!


