If you run a WooCommerce business, it’s likely possible that you might have multiple products with variations. For example, you sell t-shirts in different colors, sizes, and materials. On the other hand, your customers must have to navigate to individual product pages to view them.
Therefore, you can increase your product catalog and make product variations more interesting and appealing to customers in just a few clicks by displaying them on the shop page as individual products.
In this guide, you’ll know exactly how to show variations on your WooCommerce shop page by the end of the tutorial.
The best part is you can accomplish this with the WooCommerce Show Variations on the Shop Page in only a few clicks.
Let’s get started!
On This Page
What Are Variations in WooCommerce?
A variant in WooCommerce lets you choose an option from various choices, such as different colors, sizes, materials, SKUs, etc. These are generally referred to as ‘attributes,’ and you may have as many as you want.
A customer can add a new product to their cart once they have selected all product choices. This product you add to your shopping cart is called “variant.”
A variation is a final product choice made from different attributes to a variable product.
For example, if you sell hoodies in your store, they probably vary in size, color, or material.
Ultimately, WooCommerce variations allow you to add dropdowns on your shop page to choose which variation you would like.
Keep reading to learn how we can add variations to the shop page of your WooCommerce store.
How To Show Variations on the WooCommerce Shop Page?
The easiest way to show a variation on the WooCommerce shop page is by using the WooCommerce Show Variations on the Shop Page plugin. It’s one of the best plugins to display variations on the product shop page to provide a straightforward shopping experience to customers by displaying variations as single products on the shop page, search results, category pages, and filtered results.
WooCommerce Show Variations on Shop Page plugin allows you to select the variations that you want to show on your shop page, featured listings, filtered results, and search results or none of the above.
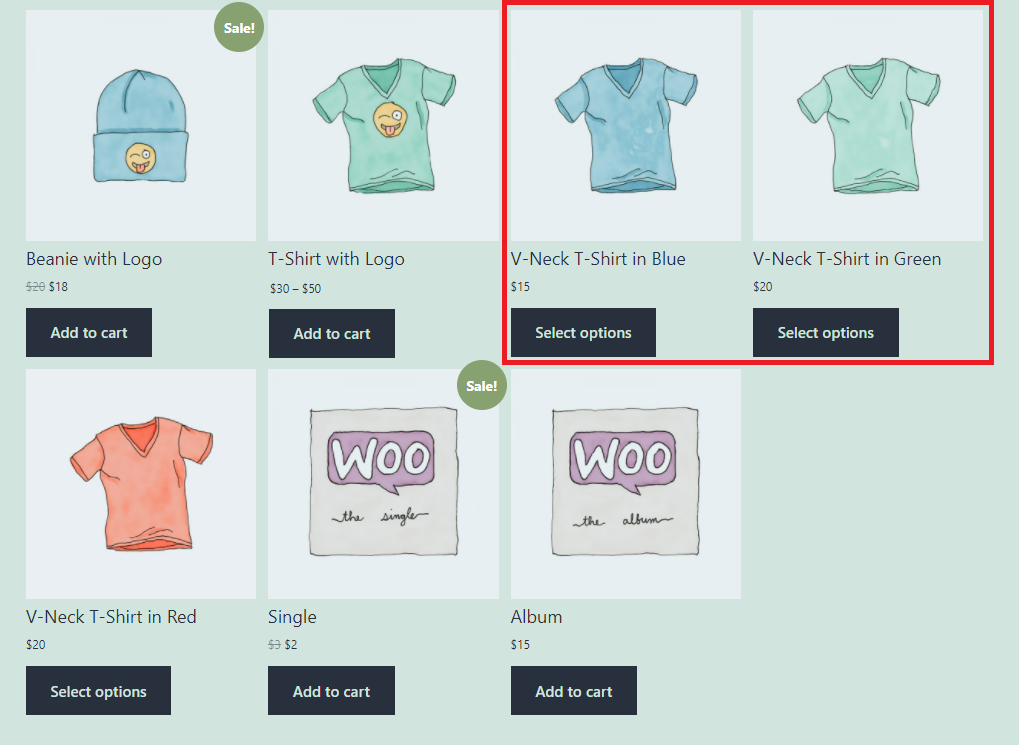
This plugin displays variation for the single products linked to the parent variable product page with the preselected options.
The screenshot below helps you understand this. Variations are labeled with red rectangular boxes for demonstration purposes.
Here are the features of the WooCommerce Show Variations on Shop Page plugin:
- Reduce the shopping time as it displays variations in search and filter.
- Create custom and engaging titles for each variation rather than the default WooCommerce variation title.
- Let’s choose whether the variation can be added to the cart from the catalog listing or not.
- Helps increase your product catalog size in minutes, increases the click-through rate of your online site, and helps optimize the search engine ranking.
So, get ready to use this intuitive yet straightforward plugin that quickly allows your customers to search for what they are looking for.
So, this is how WooCommerce Show Variations on Shop Page works; let’s get started; go through the step-by-step guide to add it to your shop page.
Step 1: Installing and Activating Woosuite Core Master Plugin
First, you’ll need to download the Woosuite Core to enable WooCommerce Show Variations on Shop Page for your shop page. After downloading it, upload and activate the plugin on your device.
You can upload the plugin at Plugins > Add New.
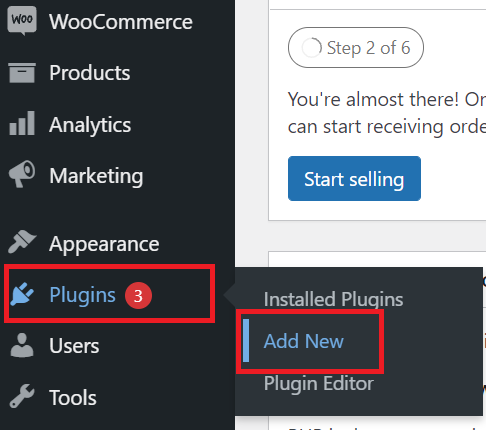
Now click on “Upload Plugin,” and select a file you downloaded (Woosuite Core Master plugin) and click “Install Now.”

After installing the plugin, activate it.
Step 2: Install WooCommerce Show Variations on Shop Page Plugin
We will use the WooCommerce Show Variations on the Shop Page plugin to show your eCommerce shop page variations. You can install this plugin under the Woosuite dashboard.
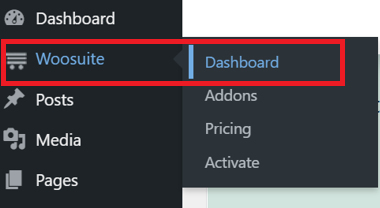
Navigate to the Woosuite Dashboard, click “Install A Plugin,” then find the “WooCommerce Show Variations on Shop Page” plugin and click the “Install Now” button to install it.
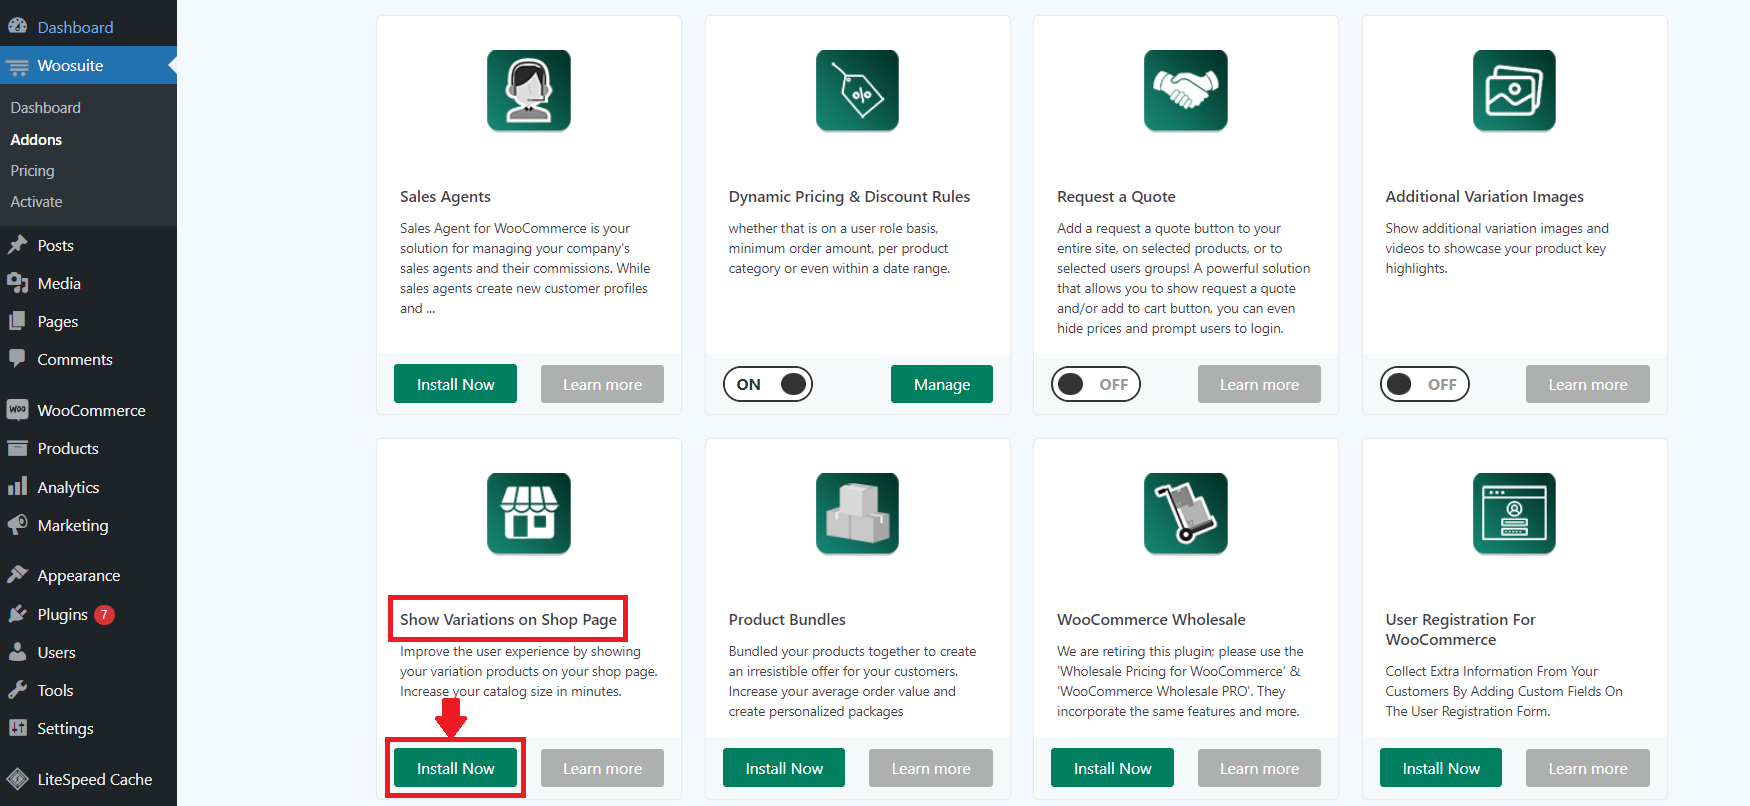
Once the plugin installation is finished, you need to activate it (turn on the toggle button).

Now that we have installed the WooCommerce Variations Shop Page, we can add product variations on the shop page.
Step 3: Add product variations on the shop page
To show your variations individually on the WooCommerce shop page, follow the given steps:
Head over to Products > All Products under the WordPress dashboard.
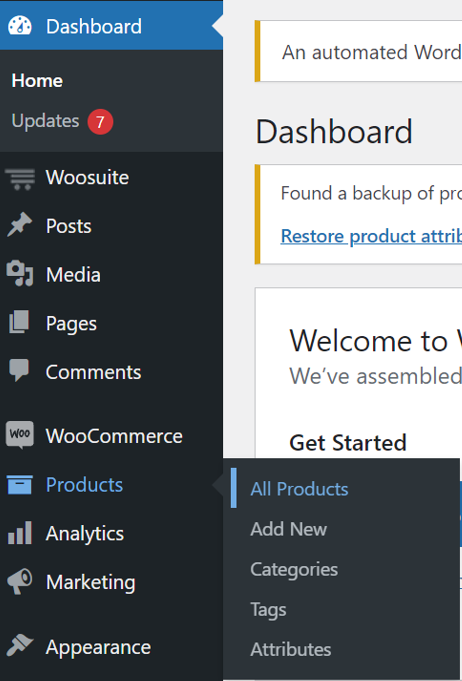
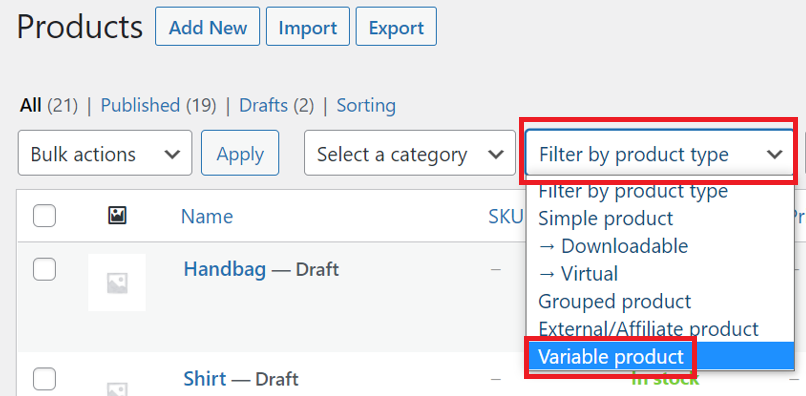
Select the variable product that you want to edit from the “Filter by product type” dropdown.
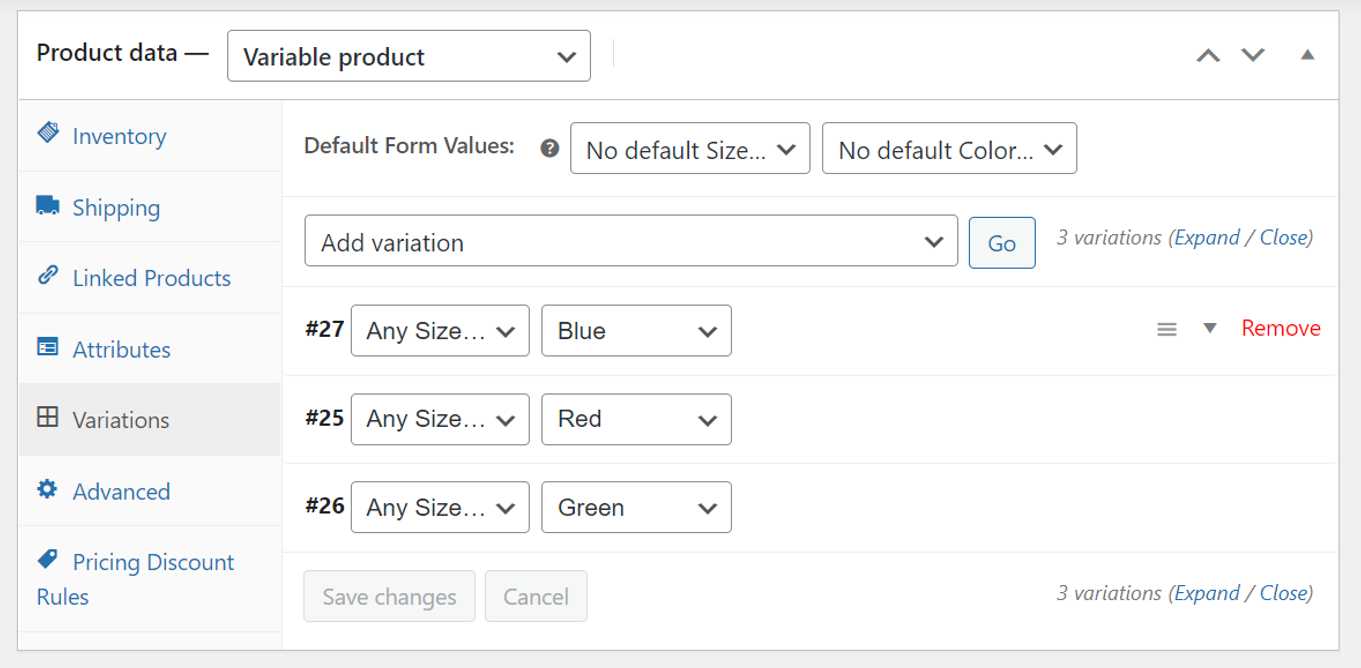
From the “Product data” section, click on the “Variations” tab located in the left menu.

Once this is done, click the expand arrow (▾) on the variation you display on the shop page.
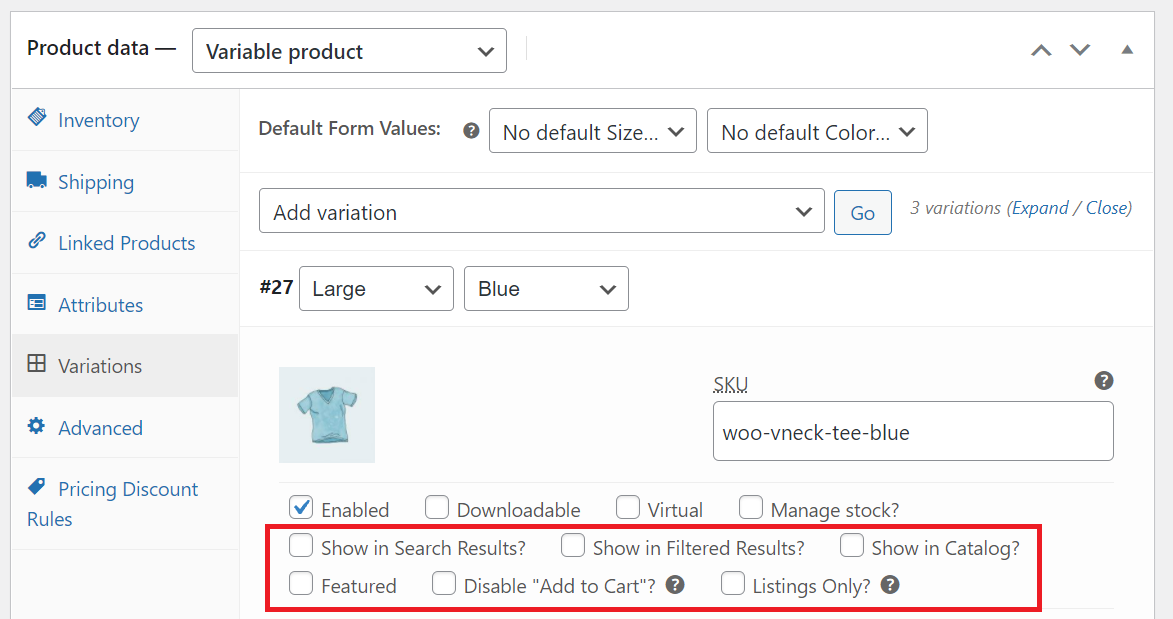
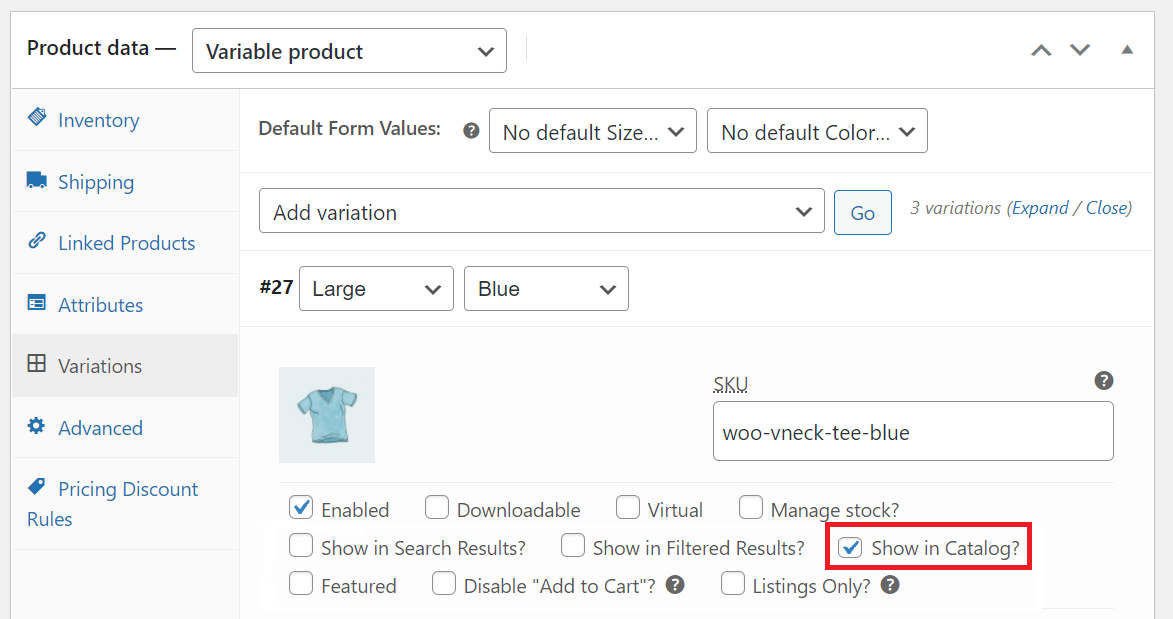
Once the “Add variation” section is expanded, you’ll see a bunch of new options available, all added by the WooCommerce Variation Show Page Plugin, including:
- Show in Search Results?
- Show in Filtered Results?
- Show in Catalog?
- Featured (will add your products in featured product queries section)
- Disable “Add to Cart”? (will replace the “Add to Cart” button with the “Select Options” button), and
- Listings Only? (Will only display a selected variation in the product listing)
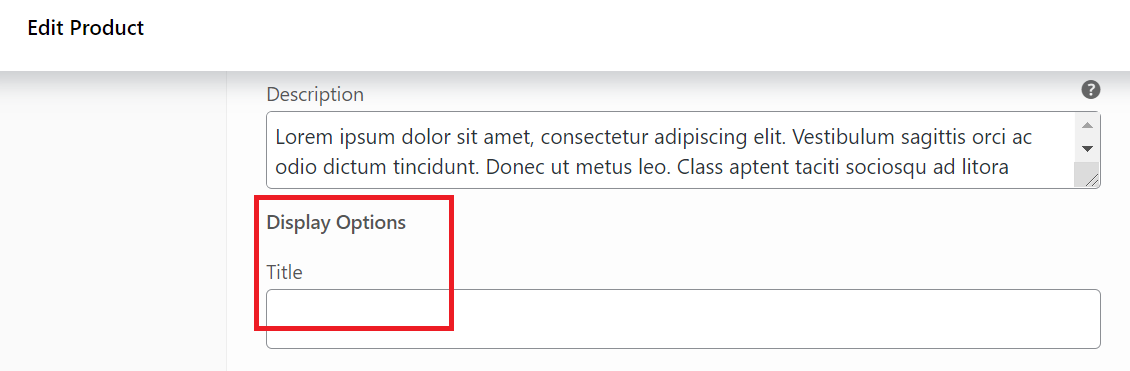
Now scroll to the “Display Options” if you want to set a custom title for your selected variations.
Once you’re done with the customization of your variations, click “Save Changes” under the “Product data” section and click “Update” to save changes on the product page.
Now view your shop page and check out the products you’ve edited after enabling variations on the shop page for individual products.

Key Points to Remember:
- Make sure that you’ve set up the variable product correctly. For step-by-step instructions on adding variations and attributes, read our guide on adding WooCommerce variations for your products (in 3 steps). Just scroll down to the how-to add variations section.
- Also, if you’re using WooCommerce Variations Shop Page, make sure to checkbox the “Show in Catalog?” setting to be visible in the catalog. Please refer to this screenshot.
Conclusion
That’s all; your WooCommerce store is now ready to start displaying variations on the shop page with ease. With this up and running, you can offer more options to your users in fewer clicks.
I hope you’ve learned a lot from this step-by-step on how to show variations on the shop page and improve your overall customer experience using the WooCommerce Variations Shop Page plugin.


