Do you want to show variations as single products in WooCommerce? You have landed in the right place.
In this tutorial, I’ll show you how to display variations as single products with the help of the WooCommerce Product Table Plugin.
You might want to show all your product variations as single products in WooCommerce to make it easy for shoppers to find their ideal product or you might want to expand the size of your catalog.
I’ll show you each step in-depth with the help of images to help you understand it better. So, continue reading to learn how to display variations as single products in WooCommerce with a few easy steps.
Read Also: How to Create a Price List in WooCommerce.
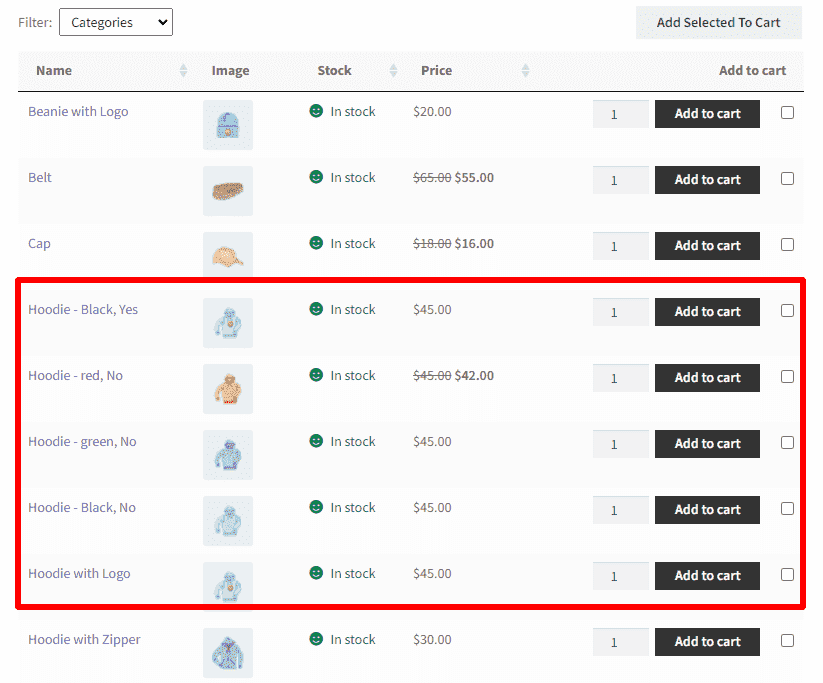
Preview:
Here is what you will be able to achieve but the end of this article:
On This Page
- 1 Why Might You Want to Show Variations As Single Products?
- 2 How to Show Variations As Single Products in WooCommerce?
- 2.1 1. Install WooCommerce Product Table Plugin
- 2.2 2. Navigate to Product Table Plugin’s General Setting
- 2.3 3. Click on the ‘Add New Table’ Button
- 2.4 4. Navigate to Order Form Display Setting
- 2.5 5. Show Variations As Single Products in WooCommerce
- 2.6 6. Choose Category to Display Variations From (Optional)
- 2.7 7. Hide ‘Search Bar’ From the Table
- 2.8 8. Disable Product Totals to Show on the Product Table
- 2.9 9. Display Variations As Single Products On Shop and Category Pages
- 2.10 11. Click on the Save Changes button
- 3 Final Results
- 4 Conclusion
Why Might You Want to Show Variations As Single Products?
WooCommerce lets you create infinite variations of a single product. Those variations are displayed on a single product page in a dropdown menu by default. Customers have to view each variation separately every time by visiting different pages. This consumes a lot of their efforts and time. And users don’t want to spend half of their time visiting different pages when they are already clear about what to buy.
This makes the buying process more complex for the customers. To improve the user experience, you can showcase your product variations as single products on shop and category pages. This way, customers will see all the variations as the main product, and they can quickly purchase them in one click.
So, if your WooCommerce store offers variable products, such as products with different dimensions, weights, sizes, colors, etc. Then, you might want to display variations as single products.
How to Show Variations As Single Products in WooCommerce?
Use Case: In my case, I want to show all product variations from the Clothing and Accessories categories as single products on the Shop and Category pages. In addition, I’ll add some additional features to make the buying process easier for customers.
Follow the steps to show variations as single products in WooCommerce.
1. Install WooCommerce Product Table Plugin
Note: You can skip this step if you have installed and activated the WooCommerce Product Table Plugin.
To install the WooCommerce Product Table Plugin, you must install the Woosuite Core plugin and activate your Woosuite license key. We have created a Quick Start Guide to walk you through the installation process.
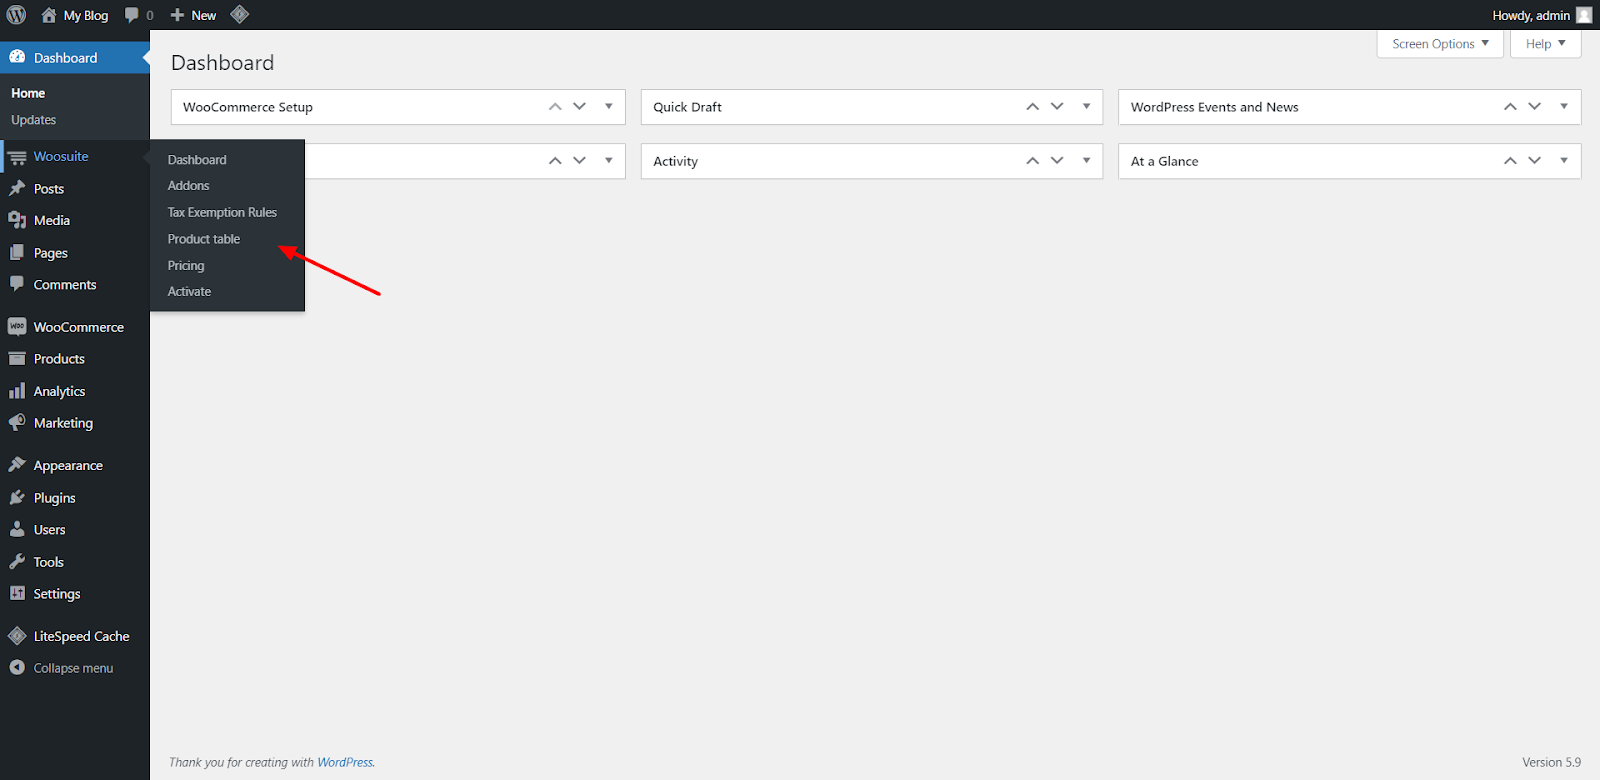
Look for the Woosuite option in the right sidebar of your WordPress toolbar. Then, click on the ‘Product Table’ option.
Navigate to the Woosuite Submenu > Click on the Product Table in the WordPress Admin Dashboard.
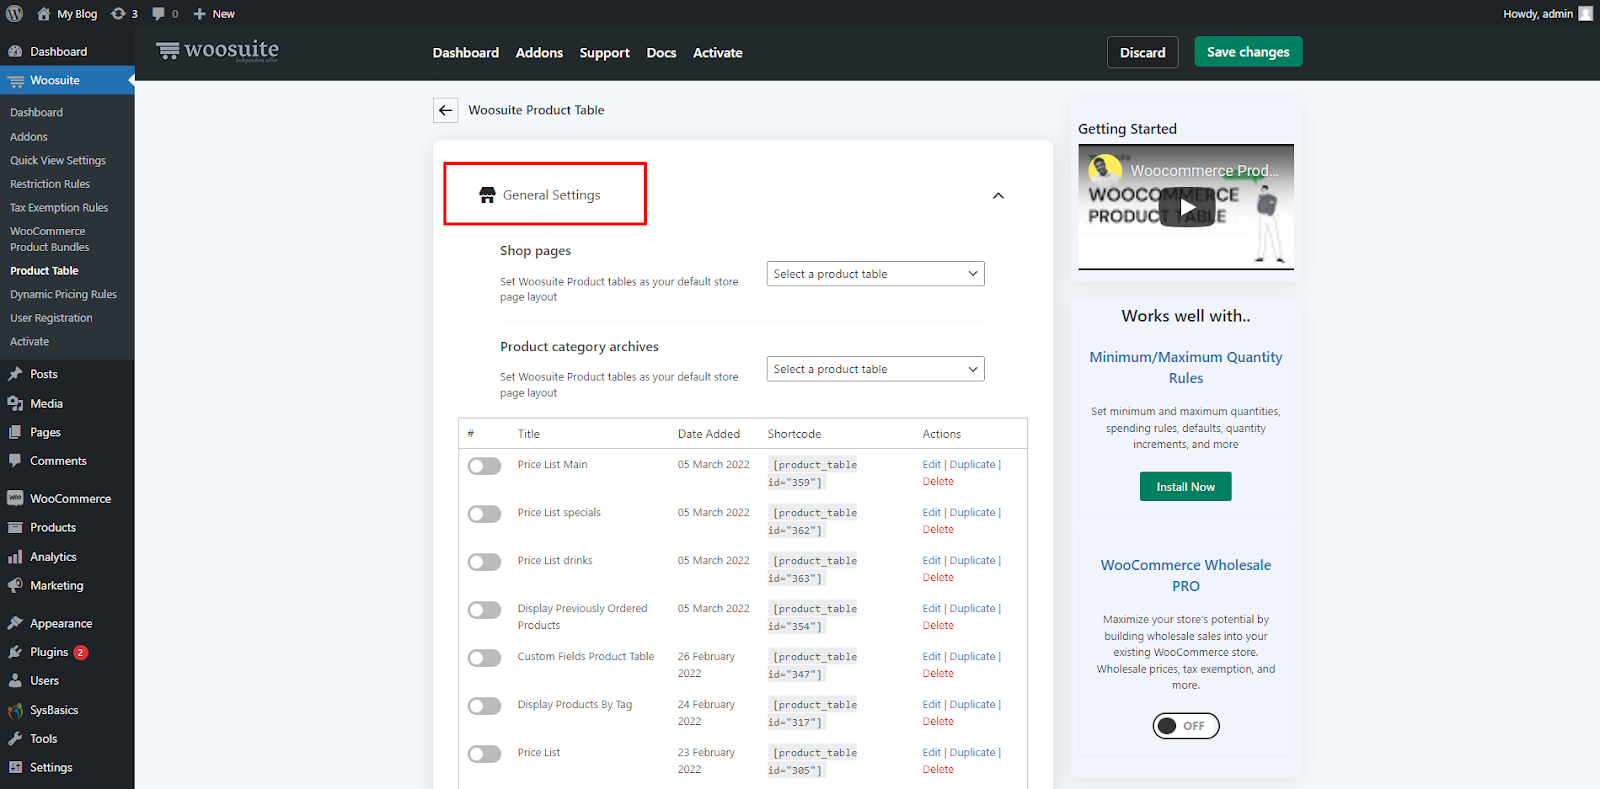
After clicking on the ‘Product Table,’ it will redirect you to the ‘General Settings.’
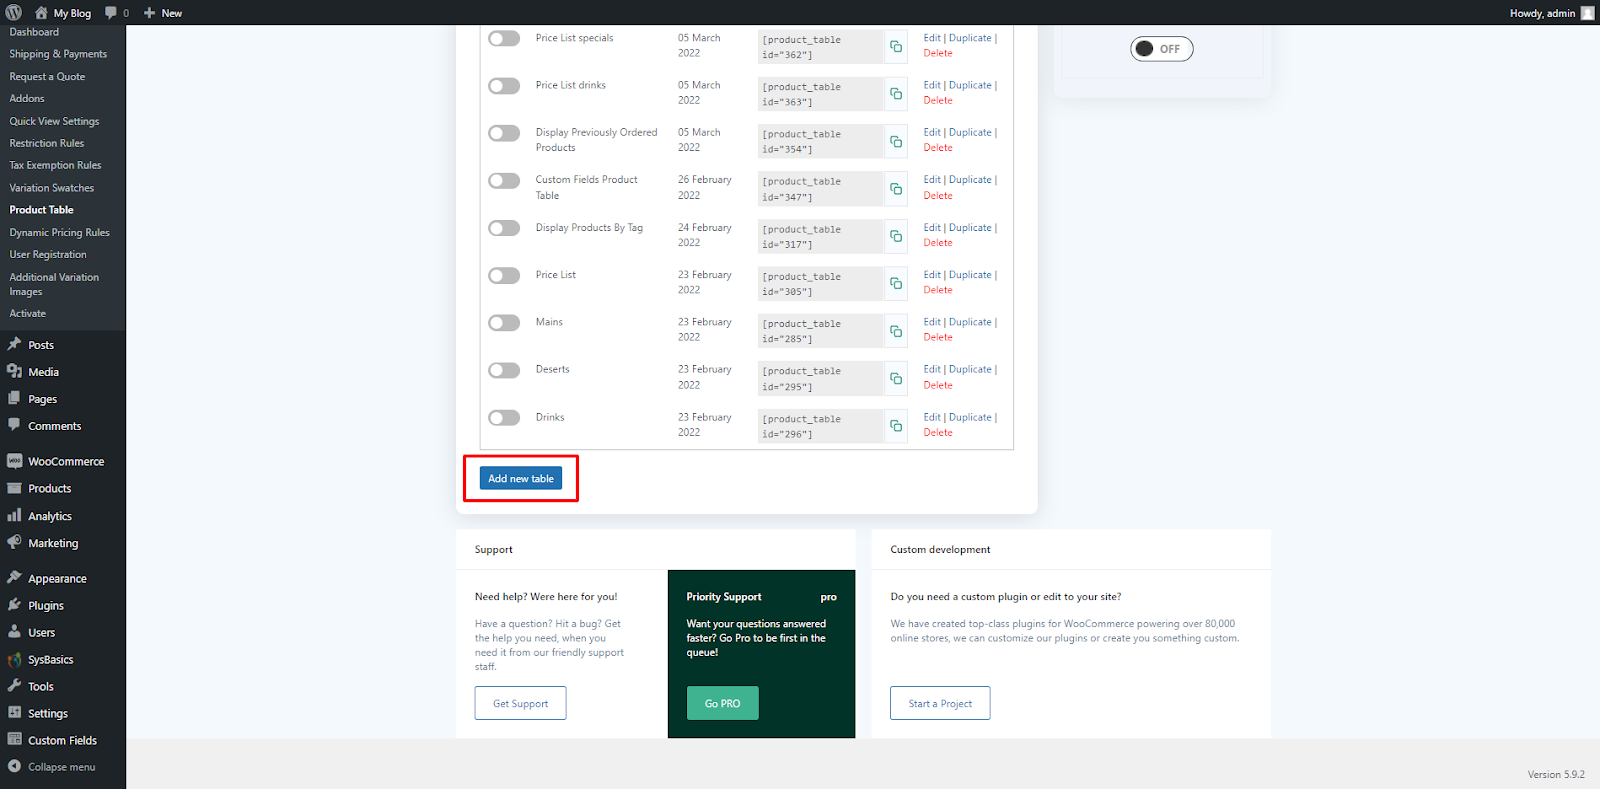
3. Click on the ‘Add New Table’ Button
Click the ‘Add New Table’ button to create a new product table showing variations as single products.
Woosuite: Product Table > General Settings > click on the ‘Add New Table’ button.
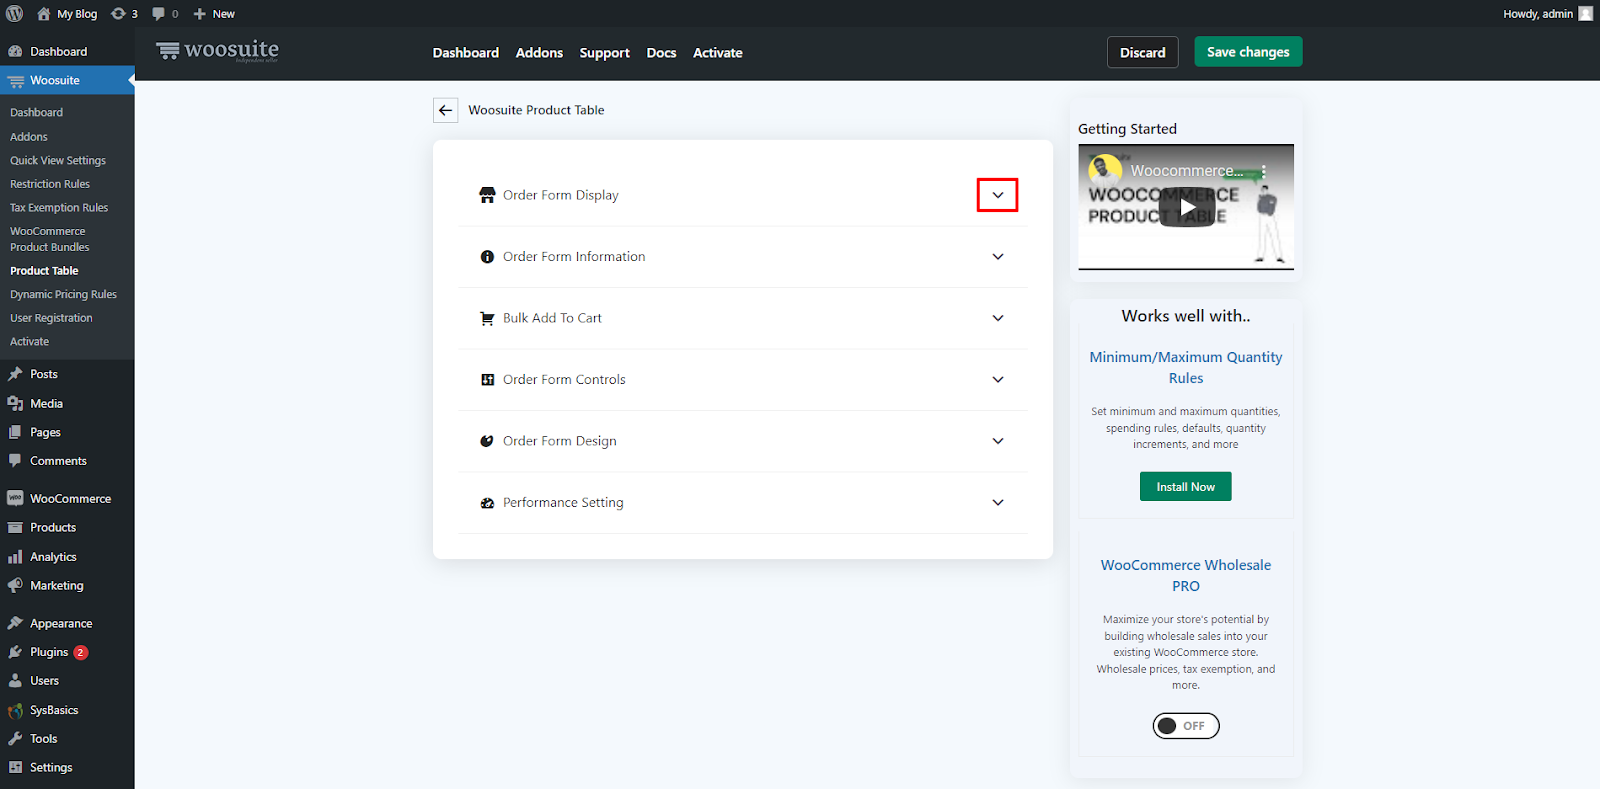
After clicking on the ‘Add New Table’ button, it will redirect you to a new page with some additional settings on it.
Click on the ‘Order Form Display’ dropdown arrow to access the settings.
5. Show Variations As Single Products in WooCommerce
Follow the steps to display variations as single products in WooCommerce.
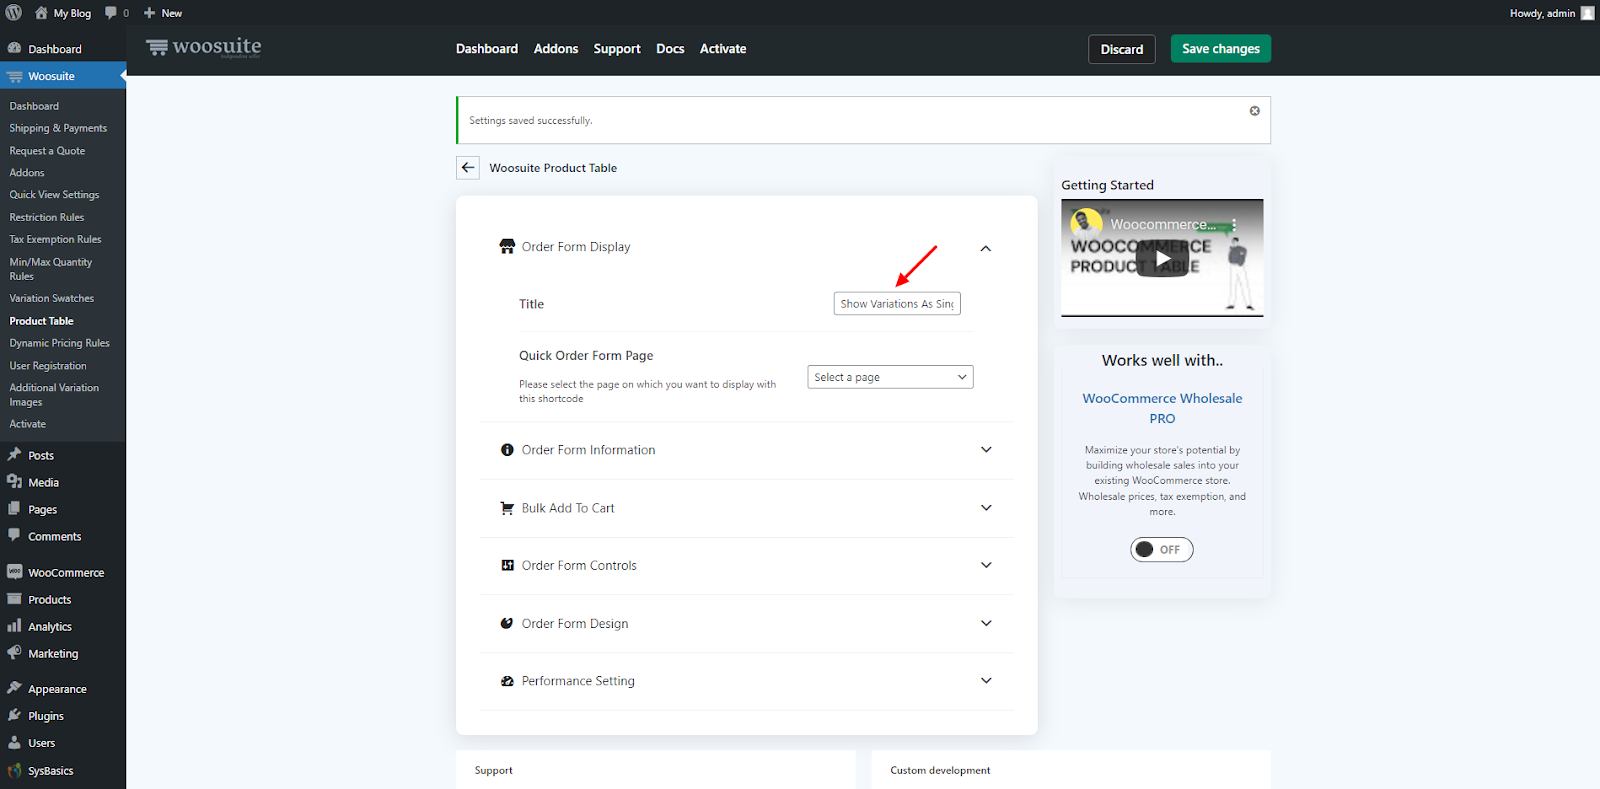
1. Give An Internal Campaign Name
Enter an internal campaign name for your new product table in the ‘Title’ field. This is for internal purposes only. This will not be visible on the front end.
2. Navigate to Order Form Information Settings
Head over to the ‘Order Form Information’ settings.

3. Add Columns to the Product Table
You now need to add columns to your product Table. You can add columns to the table according to your preferences.
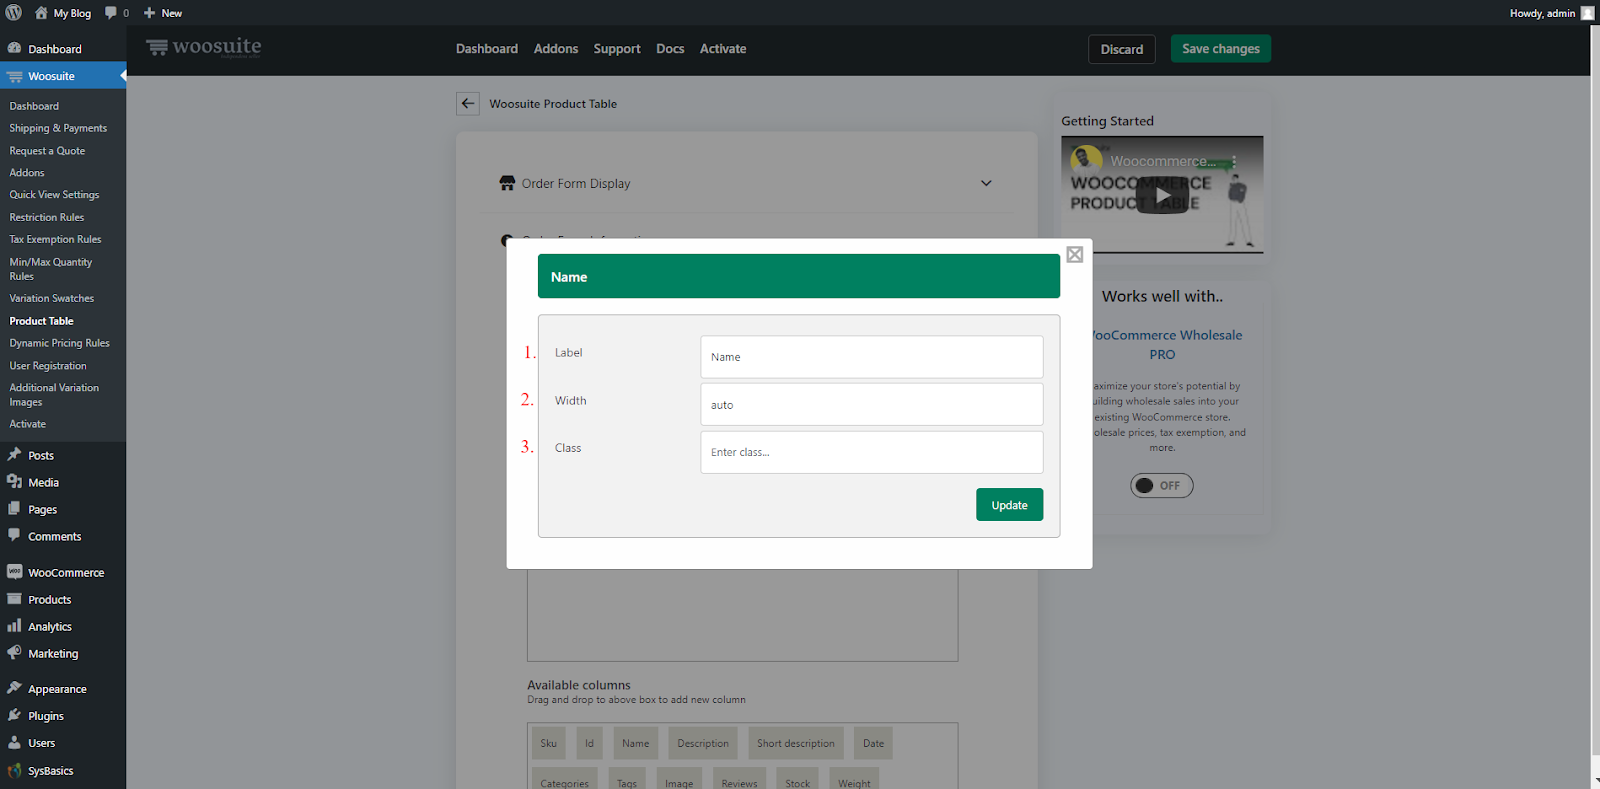
To add a particular column in the product table, drag the required columns from the ‘Available Columns’ box to the ‘Current Selected Columns’ box.
You can also edit the Columns’ name, width, and class by clicking on the ‘Pencil’ icon. Click on the Pencil icon. There you will see three options.
1. Name: You can change the name from this option.
2. Width: By default, this will be set to Auto. You can add the preferred width in the Width field.
3. Class: This field is here to let you customize a particular field with the help of CSS. You can enter your CSS code in this field.
I will add these columns – Name, Image, Stock, Price, and Add to Cart.

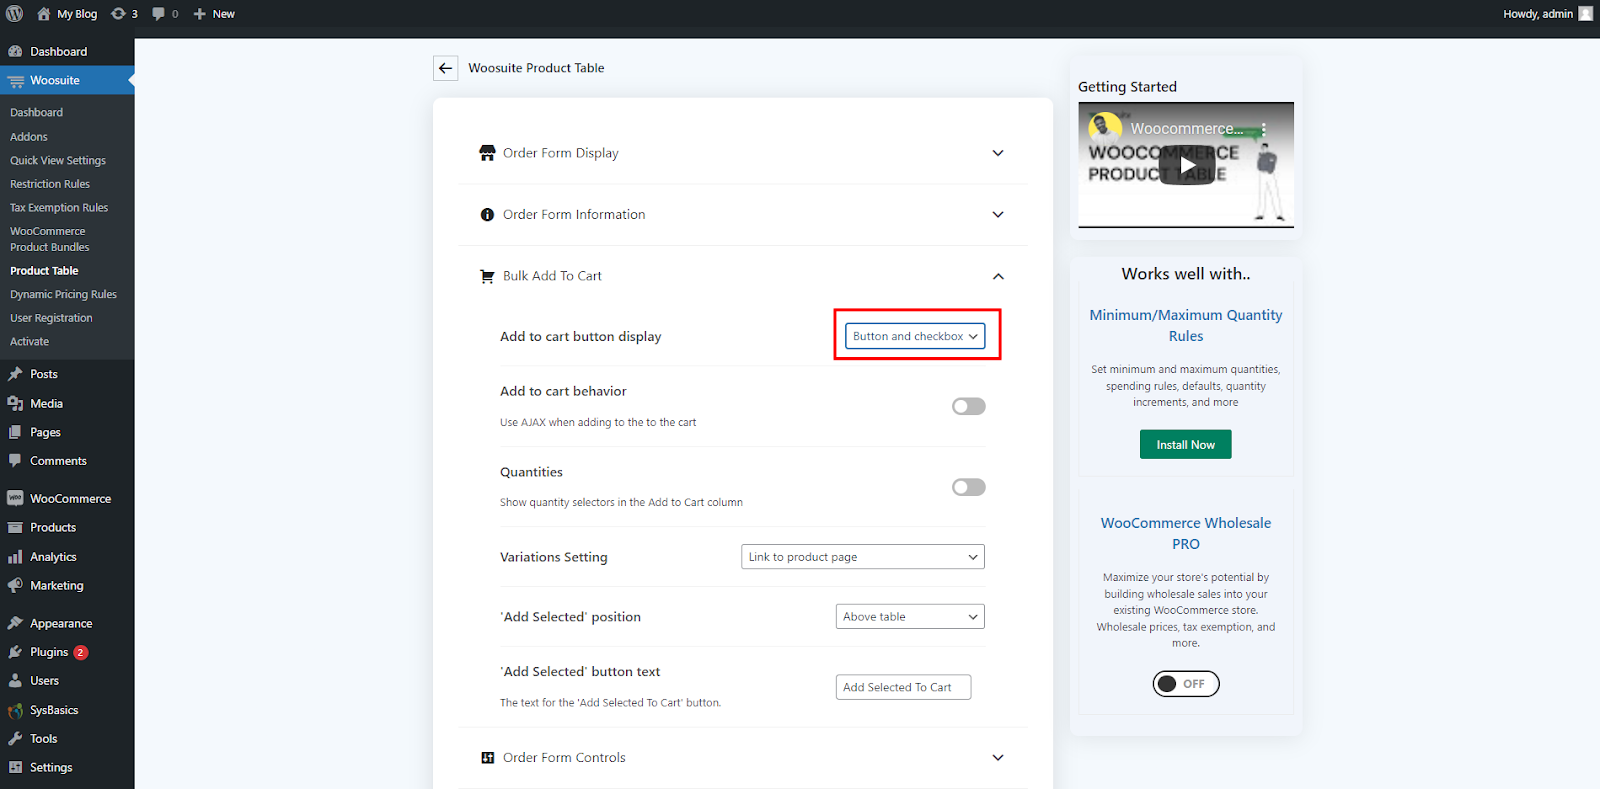
4. Enables Checkboxes and Add to Cart Button
To enable the Checkboxes and Add to Cart feature, head over to the ‘Bulk Add to Cart’ setting.

Select the ‘Add to Cart Button Display’ setting to ‘Button and Checkbox.’
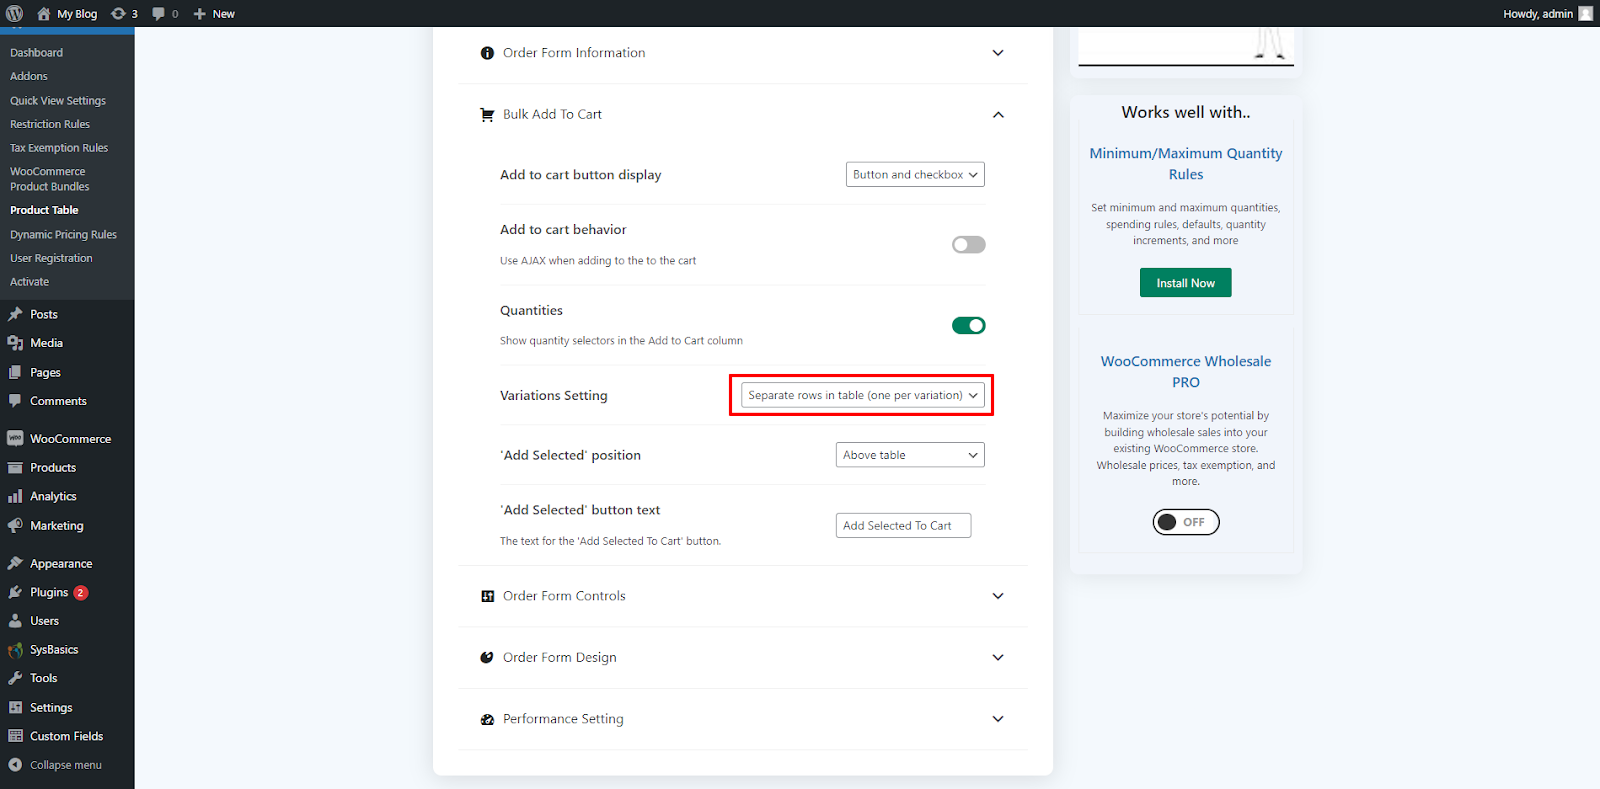
5. Show Quantities in the Table
Turn on the ‘Quantities’ option to let buyers change the quantity before adding the products to the cart.

6. Show All Products Variations On the Product Table
Select the ‘Variation Setting’ to ‘Separate Rows in Table (One Per Variation).’
Read Also: How to Display Products By Category in WooCommerce.
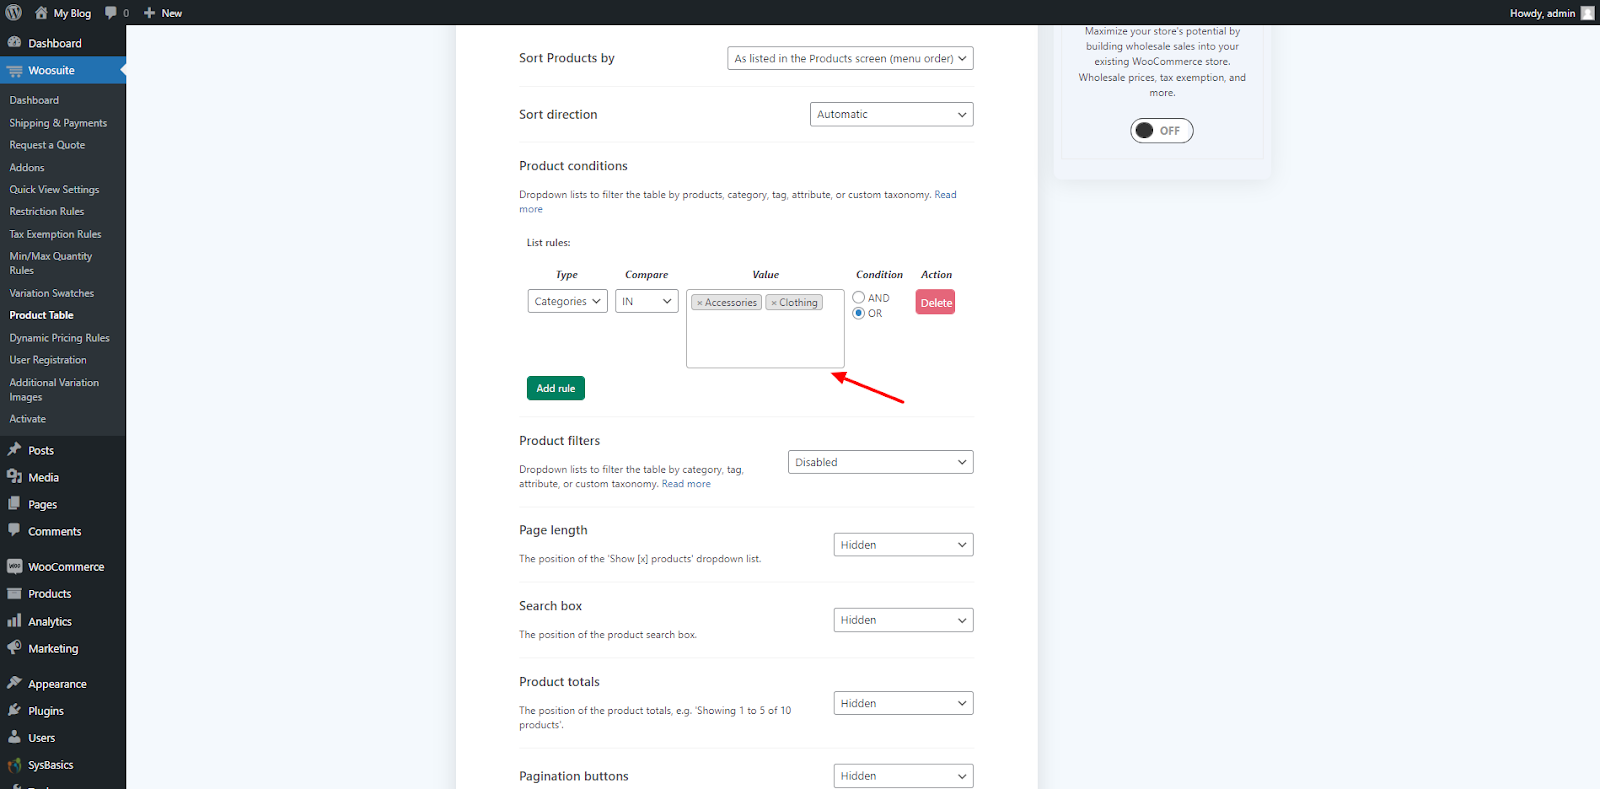
6. Choose Category to Display Variations From (Optional)
As mentioned earlier, I want to display product variations from two categories: Clothing and Accessories. If you don’t want to show variations from specific categories, you can skip this step. It will automatically show all the variations from all of the categories.
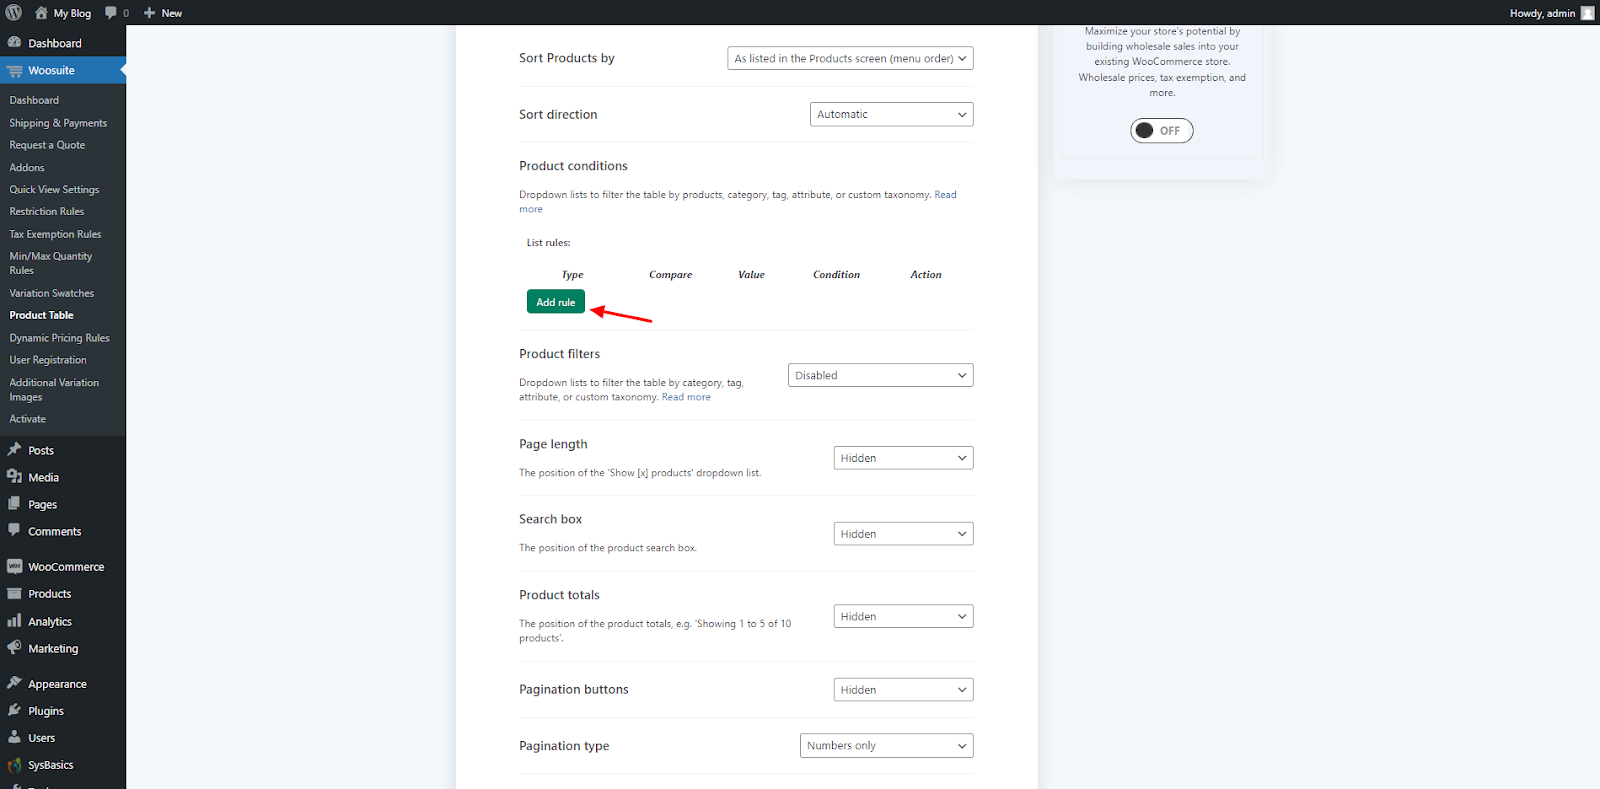
1. Search for the Product Conditions Settings
Head to ‘Order Form Control’ settings, and search for the ‘Product Conditions’ option.

2. Click on the ‘Add Rule’ Button.
Click on the ‘Add Rule’ button to create a new rule.
3. Select ‘Type to’ Setting to ‘Categories.’
You will get different options in the dropdown menu. Select ‘Categories’ from the dropdown.
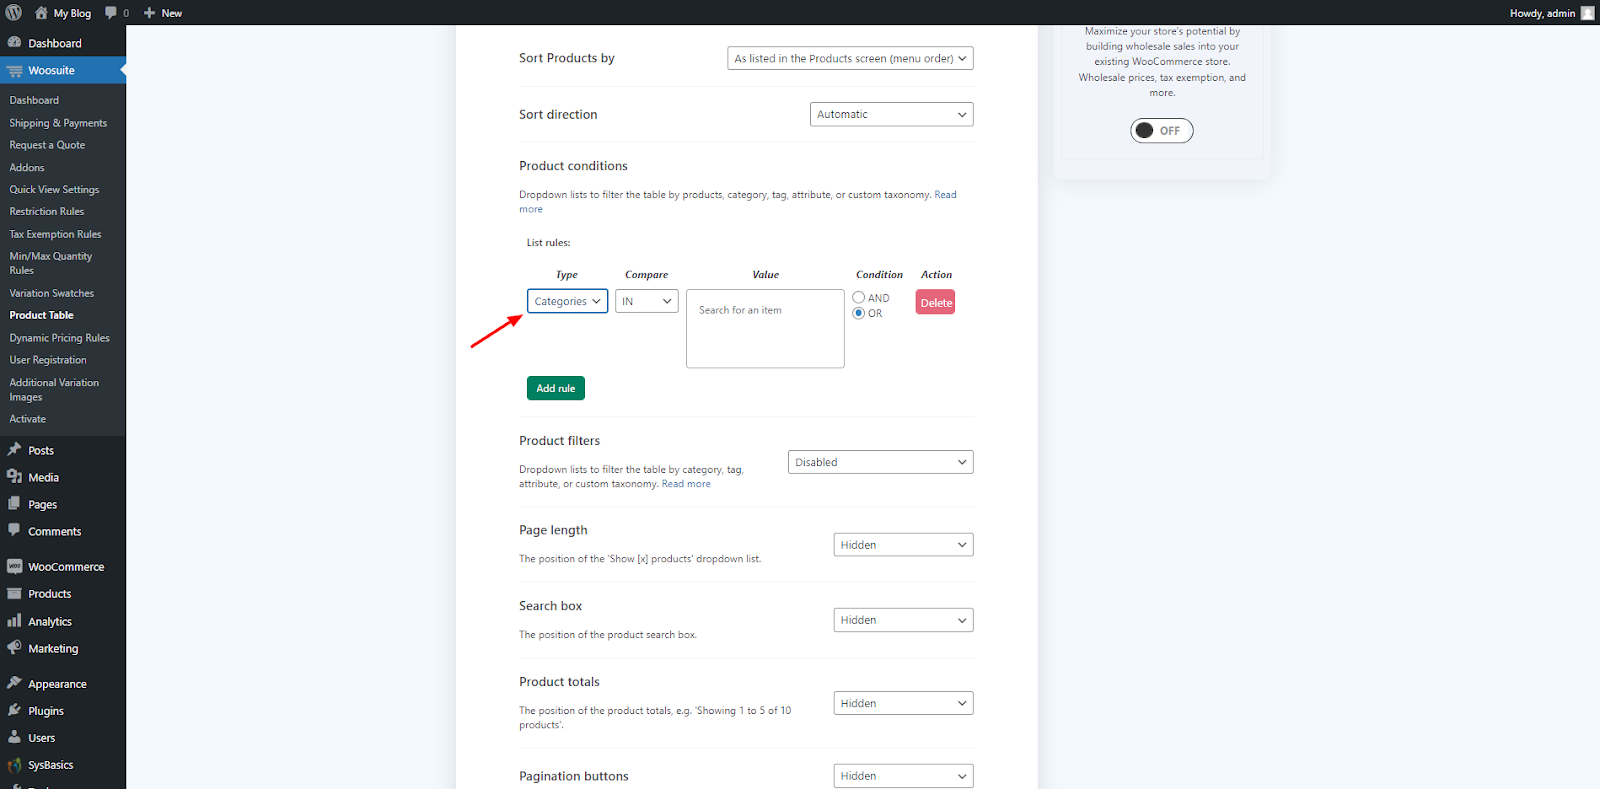
4. Add Specific Categories in the ‘Value’ Field
Select the categories from which you want to display product variations as single products. I’ll add Clothing and Accessories from the list of active categories.
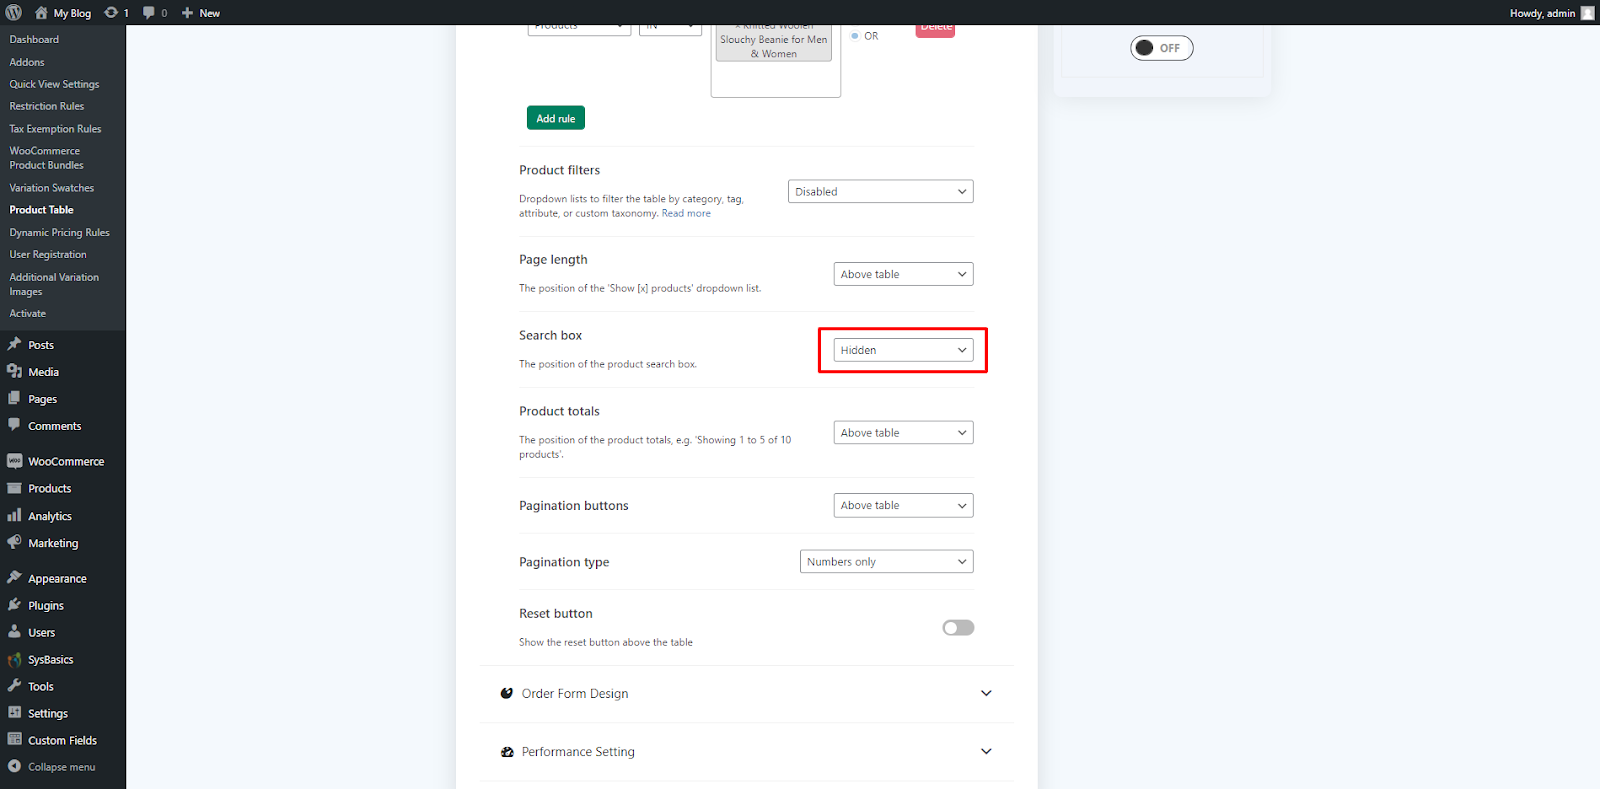
7. Hide ‘Search Bar’ From the Table
In the ‘Order Form Control’ settings, search for the ‘Search Box.’
Select ‘Hidden’ from the dropdown.
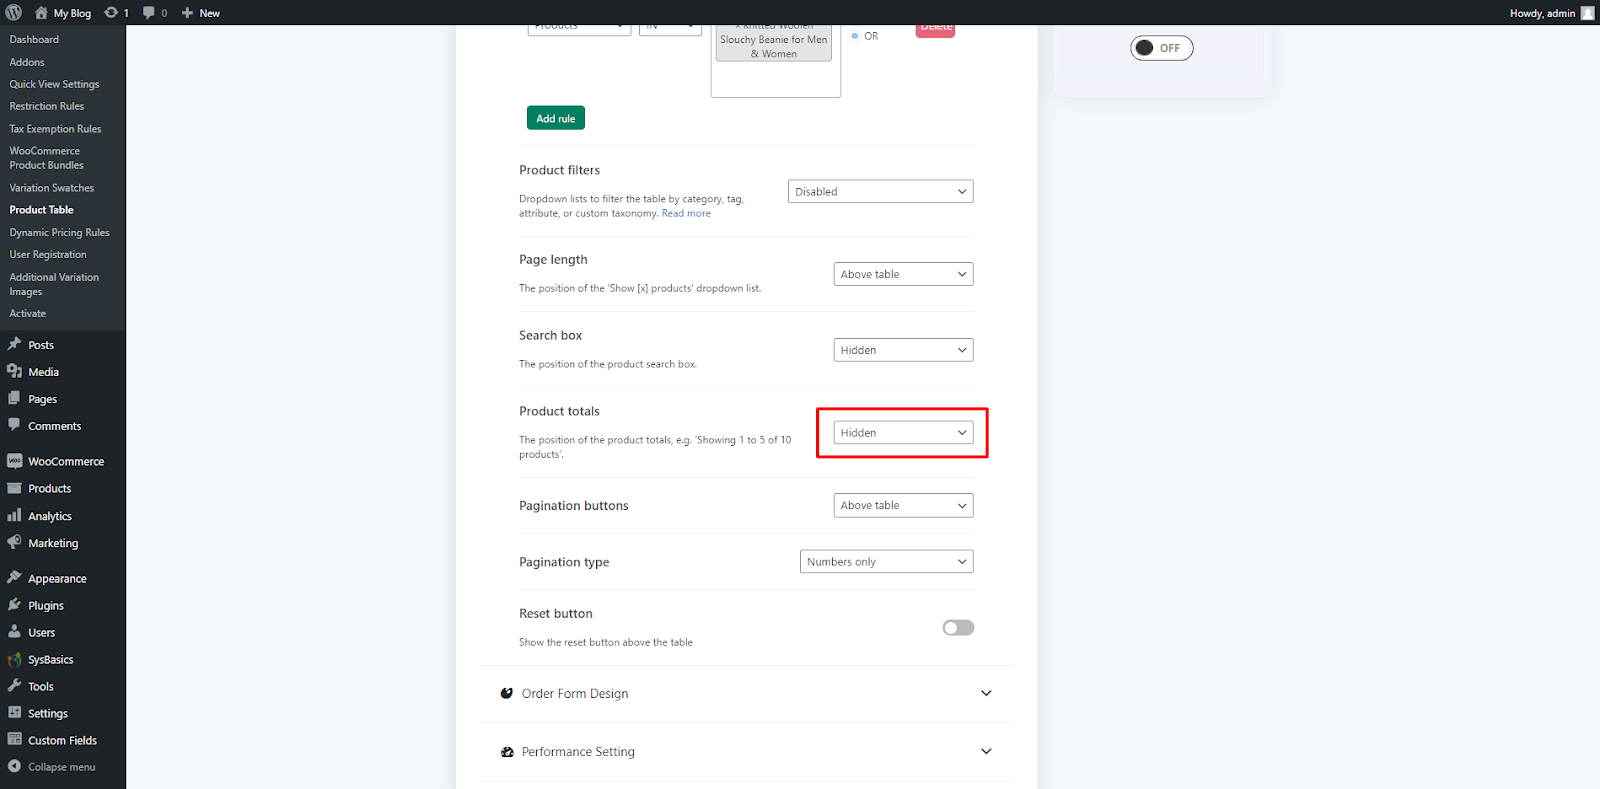
8. Disable Product Totals to Show on the Product Table
Look for the ‘Product Totals’ option, and select ‘Hidden’ from the dropdown.
9. Display Variations As Single Products On Shop and Category Pages
Head back to the ‘General Settings.’ You can head back by clicking on the ‘Arrow.’

In the ‘General Settings,’ search for the ‘Shop Pages’ and ‘Product Category Archives Pages.’

Now, select your recently created product table from the given list of product tables. Do the same with both settings.

Now, it’s time to save the changes and publish the new product table. To save the changes, click the ‘Save Changes’ button in the top-right corner of your WordPress dashboard.

Final Results
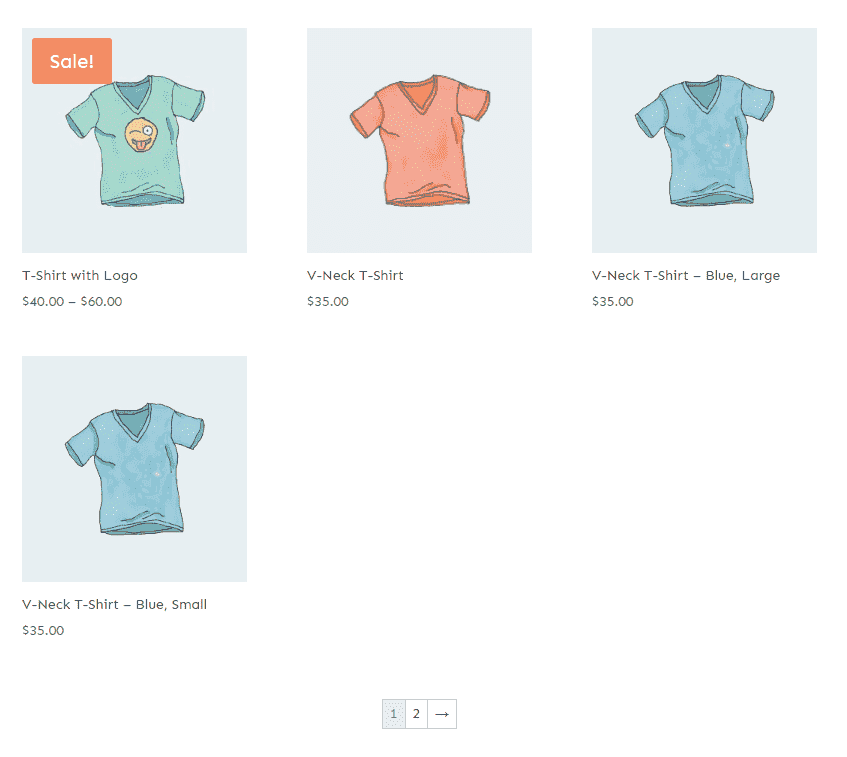
We have figured out how to display variations as single products in WooCommerce. We made all the settings correctly. We will now check whether everything is working fine or not.
I’m currently on the Shop Page, and all the product variations are displayed in the product table as single products. Here are the final results we got with the help of the Product Table Plugin.

Conclusion
We finally checked out how to show variations as single products in WooCommerce. I hope you understood the steps properly and implemented the same on your WooCommerce store. If you face any issues while showing variations as single products, leave a comment or contact Woosuite customer support. Our dedicated customer support team typically replies within 48 hours.
Ready to show variations as single products in WooCommerce?
Install the WooCommerce Product Table plugin today.


