Creating a Buy One Get One (BOGO) deal can be a powerful way to increase sales in your WooCommerce store. In this article, I will guide you through the step-by-step process of creating a BOGO coupon in WooCommerce.
Let’s dive in and start boosting your store’s revenue with BOGO deals!
How to Create a WooCommerce BOGO Coupon?
First, we need to create a coupon using the built-in WooCommerce features. After that, we need to use a plugin like Dynamic Pricing & Discount Rules to create a BOGO offer and allow customers to get it using the coupon.
The following steps will help you to do so.
1. Create a BOGO Coupon
The very first step is to create a coupon code that the customers will use to get the BOGO offer. To create the coupon code, navigate to Marketing » Coupons from your WordPress Admin Dashboard and click the Add Coupon button to create a new coupon code.

1.1. Coupon Settings
Once you click on the button, you’ll be redirected to the page where you can create and customize the coupon settings.

1.2. Add Coupon Code:
To create a coupon code, enter the coupon in the Coupon Code field. The users will use this code to get the discounts. Keep the rest of the settings as default as we’ll be tweaking those later, with the help of the Dynamic Pricing & Discount Rules plugin.

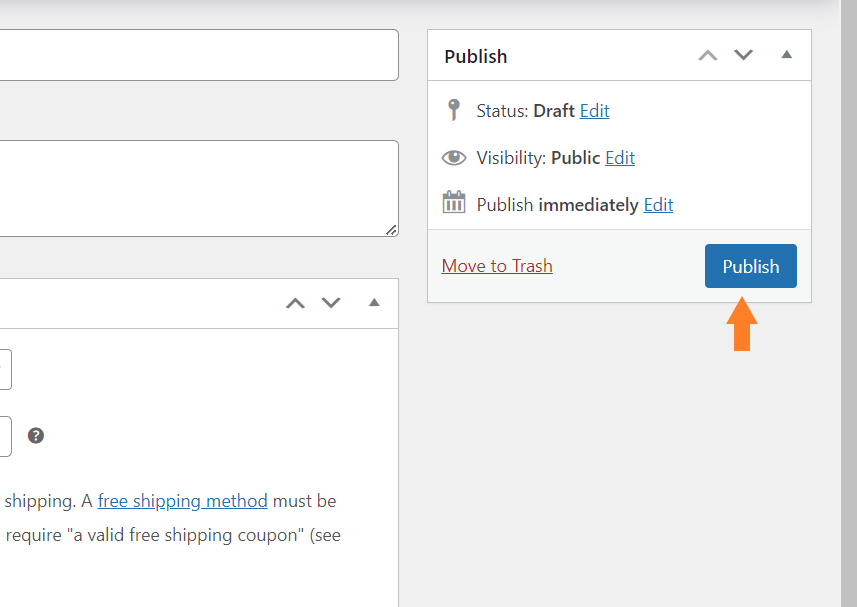
1.3. Publish the Coupon
Now, click the Publish button to publish the coupon.
2. Install and activate the Dynamic Pricing & Discount Rules Plugin
Note: You can skip this step if you have already installed and activated the Dynamic Pricing & Discount Rules plugin.
To install the Dynamic Pricing & Discount Rules plugin, you will need to install the Woosuite Core plugin and activate it with the help of a license key. We have created a Quick Start Guide for you to figure out how to install and activate the Dynamic Pricing & Discount Rules plugin.
Once you have installed and activated the plugin, navigate to Woosuite » Dynamic Pricing Rules from your WordPress dashboard.

Navigate to the Advanced Rules tab and then click Add Category Pricing button to create your Buy 1 Get 1 Free offer.
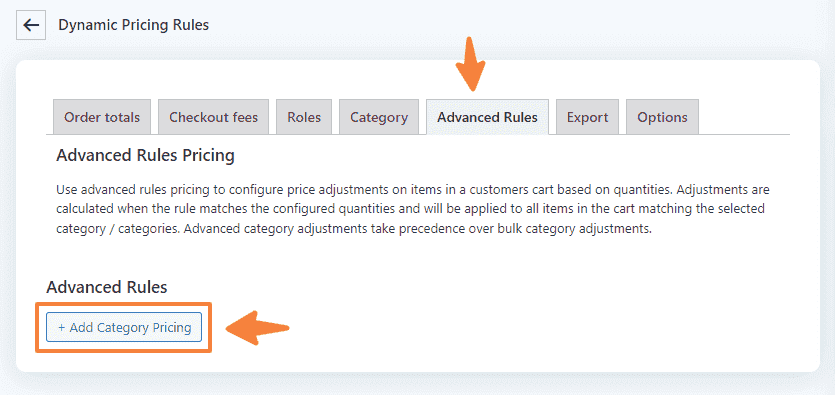
5. Create a Buy 1 Get 1 Free Offer
Once you click the button, a rule will be added, which I’ll customize to create a Buy 1 Get 1 Free coupon offer in the following steps.

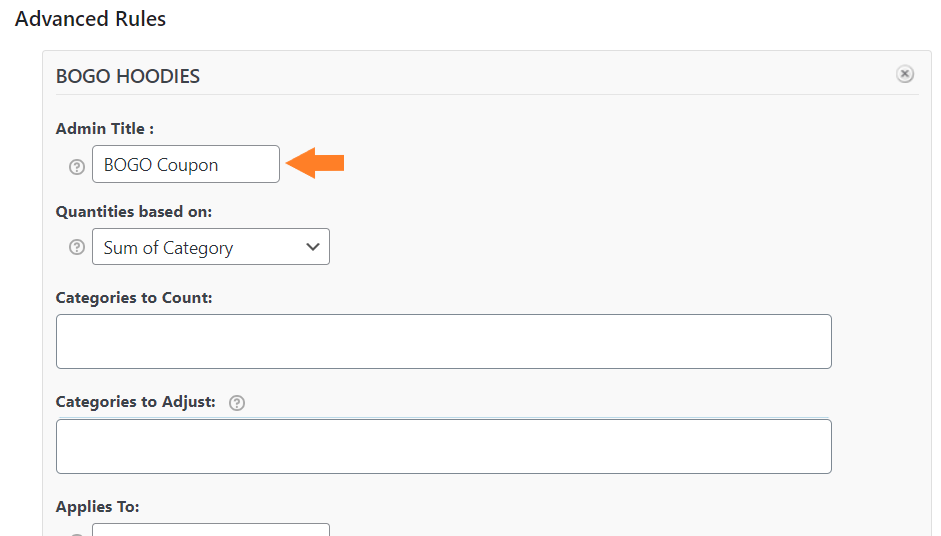
5.1. Give an Admin Title
Now, enter the rule’s name in the Admin Title field. Only the admins will be able to see this. It is beneficial if you have created several rules.
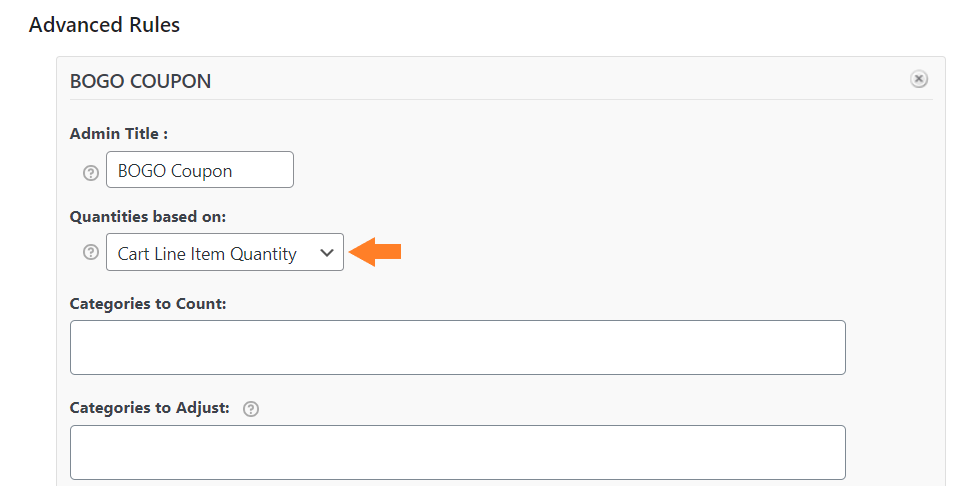
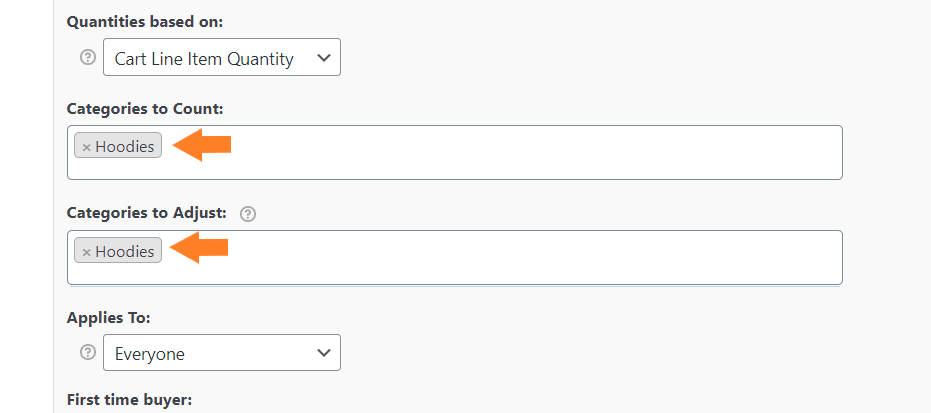
5.2. Set the Quantities
Now, from the Quantities Based On dropdown, you’ll get two options.
- Cart Line Item Quantity
- Sum of Category
For this tutorial, I have selected the Cart Line Item Quantity because the offer we are creating is based on the products in the cart.
5.3. Select the Categories for Discounts
Now, select the categories in the Categories to Count and Categories to Adjust fields. Categories to Count means that if a user purchases from the selected categories, he/she will get the discounts from the categories specified in the Categories to Adjust field.
As we are creating a Buy 1 Get 1 Free offer for users, I have selected the same category in both fields, which means that this offer only applies to the selected category.
Note: If you want to create a Buy 1 Get 1 Free offer for different categories ensure to select the correct categories so that when a user buys 1 product from one category, he/she can buy one item from another category(specified at the backend) for free.
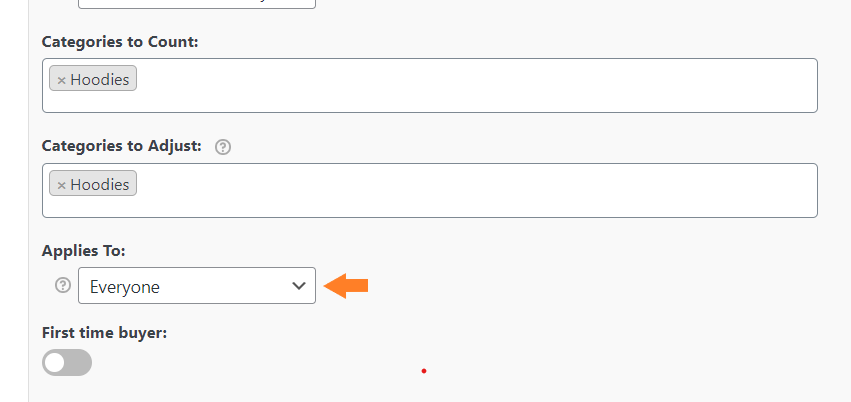
5.4. Select the Users for this Discount
From the Applies to dropdown, select the Users who can benefit from this offer. You’ll get the following options:
- Everyone
- Guests
- Specific Roles
- Specific Users
I have selected Everyone from the dropdown as I want to give this offer to all the users.
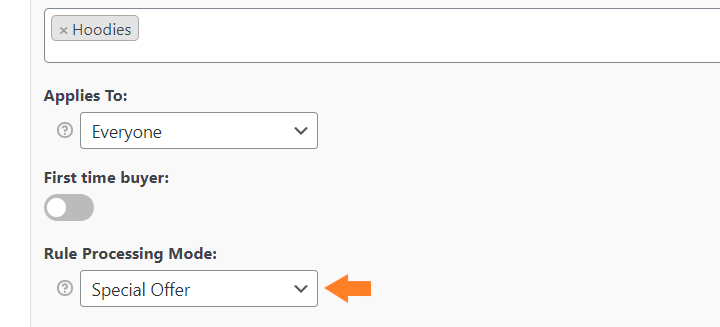
5.5. Select the Rule Processing Mode
Now from the Rule Processing Mode dropdown, you’ll get 4 options.
- Bulk
- Tiered Pricing
- Special Offer
- Bundle(Set) Discount
Make sure you select the Special Offer as the processing mode because this is the only mode that’ll allow you to create bonus pack offers like Buy 1 Get 1 Free.
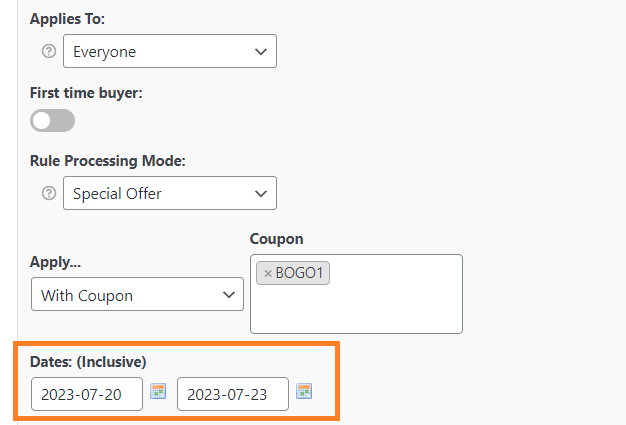
5.6. Select the Coupon Code
Next, you need to define how this discount will be triggered. As in our case, we are creating a BOGO coupon discount, so from the Apply dropdown, select With Coupon and then select the coupon we created in the very first step of this tutorial.

5.7. Select the Dates Inclusive
Next, you need to select the period during which the coupon discount will work. It works based on the date.
5.8. Set the Product Purchase and Receive Quantity
Now in the Purchase field, enter the number of products users will purchase to be eligible for the offer. In our case, we want the users to buy 1 product from the selected category, so I have entered 1 in the field.
In the Recieve field, enter the number of products you want to give users at a discount. In our case, enter the 1 in the field.
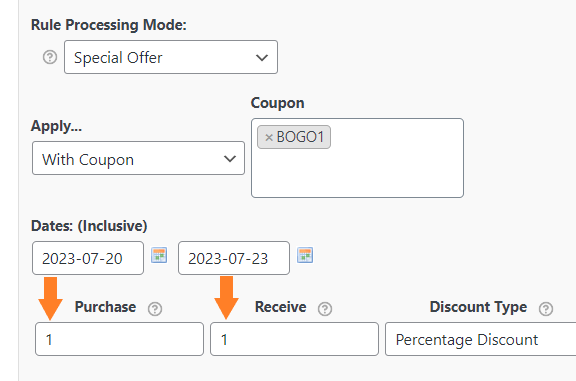
5.9. Select the Type of Discount
Now select the discount type from the Type dropdown. You can choose the discounts as
- Price Discounts
- Fixed Price
- Percentage DIscounts
I have selected the Percentage Discount as the type of discount from the dropdown.

5.10. Enter the Amount of the Discount
Now enter the amount of the discount you want to offer the customers on the product if they buy 1 product. We want to give a product for free if they buy 1 product, so in the amount field, enter 100.
From the Repeating dropdown, you can select if you want to repeat this offer, which means the users can get it as many times as they wish. Usually, it is not a good idea to repeat the offer, so I am keeping it to No.

6. Save Changes
Next, you need to save the changes. To do so, click the green Save Changes button at the top right corner of your screen.

7. Final Results
Once you have adjusted and saved the settings, let’s test them.
I visited my demo store and added 2 products to my cart from the ‘hoodies’ category. As you can see, I didn’t get any discount.
But when I added the coupon code, I got one product for free.
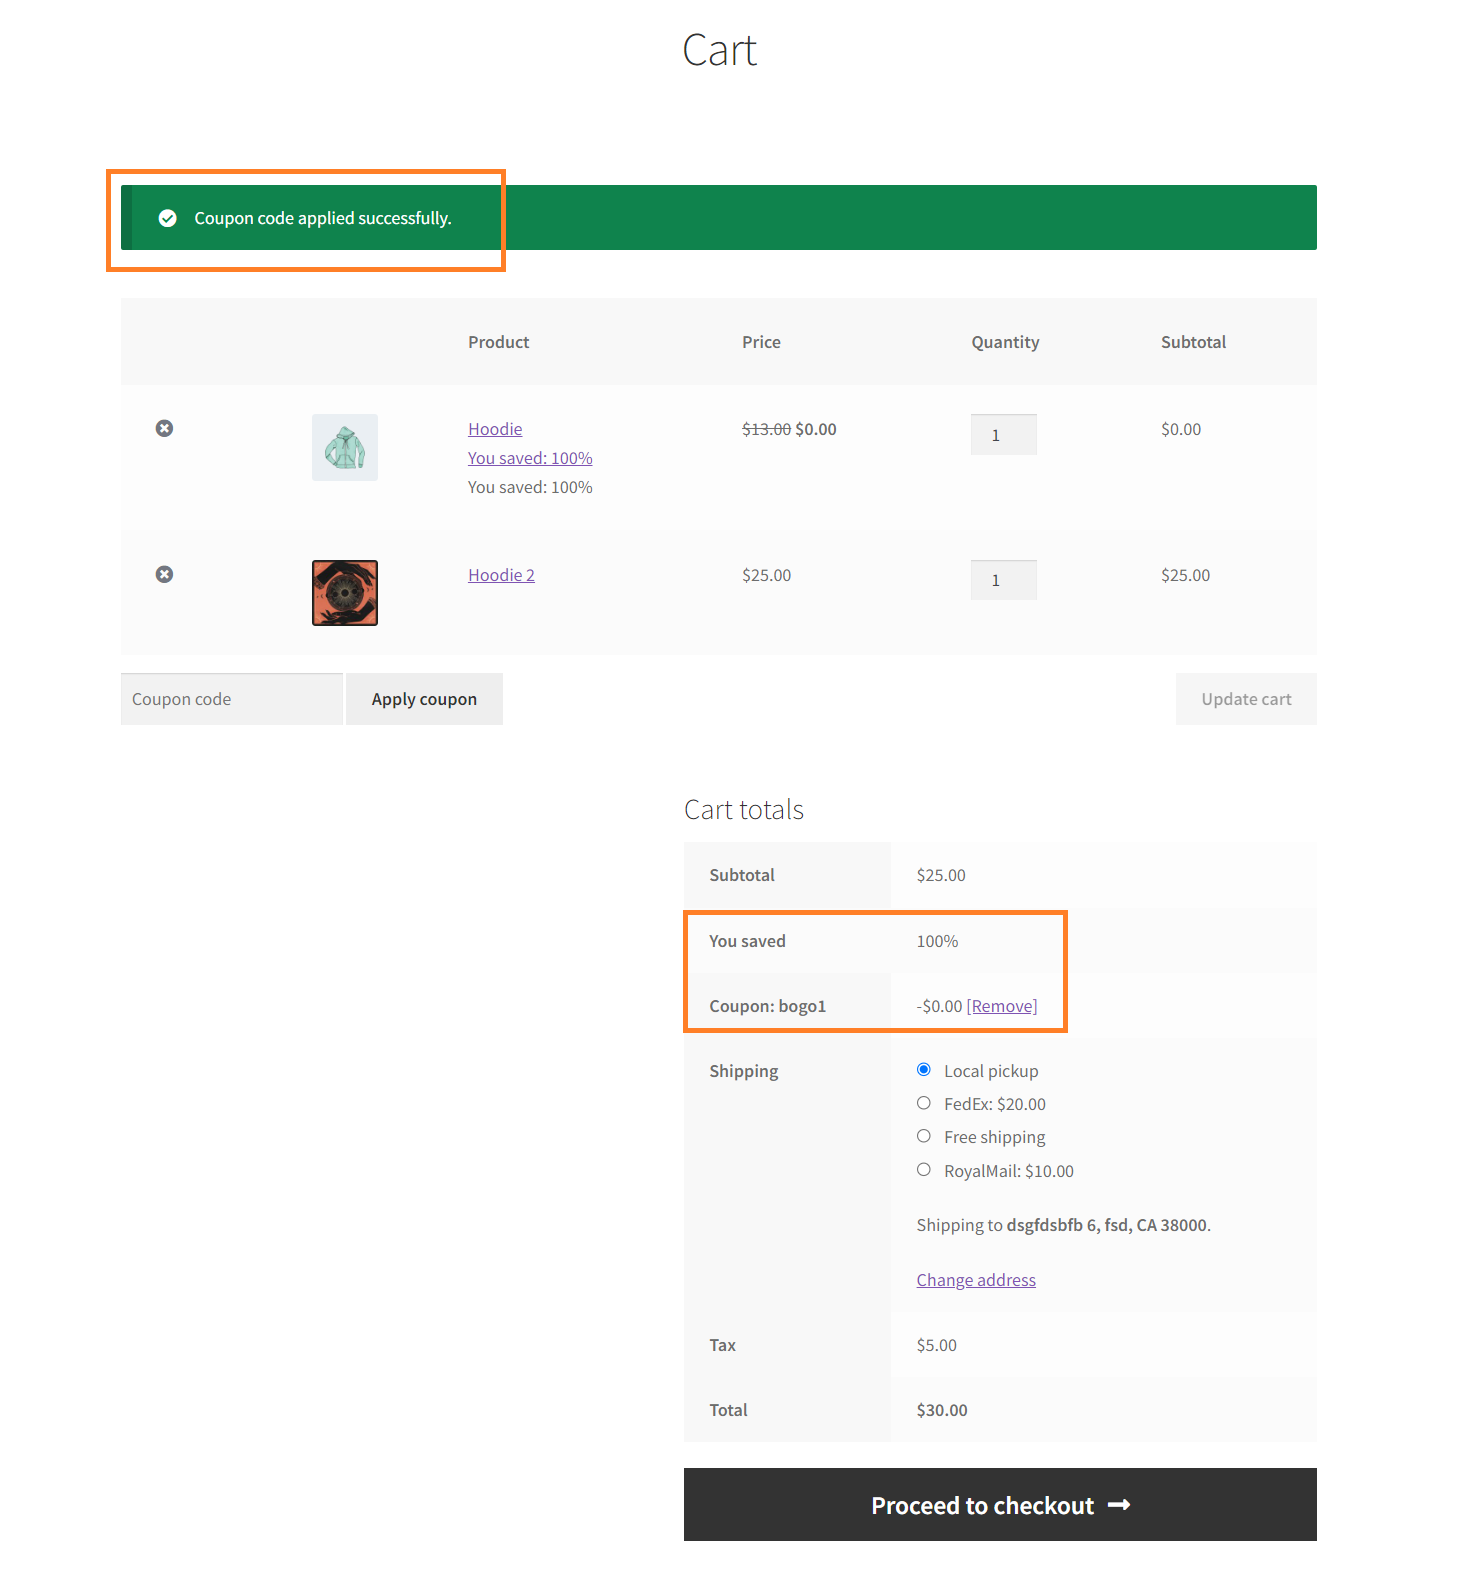
Note: If you also want to show the ‘You Saved’ amount on the cart and checkout page click here.
Conclusion
That’s it for today’s article.
I hope it was helpful to you and you were able to create a BOGO coupon offer to boost your sales. You can create the coupon using the default WooCommerce feature but to create a BOGO offer, you’ll need to use the Dynamic Pricing & Discount Rules plugin.
Download the Dynamic Pricing & Discount Rules plugin today and start offering discounts on your store!


