Do you want to add a custom fees in WooCommerce?
Most business owners want to charge an additional or custom fee for delivery services, product personalization, gift wrapping, payment gateway, storage, or something similar. But, WooCommerce, by default, does not provide any specific way of doing so.
So, In today’s tutorial, I’ll explain how you can charge an additional or custom fee in WooCommerce with the help of WooCommerce Dynamic Pricing & Discount Rules plugin.
Preview
Here’s a quick sneak peek of the final results

So without further ado, let’s jump into the tutorial.
On This Page
- 1 How to Charge Custom Fees in WooCommerce?
- 1.1 1. Install and activate the Dynamic Pricing & Discount Rules Plugin
- 1.2 2. Navigate to Dynamic Pricing & Discount Rules Plugin General Settings
- 1.3 3. Navigate to Checkout Fees Tab
- 1.4 4. Add Pricing Group
- 1.5 5. Set Checkout Fee Label
- 1.6 6. Set the Fee Type and Amount Based on the Total Cart
- 1.7 7. Select Methods
- 1.8 8. Save Changes
- 2 Final Results
- 3 Wrapping
How to Charge Custom Fees in WooCommerce?
Follow the following steps to charge custom fees in WooCommerce with the help of WooCommerce Dynamic Pricing & Discount Rules plugin.
1. Install and activate the Dynamic Pricing & Discount Rules Plugin
Note: You can skip this step if you have already installed and activated the Dynamic Pricing & Discount Rules plugin.
To install the Dynamic Pricing & Discount Rules plugin, you will need to install the Woosuite Core plugin and activate it with the help of a license key. We have created a Quick Start Guide for you to figure out how to install and activate the Dynamic Pricing & Discount Rules plugin.
Once you have installed and activated the plugin, now navigate to Woosuite » Dynamic Pricing Rules from your WordPress dashboard.

Now, navigate to the Checkout Fees tab. From here, you can add fixed or percentage custom fees at the checkout.

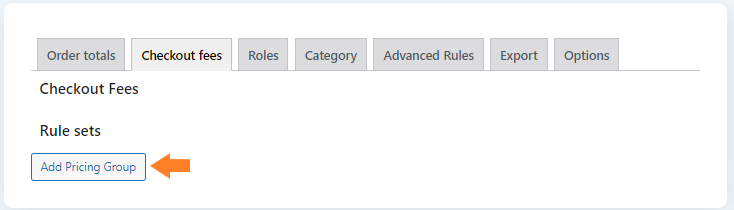
4. Add Pricing Group
Now click on the Add Pricing Group button to add custom fees at checkout.
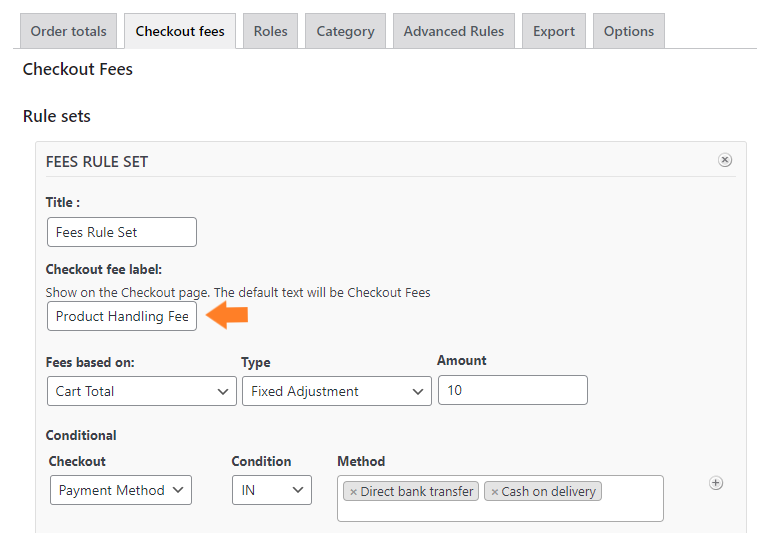
5. Set Checkout Fee Label
Now in the Checkout Fee Label field, set the label to show on the checkout page.
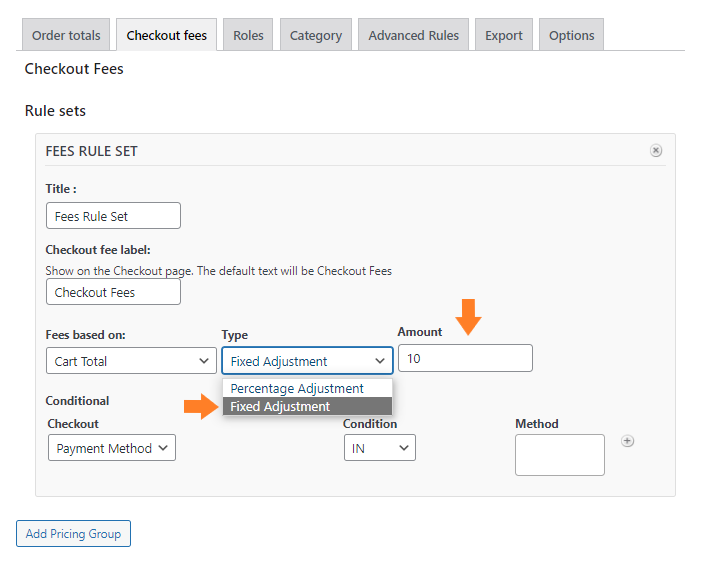
6. Set the Fee Type and Amount Based on the Total Cart
Now select Fixed Adjustment from the Type dropdown and set the amount in the Amount field.
Note: I am creating the rule to charge the fees based on the cart total. You can change it to a cart item if you want.
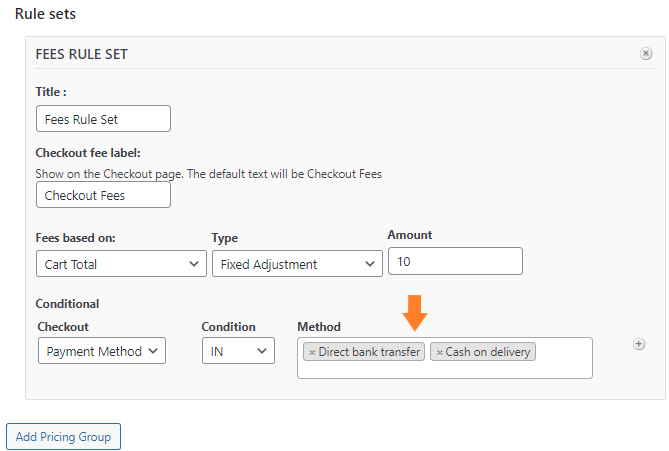
7. Select Methods
Now from the Methods field, select the payment methods on which you want to charge the additional or custom fees.
8. Save Changes
Finally, click on the Save Changes button at the top right corner to save the changes.

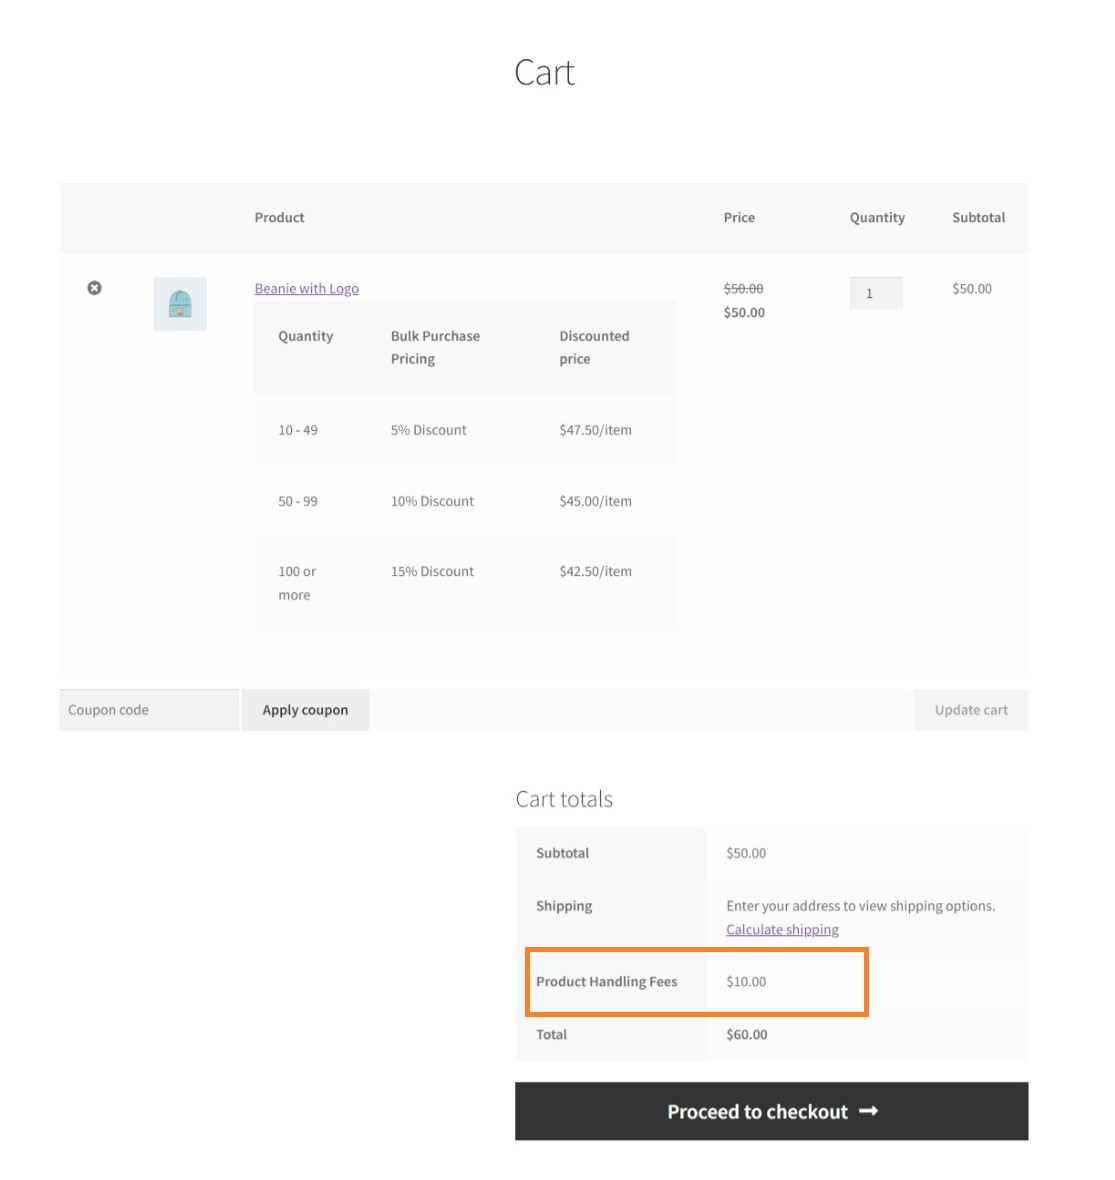
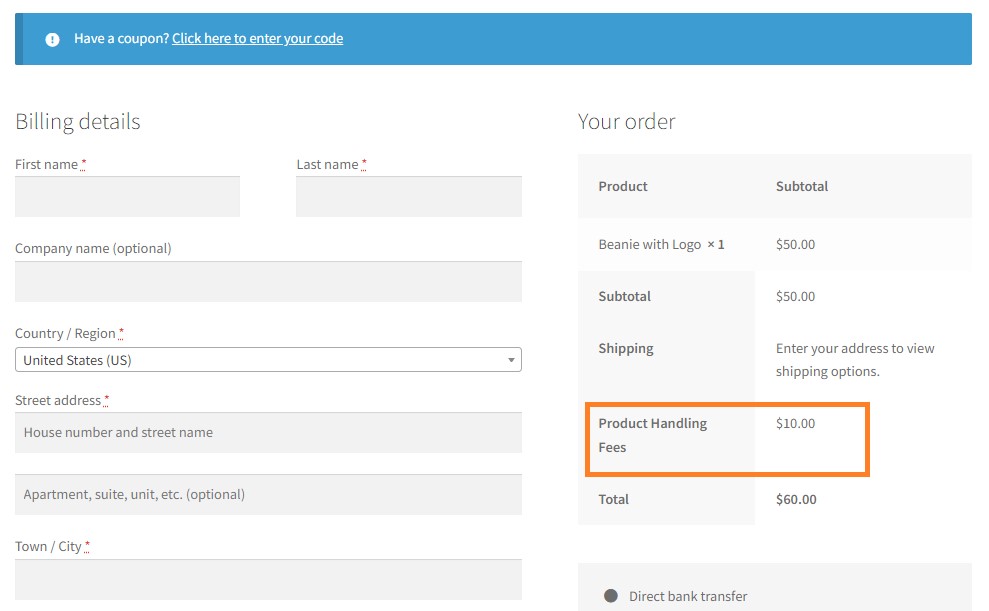
Final Results
Now if you visit your store’s cart or checkout page, you’ll see an additional fee has been added to the total price of the cart.
Here’s how it’ll look on the cart page.
And here’s how it’ll look on the checkout page.
Wrapping
Now you know how to charge custom fees in WooCommerce. This is one of the easiest methods to add an additional or custom fee in WooCommerce without writing a single line of code.
Now it’s totally up to you to configure the settings as you want and charge custom fees. If you have any queries, you can ask them in the comments or contact our customer support. Our dedicated customer support team typically replies within 48 hours.


