Do you want to create, sell, and manage WooCommerce event tickets?
If yes, then you have landed at the right place!
WooCommerce is a very diversified platform that can help you to sell any type of product. It is an excellent platform to help you easily sell, create, and manage WooCommerce event tickets.
In today’s article, I’ll walk you through creating, selling, and managing event tickets in WooCommerce. I’ll also show you the step-by-step process of creating event ticket discounts. By following the process, you can create a few promotional strategies to ensure you have a sell-out event like buy two get one free, storewide discount, and more.
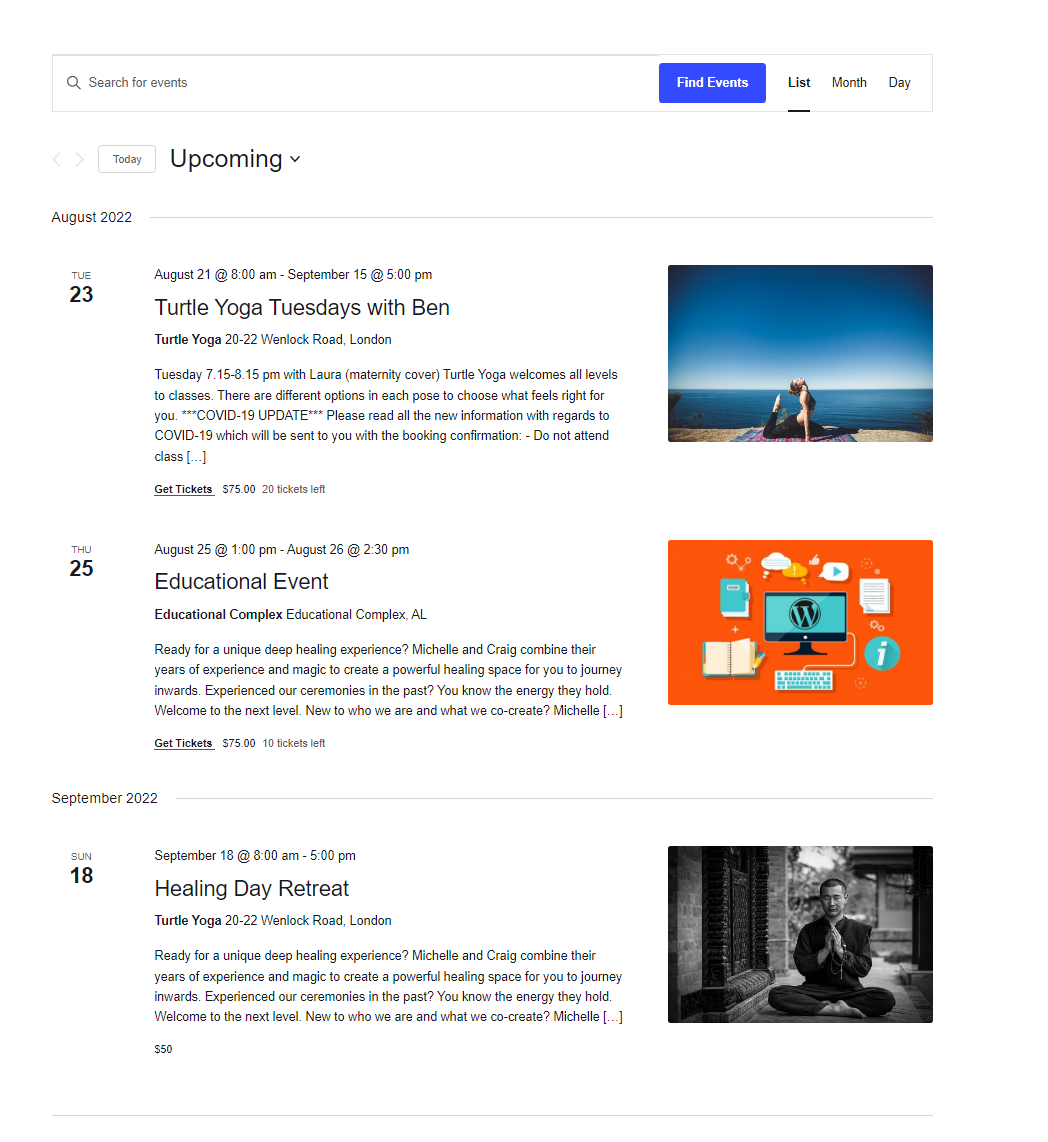
Here’s a quick sneak peek of the final results.
On This Page
- 1 Why Use WooCommerce to Sell WooCommerce Event Tickets?
- 2 What Do You Need to Sell WooCommerce Event Tickets?
- 3 How to Create, Sell, and Manage the WooCommerce Event Tickets?
- 4 Wrapping Up
Why Use WooCommerce to Sell WooCommerce Event Tickets?
WooCommerce powers more than 4.4 million eCommerce stores worldwide. Following are a few points to help you understand why you should use it.
1. Flexibility
Due to its popularity, flexibility, complete ownership, and ease of use, most event organizers are moving toward it to create and manage event tickets easily.
2. No Extra fees
Unlike other platforms where you need to give a part of your revenue to the platform you are using, you end up having a pretty small piece of cake.
WooCommerce is free to use, and you won’t be charged extra fees or per sales-based commission. You’ll get 100% of your revenue to your bank account without any hustle.
3. Design Options
There are unlimited design customization options to enhance the design of your store and list the event tickets in an improved way to increase the customer’s buying experience.
4. Payment Options
WooCommerce allows you to integrate almost all the available popular payment methods. You just need to install the payment method plugins, set them up, and you are good to take the payments.
These are not the only reasons you should use WooCommerce to sell event tickets; these reasons are explicitly explained because these are required for selling event tickets better.
What Do You Need to Sell WooCommerce Event Tickets?
To sell event tickets using WooCommerce, you must have the following plugins.
1. WooCommerce: I assume you already have installed and activated the WooCommerce plugin. This tutorial is focused on the WooCommece platform.
2. The Events Calendar Plugin: It is a free plugin you can download it from the WordPress admin dashboard by navigating to the Plugins » Add New, then searching for the ‘’events calendar” in the search bar. I have already installed and activated it.

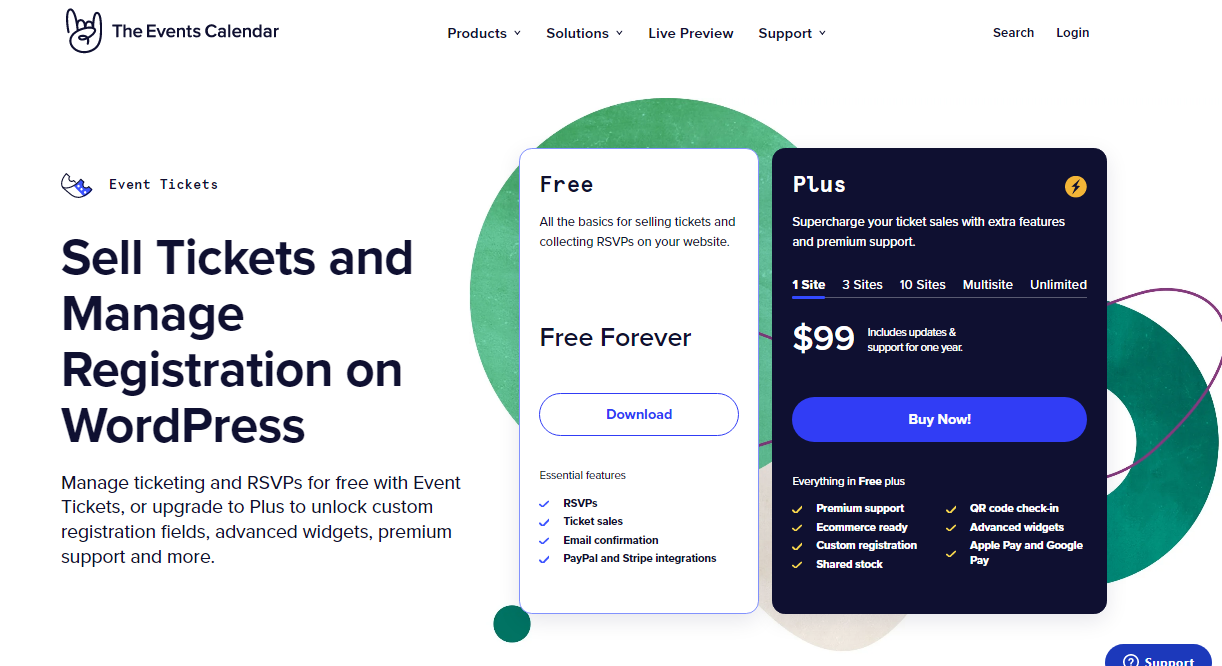
3. Events Ticket Plus Plugin: This plugin will help you to create event tickets. You can use its free version, but that won’t allow the WooCommerce integration. So I recommend you use the plus version.
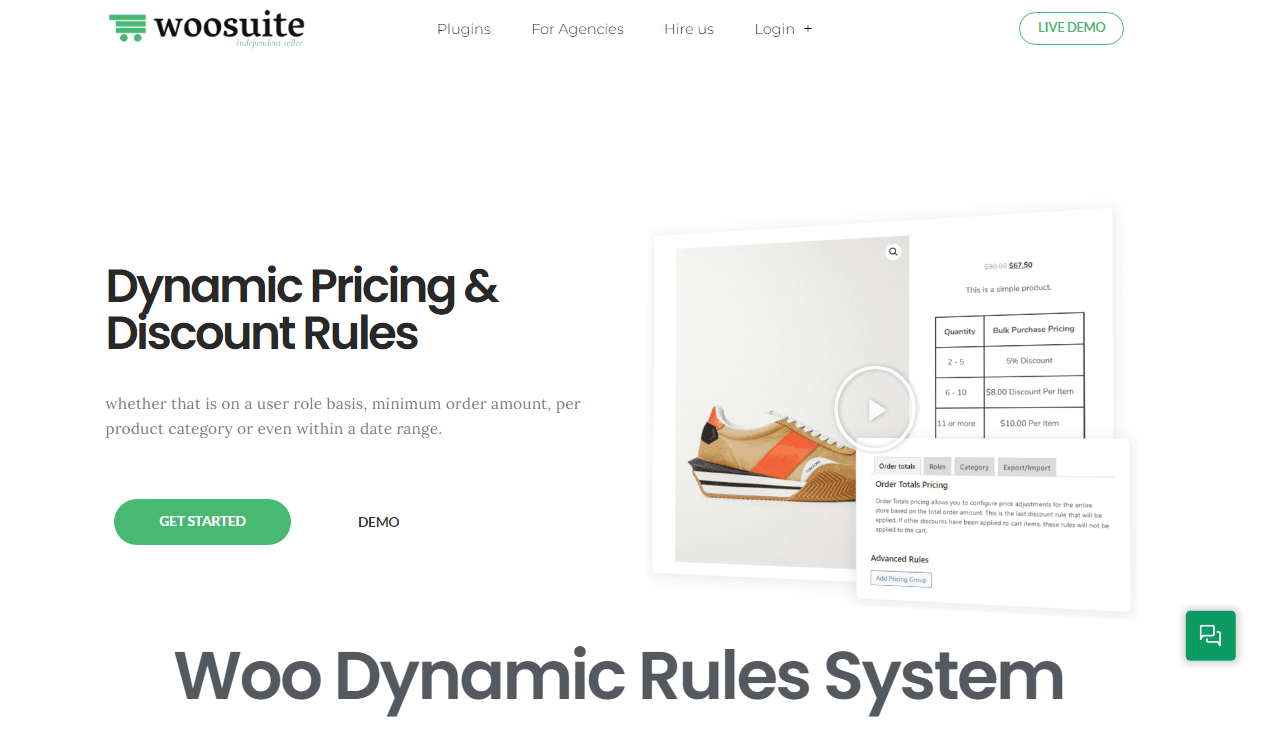
4. Dynamic Pricing & Discount Rules Plugin: This plugin will help create promotional strategies for your event tickets. You can offer discounts on the tickets using this plugin.
You can get the plugin from here.
Now you have all the plugins you need to follow along with the tutorial. Let’s dive into the actual tutorial.
How to Create, Sell, and Manage the WooCommerce Event Tickets?
Following is the step-by-step process to help you create and manage the event tickets.
1. Create Your First Event Listing
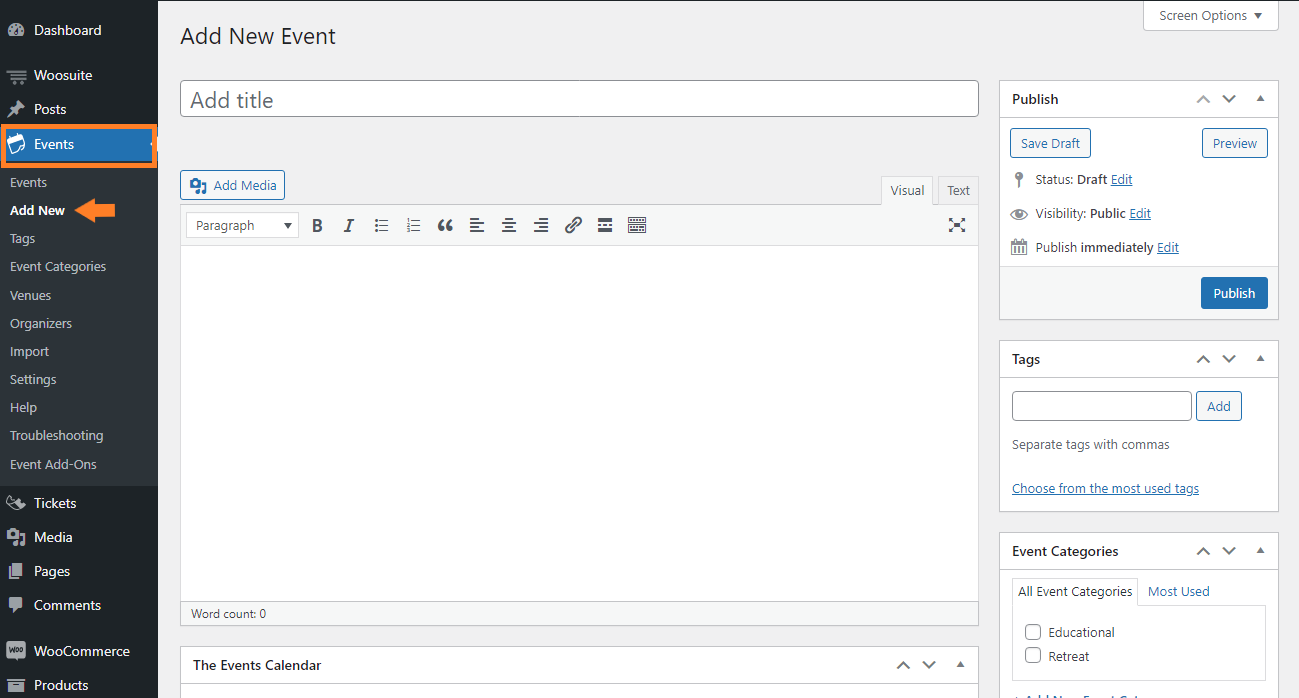
To create your first event listing, navigate to the Events » Add New from your WordPress admin dashboard. Once you click it, you’ll reach the page from where you can add a new event.
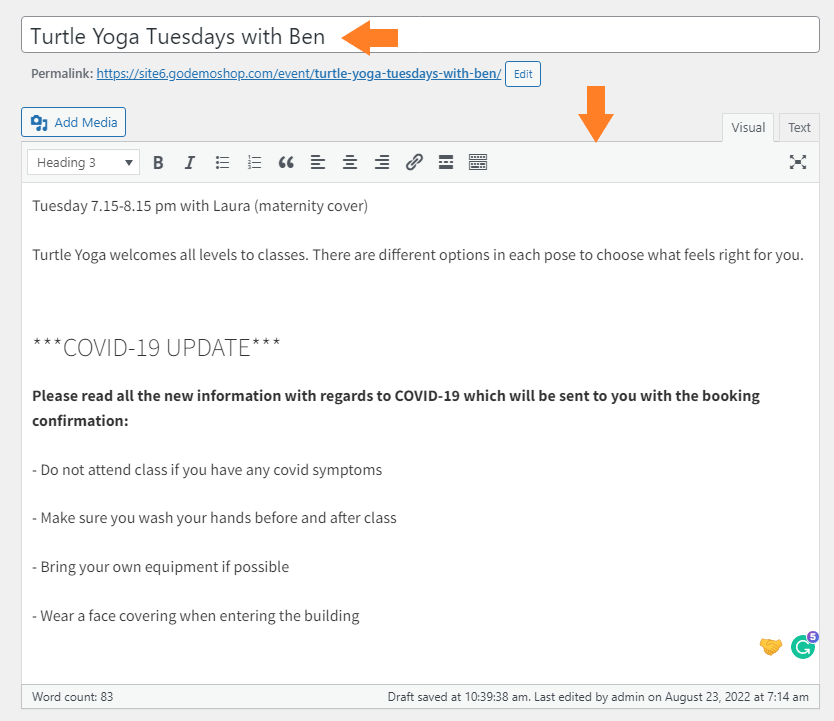
1. Add Event Title and Description
We need to add the event’s title and the description. So In the “Add Title” field, enter the event’s name, and in the “Description” section, enter the event description.
2. Select Event Category
From the “Events Category” section, select the event category. You can also create a new category.

3. Select the Event Data & Time
Now from the ‘Time & Date’ section under the ‘The Events Calendar’ tab, select the event start and end date/time.

4. Select the Event Location
Select the venue from the ‘Venue’ field under the ‘Location’ section. You can also create a new venue by selecting the ‘Create a New Venue’ from the dropdown.
But for this tutorial, I have already created and selected the venue from the ‘Venue’ dropdown.
You can also enable/disable the ‘Map’ and ‘Map Links.’ By default, they’ll be enabled.

5. Select Event Organizer
Select the event organizer from the ‘Organizer’ dropdown under the ‘Organizers’ section.
You can select the ‘Create Organizer’ from the dropdown to create a new organizer. For this tutorial, I have already created and selected the organizer.
You can add multiple organizers by clicking the ‘Add Another Organizer’ button.

6. Add Event Featured Image
Now in the ‘Featured Image’ section, add the feature image of the event. I have added a demo image for this tutorial, but you can add the feature image of your event.

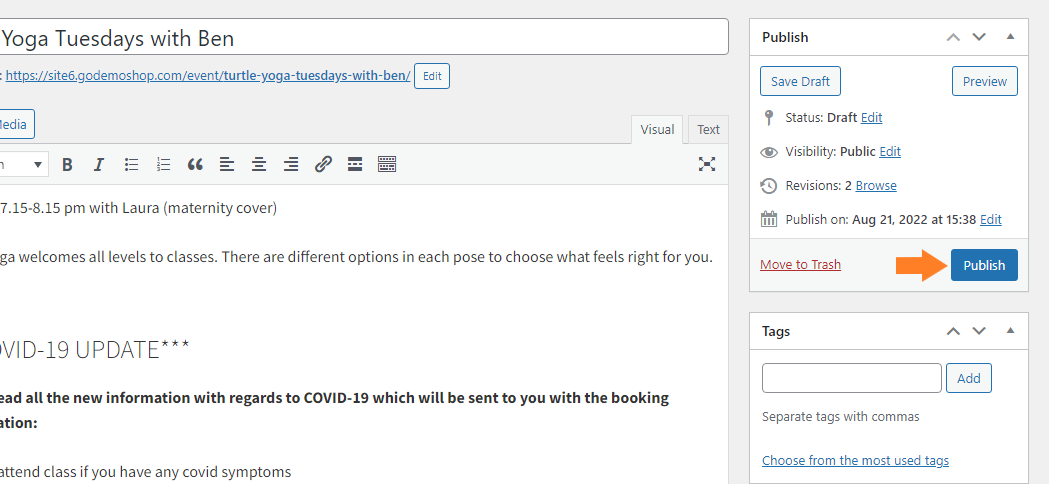
7. Publish the Event
Now scroll above and click the ‘Publish’ button to publish the event.
2. Create the Event Ticket
Once you have created the event, now is the time to create a ticket so users can buy the event ticket to enter it.
To create an event ticket, edit the event you created in the previous step. Once you are on the event edit page, scroll to the ‘Tickets’ section and click the ‘Add New Ticket’ button.
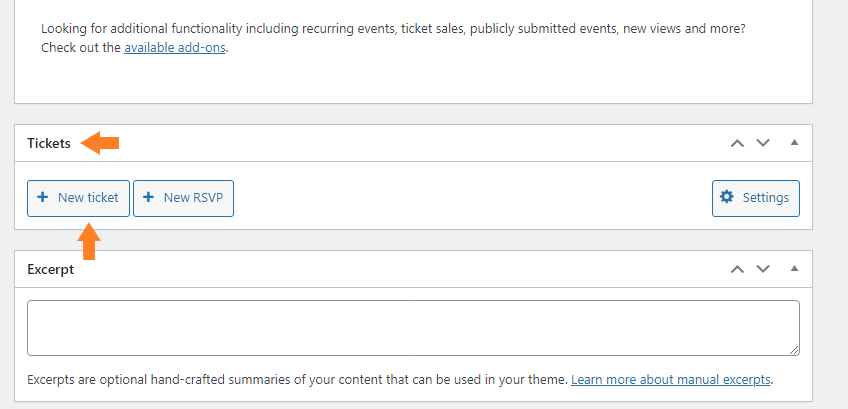
Once you click it, a new ticket will be added. Now we need to configure it according to the needs.

To configure it, follow the following steps.
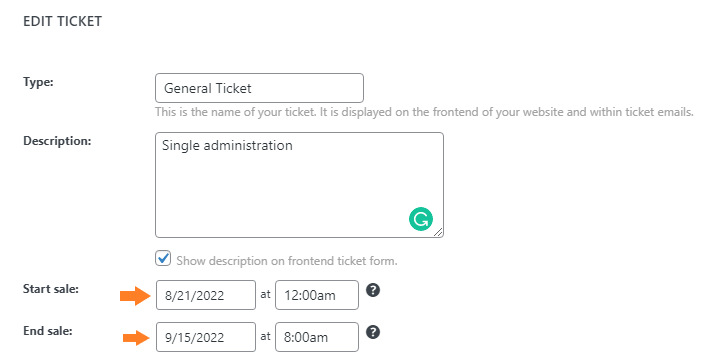
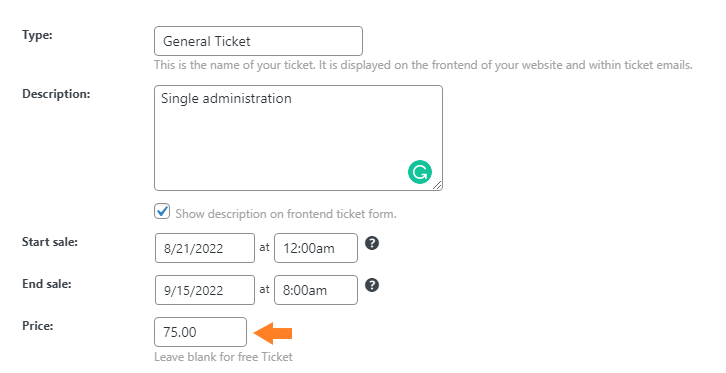
1. Add Ticket Name and Description
Now in the ‘Type’ field, enter the name of the ticket and then add the ticket’s description in the ‘Description’ field.

2. Set Start and End Date
Now from the ‘Start Sale’ and the ‘End Sale’ fields, select the starting and expiring date/time.
3. Set the Price of the Ticket
Now in the ‘Price’ field, enter the ticket price.
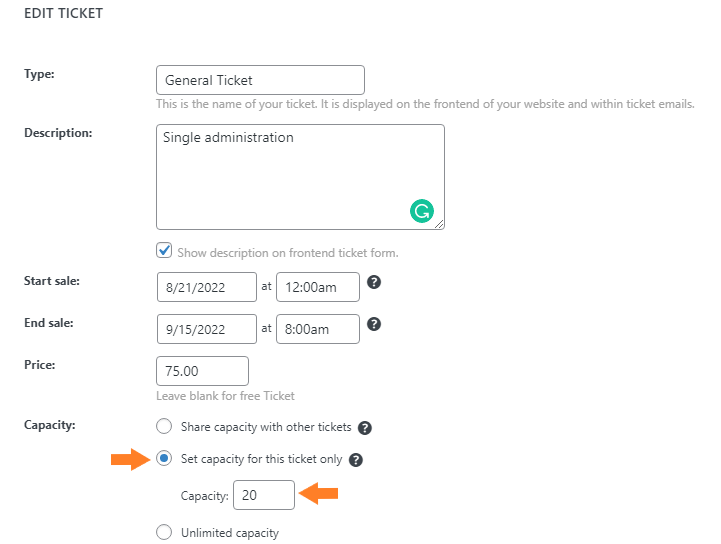
4. Set the Ticket Capacity
Select the ‘Set Capacity for this Ticket Only’ option from the ‘Capacity’ section. Enter the total number of tickets you want to sell. I added ‘20’ in the field.
5. Allow Individual Attendee Collection
Click the ‘Attendee Collection’ button and select the ‘Allow Individual Attendee Collection’ option.
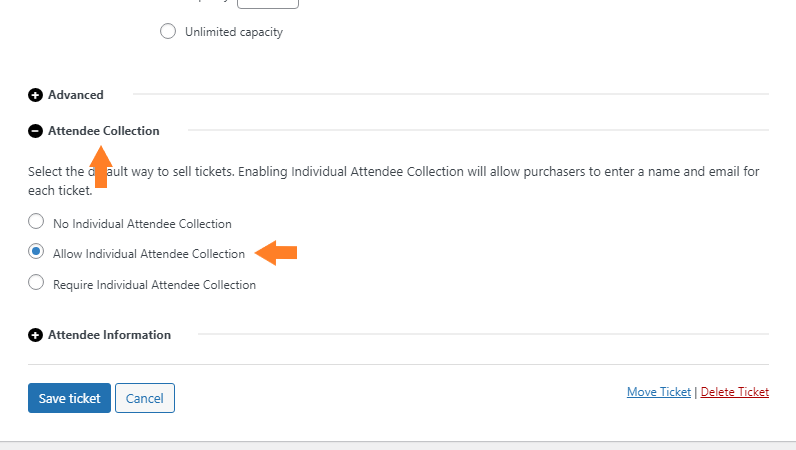
You can also play with the other section of the ticket. For this tutorial, I am leaving them to default. You can add additional fields to the ‘Attendee Information’ section.
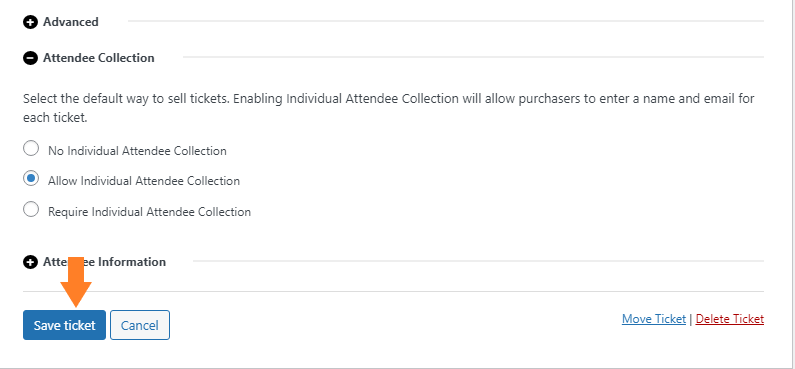
6. Save the Ticket
Click the ‘Save Ticket’ button to save the ticket.
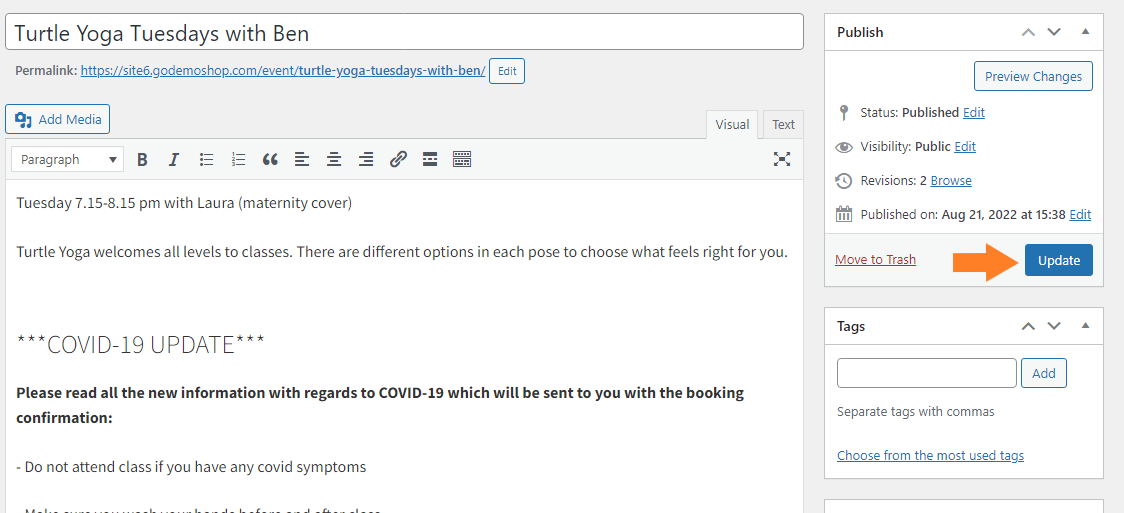
7. Update the Event
Now scroll above and click the ‘Update’ button to publish the event.
3. Add Event’s Ticket Featured Image
Once you have created the event ticket, we need to add its featured image. When you add a ticket to the event, it will be automatically added as a product in WooCommerce.
Users will purchase this ticket to enter the event. We need to add the image to make the ticket product visually better.
To add the image, navigate to the Products » All Products from your WordPress admin dashboard. Here you’ll see all the products that you created.

1. Edit the Ticket
Now edit the ticket you created in the previous step. Hover your mouse on the ticket name and click the ‘Edit’ button to edit it.

Once you click the edit button, you’ll be redirected to the product edit page.
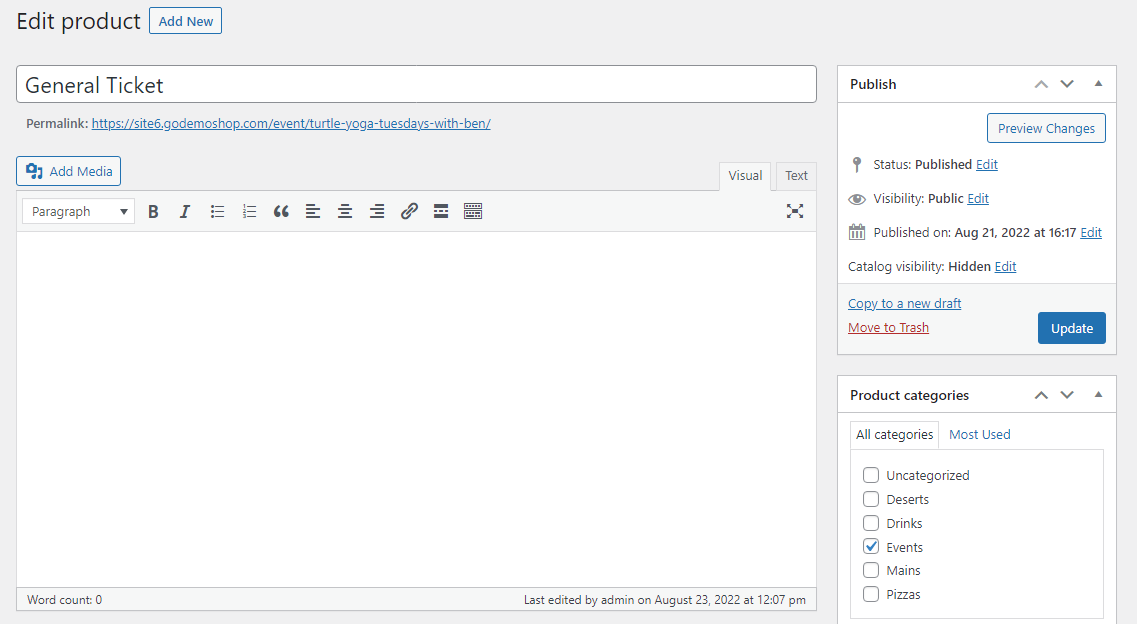
2. Add a Featured image
Scroll to the ‘Product Image’ section and add the image for the ticket. You can add any image that relates to the event.

3. Update the Ticket Product
Now scroll above and click the ‘Update’ button to save the settings.

4. Create a Discount Offer
The next step is to offer discounts to the users. I’ll use the Dynamic Pricing & Discount Rules plugin to create a Buy 1 Get 50% Off offer. This plugin will also help you to create a buy 2 get one free offer, storewide discounts, bundle discounts, and more.
To offer a discount, follow the following steps.
Once you have installed and activated the plugin, navigate to Woosuite » Dynamic Pricing Rules from your WordPress dashboard.

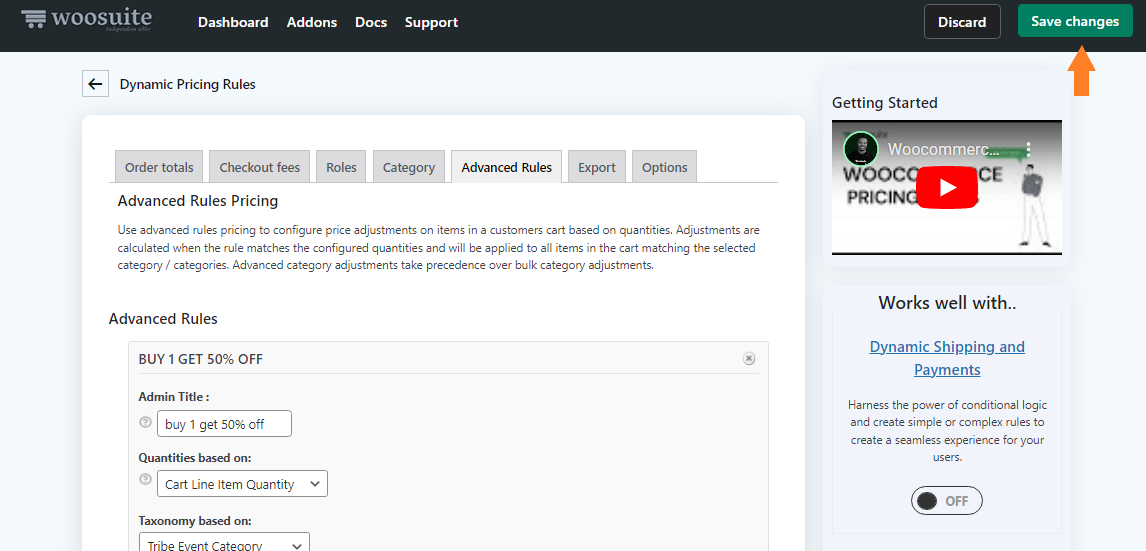
Click the Advanced Rules tab from the plugin’s settings to create the Buy 2 Get 50 % Off offer.
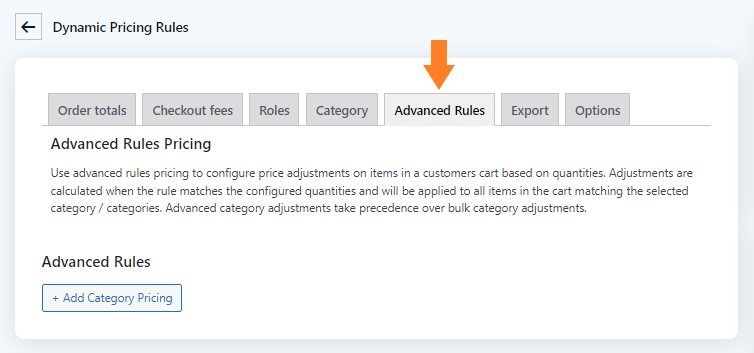
3. Create a Buy 1 Get 50% Off Offer
Click the Add Category Pricing button to create a Buy 1 Get 50 % Off offer.

Once you click the button, a rule will be added, which I’ll customize to create a Buy 1 Get 50% Off offer in the following steps.

3.1. Give an Admin Title
Now, enter the rule’s name in the Admin Title field. Only the admins will be able to see this. It is beneficial if you have created several rules.
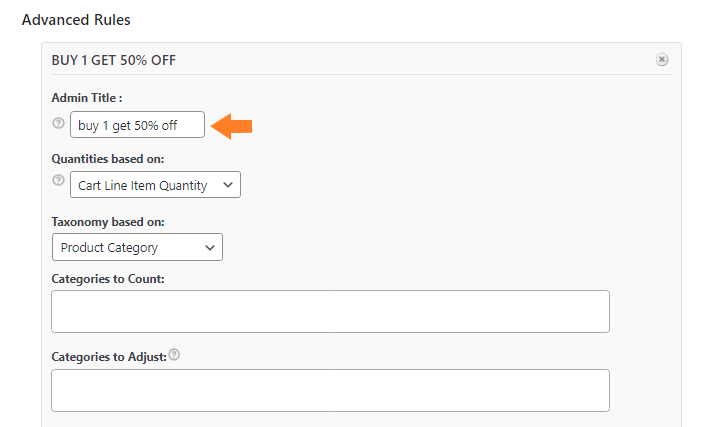
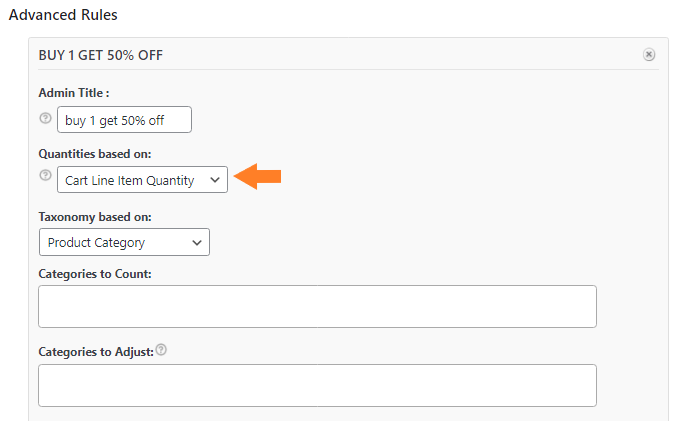
3.2. Set the Quantities
You’ll get two options from the ‘Quantities Based On’ dropdown.
- Cart Line Item Quantity
- Sum of Category
For this tutorial, I have selected the ‘Cart Line Item Quantity’ because the offer we are creating is based on the products in the cart.
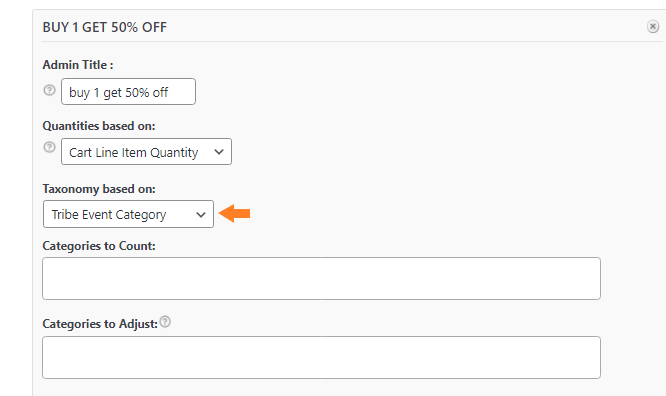
3.3. Select the Taxonomy
From the ‘Taxonomy Based On’ dropdown, you’ll get two options:
- Tribe Event Category
You need to select ‘Tribe Event Category’ from the dropdown because we are creating discounts for the event tickets. Ensure you select it correctly; otherwise, the discount won’t work.
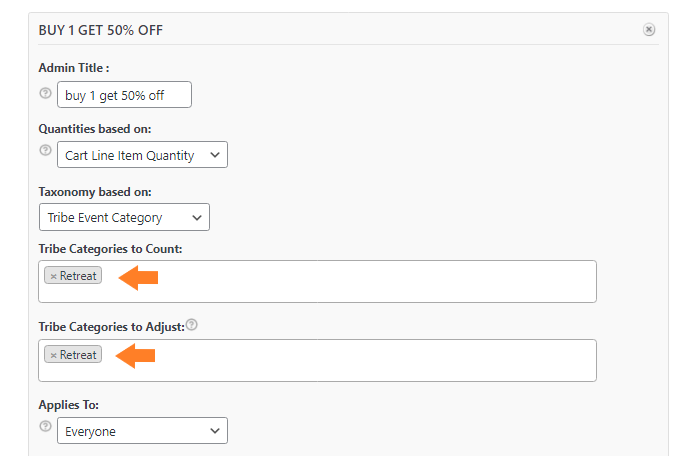
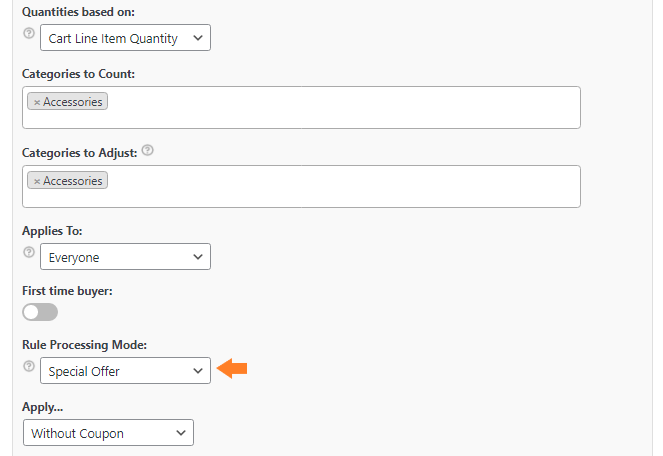
3.4. Select the Categories for Discounts
Select the event categories in the Categories to Count and Categories to Adjust fields. Categories to Count means that if users purchase from the selected categories, they will get discounts from the categories specified in the Categories to Adjust field.
As we are creating a Buy 1 Get 50% Off offer for users, I have selected the same category in both fields, which means that this offer only applies to the selected category.
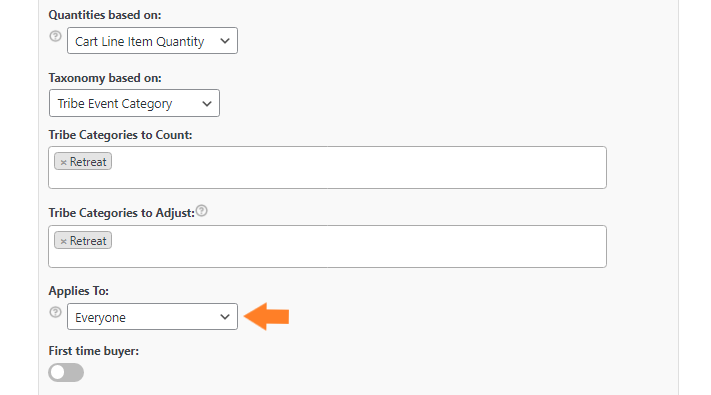
3.4. Select the Users for this Discount
From the Applies to dropdown, select the Users who can benefit from this offer. You’ll get the following options:
- Everyone
- Guests
- Specific Roles
- Specific Users
I have selected Everyone from the dropdown as I want to give this offer to all the users.
3.5. Select the Rule Processing Mode
Now from the Rule Processing Mode dropdown, you’ll get four options.
- Bulk
- Tiered Pricing
- Special Offer
- Bundle(Set) Discount
Make sure you select the Special Offer as the processing mode because this is the only mode that’ll allow you to create bonus pack offers like Buy 1 Get 50% Off offer.
3.6. Set the Product Purchase and Receive Quantity
Now in the Purchase field, enter the number of products users need to purchase to be eligible for the offer. As in our case, we want the users to buy 1 product, so I have entered 1 in the field.
In the Recieve field, enter the number of products you want to give users at a discount. In our case, enter the 1 in the field.
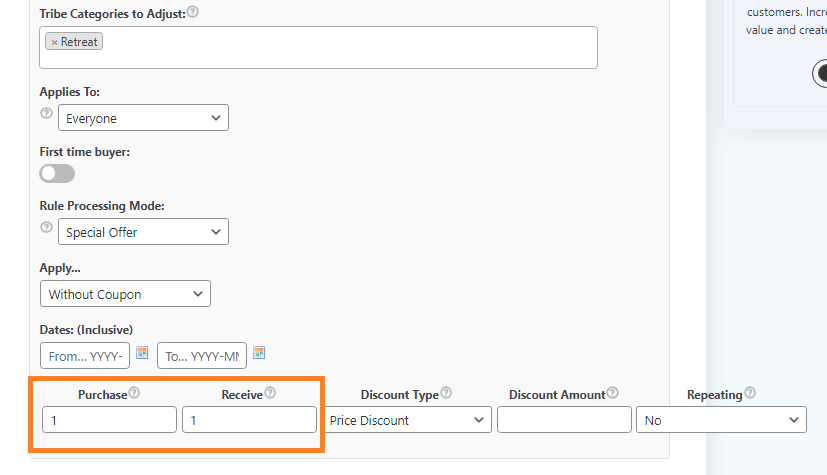
3.7. Select the Type of Discount
Now select the discount type from the Type dropdown. You can choose the discounts as
- Price Discounts
- Fixed Price
- Percentage DIscounts
I have selected the Percentage Discount as the type of discount from the dropdown.
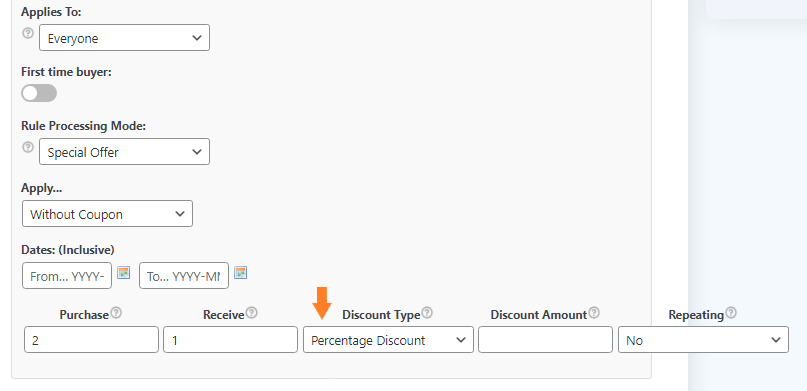
3.9. Enter the Amount of the Discount
Now enter the amount of the discount you want to offer the customers on the ticket if they buy 1. We want to give a ticket for 50% off if they buy one ticket, so in the amount field, enter 50.
From the Repeating dropdown, you can select if you want to repeat this offer, which means the users can get it as many times as they wish. Usually, it is not a good idea to repeat the offer, so I am keeping it to No.

4. Save Changes
Once all the settings are done, click the green “Save Changes” button at the top right corner of your screen to save all the settings.
5. Final Results
Once everything is done, visit the events page. You’ll notice that the events are listed there, and users can easily find the events.
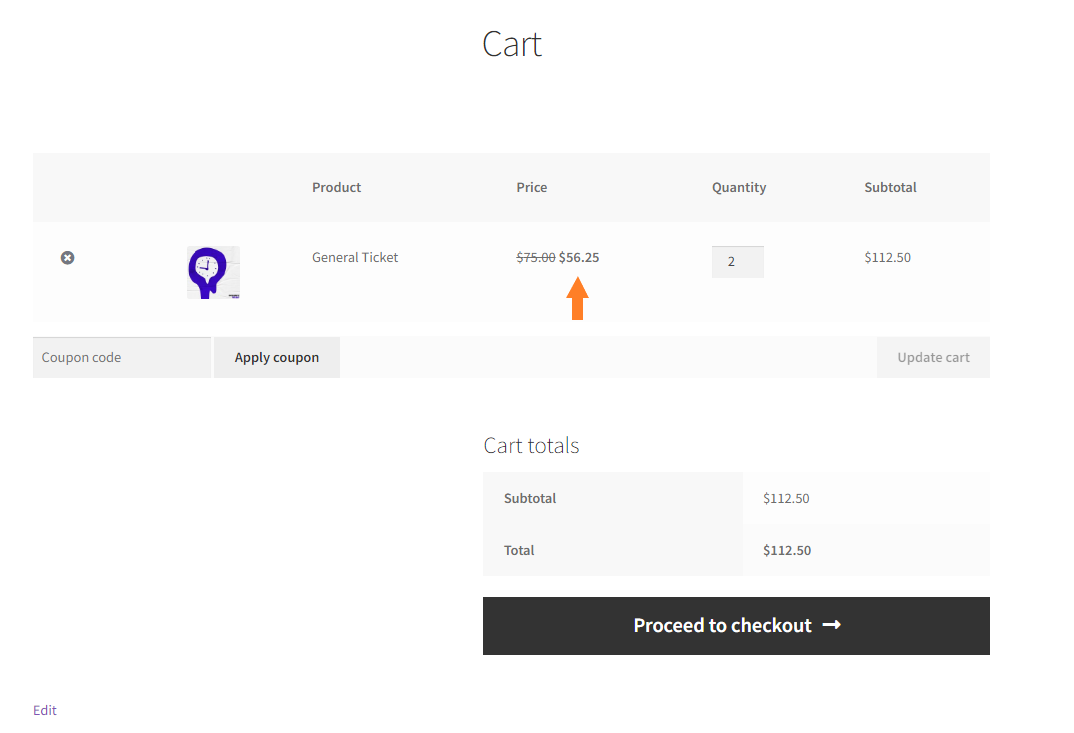
Now, if you click the event to view it, you’ll notice that you can buy the event ticket easily. To get the discount, add two tickets to the cart.

Now, if you visit your cart page, you’ll notice that the discount you created in the previous steps has been applied.
Wrapping Up
That’s it for today’s article.
Selling event tickets is easy with the help of WooCommerce and the correct plugins mentioned in this tutorial.
Now it’s up to you to play with the plugins’ settings and create different events and their tickets to sell.
I hope this article helped you learn everything about efficiently creating, selling, and managing WooCommerce events. Still, if you got any questions, please leave them in the comments. I would love to answer all of your questions.
Alternatively, you can contact our customer support for further assistance with Dynamic Pricing & Discount Rules plugin. They are quick in replying and assisting. They typically respond within a day or less.
Download the Dynamic Pricing & Discount Rules plugin to create discounts for WooCommerce event tickets easily!


