The checkout process is a crucial stage for any e-commerce store, and optimizing it can significantly impact user experience and conversion rates.
WooCommerce is a flexible and powerful platform that allows you to customize various aspects of your online store, including the order of checkout fields.
By rearranging the checkout fields, you can tailor the flow of information to better align with your business needs and customer preferences.
In this tutorial, I will guide you through the process of changing the field order on your WooCommerce checkout page.
Whether you want to prioritize specific fields, group them together for a more intuitive layout, or simply match the order to your specific industry requirements, this tutorial will help you achieve your goals.
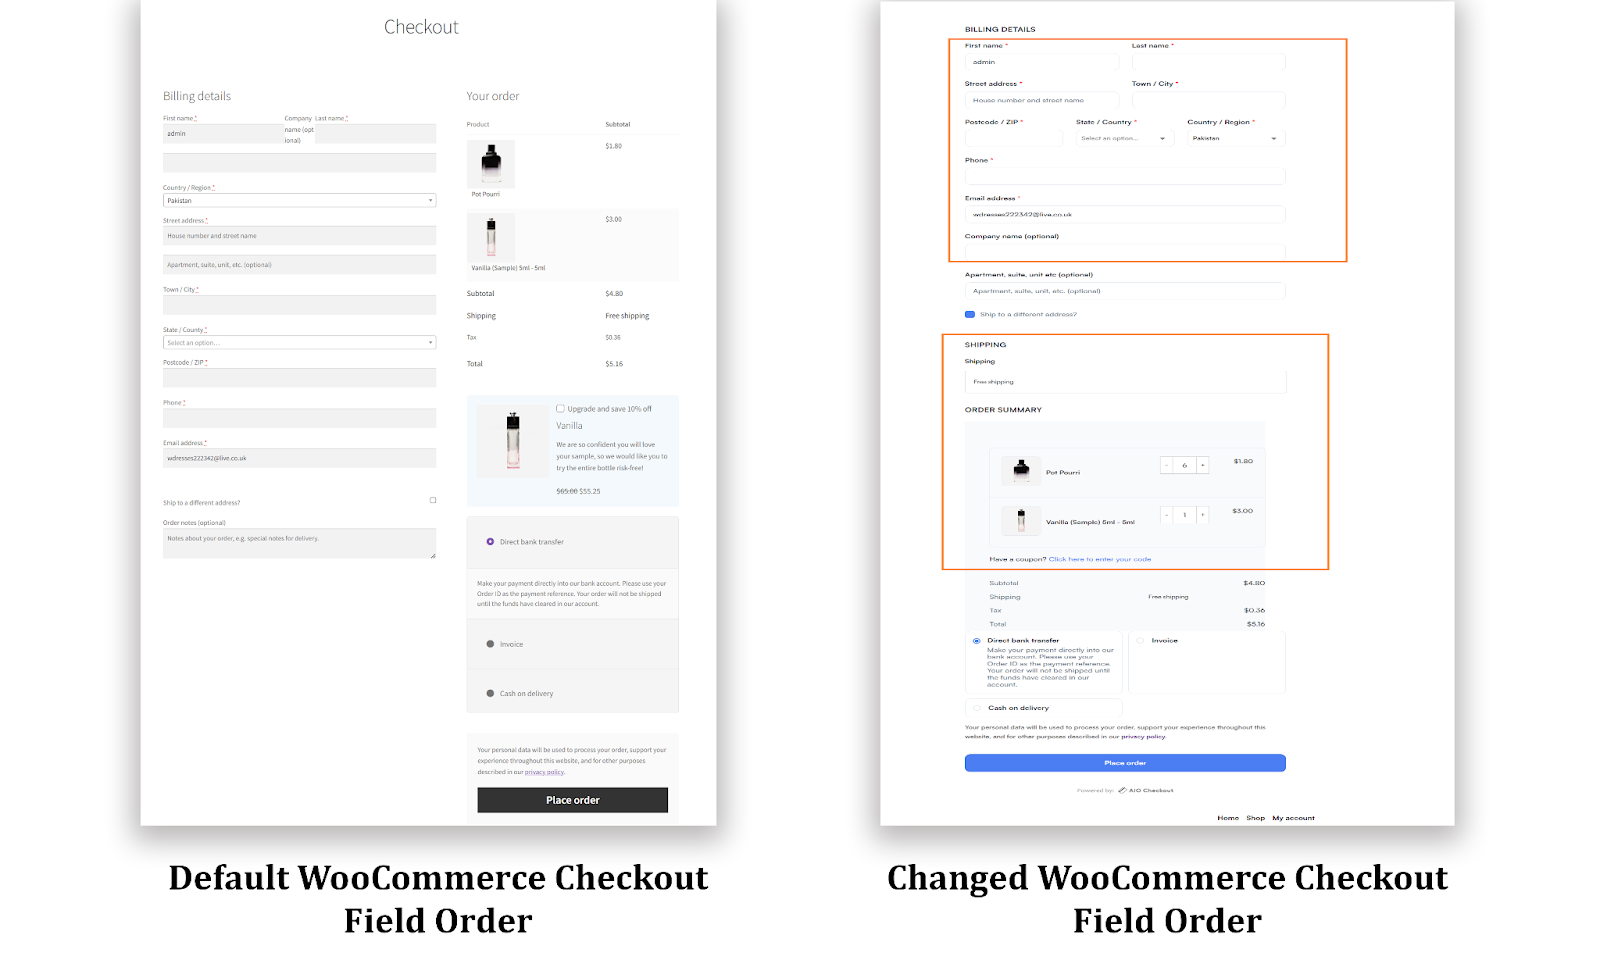
Preview
Here is the preview of the final result.

So, without any further ado, let’s jump into the tutorial.
How to Change the WooCommerce Checkout Field Order?
To change the WooCommerce checkout field order, I’ll use the AIO Checkout plugin. It is one of the most easy-to-use and all-in-one solutions to all the checkout issues.
It will allow you to change the checkout field order as you want. Follow the following steps to change the WooCommerce checkout field order.
1. Install and Activate the AIO Checkout Plugin
First, download the AIO Checkout plugin from the Woosuite store. It is free for now, and you can get it by submitting the form.

Once you have downloaded it, navigate to the Plugins » Add New from your WordPress admin dashboard, and click the Upload button to upload the downloaded file to install and activate the plugin.
Once you have installed and activated the plugin, navigate to AIO Checkout from your WordPress dashboard.

3. Create a New Checkout Form
I have already created a few checkout forms, but I’ll create a new one for this tutorial to show you the complete process.
Click the “Create New Checkout” button to create a new checkout form.

4. Change the WooCommerce Checkout Field Order
Once you click the button, a new checkout form will create. It’ll be the default WooCommerce checkout field, but you can completely customize it and change the order of fields according to your business needs.
You can also add custom fields like birthday fields, VAT number fields, etc.

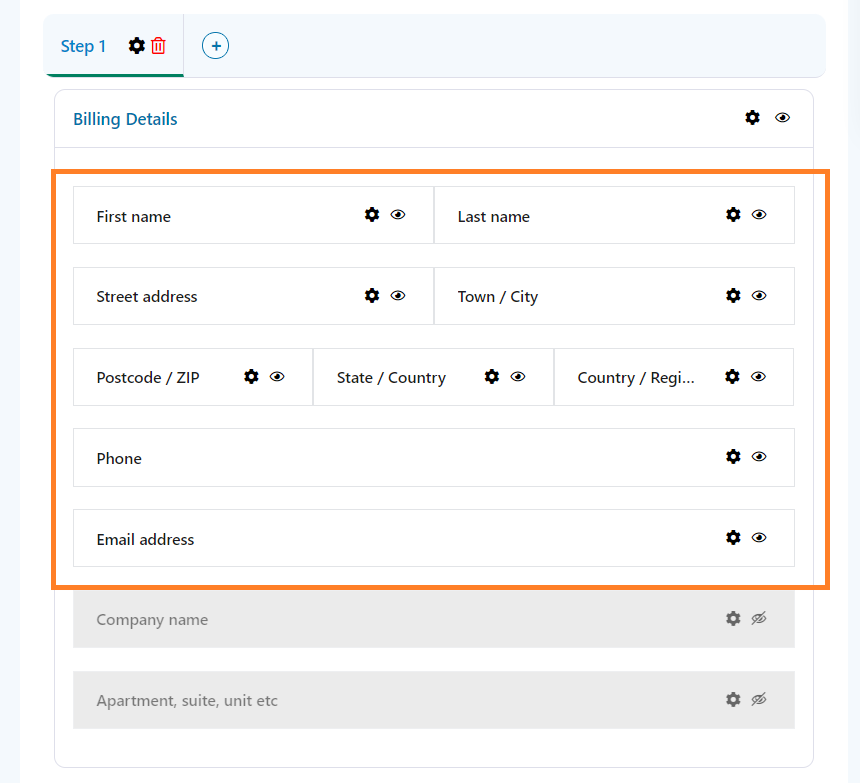
4.1. Change the Field Order
To change the checkout field order, you just need to drag the field and drop it anywhere in the checkout. You can adjust the order of each field according to your business needs and requirements.
I have changed the order of a few fields in the billing details section.
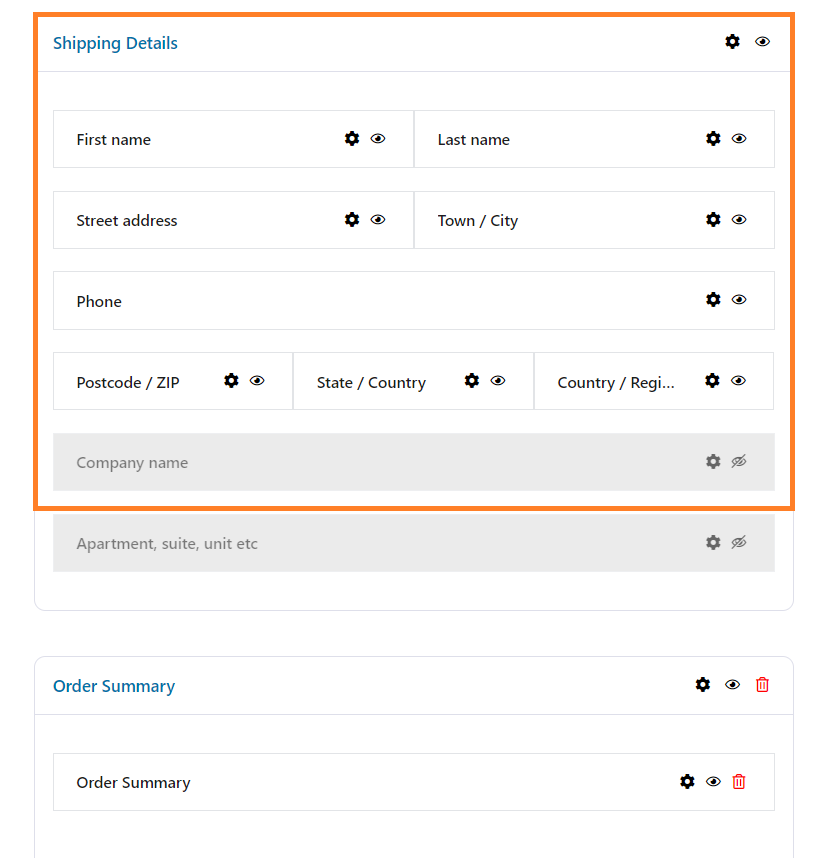
4.2. Change the Field Order of Shipping Details Section
If you also want to change the checkout field order of the shipping details section, you can do that by scrolling down and dragging and dropping the fields where you want in the shipping details section.
4.3. Change the Order of Checkout Sections
Similar to the checkout fields, you can also change the order of checkout sections. There are five different sections available in a checkout form.
- Billings Details
- Shipping Details
- Order Summary
- Shipping
- Payment
I have changed the order of the sections, but you can adjust the order according to your business needs.

You can also add additional sections to the checkout form by clicking the ‘Add Section’ button at the bottom of the page.

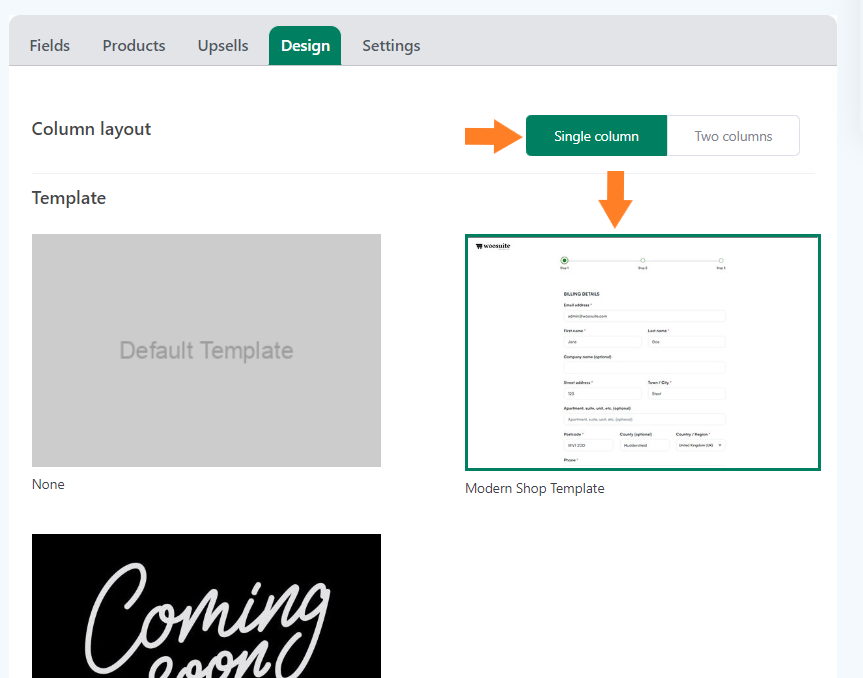
5. Select the Design of the Checkout Form
Once you have changed the checkout field order, you need to select the design of the checkout form/page.
Click the “Design” tab to select the form’s design. You can choose the design as
- Single Column
- Two Columns
I have used the “Single-Column” design and ‘Modern Shop Template’ for this tutorial, but you can choose any available designs and templates. Soon, it will have a few more templates that you can use.
6. Enable the Checkout
After selecting the checkout design, we need to enable this checkout form. Click the ‘Settings’ tab.

6.1. Enable the Checkout Form
To enable the checkout form, toggle the ‘Enable’ button. Also, ensure you have enabled the ‘Set as Global Checkout’ option to make this form the global checkout.
You can leave it disabled if you want to set this checkout form for specific user roles. I am enabling it as global checkout as I don’t want to set a user restriction.
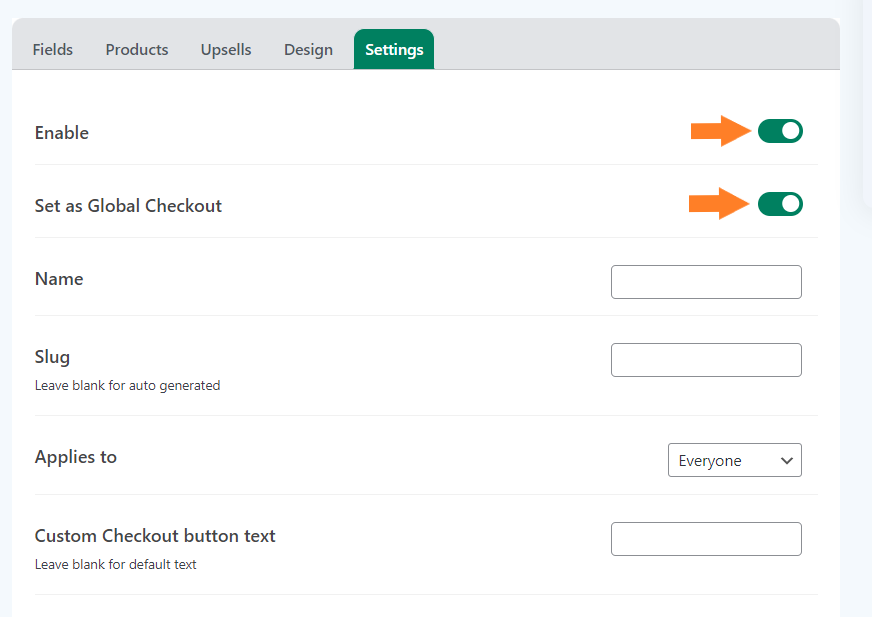
6.2. Give a Name to the Form
Now, we need to give a name to this form. It will only be displayed to the admin. It is helpful if you have created different checkout layouts for different user roles.

Note: You can also explore the other available settings and set a custom checkout button text. But I’ll move to the next step to keep this tutorial short and to the point.
7. Save the Changes
Now click the green “Save Changes” button at the top right corner of your screen to save the settings.

8. Final Results
To test the final results, add a product to cart and visit your checkout page to confirm the result.
.
Wrapping Up
That’s it for today’s tutorial. I hope this article was helpful to you and you were able to change the WooCommerce checkout field order.
AIO Checkout plugin will not only help you change the field order, but it will also help you improve your store’s cart and checkout page, improving your conversions.
Ready to get started? Download the AIO Checkout plugin now.


