Are you looking to set up product prices by user roles in your WooCommerce store? I have got your back.
In this article, I will show you how to set up product prices by user roles in your WooCommerce store. I will explain each step in detail with screenshots to help you understand better. In addition, I will be using the Woosuite Wholesale to help us enable different product prices for various user groups.
WooCommerce doesn’t allow us to assign different prices according to the user roles. Many WooCommerce store owners (including you) cater to different types of customers like wholesalers and retailers. And, this feature is useful for them.
On This Page
Why Set Prices By User Roles In WooCommerce?
WooCommerce pricing by user roles helps ensure that all your store customers are happy and satisfied with your product prices. You offer goods at effective pricing to them, and they are happy with that. Besides this, there are many advantages of setting up prices by user roles in WooCommerce. Have a read below.
Discount and Rewards: The primary benefit of role-based pricing for WooCommerce is to offer discounts and rewards to your WooCommerce store users. You can set up different prices for wholesale users differing from retail users. Many eCommerce store owners use this to offer their loyal and existing customers different pricing. It helps them retain customers for a long time and maintain a good connection with them.
Build Customer Base: Who doesn’t want to build a high-paying customer base? Everyone wants to. Most eCommerce store owners get the majority of their sales and profits from their existing customers. Now, to build a huge customer database, you have to offer something valuable to keep them with you. You can offer them value by offering more discounts and rewards. And, you can easily do that by offering discounts based on their user roles.
Get New Customers: Offering more discounts on rewards based on their user roles can help you get new customers for your new WooCommerce store. This will attract more new customers and help you build a good relationship with them.
Increase Profits and Sales: Who doesn’t like discounts and rewards? Customers love discounts, and they take advantage of them immediately. Discounts insist them to buy in more quantities because it helps them save money. Hence, this will increase your sales and profits, which is good for you.
These are the benefits or why you should set up product prices by WooCommerce user roles. You can also get these benefits if you implement this feature in your WooCommerce store.
Read the following section to know how to set up product prices by user roles in WooCommerce.
How to Setup Product Prices By WooCommerce User Roles?
As mentioned above, throughout this tutorial, I will use the WooCommerce Wholesale Pricing plugin and the WooCommerce Wholesale Pro plugin. So, follow the given steps to set up product prices by WooCommerce user roles.
Step 1. Install and Activate the WooCommerce Wholesale Pricing Plugin
Note: You can skip this step if you have already installed and activated the WooCommerce Wholesale Pricing plugin.
To install the WooCommerce Wholesale Pricing plugin, we will need to install the Woosuite Core plugin and activate the license. So, we have created a Quick Start Guide for you to figure out how to install and activate the WooCommerce Wholesale Pricing plugin. So, read ahead and install the plugin now.
Step 2. Create User Roles
To assign different prices for varied user roles, you will need to create user roles. To do this we will use our wholesale pricing plugin to create new roles.
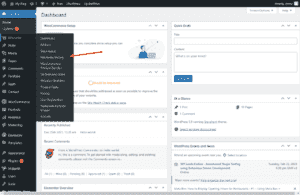
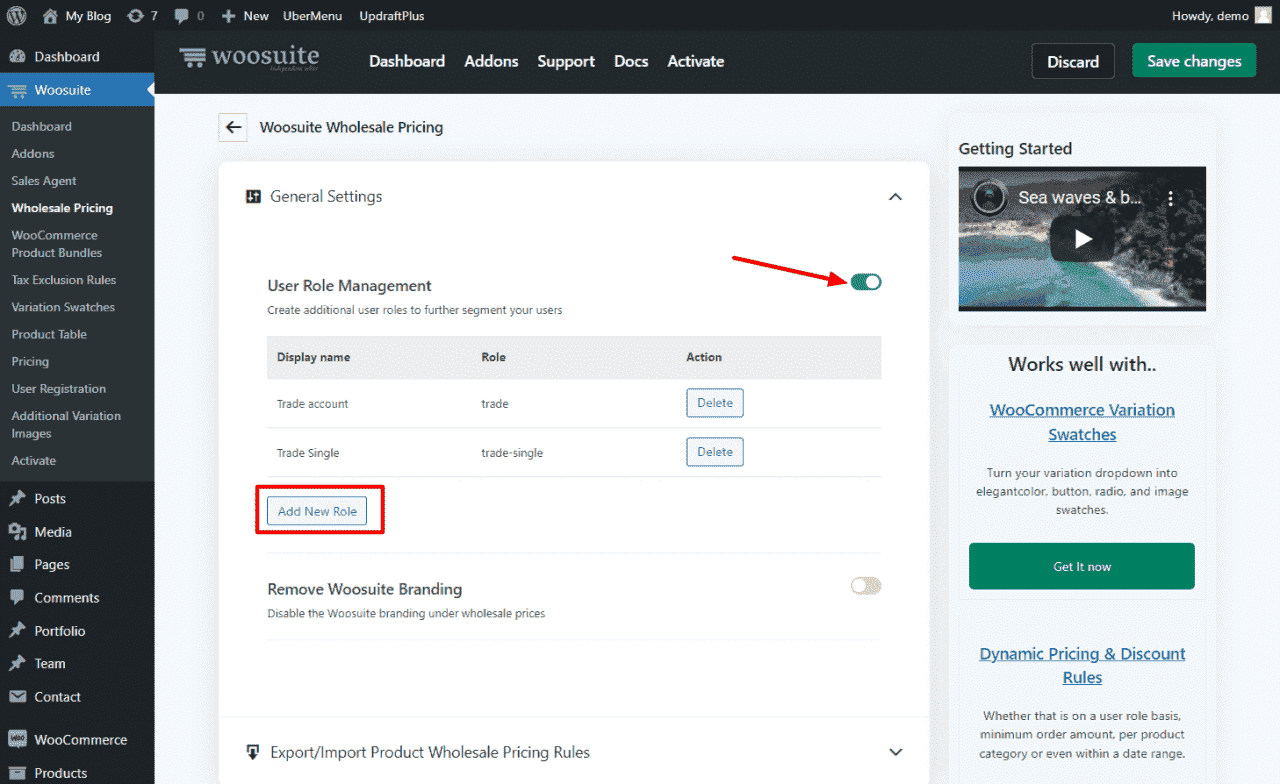
Navigate to Woosuite > Wholesale Pricing

Enable User Management and click “Add New Role”
You will then see a popup window where you can add the appropriate user role, in the screenshot below I added a wholesale tier 1 user role
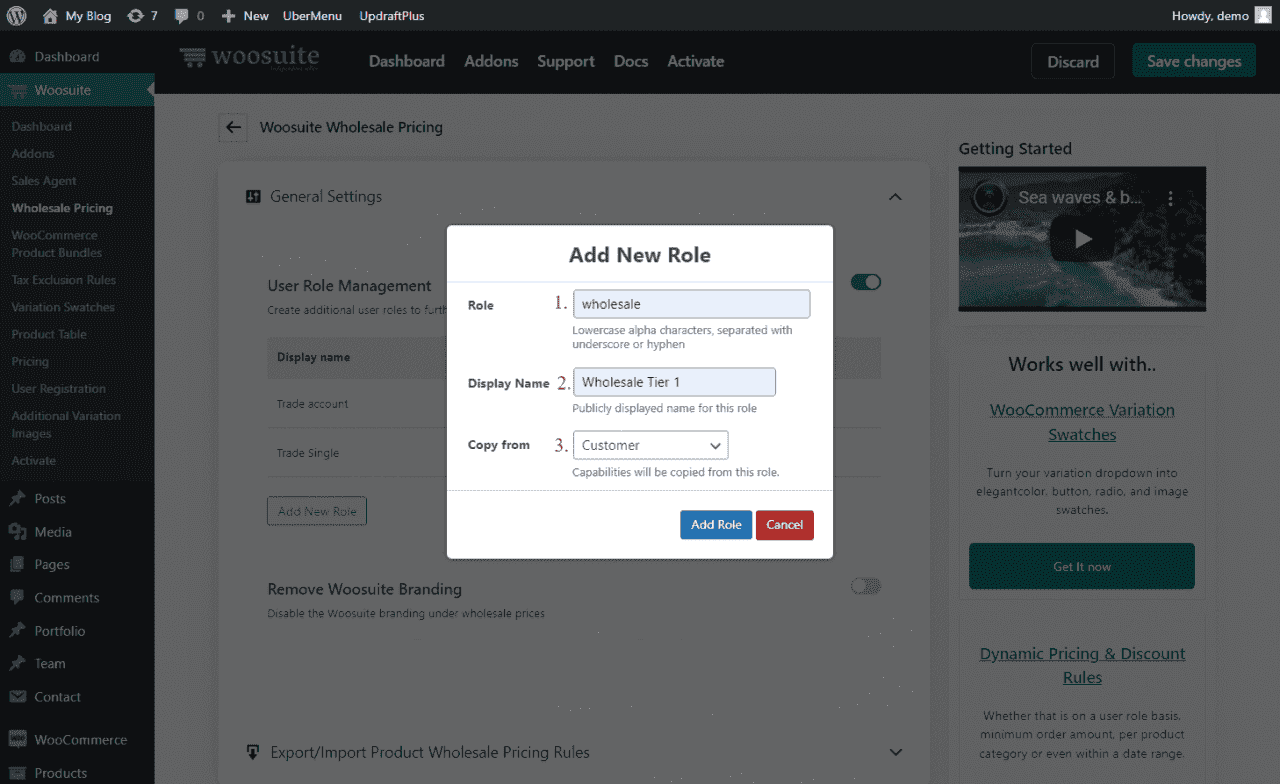
2.1 Role – add a unique role meta key in lowercase separated with underscore or hyphen
2.2 Display Name- this is the user role display name that will be seen on the frontend
2.3 Copy from- here you would choose which user role to copy the capabilities from, for example, ‘Customer’ the default customer role created by WooCommerce.
Step 3. Create Or Edit A Product
You will need to create or edit an existing product. I will suggest you create a new product. But, if you are making a new product, the process would be the same as we usually do: giving product name, description, setting price, shipping methods, product images, etc.
WordPress Dashboard > Products > Add New > Create A New Product
Note: If you have already created a product, you can skip this step and move further.
After that, select the Product Data option to Simple. After making the changes, click on the Update or Publish button.

Step 4. Setup Pricing
The next step is to set up the pricing for your new product. If you edit an existing product, you might have already set up the price earlier. You can skip this step and jump to the next one.
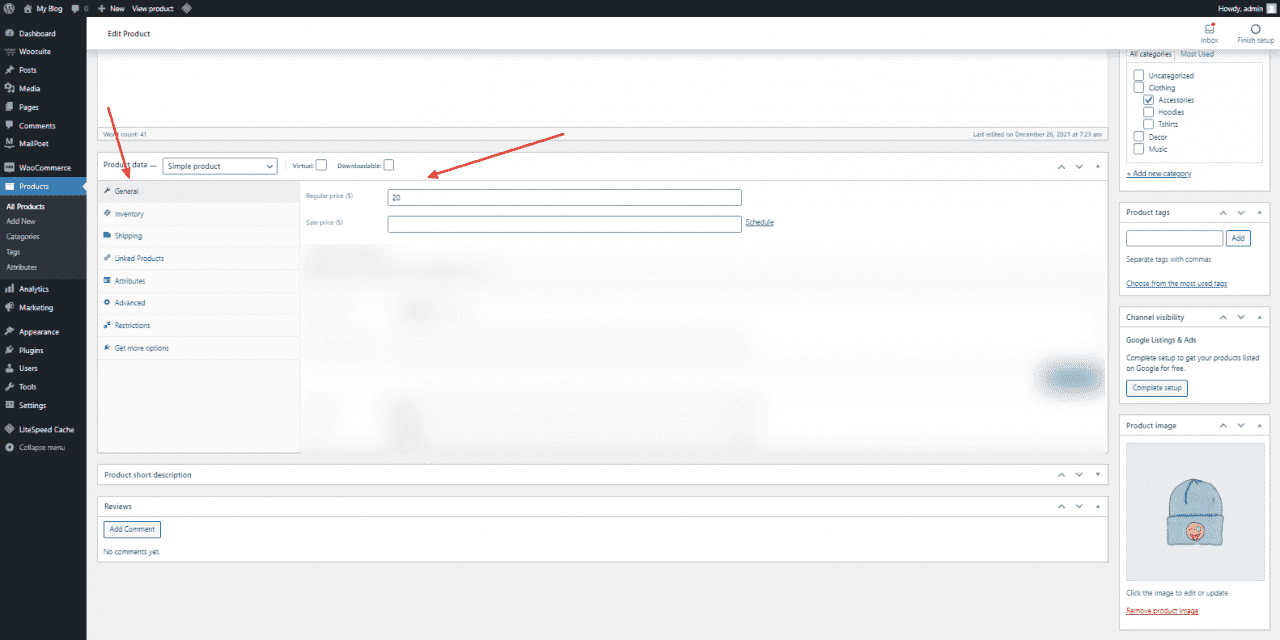
Again to assign a price to the product, edit the product and scroll down to the Product settings. In the Product settings, look for the General section. In the General section, look for the Regular and Sale pricing option. In the Regular pricing field, enter your price. You don’t need to set the Sale pricing.
Step 5. Setup Pricing Based On User Roles
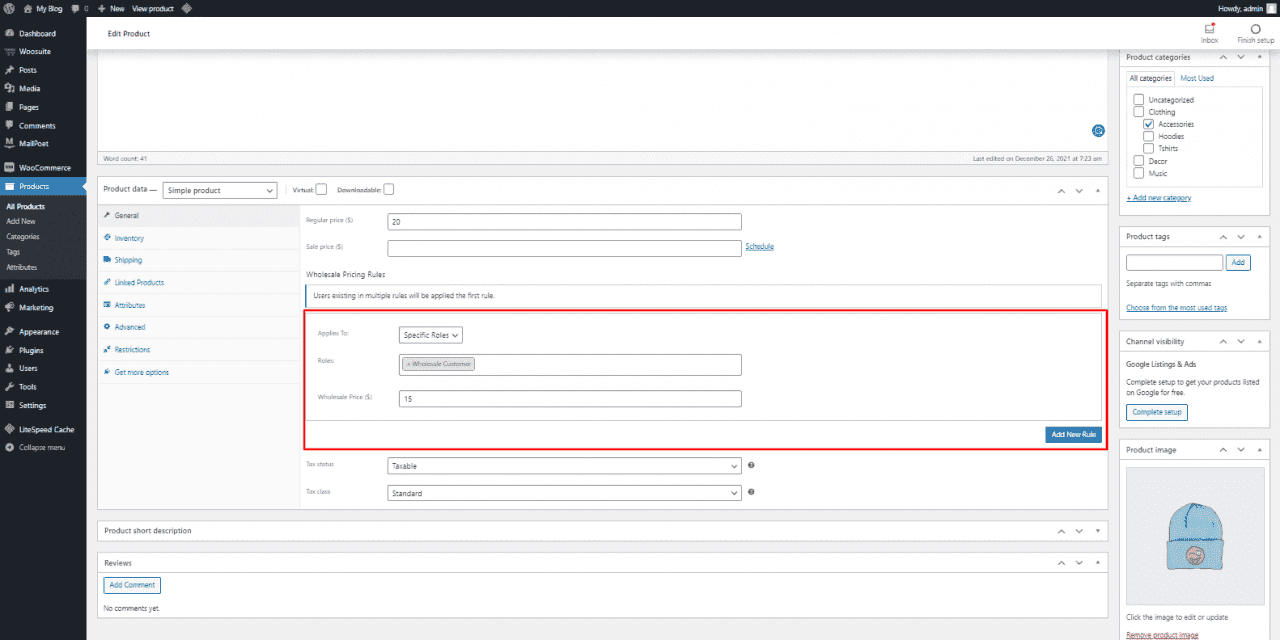
To create a new pricing rule, edit the product again, go to the Product settings and jump to the General settings. In the General Settings, you will find the Wholesale Pricing Rule section. Now, we will configure this setting.
4.1 Applies to: You will find three options – Everyone, Guests, and Specific Users. As we are creating different pricing for different customer roles, we will select the Specific User option. If you want this to apply to all users, then choose Everyone. As of now, we will choose the Specific Users option.
4.1.1 Roles: You will find all your WooCommerce user roles in the dropdown menu. It will show all the premade WooCommerce roles and the roles you have created. Now, select the user role to which you want to apply this rule.
4.2 Wholesale Price: In this field, enter the Wholesale Price you want to offer. Make sure it is different from other WooCommerce user roles.
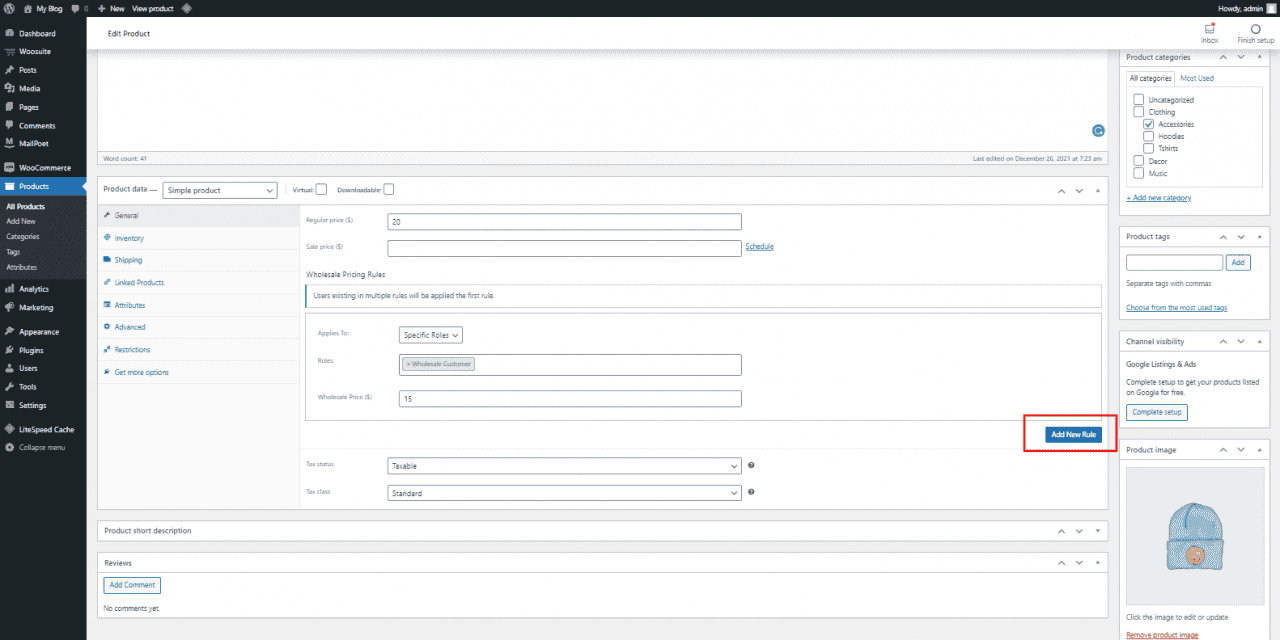
If you want to create a new rule for Retail Customer or Guest users, click on the Add New Rule button. After clicking on the Add New Rule button, you will get a new Wholesale Pricing Rule section below the previous section.
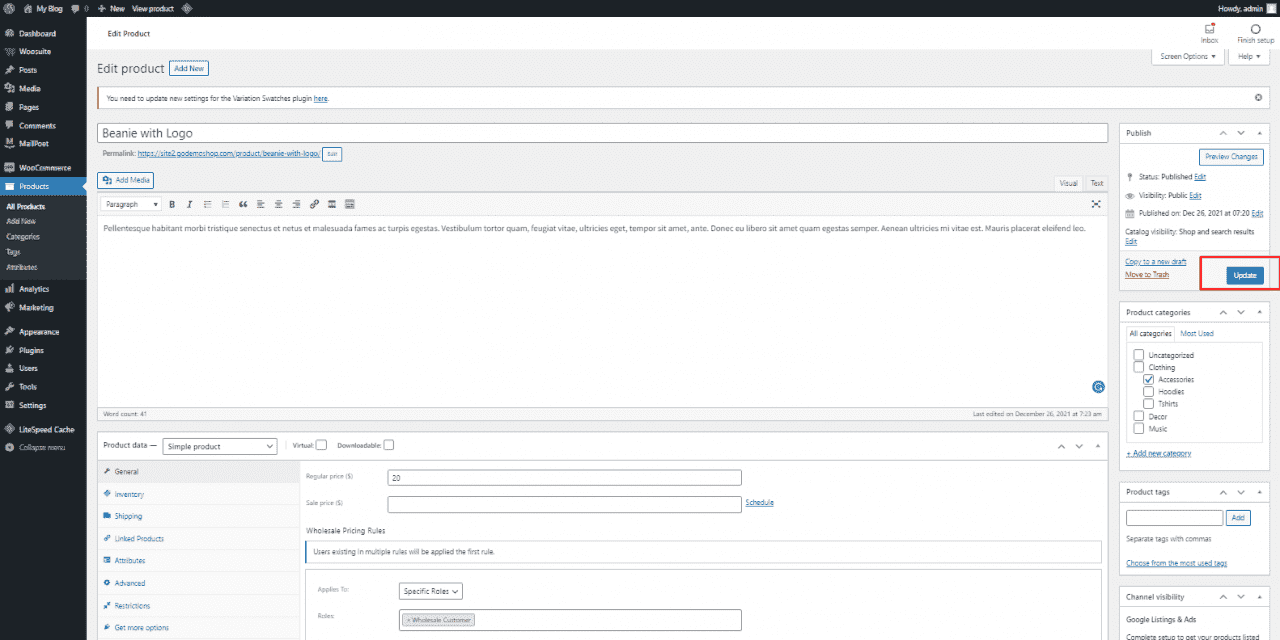
After making all the changes, click on the Update button for existing products or Publish button for new products.
Final Results
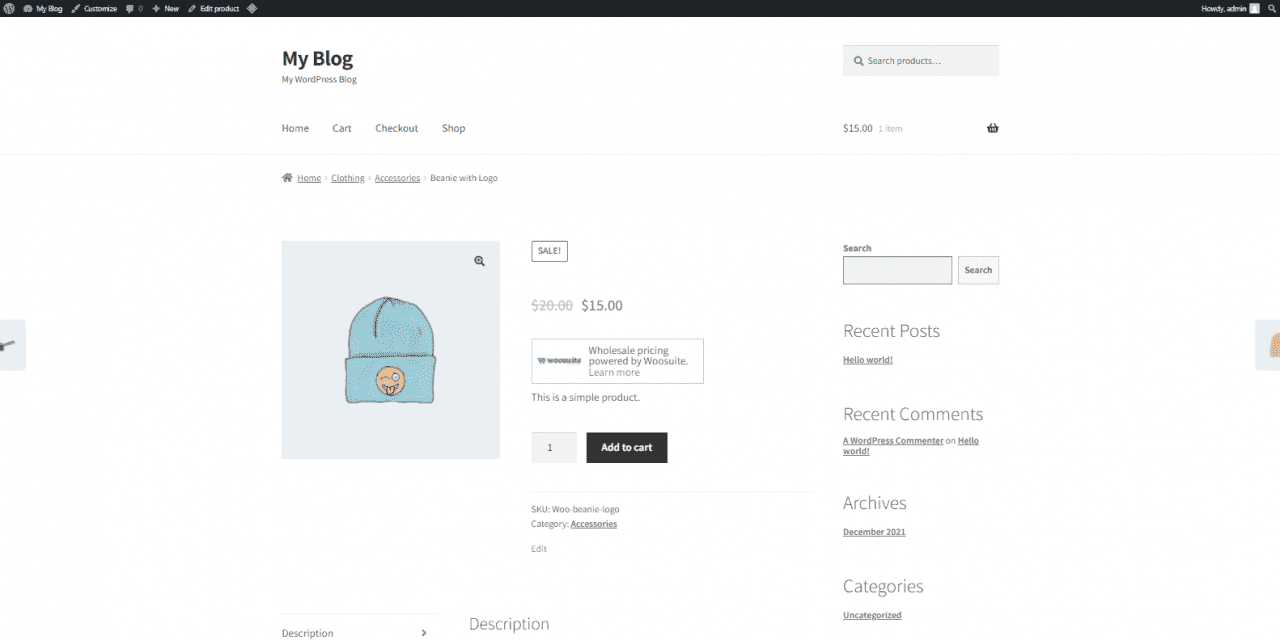
We made all the changes to the WooCommerce Wholesale Pricing plugin and the product. Now, it’s time to check whether all the settings are working perfectly. Currently, I’m at the product page. As you can see, the price has been cut down to $15 from $20. In addition, you will see the Sale icon on the top of the product. You will also see the Woosuite branding, but that can be disabled from the WooCommerce Wholesale Pricing Pro plugin settings.
Conclusion
This is how you can set up product prices for different WooCommerce user roles. In this guide, we looked at how you can assign different product prices to varied use roles. We looked at each step in detail with screenshots. We checked all the settings, and they are working fine. So, you can go ahead and use these settings.
We hope you will achieve the desired results. If you have any issues during the whole process or with the plugin, you can contact our support team. We will be happy to assist you.


