In this article, I will show you how to display product prices with and without VAT in WooCommerce. In addition, I will use the WooCommerce Tax Exemption Rule plugin to exclude specific users from your tax rule. At the end of this article, you will be able to display product prices with tax and without taxes.
So, continue reading ahead and figure out how to show product prices with and without VAT in WooCommerce.
On This Page
Why Would You Want to Display Product Prices With and Without VAT?
There could be multiple reasons for hiding VAT depending upon your requirements. Yet, there are two most common use cases for showing and not showing product prices with VAT.
Most WooCommerce store owners decide to go with this feature when catering to both types of customers. For instance, they are selling to wholesalers and retailers as well. In this case, they decide to hide VAT from Wholesale customers to attract them to buy more.
Another use case is when you want to show prices with VAT in only a few countries. As we know, not all countries have introduced VAT, except a few. So, there is no point in showing product prices with VAT to countries that haven’t implemented it yet, such as Australia, Canada, and many more. So, some store owners decided to hide taxes for this.
These are the most common uses of hiding and not hiding the display product prices with and without taxes.
How to Enable Taxes In WooCommerce?
The first and foremost step is to enable the taxes on your WooCommerce products. It might be possible that you have already enabled the taxes on your WooCommerce store. If yes, you can skip this step and jump to the final steps.
1. Head Over to Tax Settings
To enable the taxes on your WooCommerce store:
- Log in to your WooCommerce store with your login credentials.
- Find the WooCommerce option in your WordPress tool menu.
- In the WooCommerce submenu, look for the Settings option.
- Click on the Settings option to move further.

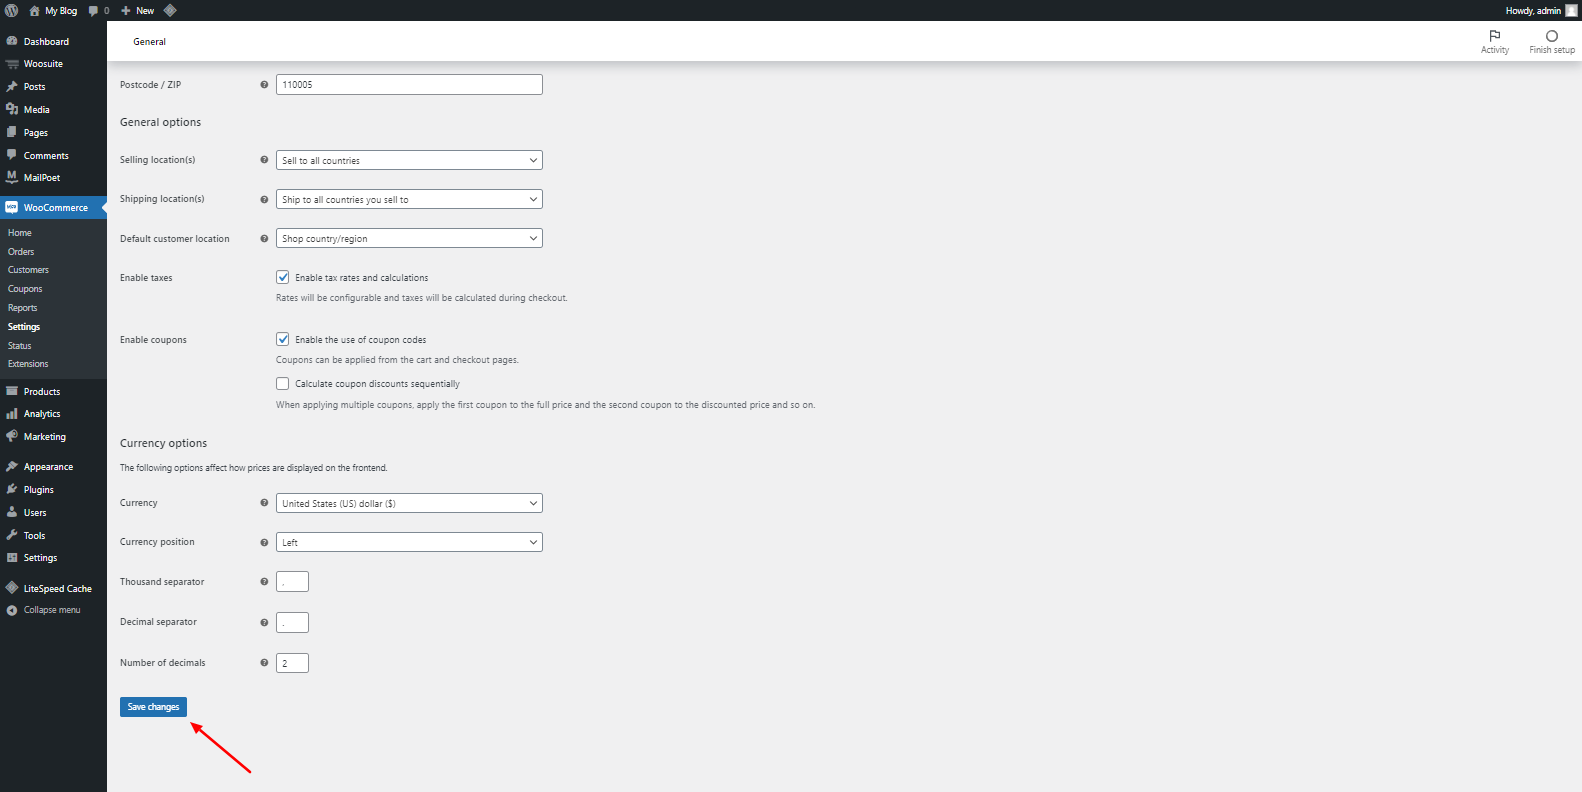
2. Enable Taxes
You will find different sections on the Settings page, such as General, Products, Tax, Shipping, and many more. Of all, you have to go to the General settings, and you will be here only, by default. Scroll down, and look for the Enable Taxes option. Tick mark the Enable Taxes checkbox option to enable the taxes on your WooCommerce store.

3. Save Taxes
After enabling the Taxes, click on the Save Changes button to save all the settings.
Now, we have enabled the taxes on our WooCommerce store. In the next step, we will figure out how to create tax rates in WooCommerce. Here is the twist, currently the taxes will be applied to all the users. We will now learn to exempt the taxes to a few users or countries only.
4. Configure Tax Rates
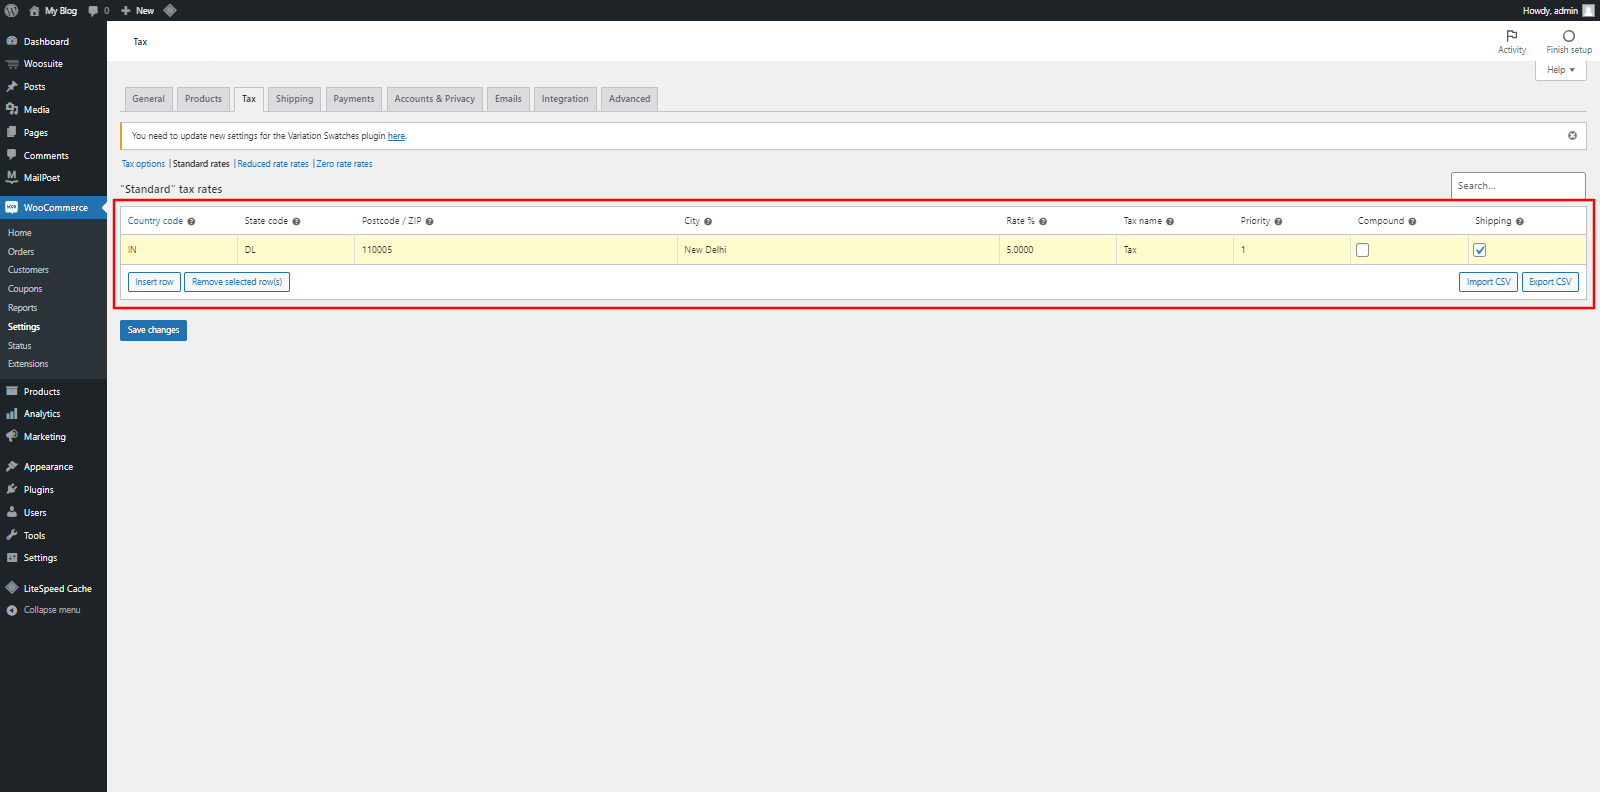
In this step, we will learn to create tax rates in WooCommerce. To create tax rates in WooCommerce, head over to your Woocommerce setting and jump to the Tax section. You will see three options – Standard Rates, Reduced Rate Rates, and Zero Rate Rates.

Now, click on the Standard Rate to create a new tax rate for your required country. It will send you to a new web page with some additional settings. We will now configure each setting individually.
Country Code: In this field, enter the Country Code for which you want to create this tax rate. For instance, if you want to make a tax rate for the USA, enter the US in the Country Code field.
State Code: Enter the two-digit code of the state for which you want to create this tax rate in the US. Else, leave this field blank if you want to apply this tax to all states in the USA.
Postal/Zip Code: In this field, enter the postal or zip code for which you are creating this tax rate. For example, if you are creating this rule for Columbia in the USA, enter a Colombian state’s postal or zip code. Leave this field blank if you want to apply this rule to all Columbian states.
City: Enter the city code in this field. You have to add based on your selected country and state.
Rate (%): In this field, enter the tax rate you want to apply to the specific country you chose.
After making all the required changes, click on the Save Changes button to save your settings.
We have now enabled the tax settings. Besides, we learned how to create tax rates. In the next section, we will learn to show product prices with and without VAT. So, read the next section to check that out.
5. Choose how to display Prices in your Shop
Once you have your tax rates set up, you can now choose how to display the VAT on the shop and checkout page.

How to Exclude Specific Products, Users, and Countries from VAT In WooCommerce?
As mentioned above, I will use the Tax Exemption Rules plugin. The tax exemption rule plugin will help you exclude specific user roles from paying taxes. It means when you exclude a specific user role from paying taxes, they won’t see the taxes in the total cart amount. As a result, the taxes are already hidden from the users. I will explain each step in detail with screenshots. So, follow the given steps to exclude specific user groups from paying taxes. As a result, the taxes will be hidden from specific customers.
Step 1. Install and Activate the Tax Exemption Rules
Note: You can skip this step if you have already installed and activated the Tax Exemption Rules plugin.
To install the Tax Exemption Rules plugin, we need to install the Woosuite Core plugin and activate the license. So, we have created a Quick Start Guide for you to figure out how to install and activate the Tax Exemption Rules plugin.
So, read ahead and install the plugin now.
Step 2. Show Product Prices With and Without VAT
My Use Case: Let’s say I want to exclude by VAT registered Wholesale from paying VAT but still collect VAT from retail customers. Your use case could be different, but the steps would be the same.
To create tax exempt rules:
- Navigate to Woosuite menu.
- Under the Woosuite tool menu, select Tax Exemption Rules.
- Click ‘Add Restriction’
- In the short description create your rule name(for internal reference).
- Select the user role for the condition
- Add another condition with the AND modifier then select the Country this rule applies to.
- Save changes.

Now, we are done creating the tax exemption rules. After this, Wholesale users from the UK will be excluded from paying VAT. While retail users from the UK will still pay VAT on their orders.
Conclusion
This is how you can display product prices with and without VAT in WooCommerce. In this tutorial, we looked at how to show product prices with and without VAT in WooCommerce to selected customers. We looked at each step in detail with images to make the process easier. We hope you achieved the desired results without any issues.
If you have any issues during the whole process or with the plugin, you can contact our support team. We will be happy to assist you.


