If you are looking for a way to allow customers to select multiple variations in your WooCommerce store, you are at the right place!
The default shop page of WooCommerce doesn’t allow you to show the product variations therefore, the users have to go to the product page to select the product variations, and they can select one variation at a time.
To overcome this issue and help you improve the customer’s shopping experience and get you more sales, I’ll show you how to allow customers to select multiple variations from the shop page using the WooCommerce Product Table plugin.
Here’s a quick sneak peek of the final results we’ll be accomplishing today.
You can also achieve a similar setup on the product page see: how to create a WooCommerce variations table.
Before diving into the tutorial, let’s see why you should allow customers to select multiple variations from the shop page.
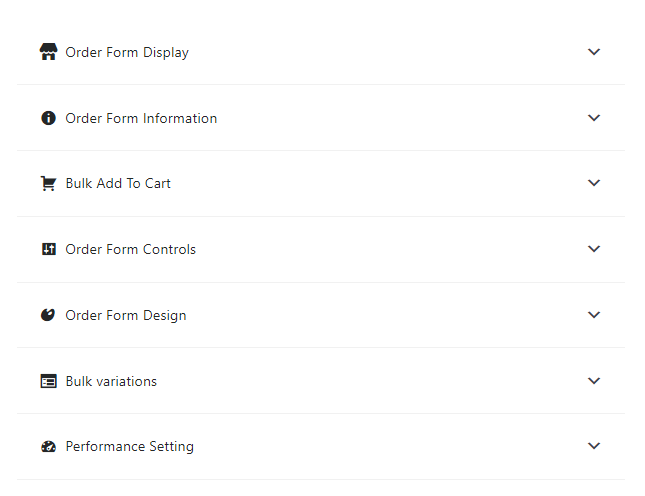
On This Page
Why you Should Allow the Customers to Select Multiple Variations from the Shop Page?
Usually, when the wholesale or regular customers come to your site and want to buy multiple variations of a product in bulk, they have to go to the product page, select one variation first add it to the cart and then they’ll select the other variation and add it to the cart.
They’ll repeat the process if they want to buy some other product.
It can be a frustrating and time-consuming process for them, and they can leave your site and go to some other store where they won’t face such bad shopping experiences.
This can cause you to lose your potential customers and sales.
That’s where the multiple or bulk variations grid comes in handy. You can display the variations grid on the shop page and allow the customers to select multiple variations of different products from a single page.
And they can easily add all of the selected variations to their cart. This will help you increase their shopping experience and provide them value so they can turn into your permanent and regular customers.
Now you know the reason to use the bulk variations table, let’s dive in and see how you can create it.
How to Allow Customers to Select Multiple Variations From the WooCommerce Shop Page?
Here’s the step-by-step process to allow customers to select multiple product variations from the WooCommerce shop page that will increase the customer’s buying experience and your sales.
I’ll be using the WooCommerce Product Table plugin to create the multiple variations grid. This plugin will also help you to customize the add to cart button, display products in a list, and much more.
Follow the following steps to create multiple or bulk variations grid.
1. Install and Activate the WooCommerce Product Table Plugin
Note: You can skip this step if you have already installed and activated the WooCommerce Product Table plugin.
To install the WooCommerce Product Table plugin, you will need to install the Woosuite Core plugin and activate it with the help of a license key. We have created a Quick Start Guide for you to figure out how to install and activate the WooCommerce Product Table plugin.
2. Create a New Product Table
Once you have installed and activated the plugin, we must create a product table displaying all the product variations in a grid. So, follow the following steps:
1. Add a New Table
Navigate to Woosuite » Product Table from your WordPress dashboard and click on the Add New Table button.

Once you click it, you’ll see a screen where you can create and control the different table settings.
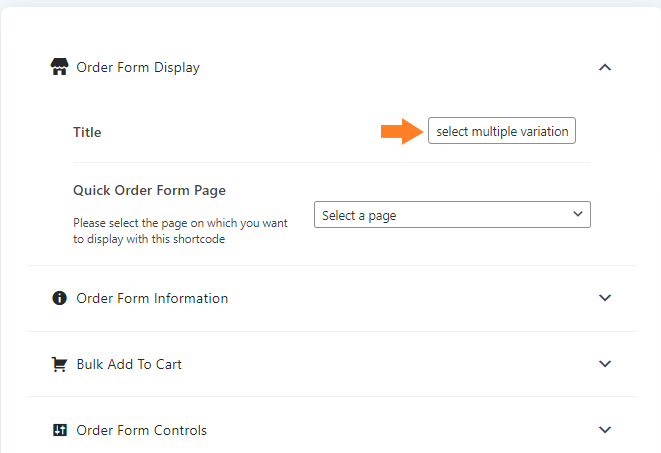
2. Order Form Display
Give an internal name to the table. You should use a unique name as It will be helpful if you work with multiple product tables at a time.
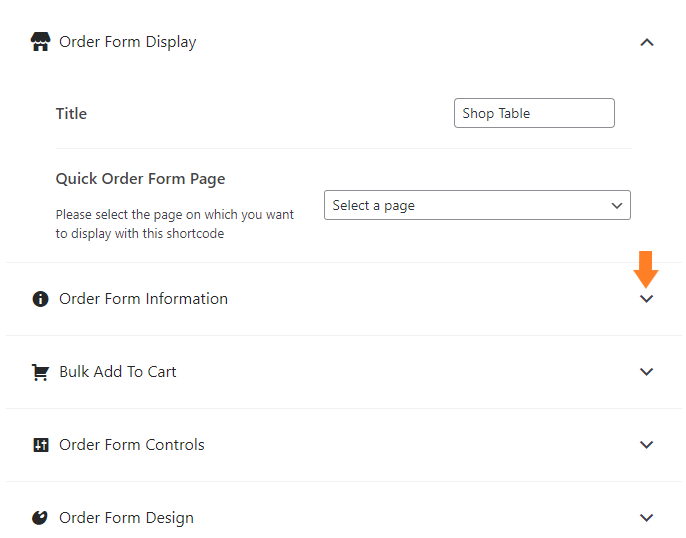
3. Order Form Information
Now expand the Order Form Information by clicking on the (▾)
Now, add an inner column to the table. Just drag the inner column from the Available columns section and drop it in the selected columns section to add the inner column.

4. Change the Column Name
Now we need to change the column name and set the inner columns to the table.
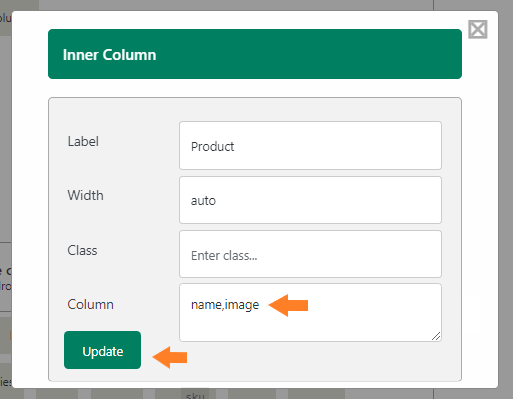
4.1. To change the column name, click on the pencil icon on the column.

4.2. Once you click it, you’ll see a popup from where you can edit the column label and add inner columns. I have changed the column label to “Product”. You can change it as you want.
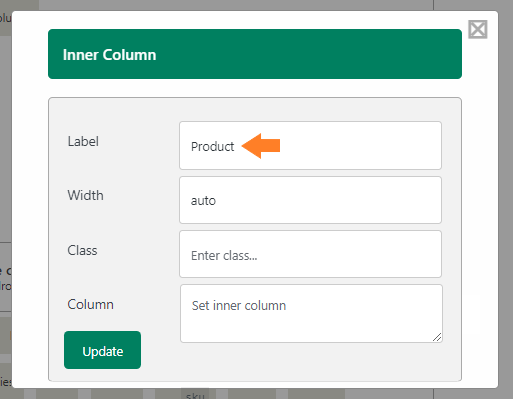
4.3. Now set the inner columns in the “Columns” field. You can separate the columns by a comma. I have set the columns as “name and image”. You can set it according to your store and choice. Once you set the columns, click the “Update” button below to save the column settings.
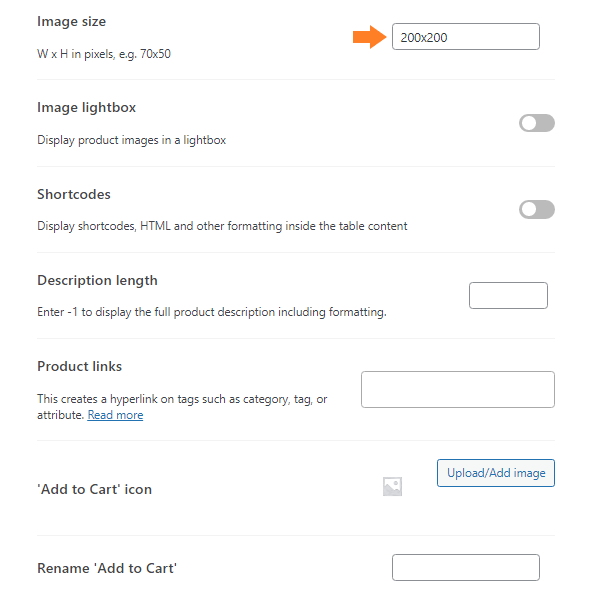
You can also adjust the other settings like the image size and description length. I have changed the image size to “200*200” and I have kept the rest of the settings as default.
3. Enable the Bulk Variations
Now, expand the Bulk Variations tab by clicking on the (▾)

1. Enable the Bulk Variations
Once you open the Bulk Variations tab, you’ll see a toggle button from where you can enable the variations grid instead of the default table.
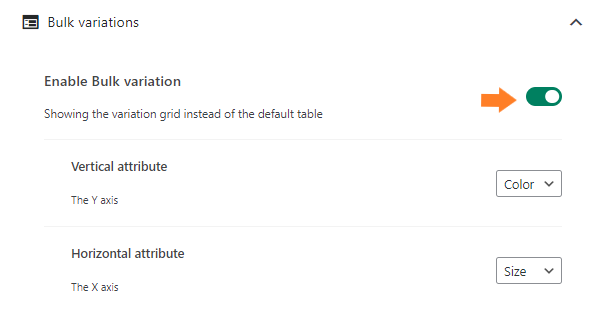
2. Select Vertical and Horizontal Attributes
Once you enable the bulk variations grid, you’ll see 2 new fields below it. From these fields, you need to select the attributes. You can select vertical attribute and horizontal attribute.
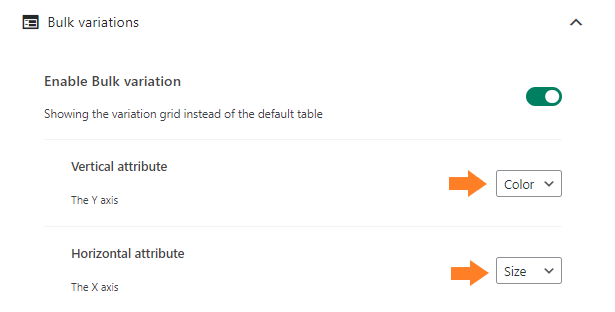
I have selected “Color” as the Vertical Attribute and “Size” as the Horizontal Attribute. You might have created different attributes so there’s no need to worry, just select the attributes you have.
4. Save the Changes
Once all the settings are done, now click on the green “Save Changes” button at the top right corner of your screen to save all the settings.

5. Set WooSuite Product Table As Default Shop/Category Page Layout
To set the WooSuite product table as the default shop page layout, go back to the General Settings of the plugin by clicking on the back arrow at the top.

Now select the table you just created, from the Shop Pages and Product Category dropdown and click on the Save Changes button to save the changes.

6. Final Results
Now let’s visit the shop page of our store and as you can see from the below screenshot, all the product variations are being displayed in a gird. Now users can select multiple variations at a time and add them to their cart easily.

Wrapping Up
Now you know the method to allow the customers to select multiple variations from the shop page.
By following this method, you can boost the visibility of all the product variations and make the buying experience more enjoyable for clients. Customers will be able to view all of your product variations in a grid without navigating through a single product page.
If you have any queries, you can ask them in the comments or contact our customer support. Our dedicated customer support team typically replies within 48 hours.
To get started, download the WooCommerce Product Table plugin today and build something great at your store!


