Do you want to enable the admin approval for WooCommerce user registrations? But don’t know how to do it? I have got you covered here.
In this tutorial, I’ll show you how to enable admin approval for WooCommerce user registrations. In this way, whenever a user will submit the registration form on your site, they’ll have to wait to login into their account until you approve them.
I’ll demonstrate this in a few simple steps with the help of screenshots so that you can understand the process better.
On This Page
Why do you need to approve or reject the User Registration forms?
WooCommerce’s native registration form doesn’t allow you to manually approve the user’s request and add custom fields in the registration form.
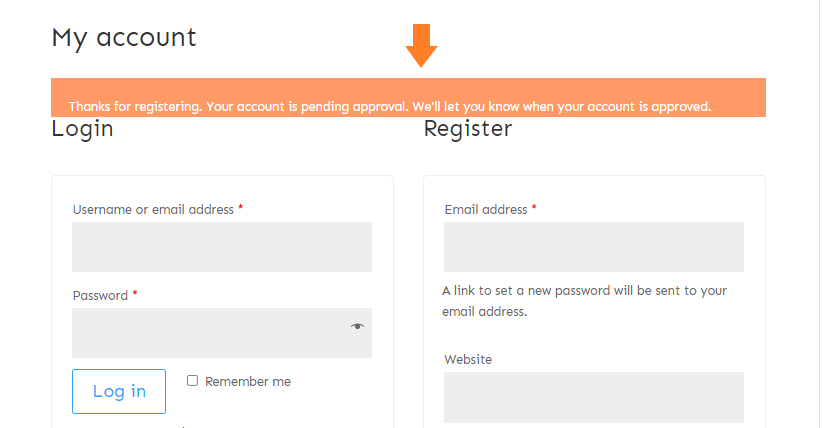
When the user registers, they’ll automatically get approved, which means any user can register on your WooCommerce store.
So to keep only qualified users on your site, you might want to approve the users manually. So, they won’t be able to login until they get approval from you(admin).
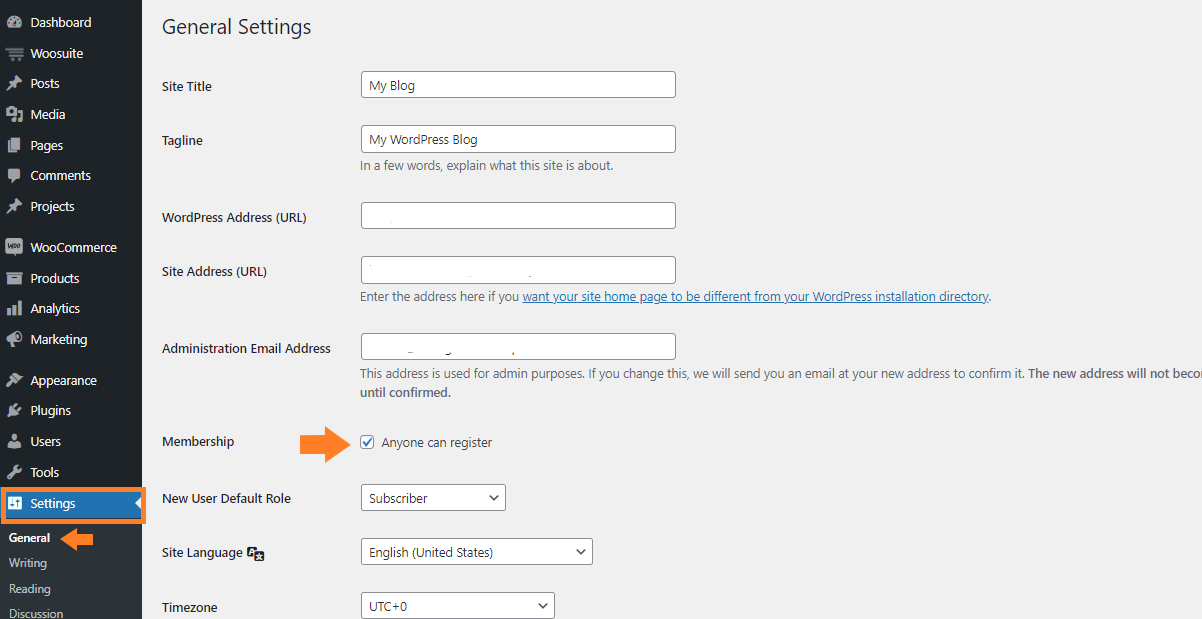
Before diving into the actual tutorial, make sure that you have checked the ‘Anyone can register‘ settings by navigating to the Settings » General.
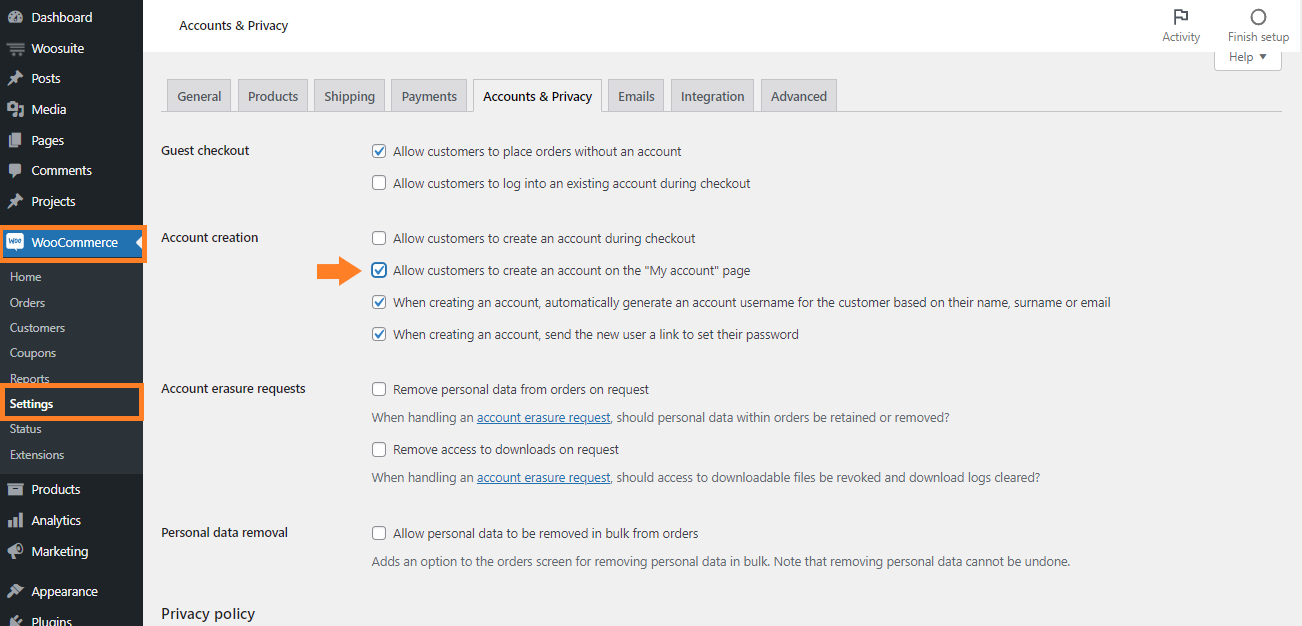
Also, if you aren’t using a custom registration page, you need to ensure that you have checked the Allow customers to create an account on the “My Account” page by navigating to the WooCommerce » Settings » Accounts & Privacy.
Now Let’s dive in to see how you can enable admin approval and create custom fields for user registration.
How to enable admin approval for user registrations?
To enable the admin approval for user registrations and create custom registration form fields. I’ll be using the Woosuite User Registration plugin for this tutorial.
1. Install and activate the Woosuite User Registration Plugin for WooCommerce
Note: You can skip this step if you have already installed and activated the WooCommerce User Registration plugin.
To install the WooCommerce User Registration plugin, you will need to install the Woosuite Core plugin and activate it with the help of a license key. We have created a Quick Start Guide for you to figure out how to install and activate the WooCommerce User Registration plugin.
2. Enable Admin Approval
Follow the below steps to enable the admin approval for new users.
1. In WordPress Dashboard
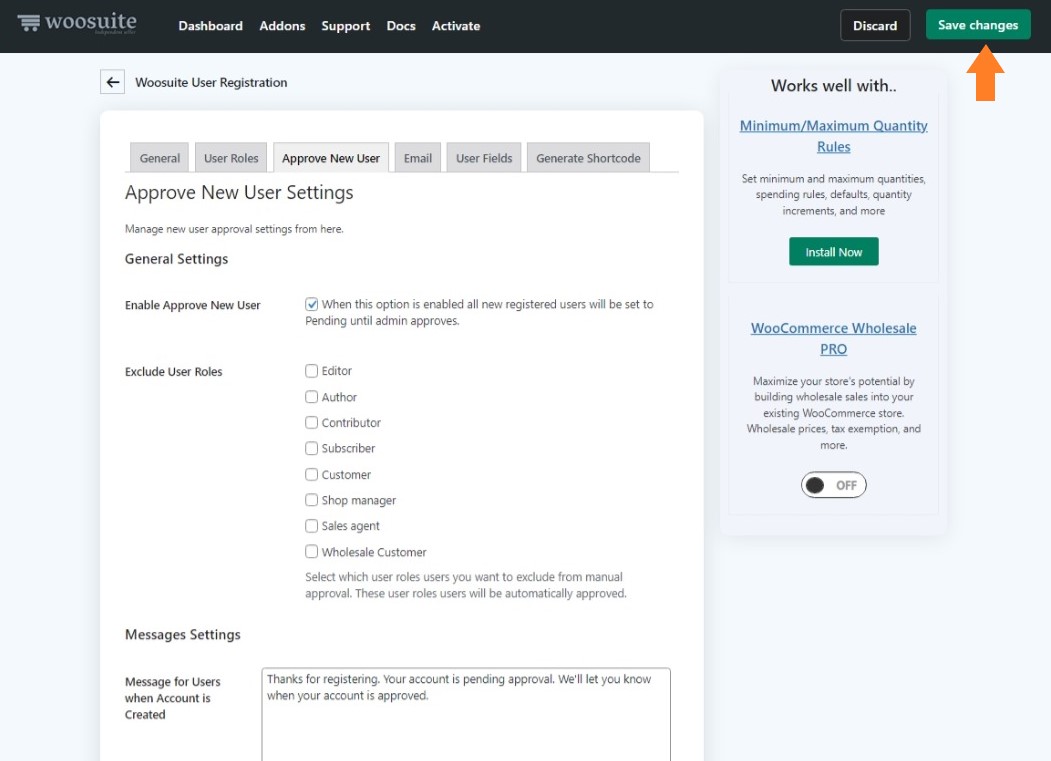
Navigate to Woosuite » User Registration and click on it.

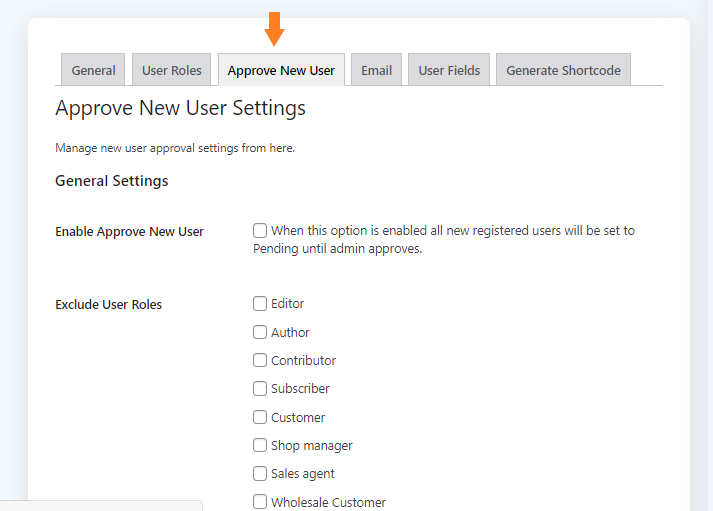
2. Click on Approve New Users
Now click on the Approve New Users tab and you’ll see the settings from where you can enable the admin approval for new users.
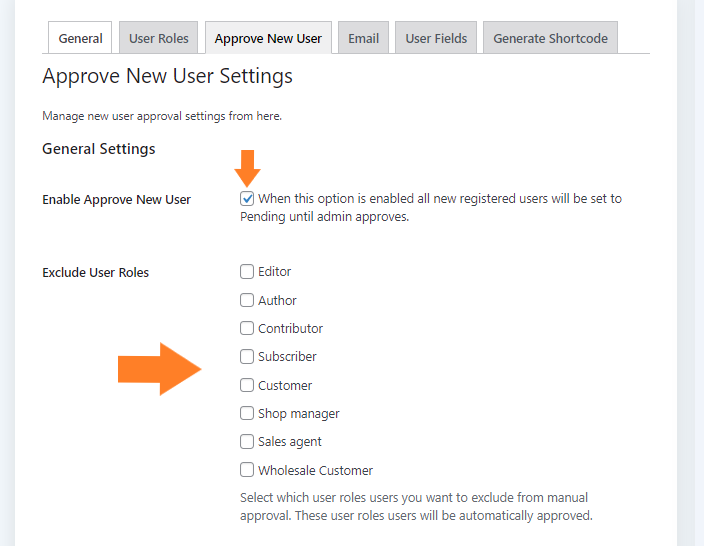
3. Click the Checkbox
Click the Checkbox to enable the admin approval for new users. You can select the user roles you want to exclude from manual approval. For this tutorial, I am keeping it very simple.
4. Scroll to the Messages Section
Now scroll down to the Messages Section. From here you can set the custom messages for users when they register/login to their account. You can display a custom notification message when a user is approved or disapproved.

5. Click on the Save Changes
Now click on the Save Changes to save the changes.
3. Send Notifications for Account Approval and Rejection
Now let’s see how you can send email notifications to admin and users when a new user registers. To set up the email notifications, click on the Emails tab.

1. Admin Notifications:
To enable the admin notifications when a user submits a registration form, follow the following steps.
- Add the Admin Email Address to receive the notifications and click on the checkbox to enable the admin notifications.

You can create and send custom emails when:
1.1. A new user registers
1.2. A user needs approval
2. User Notifications:
You can enable the Welcome Emails for users by clicking on the Checkbox. To do so follow the following steps.
1. Scroll down to the page till you see the Enable Welcome Emails.
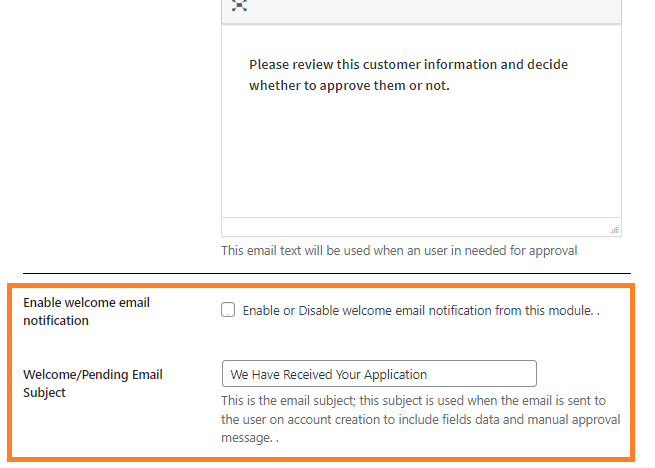
2. Click on the checkbox to enable the welcome email notifications for users.

3. Create custom emails for users. You can create three different emails for three different instances.
3.1. A user submits the form: Here you can create the welcome emails for users. This email will also act as the pending approval email notification. Enter the email subject and email body.

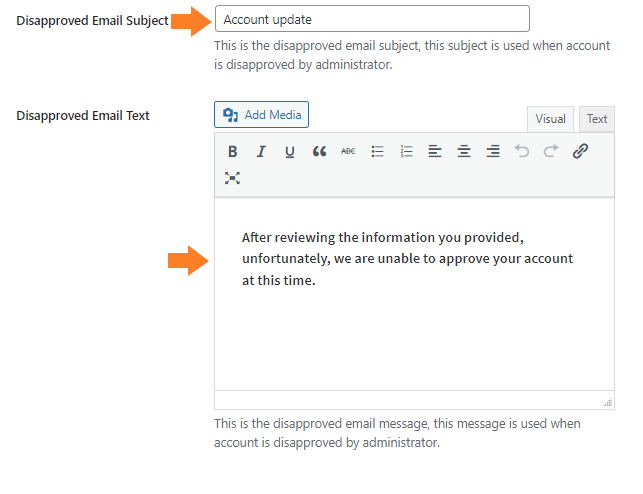
3.2. The account is approved by the administrator: Below the welcome email, you can set the custom email to notify the users if their account is approved. Users will receive this email when you(admin) will approve the account.

3.3. The account is disapproved by the administrator: Below the approved email, you can set the custom emails to notify the users that their account is disapproved. Users will receive this email when you(admin) will disapprove of the user’s account.
4. Create Custom Fields for User Registration
To create custom fields in the user registration form, follow the following steps.
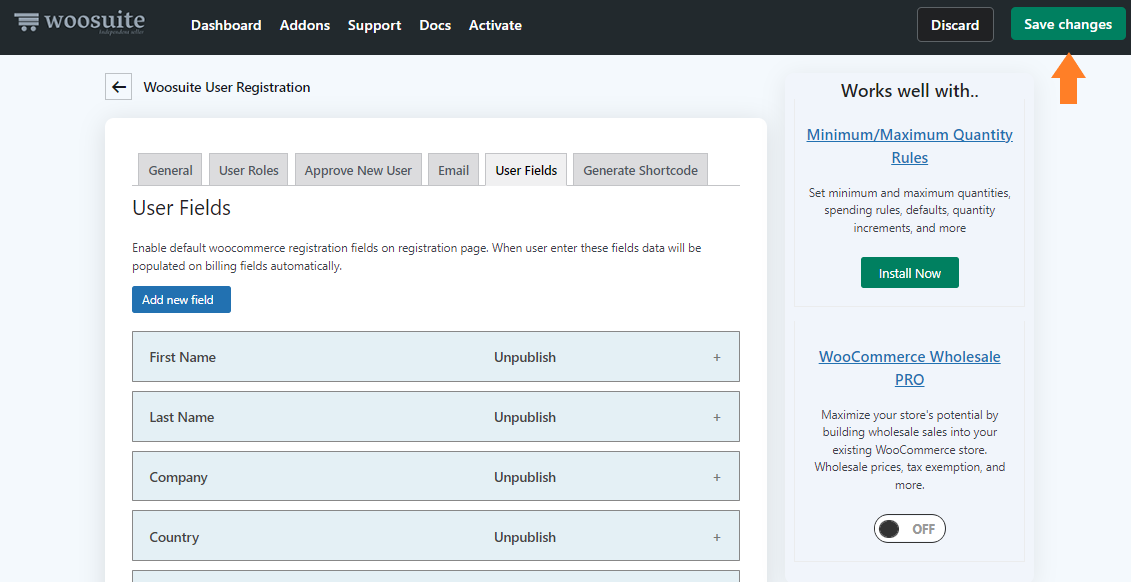
1. Click on the User Fields.
Click on the User Fields tab.

2. Click on the Add New Field button
Click on the Add New Field button to add a new field. The field will be added below the existing fields.

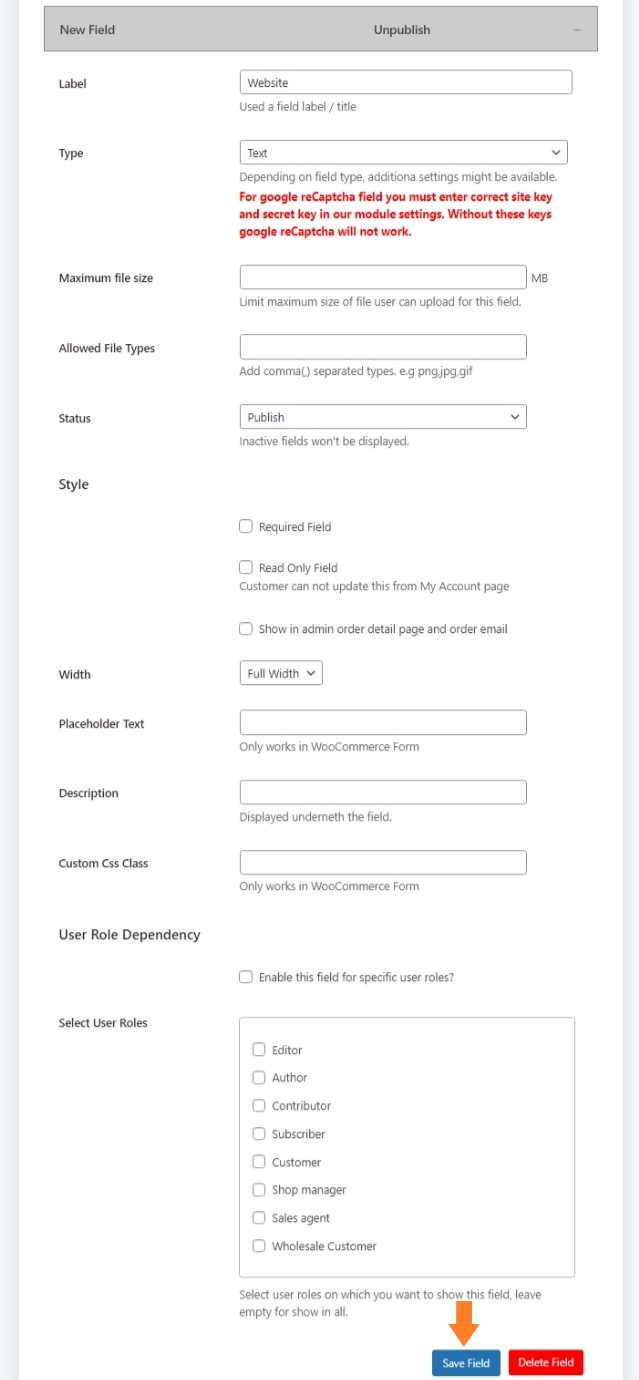
3. Click on the field
Now click on the field to edit the field settings.
`

4. Enter the field name
Enter the field name or label.
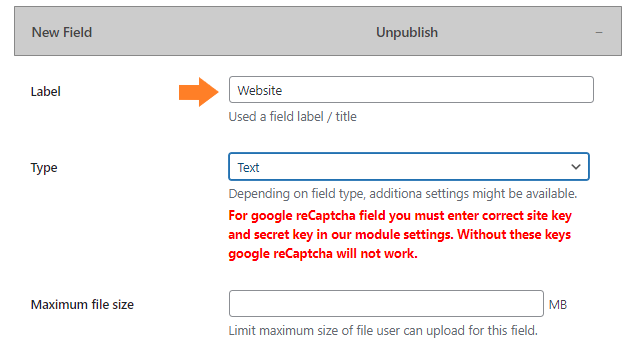
5. Select the field type
Select the field type from the dropdown. I am selecting the type as ‘Text’.

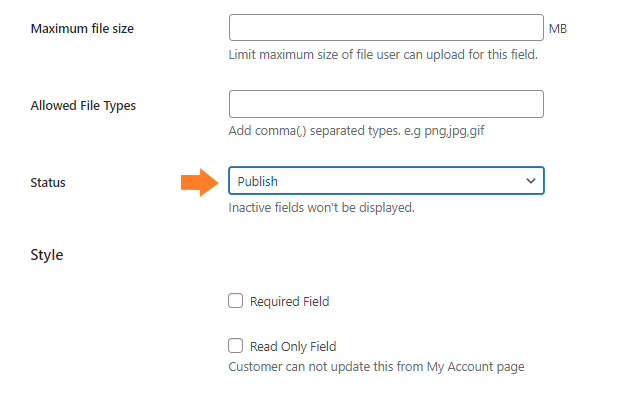
6. Publish the field
Now select ‘Publish’ from the dropdown to publish the field.
7. Click on the Save Field button
Now click on the Save Field button to save the field.
8. Click on the Save Changes button above
Finally, click on the Save Changes button to save the settings.
Note: By default following WooCommerce registration fields will be added by the plugin but all of the fields are unpublished.
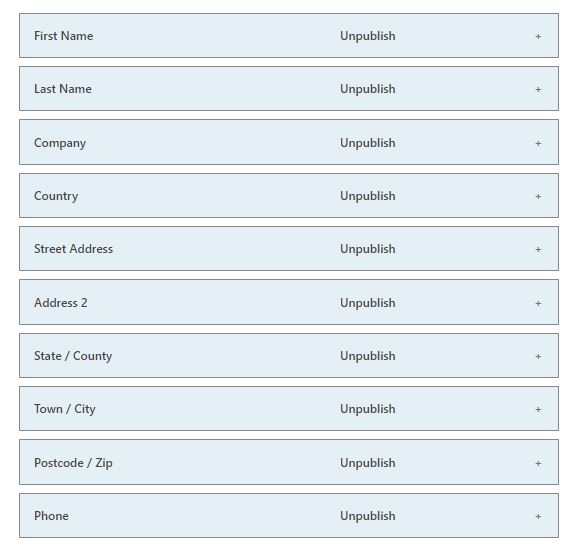
To publish any of these fields, click on the field to expand it and then change its status from Unpublished to Publish and save the field by clicking on the Save Field button.

5. Final Results
Now let’s test the field we just added to the registration form.
To check it, you need to log out from your site and go to your site’s registration page. You’ll be able to see the field you added in the user registration form.

Now when a user will submit the form, he or she will also see the welcome message that you have set.
Approve New Users
Now if you(admin) want to approve the new users, by following the below steps.
1. In WordPress Dashboard
Navigate to the Users » All Users from the WordPress dashboard and you’ll see a new user with a pending status.
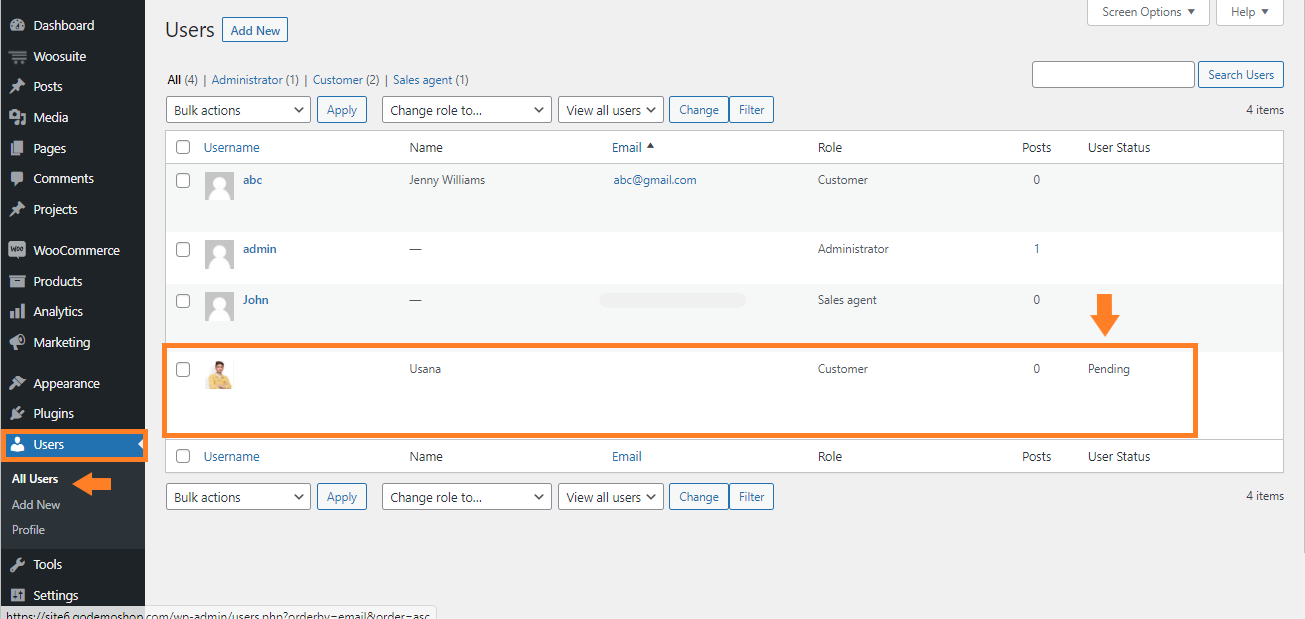
2. Click on the Approve button
To approve it, hover the mouse on the user account and you’ll see some options, simply click on the Approve to approve the user.

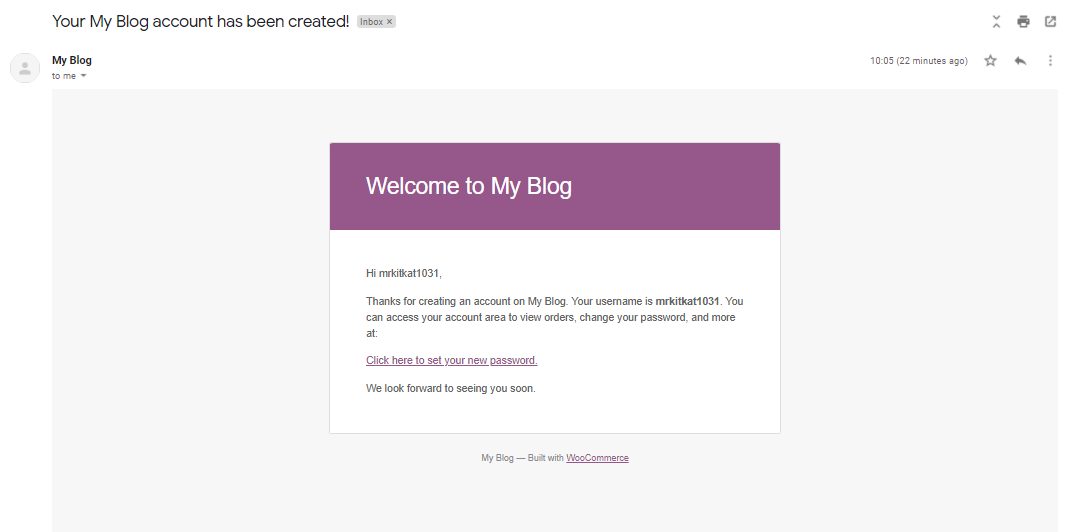
Once you approve the account, the user will receive the email of account approval.
6. Generate Shortcode (Optional)
You can generate the shortcode of the form and use it anywhere on the site.
To create a short code, follow the steps given below.
1. Click on the Generate Shortcode
Click on the Generate Shortcode tab.
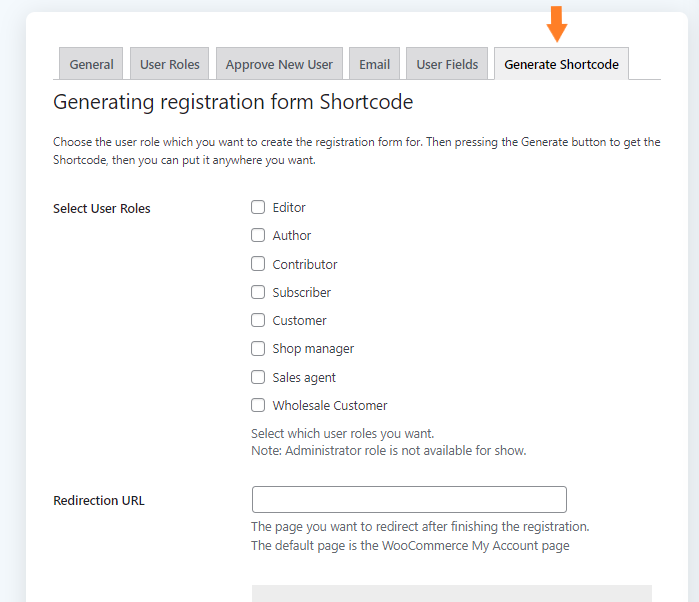
2. Select the user roles
Now select the user roles, if you want, you can add a redirection URL to redirect the users after completing the registration. Once done, click on the Generate Shortcode button and a shortcode will be generated. Now you can copy it and use it anywhere on the site.

3. Click on the Save Changes button
Now click on the Save Changes button to save the changes.

Wrapping Up
Now you know how to enable admin approval for user registrations and add custom fields in the registration form. If you have any queries, you can ask them in the comments or contact our customer support. Our dedicated customer support team typically replies within 48 hours.
Now it’s over to you, to get started download WooCommerce User Registration today!


