In today’s article, I’ll walk you through the step-by-step process of creating a lookbook in WooCommerce to help show your customers what the product will look like in real life setting.
I’ll be using the WooCommerce Product Bundle plugin to create our lookbook. This plugin will also help you create different types of product bundles.
Lookbooks are very helpful in convincing customers to buy the products by allowing them to visualize how they could use the product.
For example, If you sell office furniture, it is a great idea to help customers visualize your products by creating a lookbook. Customers will be encouraged to buy the product by actually seeing the products in action in real life.
Note: You can use the WooCommerce lookbook for any product that customers want in action, e.g., clothing stores, where customers would love to see how the shirt or trousers will look upon wearing before purchasing it.
For this tutorial, I’ll be taking the example of office furniture. Here are the final results we’ll be achieving today.

Without any further ado, let’s jump straight into the tutorial.
On This Page
1. Install and Activate the WooCommerce Product Bundle Plugin
Note: You can skip this step if you have already installed and activated the WooCommerce Product Bundle plugin.
To install the WooCommerce Product Bundle plugin, you will need to install the Woosuite Core plugin and activate it with the help of a license key. We have created a Quick Start Guide for you to figure out how to install and activate the WooCommerce Product Bundle plugin.
2. Add a New Product to WooCommerce
Once you have installed and activated the plugin, now is the time to create your first WooCommerce lookbook.
To create it, you need to create a product bundle. This product bundle will work as a WooCommerce lookbook, and customers can visualize your products.
So to add a product, follow the following steps.
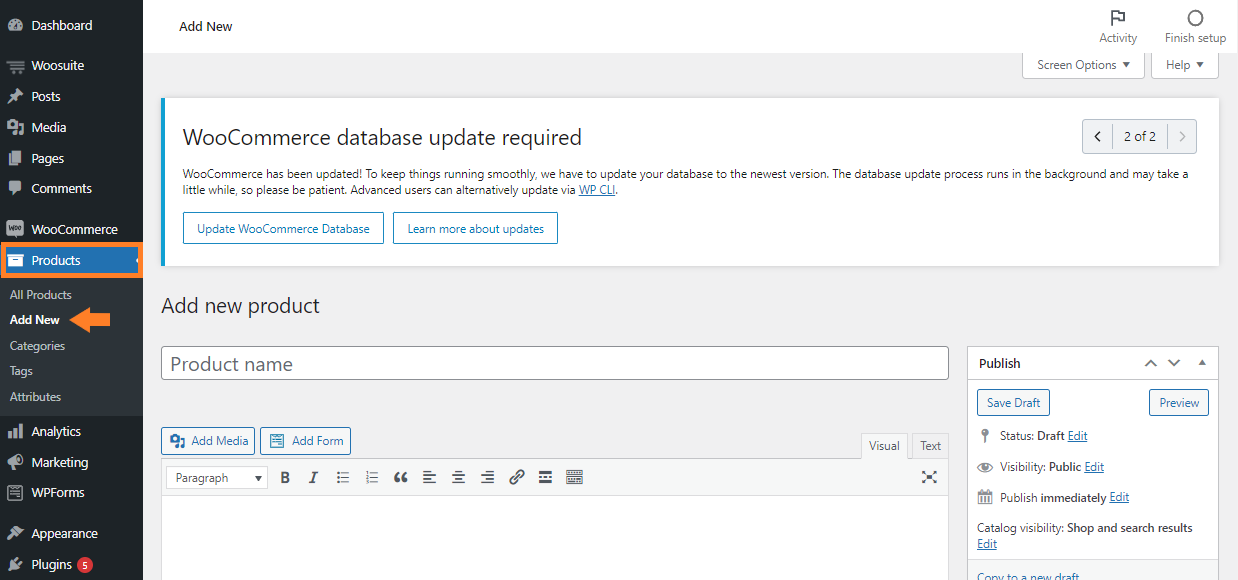
2.1. From WordPress Dashboard
Navigate to Products » Add New from your WordPress dashboard to create a bundle product or WooCommerce lookbook.
2.2. Give a Name to Lookbook
Now in the ‘Product Name’ field, give a name to the product. I have given it the name “A Modern Home Workspace” as I’ll add the workspace products to the lookbook.

2.3. Add Product Category
Now we need to assign a category to keep everything organized. To assign the category, click the checkbox, or You can create a new category by clicking on the “Add New Category” button in the ‘Product Category’ section.

2.4. Add the Product Short Description
Now scroll to the ‘Product Short Description’ section and add a short and precise description of the bundle or lookbook.

3. Add the Lookbook Gallery and Featured Image
Once you are done with the basic settings, now you need to add the gallery of the lookbook and featured images. The gallery will help the users to see the individual products in the lookbook.
The featured image will give an idea to the users about how the products in the bundle will look in real life and how they can use the products in different ways.
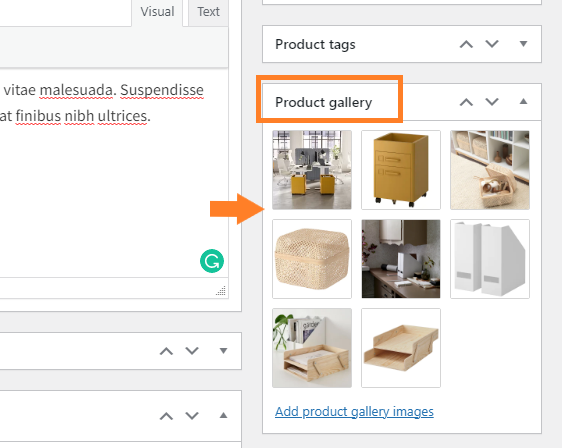
3.1. Add Product Gallery
In the ‘Product Gallery’ section, please add the gallery of the lookbook.
3.2. Set the Featured Image
In the ‘Product Image’ section, please set a featured image. Ensure that the image you add should give customers a clear look at the products you added to the lookbook.

4. Configure the Lookbook
After adding the gallery and image, scroll down to the ‘Product Data’ section and select “Bundled Product” from the dropdown.
Once you select it, you’ll see a new “Bundled Products” tab on the left side of the section.

Now from the “Bundled Products” tab, you can select the products you want to add to the lookbook and play with other settings.
Following are the few settings that you can configure here.
4.1. Select the Template
From the ‘Template’ dropdown, you’ll get two options,
- Default
- Above the fold
You can select whatever you want, but I recommend you to choose the ‘Default’ because it will display the child products below the lookbook featured image and description that will give a very decent look to the lookbook.

4.2. From Apply to Dropdown
You can select how you want to group the products from the ‘Apply To‘ dropdown. You’ll get the following options in the dropdown.
- Products
- Product Categories
- Product Tags
I have selected the ‘Products’ from the dropdown as I want to add individual products to the lookbook.

4.3. Select the Products
From the ‘Select Products’ dropdown, you need to select the products you want to add to the lookbook. Leave the ‘Quantity’ for each product as default. You can change it if you want.
Note: I have already created the products I want to add to the lookbook. So if you haven’t created the child products, first, you need to add related child products that you’ll add to the lookbook so customers can buy them from a single page. Ensure that the products you add should be similar and can be used side-by-side.

4.4. Select the Price Display Rule
From the ‘Price Display’ dropdown, You’ll get four options,
- None: It will not display any price.
- Combined: It means that the prices of each product are summed up and displayed to the user.
- Range: The price will be shown in the range, from the product’s lowest price in the lookbook to the highest price in the lookbook.
- Custom: It means that you can set a custom price.
For this tutorial, I have selected the ‘Range’ price display.

4.5. Hide the Add all to Cart Button
After that, you need to select ‘No’ from the ‘Enable Add all to Cart’ dropdown. Users cannot add all the products in the lookbook to their cart.

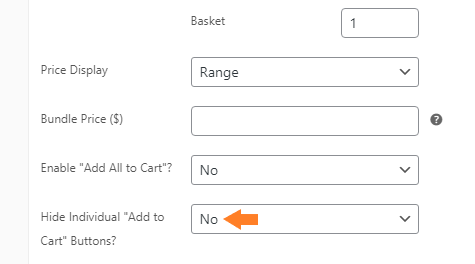
4.6. Show Individual “Add to cart” button
This field allows you to choose if you want to display the add-to-cart button for the individual products in the lookbook.
I have selected “No” from the dropdown because I don’t want to hide the individual cart buttons.
So, the customers can add individual products to their carts.
Note: It entirely depends on what you want. You can select ‘Yes‘ from the dropdown if you want customers to buy all the products in the lookbook. In that case, you will need to enable the add all to cart button.
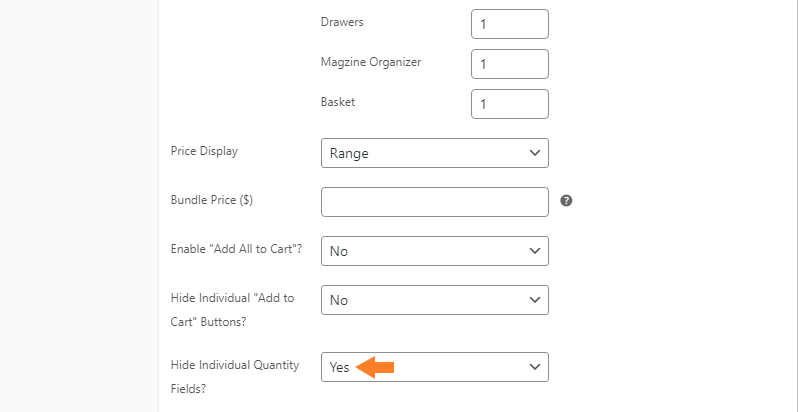
4.7. Hide “Individual Quantity Field”
This field lets you choose if you want to allow the users to select the quantity of the individual product.
Keep this to ‘Yes’ if you do not want to allow the users to change the individual product quantity in the lookbook.
4.8. From the Hide Individual Prices Dropdown
From the ‘Hide Individual Prices’ dropdown, you can choose whether you want to display individual products’ prices or not.
I have selected “No” from the dropdown as I do not want to hide the prices of individual products.

4.9. From the Hide Individual Description Dropdown
From the ‘Hide Individual Description’ dropdown, you can select whether you want to display the description of each product in the lookbook or not.
I have selected “Yes” from the dropdown as I want to hide the description for each product in the lookbook.

5. Publish the Lookbook
After configuring the WooCommerce lookbook, scroll to the top of the page and click the blue ‘Publish’ button to publish it.

6. Final Results
You have successfully created your WooCommerce lookbook. To test it, please visit the lookbook page.
It will have a featured image explaining how the products in the bundle will look in real life and how the users can use them differently.
Below the featured image, there will be a gallery so users can see individual product images.
And the last section will have all the products (one product in a row) that you have added to the lookbook. Users can add any product they want without navigating to the individual product pages.
Wrapping Up
That’s it for today’s tutorial.
Now you know how to create a WooCommerce lookbook with the help of the WooCommerce Product Bundle plugin and allow customers to see what the products look like in real life.
WooCommerce lookbook will help you to encourage the customers to buy similar items that they can use together. It will also help you increase the average order value(AOV) and revenue.
I hope this article was helpful to you. Please post the questions in the comment section or contact our customer support team for a quick response.
Ready to get started? Download the WooCommerce Product Bundle plugin now to create a WooCommerce lookbook!


