WooCommerce is a dynamic eCommerce platform that allows you to easily get recurring orders. You can sell your products or services to customers and charge them after a specific period. This will help you increase your revenue and sales.
This article will guide you through the step-by-step process for generating recurring orders in WooCommerce and share the best way to sell your subscription products or services in WooCommerce.
Without any further ado, let’s jump straight into it.
On This Page
How to Get WooCommerce Recurring Orders?
To enable the WooCommerce recurring orders, I’ll use the AovUp Subscriptions. It will allow you to create products requiring customers to place recurring orders after a specific period.
They can subscribe to your products or services, and when the subscription is over, they can re-subscribe, helping you get recurring orders.
The following is the step-by-step process to enable recurring or subscription orders in your WooCommerce store.
1. Install and Activate the AovUp Subscriptions Plugin
First, you must purchase the AovUpSubscriptions plugin from the official WooCommerce store and download its zip file.
- Once downloaded, navigate to Plugins > Add New from your WordPress dashboard.
- Click the ‘Upload’ button to upload the plugin to your site.
- After that, a pop-up will appear on the screen, click the ‘Choose a file’ button to select the plugin’s zip file from your computer.
- Once you have selected the file, click the ‘Install Now’ button to install the plugin.
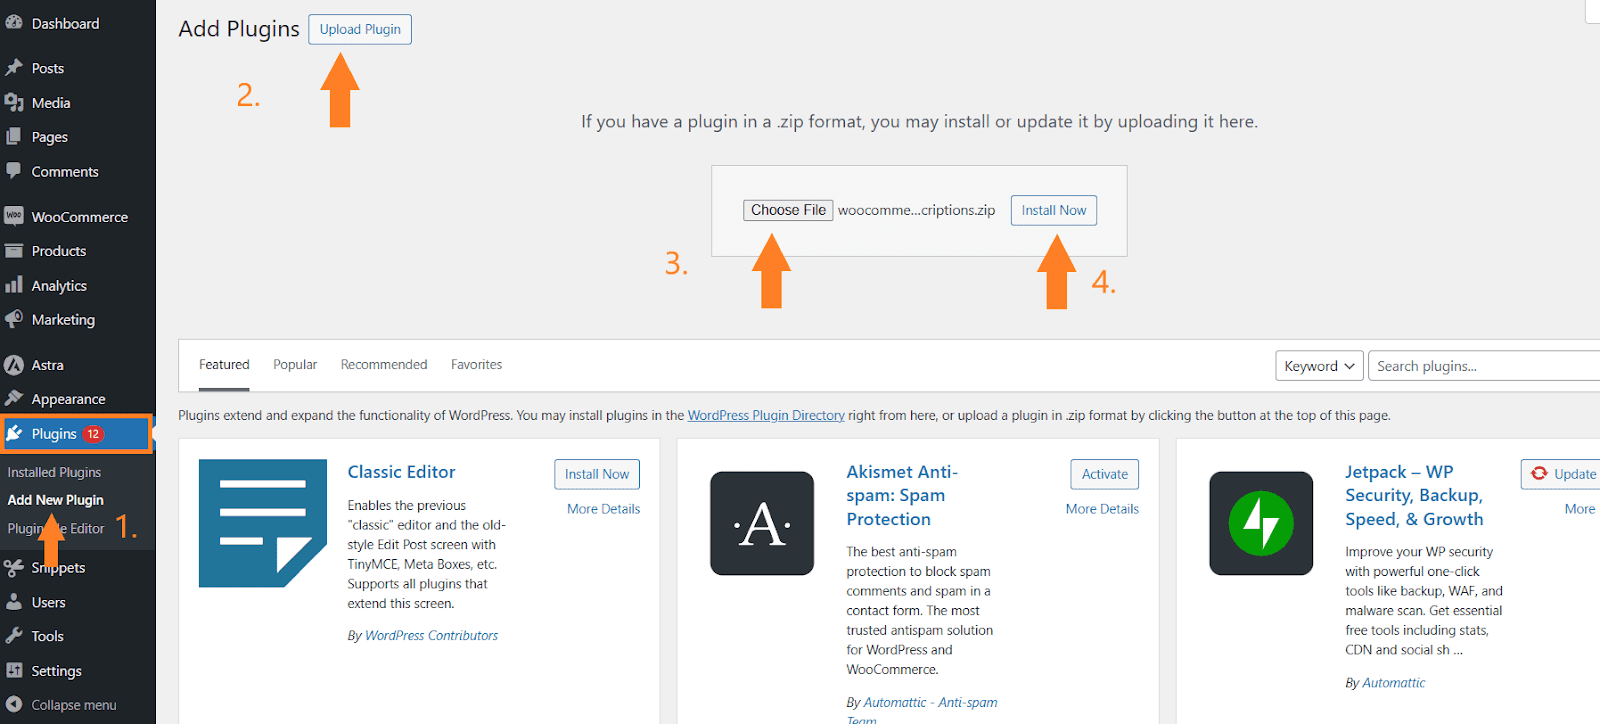
- After the plugin installation, you will be redirected to a new page. Click the ‘Activate’ button to activate the plugin.
2. Configure the Plugin Settings
After installing and activating the plugin, you may want to configure a few of its settings to get the maximum of it. To configure the plugin settings, navigate to AovUp > Subscriptions from your WordPress dashboard.
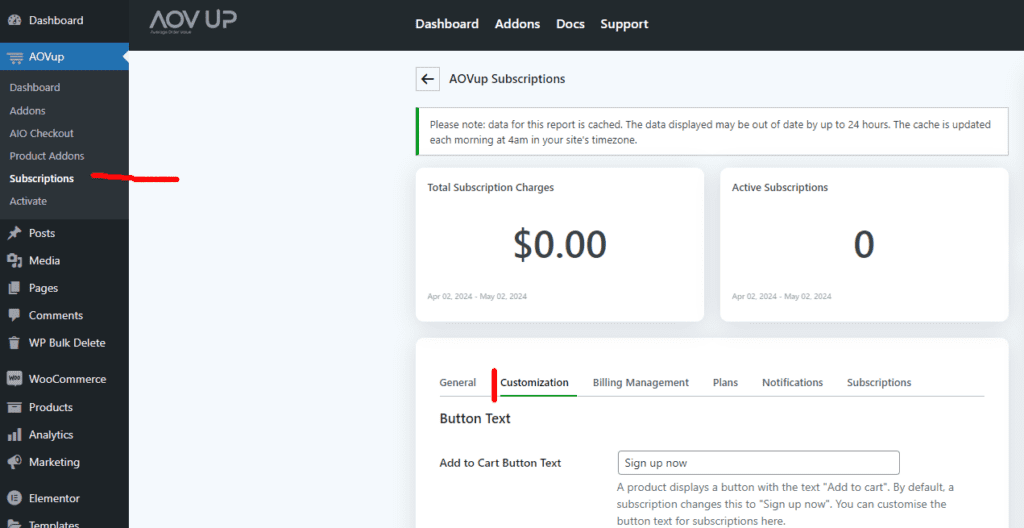
The first thing you might want to adjust according to your store is to change the add-to-cart and order placement button text that allows customers to purchase subscription/recurring payment products.
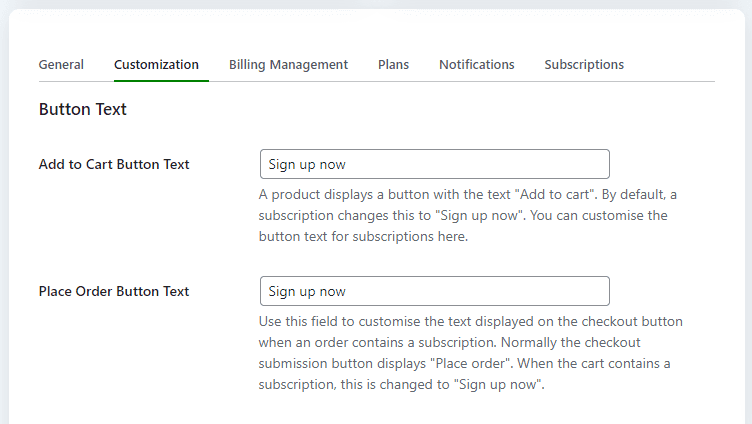
You can change the text for both buttons from the Button Text section.
- To change the add-to-cart button text, enter the text you want in the ‘Add to Cart Button Text’ field.
- To change the order placement button text, enter the text you want in the ‘Place Order Button Text’ field.
2.2. Select the Default User Role
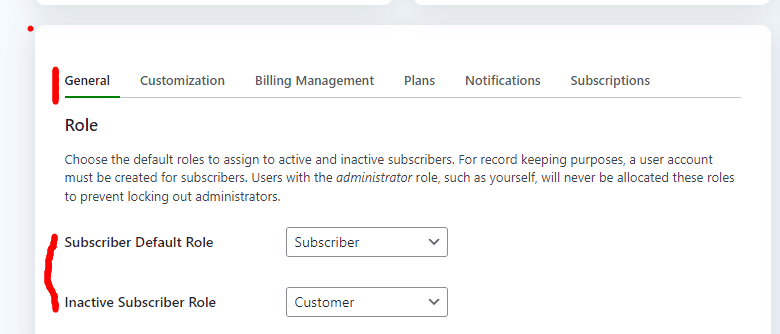
After that, you may also want to change the user role of those who sign up for recurring order products. The plugin will assign them a subscriber user role by default, but you can change it from the ‘Subscriber Default Role’ dropdown.
You can also select the user role for the inactive subscriber from the ‘Inactive Subscriber Role’ dropdown.
2.3. Adjust the Renewal Settings
You can also check out the other available settings and configure them according to your requirements.
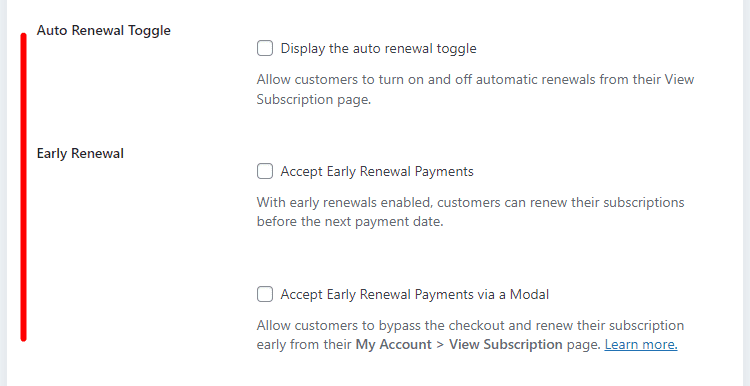
Navigate to Billing Management > ‘Renewals’ settings section. You can turn auto-renewal on or off from here or create a toggle button that customers can use to turn automatic renewals on/off themselves. The button will be displayed on the subscription page. You might also want to enable a few other checkboxes.
2.4. Save Settings
Scroll to the bottom of the page and click the blue ‘Save Changes’ button to save the settings.
3. Create a Recurring Payment/Subscription Product
After configuring the plugin’s settings, we must create a subscription product to place recurring orders. The plugin we installed adds this feature to our store, and we can create simple and variable subscription products.
You can create a new product or edit an existing product to make it a subscription. I’ll create a new product.
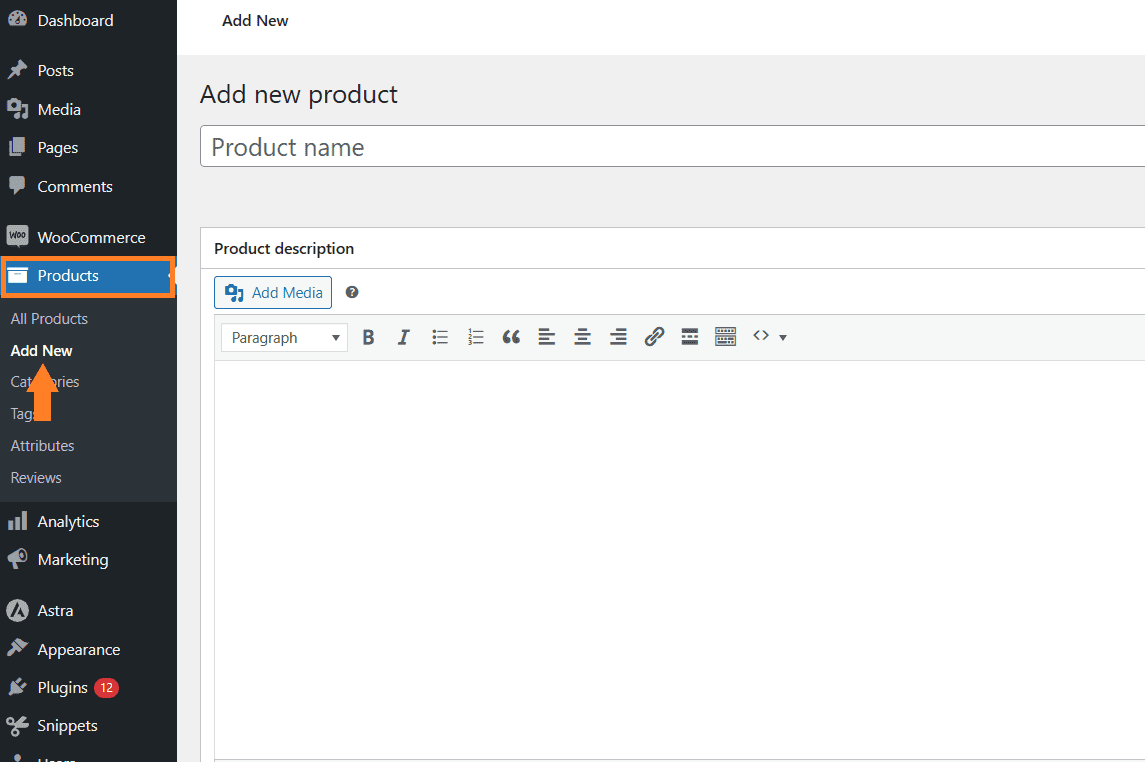
To create a new product, navigate to Products > Add New from your WordPress dashboard.
3.1. Add Product Details
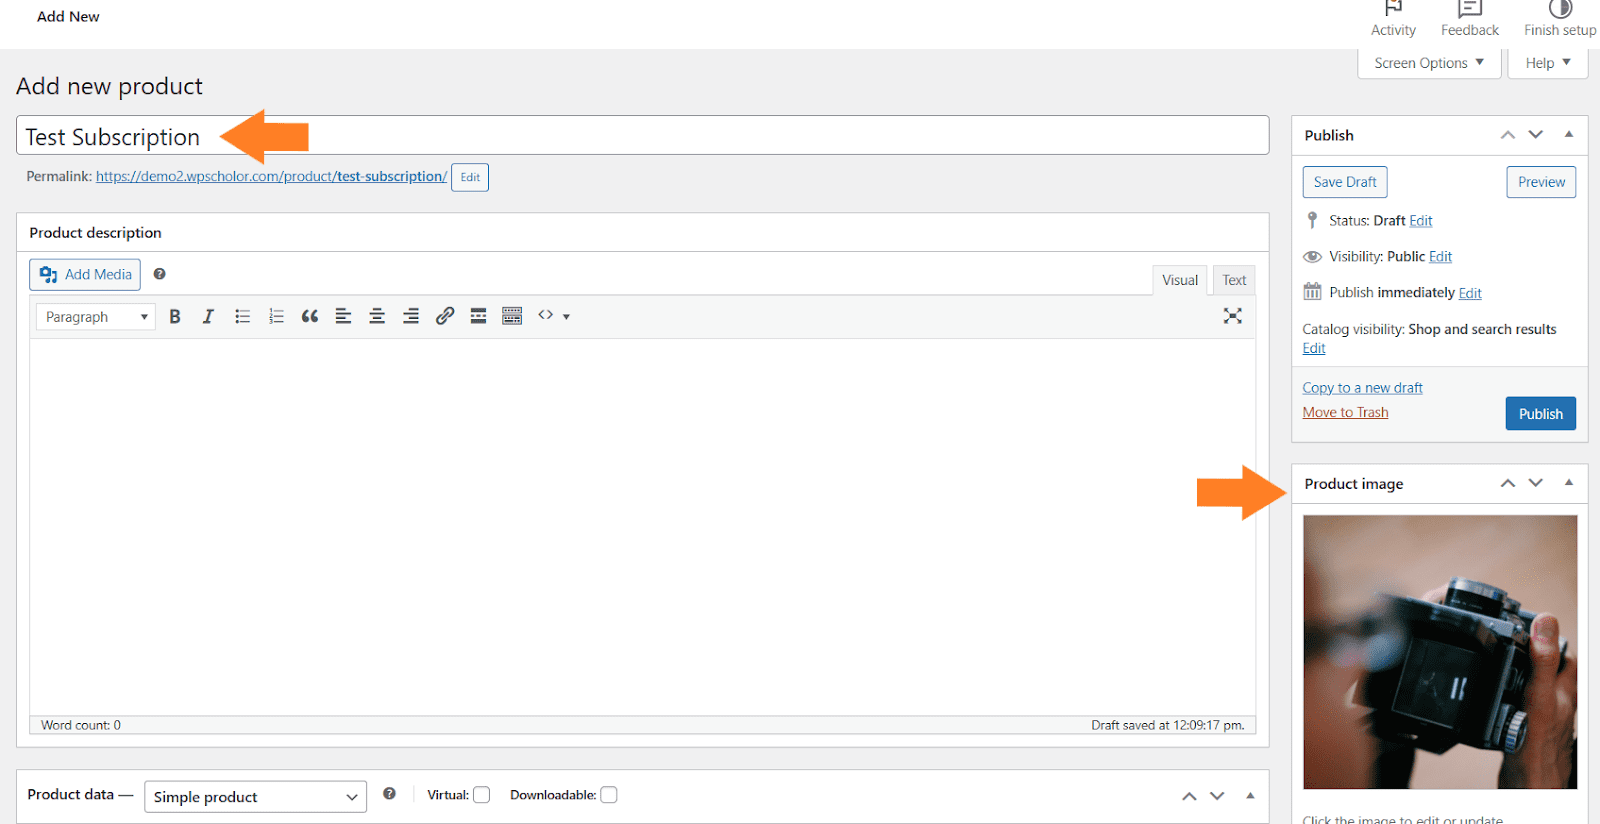
Once you click it, you’ll be redirected to the page where you can add and publish the product details.
You can add the product title, image, and price. You can also add a description if you want. There are several other options that you can configure from there.
3.2. Select the Product Type
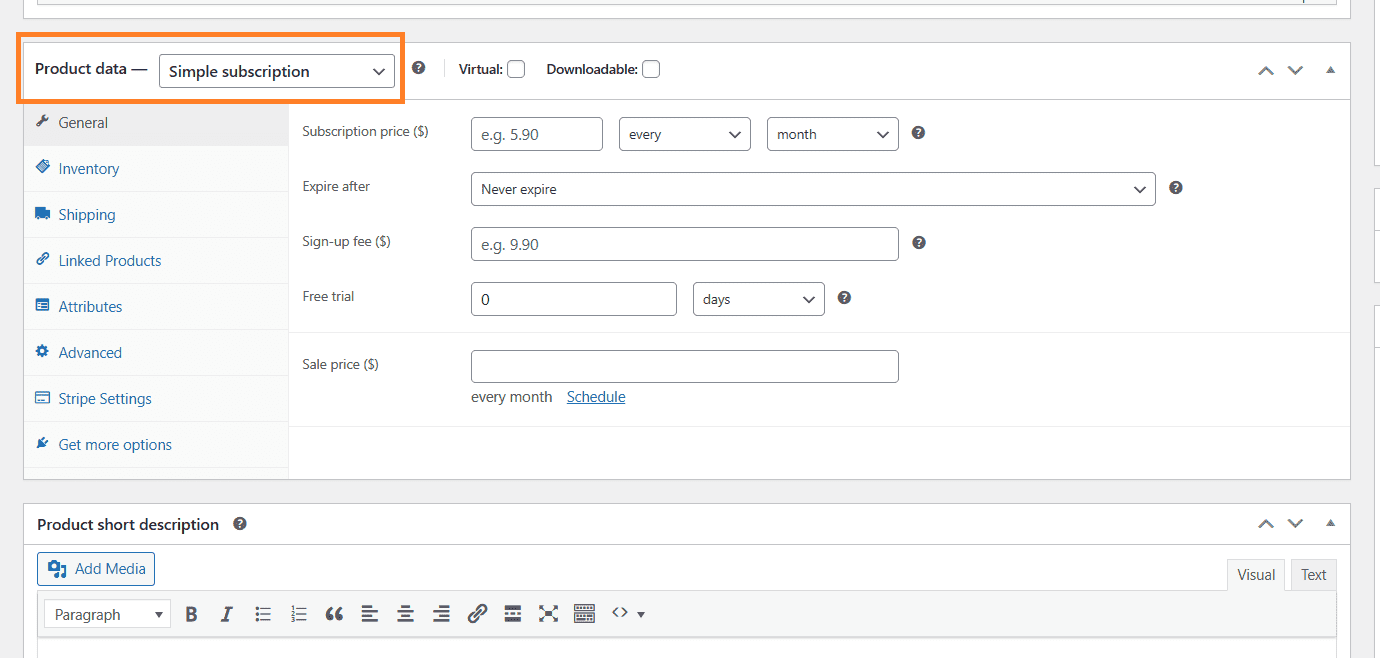
After adding the product details, you must scroll down to the ‘Product Data’ section and select the type from the dropdown. As mentioned earlier, with the help of this plugin, you can create
- Simple Subscriptions
- Variable Subscriptions
Note: With the help of this plugin, you can sell one-time payment products and subscription or recurring payment products simultaneously.
I’ll create a simple subscription product to show you how to get recurring orders in your WooCommerce stores.
4. Configure the Recurring Orders Product Settings
Once you have selected the product type, you’ll see some new fields below from which you can configure the recurring order settings. You can choose when customers need to renew their subscription, or you can select its expiration time and more.
The following are the settings that you need to configure.
4.1. Set the Price
First, you need to set the product price and the duration after which you want your customers to re-pay you and place the order again (recurring orders).
You can enter the price in the ‘Subscription Price’ field, and you can select the duration from the dropdown right next to it.
I want my customers to pay $10 monthly for this product or service. I have configured the fields accordingly.

4.2. Select the Expiry Time
Next, you can select the subscription’s expiration time. This is the time after which the subscription product or service will expire automatically.
By default, it is set to ‘Never Expire’, meaning the subscription will never expire automatically. However, you can unsubscribe from it manually as an admin or a customer.
You may want to select an expiry time that works best depending on your products and business needs.
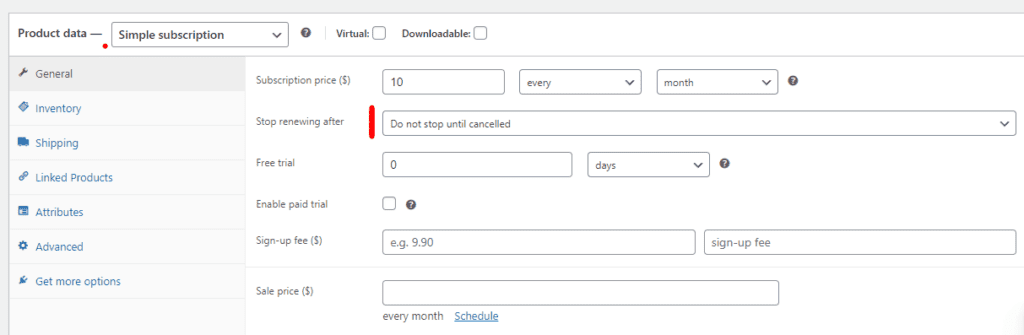
4.3. Other Settings
You can also offer a free trial for a specific period and charge a sign-up fee for the subscription. This fee will be the amount that customers will need to pay above the subscription price (subscription price + sign-up fee).
You can also sell this at a discounted price. It depends on how you want to configure these settings.
4.5. Publish the Product
Finally, you need to scroll to the top of the page and click the blue ‘Publish’ button to publish the product.

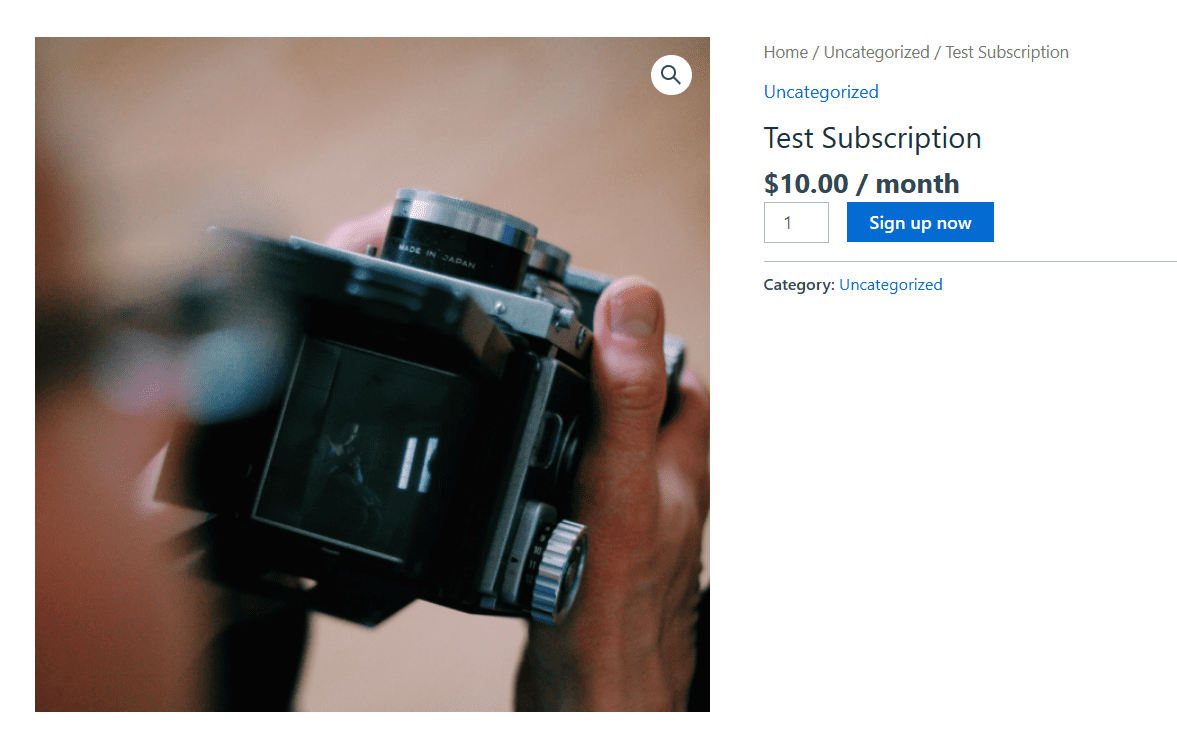
5. Final Results (Get WooCommerce Recurring Orders)
Once the product is published, test the final results and see if customers can place recurring orders. .
Customers could purchase it as regular products, and they’d be charged $10 every month. You can renew the subscription automatically or allow customers to renew it manually.
Bonus tip: optimize the user flow?
If you are selling products or services where users subscribe to more than one product, it’s time-consuming for customers to go to each product’s page and add a product to the cart.
To improve the customer experience and help them save time, you can use the WooCommerce Product Table plugin to replace the default shop page with a more user-friendly table layout that displays all your products or services in a list form.
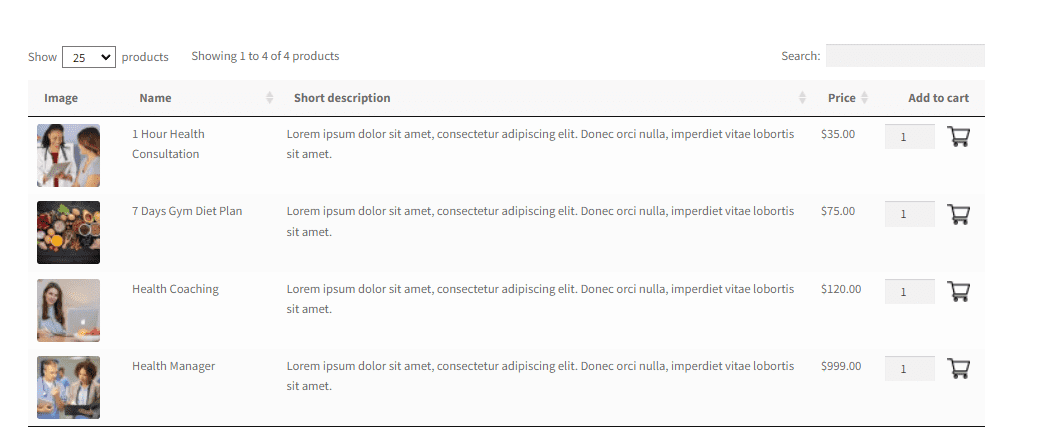
This way, your customers can view and purchase other subscription products or services without navigating to each product’s page. It makes it easy for customers to shop from your store.
Conclusion
That’s it for today’s article.
I hope it was helpful to you and you were able to get recurring orders in your WooCommerce store. This will help you get a continuous stream of income every month.
You can further increase your average order value and the customer experience by using the WooCommerce Product Table plugin.
Ready to get started? Download the WooCommerce Product Table now!


