Do you want to create a private store in WooCommerce? You have landed at the right place!
In today’s article, I’ll walk you through the step-by-step process of creating a private store in WooCommerce with the help of the WooCommerce Restriction Rules plugin.
It will allow you to create a WooCommerce private store in just a few simple steps. After completing this tutorial, you can create a private online store where only logged-in customers can purchase. At the same time, the guest customers will be redirected to the signup/registration page.
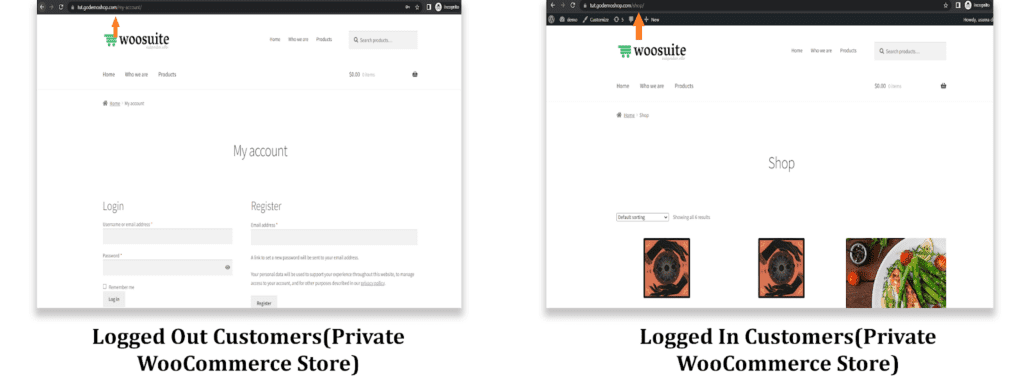
Preview:
Here are the final results that we are going to achieve today.
So without any further ado, let’s jump into the tutorial.
On This Page
What is a Private WooCommerce Store?
A private WooCommerce store is an online store that offers exclusive access and a personalized shopping experience to a specific group of customers. Unlike a general store, accessible to anyone, a private store restricts access to only authorized users.
The owner controls who can view and purchase products in a private store. This can be useful in various scenarios, such as catering to wholesale buyers, offering specialized products to a specific group, or creating a members-only store for VIP customers.
How to Create a Private Store in WooCommerce?
As mentioned above, I’ll use the WooCommerce Restriction Rules plugin to create a private store in WooCommerce. The plugin makes it easy to create a private store.
The plugin will help you with several other features as well:
- Restrict Product Purchases
- Password Protect Shop Page
- Sell Access to a Page
- Hide WooCommerce Products Without Image
- Create a Private WooCommerce School Shop
- Hide Products from Search
- Restrict WooCommerce Products By User Roles
Follow the following steps to create a WooCommerce private store.
1. Install and Activate the WooCommerce Restriction Rules Plugin
Note: You can skip this step if you have installed and activated the WooCommerce Restriction Rules plugin.
To install the WooCommerce Restriction Rules plugin, you will need to install the Woosuite Core plugin and activate it with the help of a license key. We have created a Quick Start Guide for you to figure out how to install and activate the WooCommerce Restriction Rules plugin.
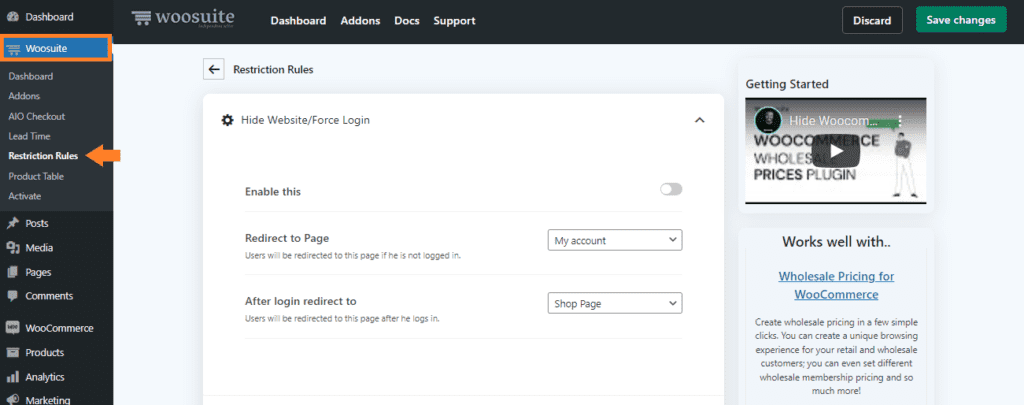
Once you have installed and activated the plugin, navigate to the Woosuite » Restriction Rules from your WordPress dashboard.
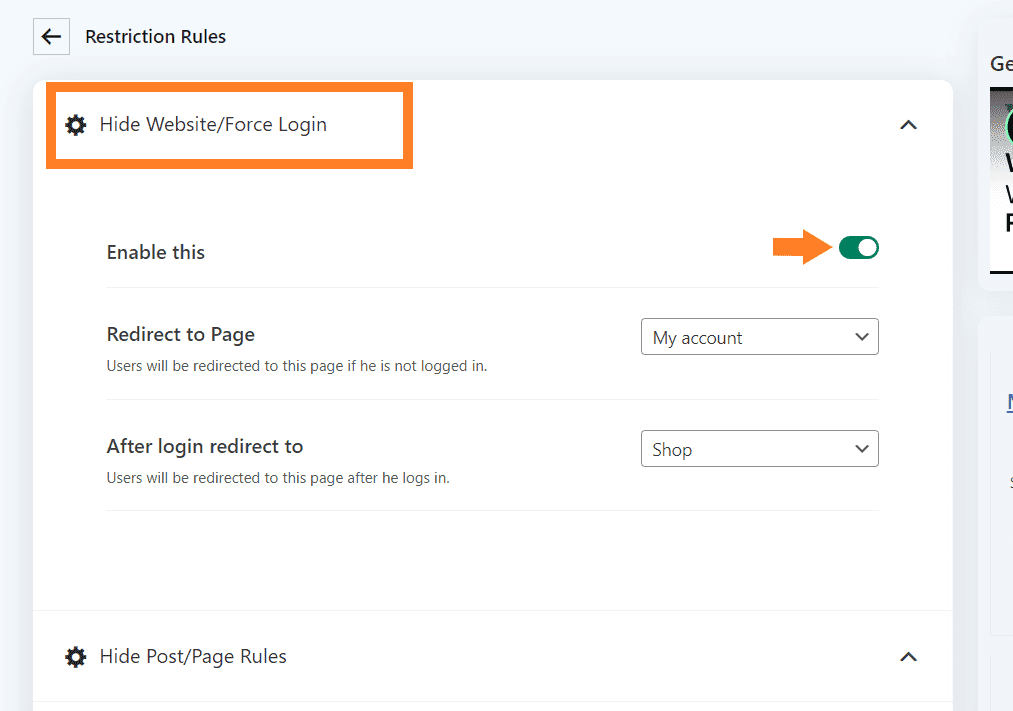
3. Enable WooCommerce Private Store Mode
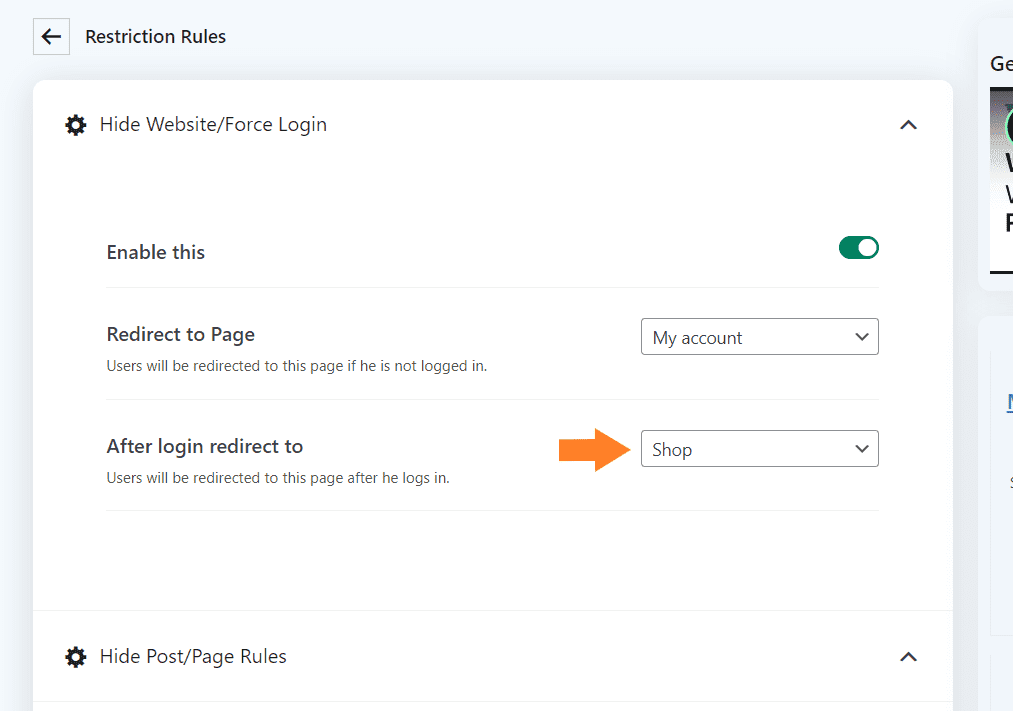
Once you are in the plugin’s settings, the ‘Hide Website/Force Login’ tab will be expanded by default. To create a WooCommerce private store, enable the first option in the tab.
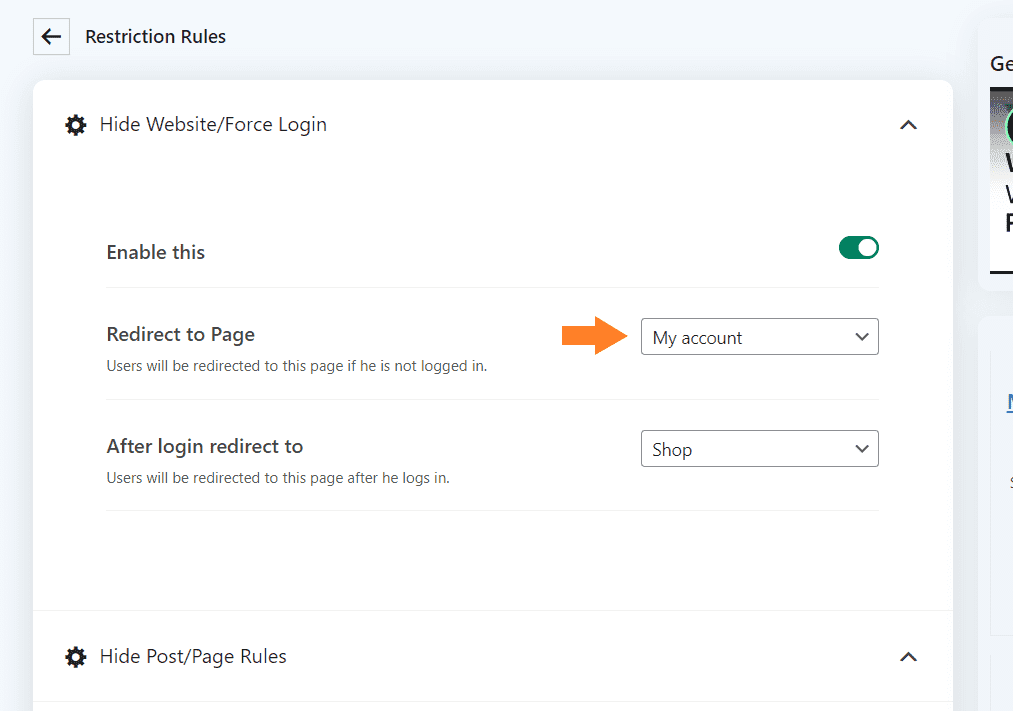
3.1. Redirect to Page
After that, you must select the page where you want to redirect the customers if they are not logged in. You can select the page from the ‘Redirect to Page’ dropdown.
Ensure you have selected the ‘My Account‘ page from the dropdown. In your store, the account page may have a different name, but you need to select your store’s account page where customers can register themselves.
3.2. After Login Redirect To
After that, you must select the page where you want to redirect the customers once logged in. Select the page from the ‘After login redirect to‘ dropdown.
I selected the ‘Shop Page‘ from the dropdown to redirect the logged-in customers to the shop page. But you can select whatever page you want. The dropdown will show all the published pages on your store, and you select the one you want.
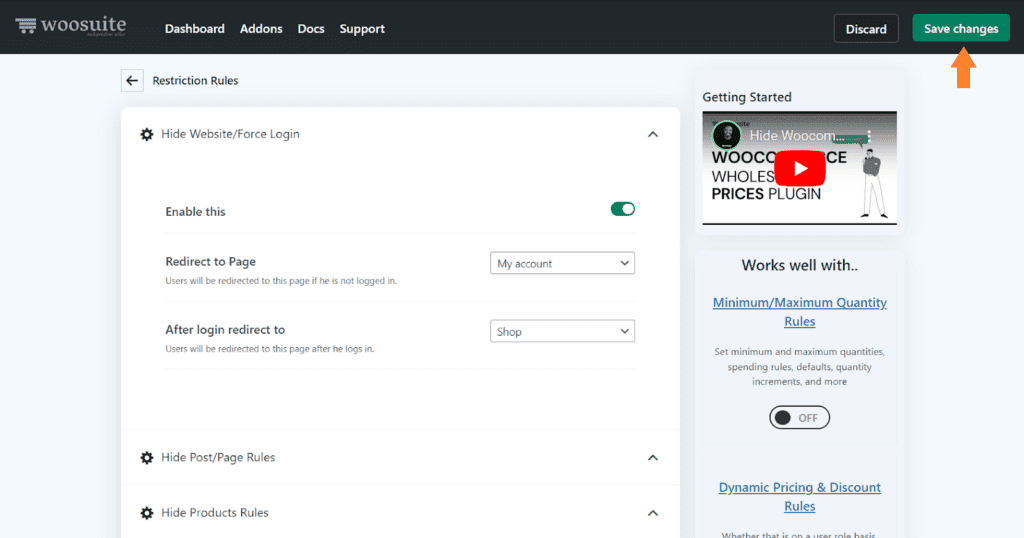
4. Save Changes
Once you have enabled the WooCommerce private store mode and made the necessary configurations, click the green ‘Save Changes’ button at the top right corner of your screen to save the settings.
5. Final Result
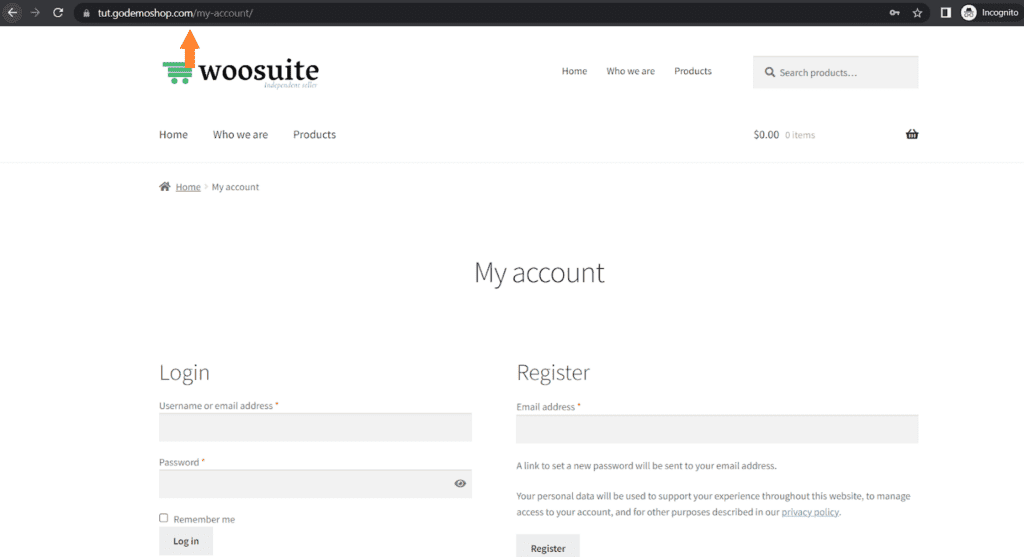
To test the final results, I copied my store’s shop page URL and visited it as a guest user in incognito mode. I was redirected to my account page as I wasn’t logged in.
I also couldn’t access any product with a direct link. I was redirected to my account page If I tried to do so.
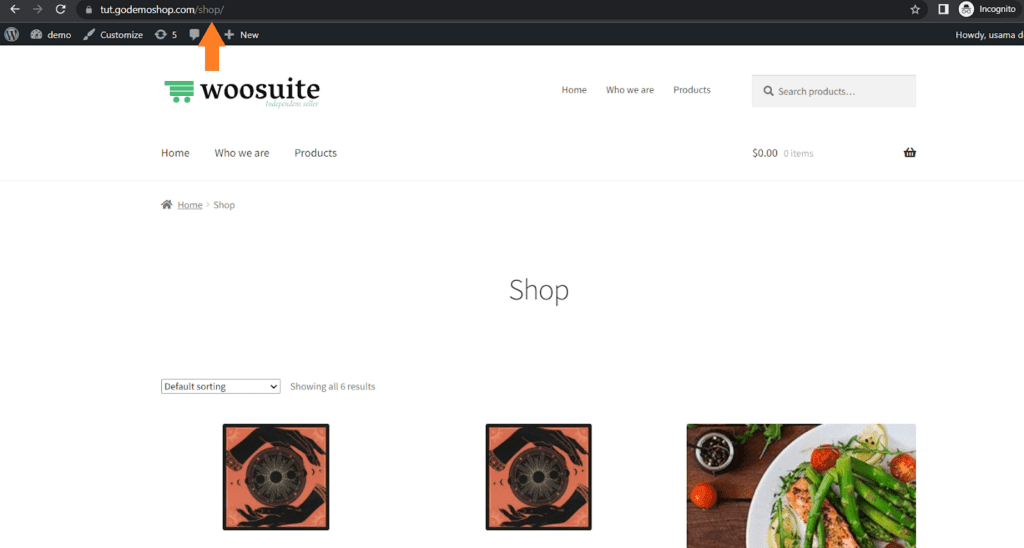
Once logged in, I was redirected to the shop page and could purchase the products as a regular customer.
How to Improve the Cart and Checkout Pages Of Your Private WooCommerce Store?
Woosuite is a collection of WooCommerce plugins that can help improve the functionality and appearance of your WooCommerce store. It also enables you to improve the cart and checkout pages.
I have compiled a few guides to help you customize the WooCommerce cart and checkout pages to improve the customer experience and increase sales.
- Create a WooCommerce Checkout Like Shopify
- How to Add One-Click Buy Checkout
- How to Combine WooCommerce Cart and Checkout Page
- How to Create a WooCommerce Checkout Countdown
- How to Create a WooCommerce 2-step Checkout
- How to Add Captcha to WooCommerce Checkout
Final Thoughts
That’s it for today’s tutorial. I hope this article was helpful to you and you were able to create a private WooCommerce store easily. It will also help you to get the customer’s emails which you can use to send them the latest deals and products.
Ready to get started? Download the WooCommerce Restriction Rules plugin and build something great at your store.


