One of the most challenging aspects of the online business checkout process is ensuring that customers provide accurate and complete shipping information.
This is where the WooCommerce autocomplete address feature comes in handy, as it allows customers’ addresses to be autocompleted using Google Maps API during checkout.
This tutorial will tell you how to add the WooCommerce autocomplete address at checkout in your store. I’ll explain a few advantages of adding this feature to your online store. In the end, I’ll also share some tips to improve the customer experience further at your store.
So, let’s dive in!
On This Page
- 1 Advantages of WooCommerce AutoComplete Address Feature
- 2 How to Add WooCommerce AutoComplete Address Feature to Your Store?
- 2.1 1. Install and Activate the AIO Checkout Plugin
- 2.2 2. Navigate to the Google Cloud Platform
- 2.3 3. Create a New Project
- 2.4 4. Get the API Key
- 2.5 5. Add Restrictions to the API
- 2.6 6. Copy the API Key
- 2.7 7. Navigate to the AIO Checkout
- 2.8 8. Enable the WooCommerce AutoComplete Address Feature
- 2.9 9. Final Results
- 3 Conclusion
Advantages of WooCommerce AutoComplete Address Feature
The WooCommerce autocomplete address feature offers several advantages for businesses that implement it at checkout. Here are some of the benefits:
- Improve the customer experience.
- Saves time.
- Increase efficiency.
- Gain customer trust.
How to Add WooCommerce AutoComplete Address Feature to Your Store?
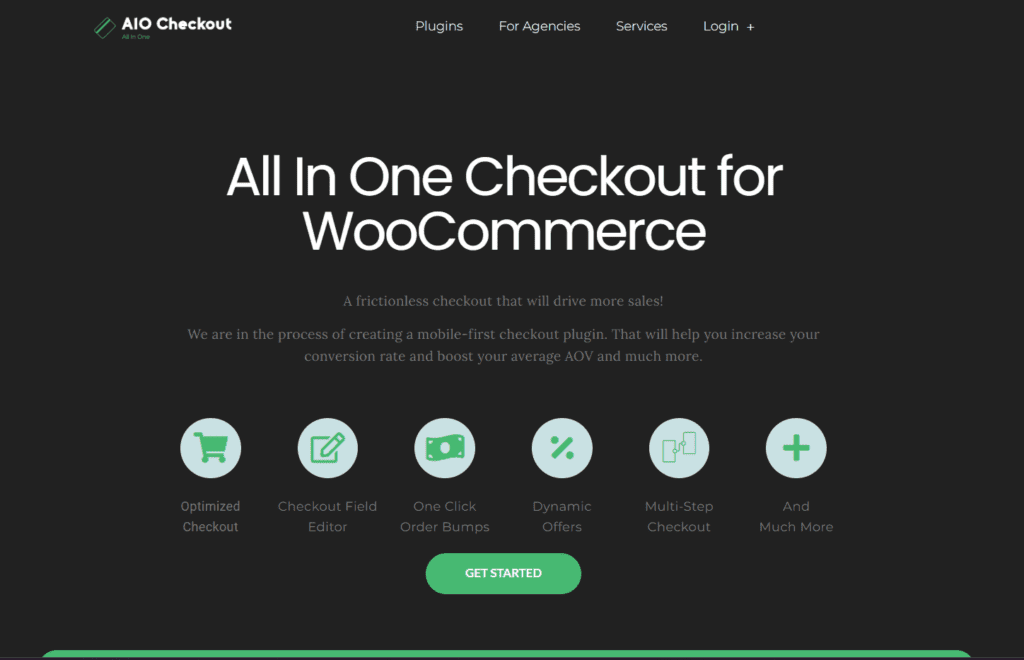
To add the WooCommerce autocomplete address feature to the WooCommerce store, I’ll use the AIO Checkout plugin. It gives an easy-to-use feature to add this feature to any WooCommerce store.
We’ll also need the Google Maps API to get the address from Google and populate it to the customers during checkout.
Follow the following steps to add the WooCommerce autocomplete address feature to your store.
1. Install and Activate the AIO Checkout Plugin
First, download the AIO Checkout plugin, you will need the pro version to access this feature.
Once you have downloaded it, navigate to the Plugins » Add New from your WordPress admin dashboard, and click the Upload button to upload the downloaded file to install and activate the plugin.
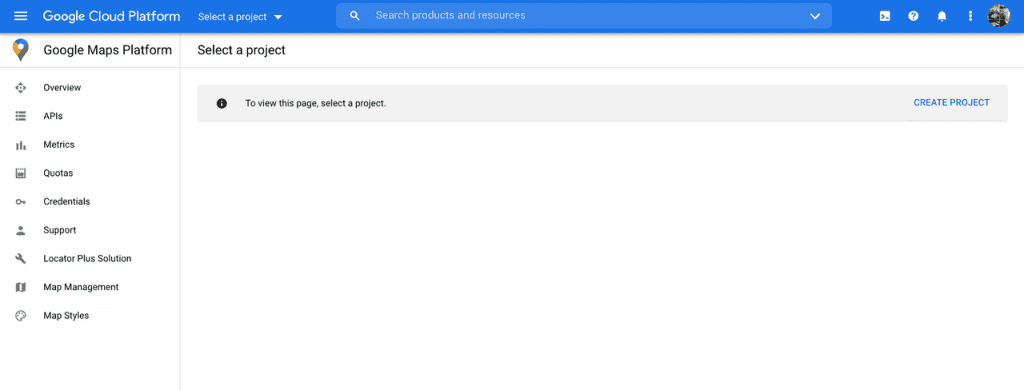
After installing the plugin, you need to open a new tab and search for the Google Cloud Platform, or you can simply click here to navigate to Google Cloud Platform.
You will need to log in to your Google account. If you have already created a project in Google Cloud, the following screen may differ from yours.
3. Create a New Project
If this is your first time on the Google Cloud Platform, you need to create a new project. Click the ‘Create New’ project button to create a new project.
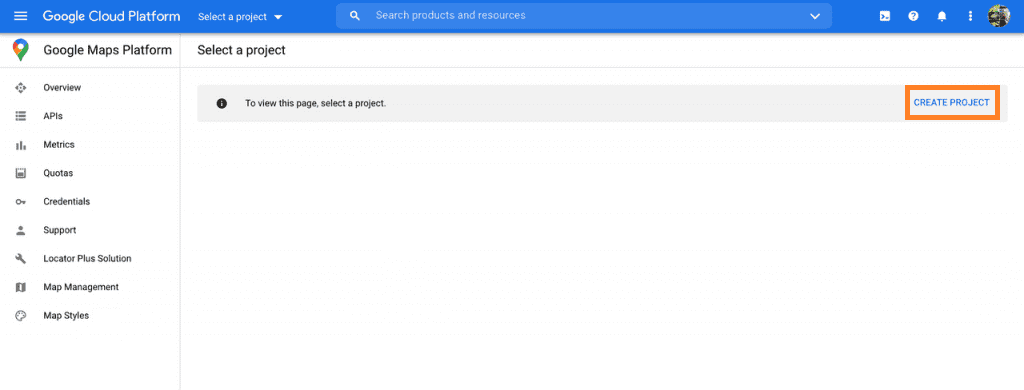
If the above screen differs from yours, that is because you may have already created a project. You’ll need to create a new project for autocomplete address feature.
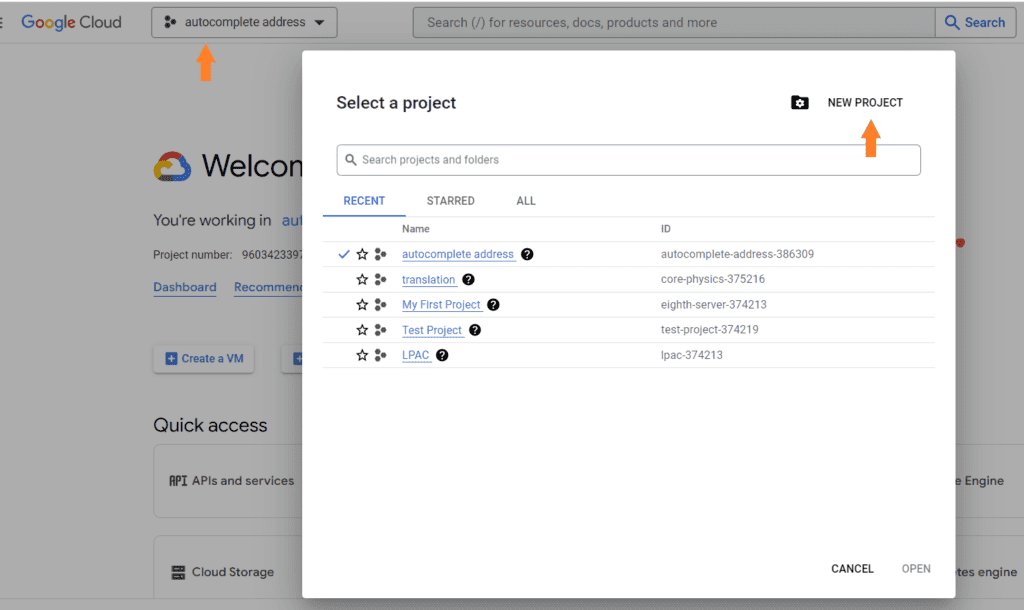
To create a new project, you’ll need to click the box at the top left corner of your screen. It will open a pop-up from where you can click the ‘New Project’ button to create a new project.
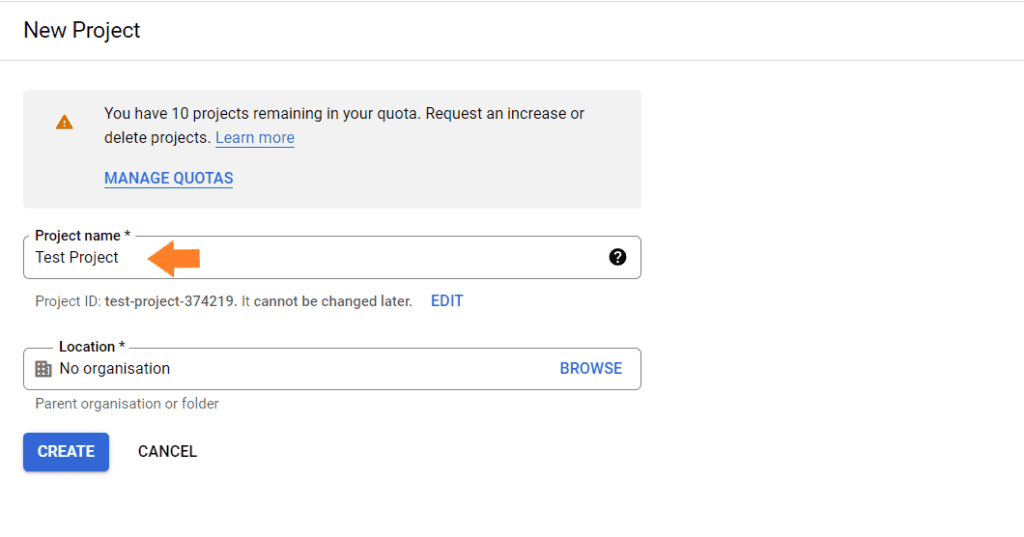
3.1. Give a Name to the Project
Once you click the button, you’ll be redirected to a page where you can create a new project. First, you need to give a name to the project in the ‘Project Name’ field.
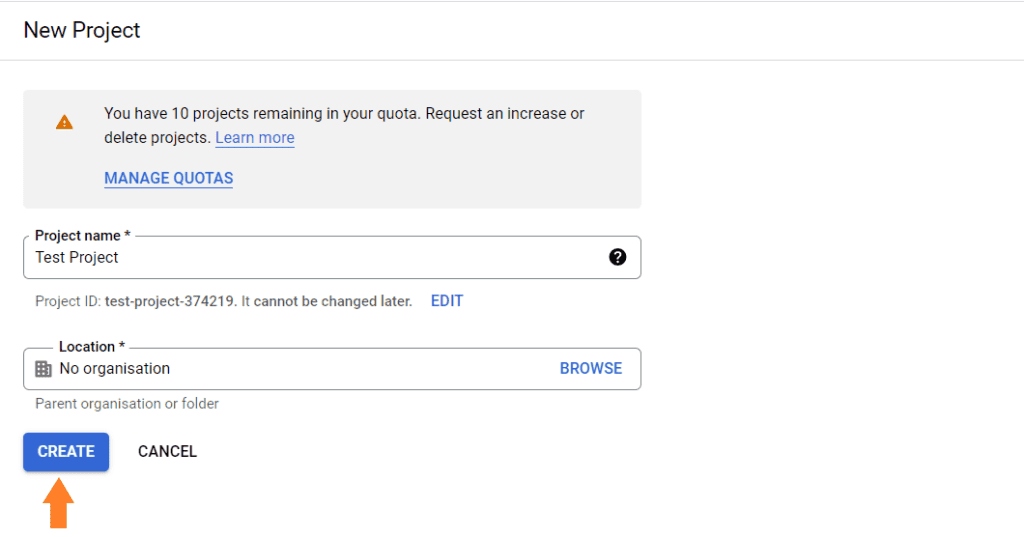
3.2. Create the Project
After that, you just need to hit the ‘Create’ button to create a new project. After clicking it, it will take a few minutes to create a new project.
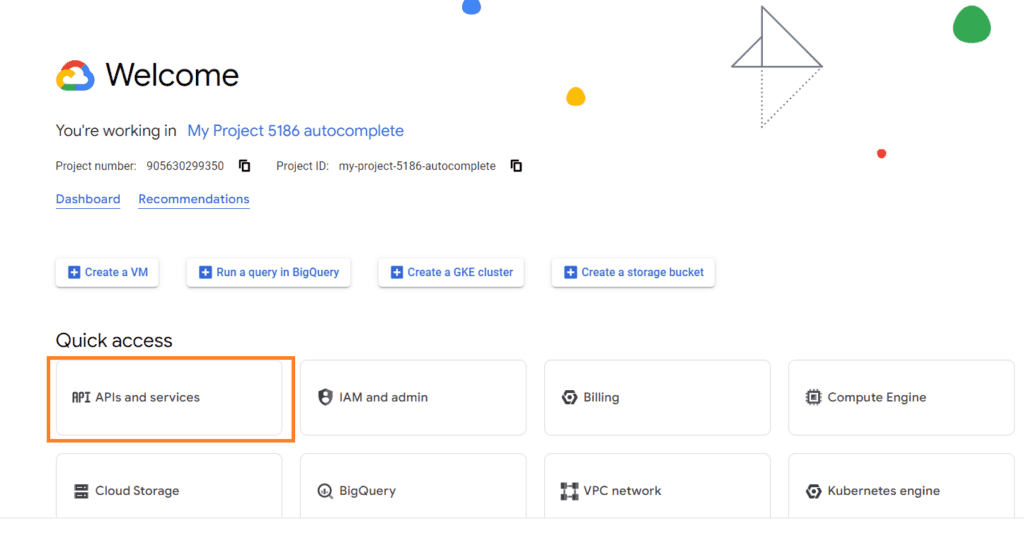
4. Get the API Key
Once the project is created, you’ll automatically be in the project. Simply click the ‘API and Services’ tab from the Quick Access section.
4.1. Enable API & Services
After clicking it, you’ll reach the API section, where you can create an API for this project. To do so, click the ‘Enable API & Services’ button at the top.

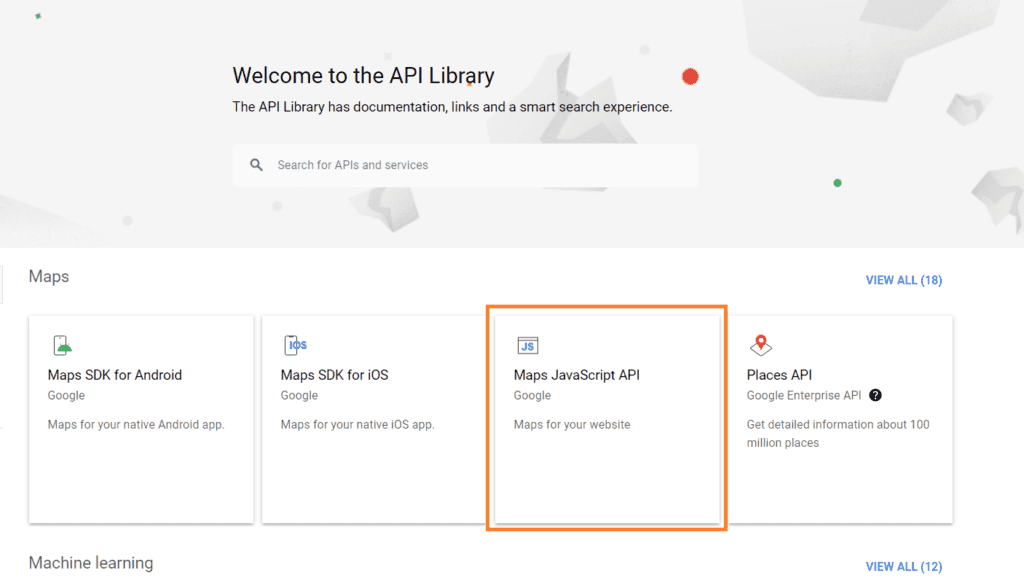
4.2. Select the Google Map API
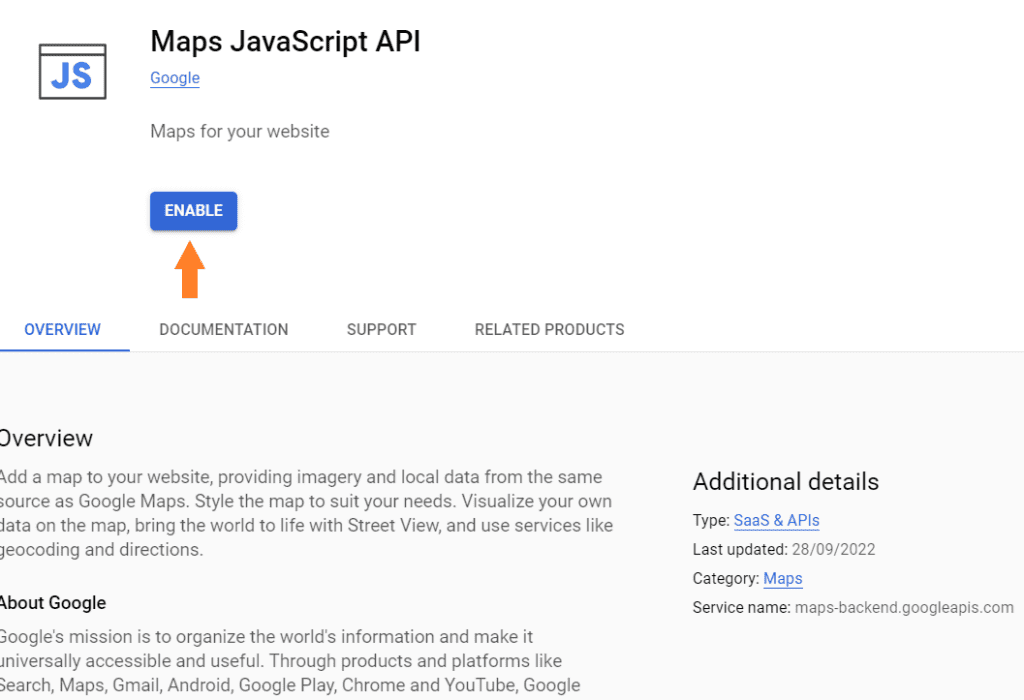
After that, you’ll be redirected to the API Library. From the Maps section, click the ‘Maps JavaScript API’ tab.
4.3. Enable the API
On the next page, click the ‘Enable’ button to enable the API.
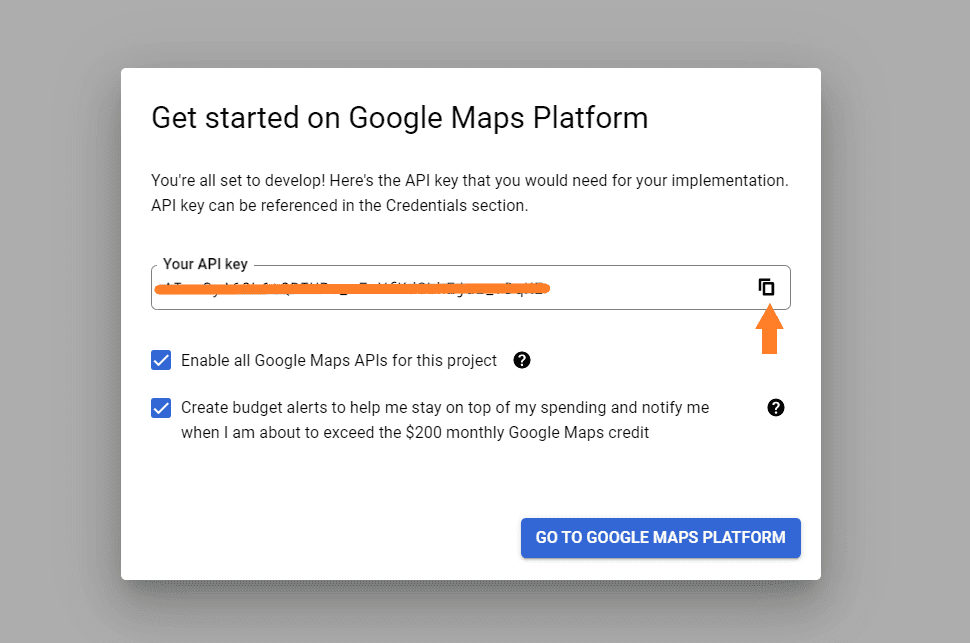
4.4. Copy the API
It will take a few seconds to enable the API. Once enabled, you’ll see a pop-up with the API Key. You can click the copy icon to copy the key.
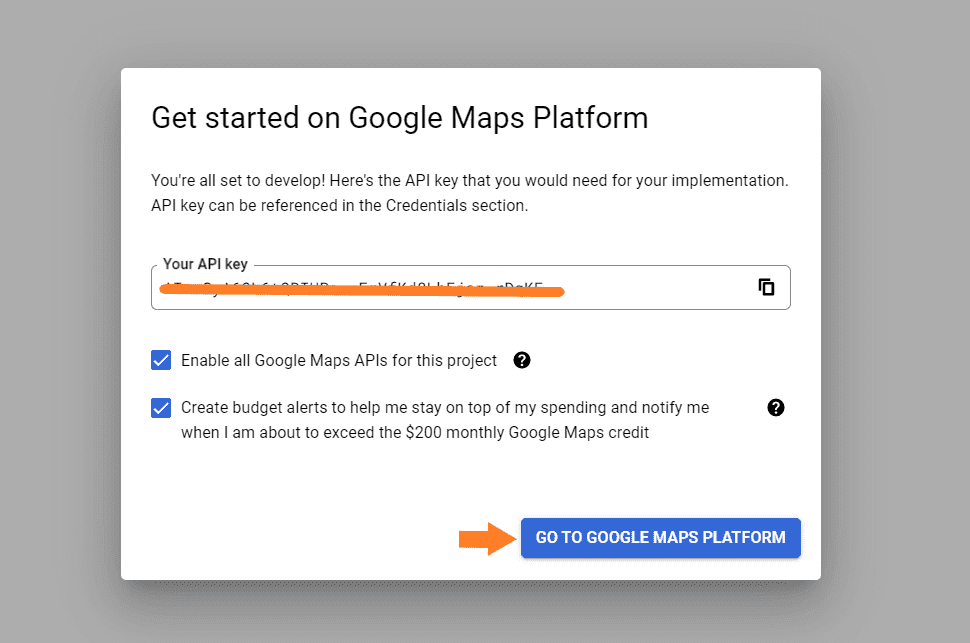
5. Add Restrictions to the API
Once you get the API, there are a few things you need to configure to ensure that the API is only called by your website. To do so, you need to add restrictions.
Click the ‘Go To Google Maps Platform’ button.
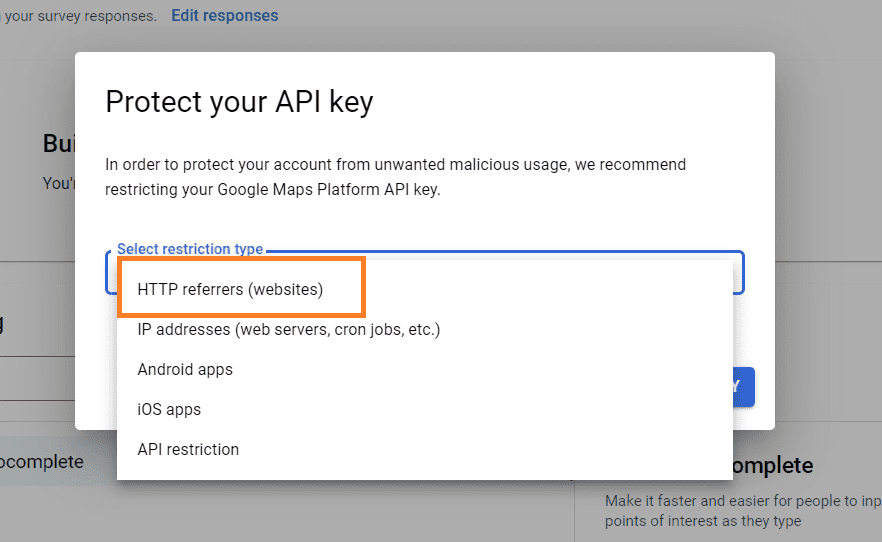
5.1. Select the Restriction
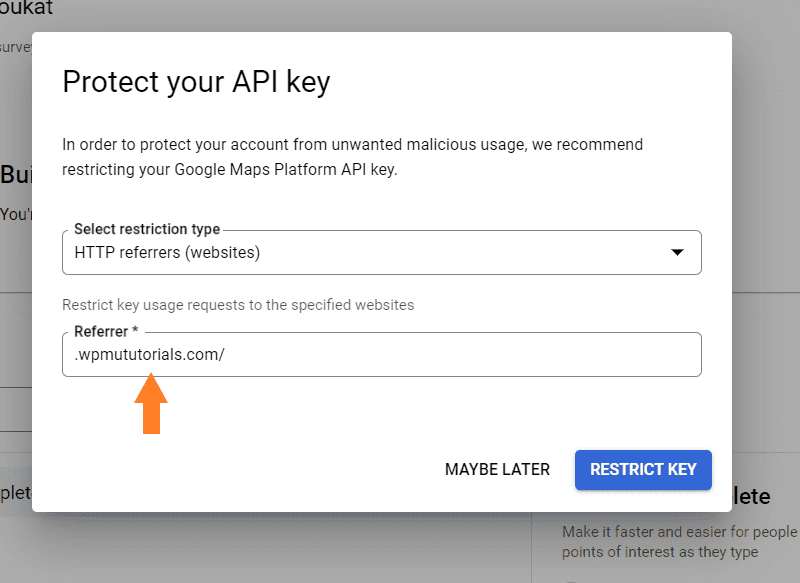
On the next page, a ‘Protect Your API’ pop-up will appear. The dropdown will have five different options. Select the ‘HTTP referrers (website)’ option, as we want to use the API for the website.
5.2. Enter Your Website Address
Once you select it, a new ‘Referrer’ field will appear below it. Enter your website address in the field.
Note: Ensure you enter the referrer correctly; otherwise, the autocomplete address feature won’t work.
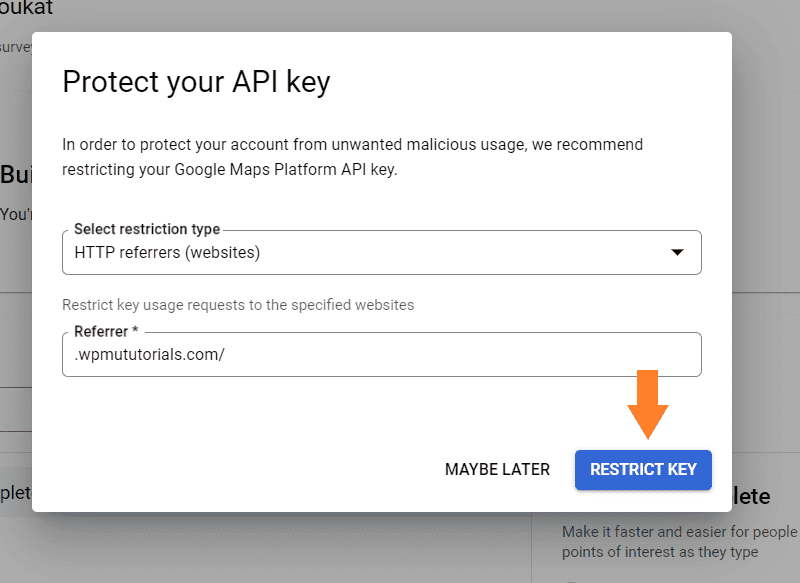
5.3. Restrict API Key
Finally, click the ‘Restrict Key’ button to restrict the API key to your website. Now only your website can call and get the API results.
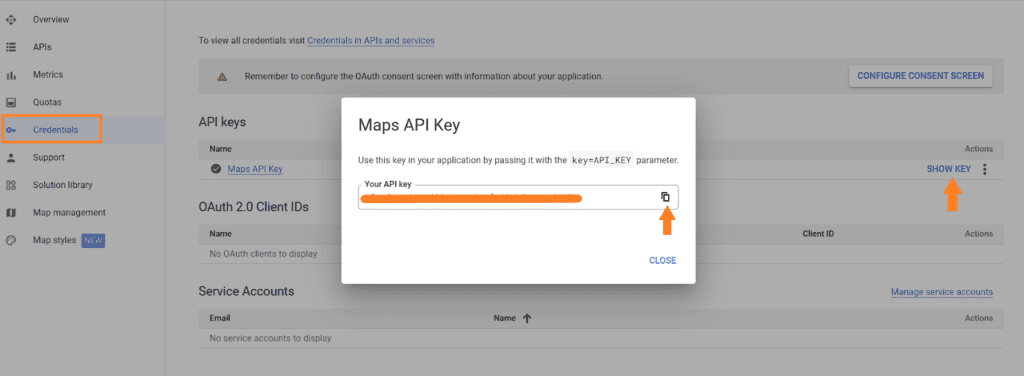
6. Copy the API Key
You can skip this step if you have previously copied the API key. But in case you didn’t copy it, click the ‘Credentials’ tab from the left sidebar and then click the ‘Show Key’ button to get the API.
Once you get it, click the copy icon to copy the key.
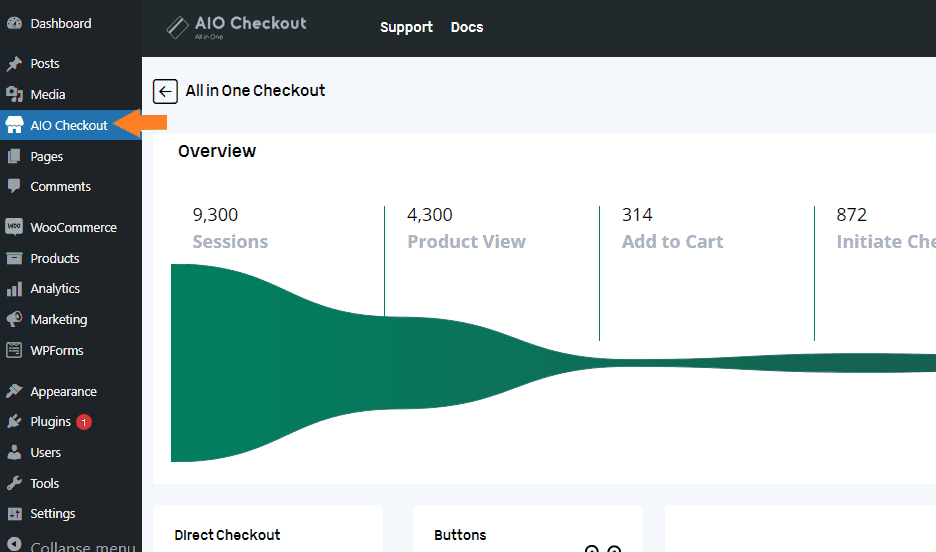
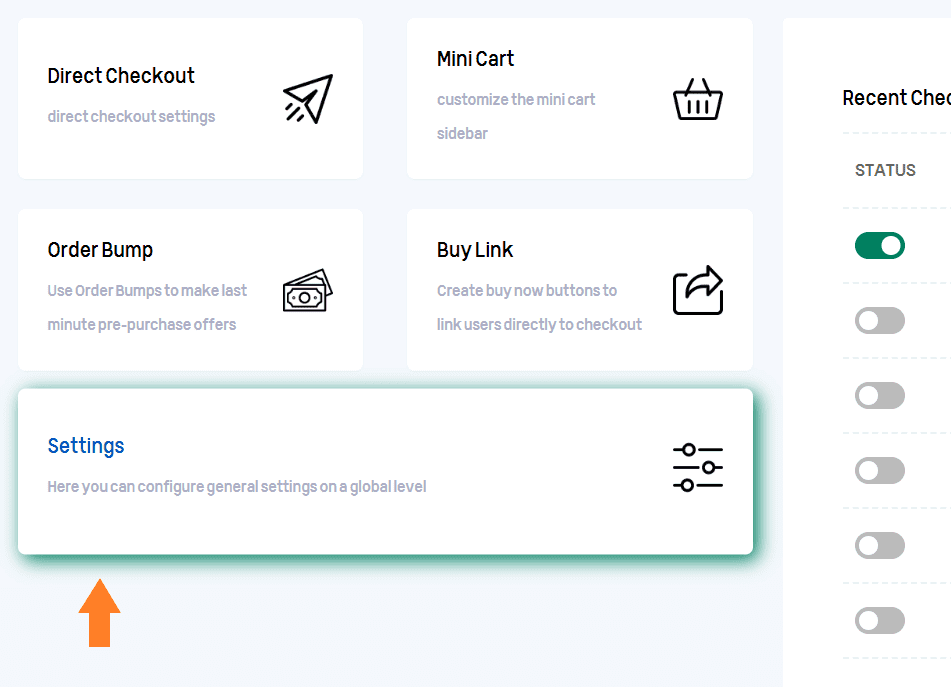
Once you get the Google Maps API key, navigate to AIO Checkout from your WordPress dashboard.
8. Enable the WooCommerce AutoComplete Address Feature
From the AIO Checkout’s main settings, Click the ‘Settings’ tab to open the general settings pop-up.
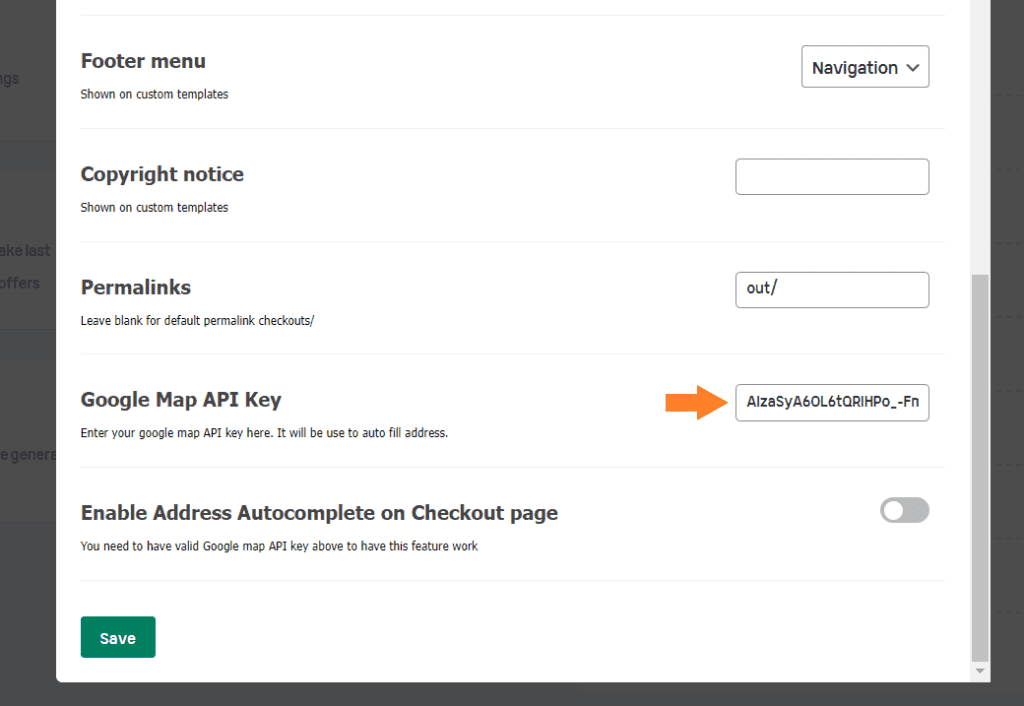
8.1. Paste the Google Maps API Key
After clicking the settings, a pop-up will appear. Scroll to the bottom of it and paste the Google Maps API Key in the ‘Google Map API Key’ field.
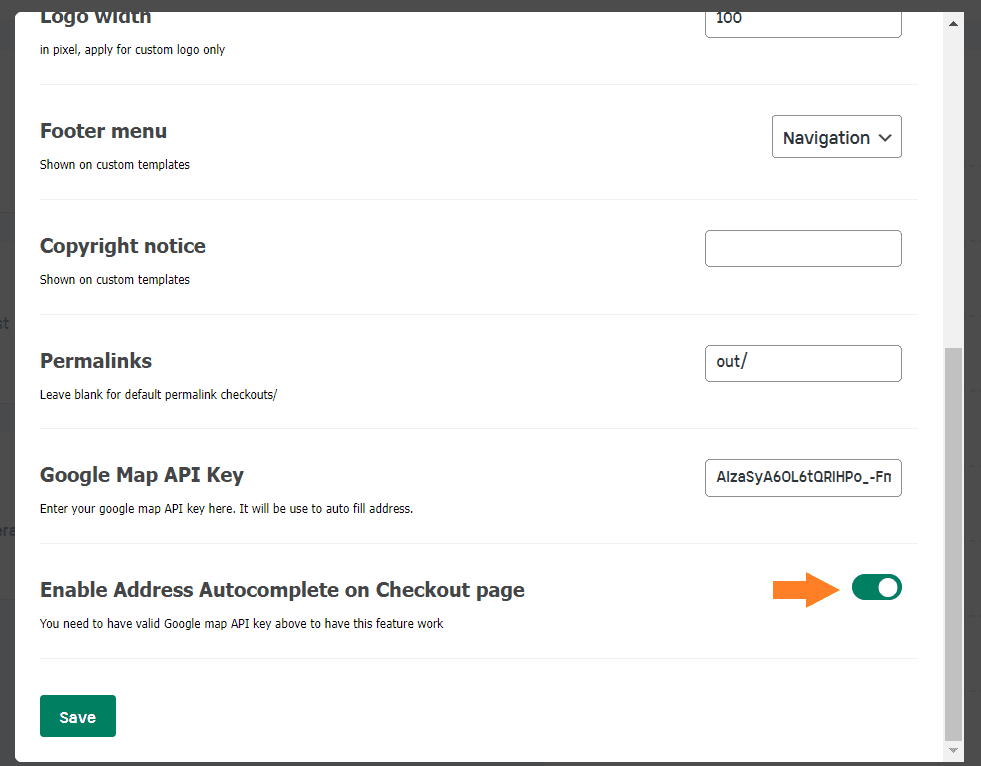
8.2. Enable the AutoComplete Address on Checkout
Finally, you need to toggle the ‘Enable Address Autocomplete on Checkout page’ option to add this feature to your store.
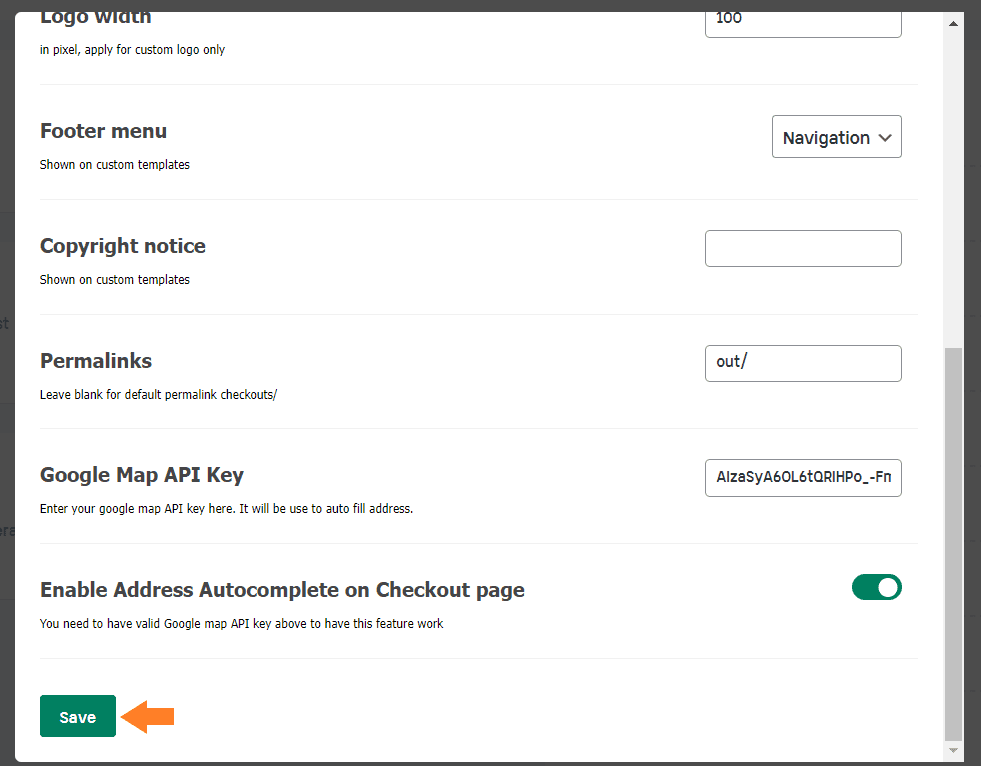
8.3. Save Settings
Finally, click the green ‘Save’ button at the bottom of the pop-up to save the settings.
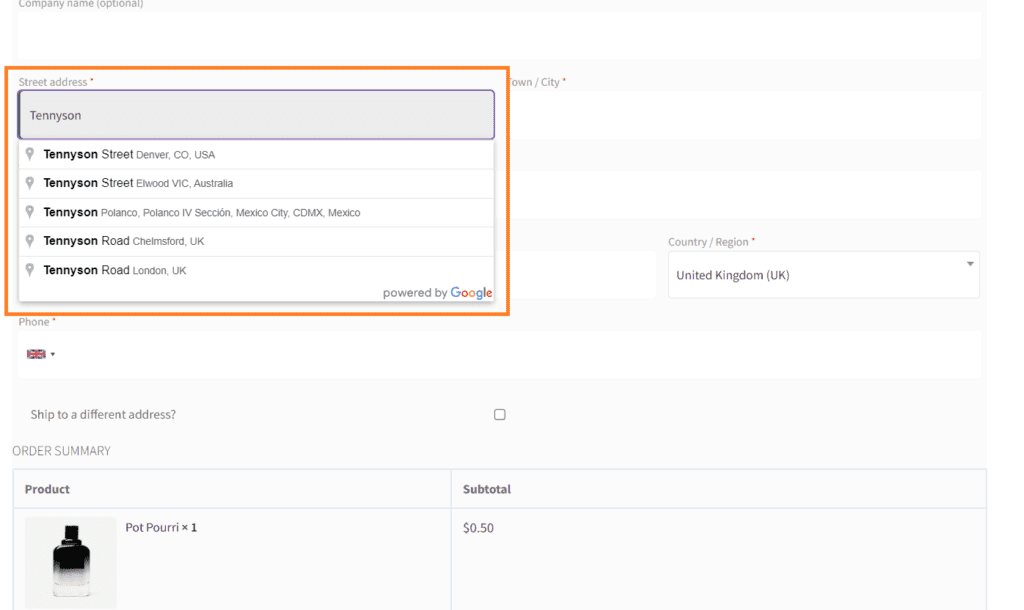
9. Final Results
Now, let’s test it. I added a product to my cart and visited the checkout page to test it. When I added the address, I could see the addresses being popped up by the Google Maps API.
I can select the address; after selecting it, the other address fields will automatically be filled up.
Conclusion
I hope this article was helpful to you and you were able to add the WooCommerce autocomplete address to your store’s checkout page.
AIO Checkout will help you improve the default WooCommerce checkout page with tons of other features for which you would generally have to download more plugins to your store.
But AIO Checkout is giving you everything you may need to improve the WooCommerce checkout and the user experience of your store.
Here’s the revised summary of this article.
- Install the AIO Checkout plugin.
- Get the Google Maps API key.
- Paste the Key to the plugin.
- Enable the autocomplete address feature from the AIO Checkout settings.
Want to speed up the checkout process by enabling an auto address? Get the AIO Checkout plugin now!


