Do you want to add a checkout countdown timer to your WooCommerce store?
If yes, then you have landed at the right place!
WooCommerce is an excellent platform for creating eCommerce websites, but it doesn’t allow you to add a timer to let customers know how long their cart will be reserved.
So In today’s article, I’ll show the step-by-step process of creating a checkout countdown for WooCommerce with the help of the AIO Checkout plugin. This plugin is an all-in-one solution to all the checkout issues and can help you add custom fields, create direct checkout, create a free shipping amount counter, and more.
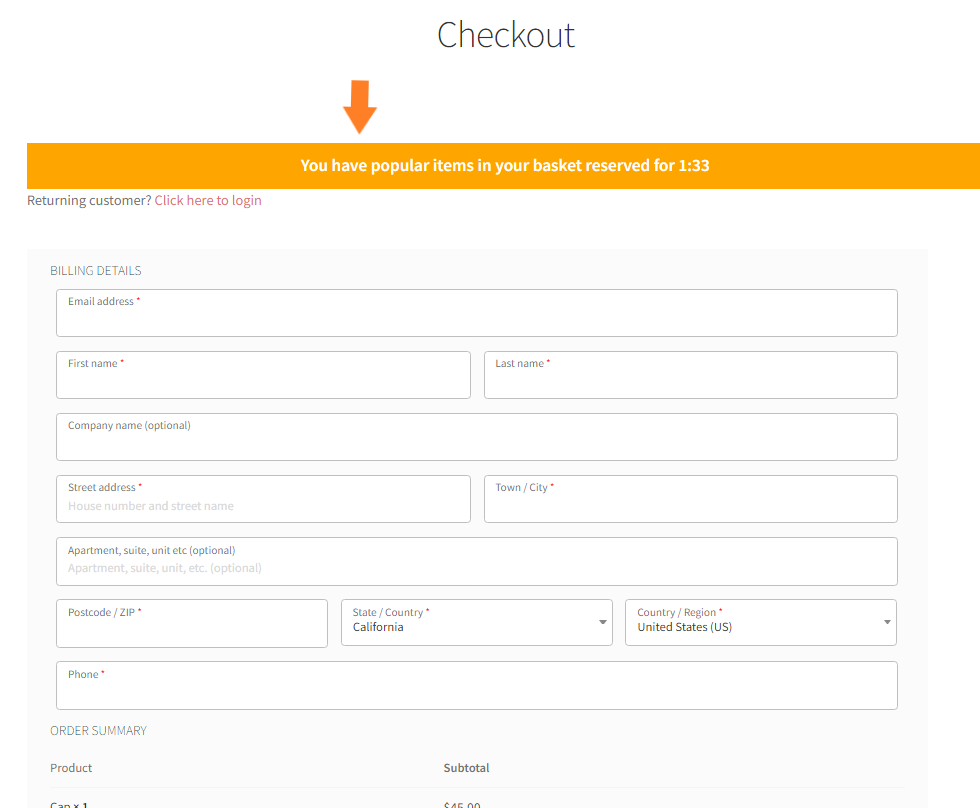
Here’s a quick sneak peek of the final results.
Before diving into the tutorial, let’s discuss some benefits of creating a WooCommerce checkout countdown.
On This Page
Benefits of WooCommerce Checkout Countdown
There are several benefits of creating a checkout countdown, but the following are a few ones.
1. Reduce Abandonment Rate
By displaying a countdown at checkout, users will feel the urgency to buy the items in the cart before they expire. This way, users will complete the purchase, and It can help you reduce the abandonment rate.
2. Convert More Sales
WooCommerce checkout countdown will help you get more sales because once the abandonment rate is reduced, you’ll get more sales than usual. It will also increase your revenue.
3. Creates Urgency
A countdown at the checkout will let users know that the items in the cart are reserved for a specific time, and if they don’t complete the purchase within that time, the cart will reset, and the items will expire, so they will need to add the items again to their cart.
So the users will try to complete the purchase before the countdown ends and the cart expires.
Now that we know a few benefits of using a checkout countdown. Let’s dive into the tutorial and see how to create one.
How to Create a Checkout Countdown for WooCommerce?
I’ll use the AIO Checkout plugin to create a WooCommerce checkout countdown. To create a checkout countdown, please follow the following steps.
Note: The countdown will only work with the checkout form created with AIO Checkout. I have created a checkout form using the AIO Checkout plugin. This tutorial is about creating a checkout countdown, but you can follow the WooCommerce checkout tutorial to create the form.
1. Install and Activate the AIO Checkout Plugin
First, you need to download the AIO Checkout plugin.
Once you have downloaded it, navigate to the Plugins » Add New from your WordPress admin dashboard, and click the Upload button to upload the downloaded file to install and activate the plugin.
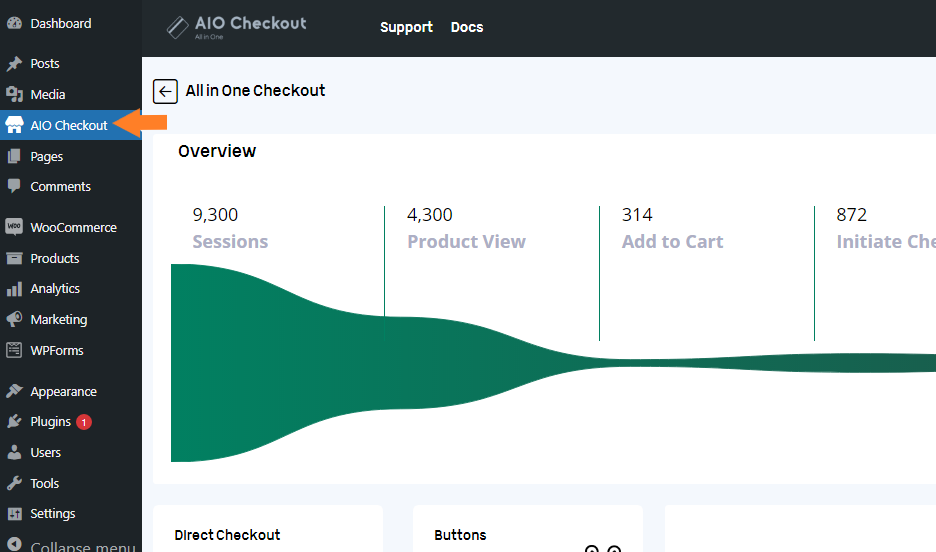
Once you have installed and activated the plugin, navigate to AIO Checkout from your WordPress dashboard.
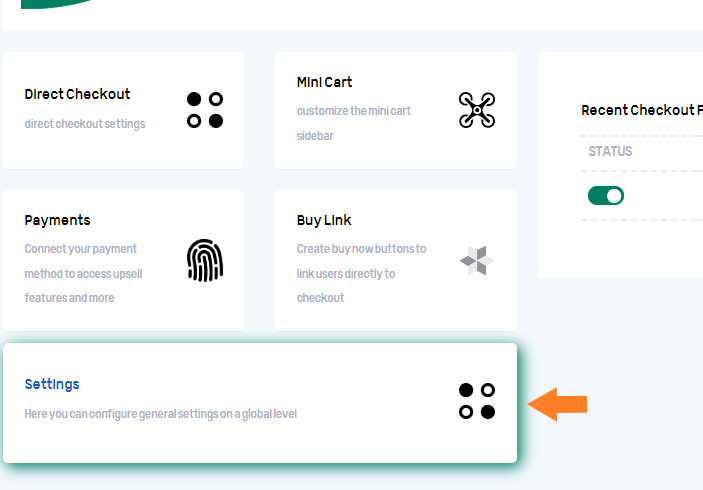
3. Click the Settings Section
After that, to create a checkout countdown, hover your mouse to the “Settings” section and click it.
4. Enable the Checkout Timer
Once you click it, a pop-up will appear from where you can configure the general settings globally. Click the toggle button next to the “Enable Checkout Timer” to enable it.

Once you enable the checkout timer, a few fields will appear below it. By using those fields, we can further control the timer.
4.1. Set Countdown Start Time
Now in the “Checkout Start From (In Minutes)” field, enter the time in minutes from where the checkout countdown will start. For example, if you set it to 1, the countdown will begin from 1 minute and then reverse.
For this tutorial, I started the time with 2 minutes.

4.2. Clear the Cart on Timeout
Now we need to enable the “Clearing Cart on timeout” option so that when the countdown is finished, the cart should be expired, and the user will have to add the items to the cart again.
Click the toggle button next to the “Clearing Cart on timeout” to enable it.
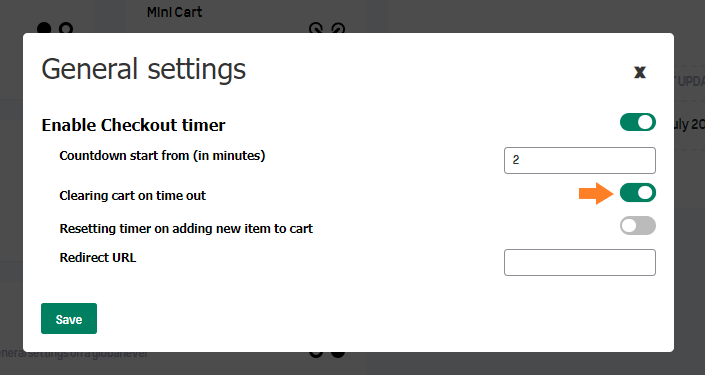
If you want, you can reset the timer when a user adds new items to the cart and add a redirect URL. But for this tutorial, I am keeping these settings off.
5. Save the Changes
Once you have enabled the checkout countdown and configured it, click the “Save“ button in the popup to save the settings.

6. Final Results
Once the settings are saved, let’s test it.
I added a few items to my cart to test it and visited my store’s checkout page. As you can see in the screenshot, the checkout countdown is at the top of the checkout form.
It will encourage the users to complete the checkout before the countdown ends.
Wrapping Up
That’s it for today’s tutorial.
Now you know how to create a WooCommerce checkout countdown with the help of the AIO Checkout plugin. As I mentioned earlier, this plugin will help create different checkout types like 2-step checkout and direct checkout, and you can also add custom checkout fields to the form.
I hope this article was helpful to you and if you got any questions, please post them in the comments section. I would love to answer all your questions.
Alternatively, you can contact our customer support team for quick assistance. They typically reply within an hour or less.
Ready to get started? Download the AIO Checkout plugin and build something great at your store!


