The more information you can display about the product, the better. It is because customers need to know everything related to the product you are selling.
By default, WooCommerce allows you to display three tabs on the product page:
- Description Tab: Includes your long product description.
- Reviews Tab: Display customers’ reviews of your product.
- Additional Information Tab: Show product attributes.
But if you want to add any other tabs, unfortunately, WooCommerce doesn’t give you any built-in option. There are plugins available that can help you with it, but you may not want to install any extra plugins to your site because they can slow down your site.
So In today’s article, I’ll share the code you can use to add custom tabs in WooCommerce. You can simply copy the code and paste it to your site, and you are good to go.
But before diving into the tutorial, let’s expand more about the product tabs that WooCommerce provides by default.
On This Page
- 1 What are the Product Tabs in WooCommerce?
- 2 How to Add Custom Product Tabs in WooCommerce?
- 2.1 1. Code to Create Tab in the Backend
- 2.2 2. Code to Add Data Panel to the Tab
- 2.3 3. Code to Save the Custom Tab Data
- 2.4 4. Code to Add Tab on the Front End
- 2.5 5. Complete Code to Copy
- 2.6 6. Paste the Code Into Your Store to Add WooCommerce Tabs
- 2.7 7. Final Results
- 3 Ending Thoughts
What are the Product Tabs in WooCommerce?
To better organize the product page, tabs can be used to categorize similar content under separate headings.
The information for a given product is organized into discrete tabs, each easily accessible by the user. That way, everything is neatly organized, simple to read, and simple to understand.

Note: The design of the tabs depends on the theme you are using. As I am using the Storefront theme, It may differ from the one in the image above if you use a different theme.
Many modern products have extensive details that the consumer needs to be informed of. But it can be difficult to fit all that data into one place.
Therefore, many product pages have several tabs, such as short descriptions, long descriptions, technical specs, reviews, and more.
So without any further ado, let’s jump into the tutorial.
How to Add Custom Product Tabs in WooCommerce?
As mentioned above, using two methods, you can add custom product tabs in WooCommerce.
- Using Plugin
- Using Custom Code
For this tutorial, I’ll be focusing on the second method. So let’s dive into it.
1. Code to Create Tab in the Backend
First, I’ll write the code to add a custom tab in the backend. The tab will be displayed in the product edit page’s product data section.
To display a custom tab, we need to use the filter hook that refers to specific points in the WooCommerce product page. Following is the hook that you should use.
Note: Please do not change the hook name or the function name. If you change the function name in the hook, then ensure you also change the function name in the rest of the code.
Also, you can replace the ‘Woosuite Custom Tab’ with the tab name you want to display in the product data section of the product edit page in the backend.
You can copy and paste the following code to create a tab.
add_filter( 'woocommerce_product_data_tabs', 'woosuite_add_custom_product_data_tab' );
function woosuite_add_custom_product_data_tab( $tabs ) {

	$tabs['woosuite'] = array(
		'label'    => __( 'Woosuite Custom Tab', 'your-text-domain' ),
		'target'   => 'woosuite_product_data_panel',
		'priority' => 100,
	);
	return $tabs;

}
2. Code to Add Data Panel to the Tab
Now, We need to write the code that will add the data panel to the tab so that when you click the tab in the backend, you can add data to the tab.
First, I’ll use the action hook and then write the function to add the data panel to the tab.
Please do not change anything here, as the code won’t work. You can add the data you want if you have good code knowledge.
Following is the code to add the data panel to the custom tab in the backend.
add_action( 'woocommerce_product_data_panels', 'woosuite_add_product_data_panels' );
function woosuite_add_product_data_panels() {

	echo '<div id="woosuite_product_data_panel" class="panel woocommerce_options_panel hidden">';

	woocommerce_wp_text_input(
		array(
			'id'          => 'woosuite_tab_title',
			'value'       => get_post_meta( get_the_ID(), 'woosuite_tab_title', true ),
			'label'       => __( 'Tab title', 'your-text-domain' ),
			'description' => __( 'Set a title for the tab in the front end.', 'your-text-domain' ),
		)
	);

	woocommerce_wp_select(
		array(
			'id'          => 'woosuite_tab_content',
			'value'       => get_post_meta( get_the_ID(), 'woosuite_tab_content', true ),
			'label'       => __( 'Tab content', 'your-text-domain' ),
			'description' => __( 'Select a page to display its content in the custom tab.', 'your-text-domain' ),
			'options'     => wp_list_pluck( get_pages(), 'post_title', 'ID' ),
		)
	);

	echo '</div>';

}
3. Code to Save the Custom Tab Data
Once the data panels are added, we need to save the data so we can use it to display on the front end.
We’ll first use an action hook and then write the function to save the custom tab data. Following is the code to do so.
add_action( 'woocommerce_process_product_meta', 'woosuite_save_custom_tab_data' );
function woosuite_save_custom_tab_data( $post_id ) {

	$woosuite_tab_title   = $_POST['woosuite_tab_title'];
	$woosuite_tab_content = $_POST['woosuite_tab_content'];

	if ( ! empty( $woosuite_tab_title ) ) {
		update_post_meta( $post_id, 'woosuite_tab_title', esc_html( $woosuite_tab_title ) );
	}

	if ( ! empty( $woosuite_tab_content ) ) {
		update_post_meta( $post_id, 'woosuite_tab_content', absint( $woosuite_tab_content ) );
	}
}
4. Code to Add Tab on the Front End
Now everything is done at the backend, but we want to show the data on the front end, which we saved in the above step.
Following is the code to help you do so.
add_filter( 'woocommerce_product_tabs', 'woosuite_new_wc_product_tab' );
function woosuite_new_wc_product_tab( $tabs ) {
	global $product;

	$title = get_post_meta( $product->get_ID(), 'woosuite_tab_title', true );

	if ( empty( $title ) ) {
		return $tabs;
	}

	$tabs['desc_tab'] = array(
		'title'    => $title,
		'priority' => 50,
		'callback' => 'woosuite_new_wc_product_tab_content',
	);

	return $tabs;
}
function woosuite_new_wc_product_tab_content() {
	global $product;

	$page    = get_post_meta( $product->get_ID(), 'woosuite_tab_content', true );
	$content = apply_filters( 'the_content', get_post_field( 'post_content', $page ) );

	echo $content;
}
5. Complete Code to Copy
I hope you have understood the code. The complete code will be something like the following. You can copy and paste it to your store to add WooCommerce tabs.
add_filter( 'woocommerce_product_data_tabs', 'woosuite_add_custom_product_data_tab' );
function woosuite_add_custom_product_data_tab( $tabs ) {

	$tabs['woosuite'] = array(
		'label'    => __( 'Woosuite Custom Tab', 'your-text-domain' ),
		'target'   => 'woosuite_product_data_panel',
		'priority' => 100,
	);
	return $tabs;

}
add_action( 'woocommerce_product_data_panels', 'woosuite_add_product_data_panels' );
function woosuite_add_product_data_panels() {

	echo '<div id="woosuite_product_data_panel" class="panel woocommerce_options_panel hidden">';

	woocommerce_wp_text_input(
		array(
			'id'          => 'woosuite_tab_title',
			'value'       => get_post_meta( get_the_ID(), 'woosuite_tab_title', true ),
			'label'       => __( 'Tab title', 'your-text-domain' ),
			'description' => __( 'Set a title for the tab in the front end.', 'your-text-domain' ),
		)
	);

	woocommerce_wp_select(
		array(
			'id'          => 'woosuite_tab_content',
			'value'       => get_post_meta( get_the_ID(), 'woosuite_tab_content', true ),
			'label'       => __( 'Tab content', 'your-text-domain' ),
			'description' => __( 'Select a page to display its content in the custom tab.', 'your-text-domain' ),
			'options'     => wp_list_pluck( get_pages(), 'post_title', 'ID' ),
		)
	);

	echo '</div>';

}
add_action( 'woocommerce_process_product_meta', 'woosuite_save_custom_tab_data' );
function woosuite_save_custom_tab_data( $post_id ) {

	$woosuite_tab_title   = $_POST['woosuite_tab_title'];
	$woosuite_tab_content = $_POST['woosuite_tab_content'];

	if ( ! empty( $woosuite_tab_title ) ) {
		update_post_meta( $post_id, 'woosuite_tab_title', esc_html( $woosuite_tab_title ) );
	}

	if ( ! empty( $woosuite_tab_content ) ) {
		update_post_meta( $post_id, 'woosuite_tab_content', absint( $woosuite_tab_content ) );
	}
}
add_filter( 'woocommerce_product_tabs', 'woosuite_new_wc_product_tab' );
function woosuite_new_wc_product_tab( $tabs ) {
	global $product;

	$title = get_post_meta( $product->get_ID(), 'woosuite_tab_title', true );

	if ( empty( $title ) ) {
		return $tabs;
	}

	$tabs['desc_tab'] = array(
		'title'    => $title,
		'priority' => 50,
		'callback' => 'woosuite_new_wc_product_tab_content',
	);

	return $tabs;
}
function woosuite_new_wc_product_tab_content() {
	global $product;

	$page    = get_post_meta( $product->get_ID(), 'woosuite_tab_content', true );
	$content = apply_filters( 'the_content', get_post_field( 'post_content', $page ) );

	echo $content;
}
6. Paste the Code Into Your Store to Add WooCommerce Tabs
Now you have understood the code, let’s add it to your store. To add the code, there are two methods, and you can use any of them. I’ll explain both ways.
So let’s dive in.
6.1. Method 1: Add the Code Using the Plugin
The plugin is the first method to add the code to your site. Please follow the following steps to add it.
1. Install the Code Snippet Plugin
You need to download the Code Snippets plugin and install it on your site. To install the plugin, navigate to the Plugins » Add New from your WordPress admin dashboard and search for the ‘code snippet’ in the search bar.
I have already installed it and need to activate the plugin.

Once you have installed and activated the plugin, navigate to the Snippets » Add New from your WordPress admin dashboard.

3. Paste the Code
After that, give a name to the snippet. You can name it whatever you want, and it’s only for admin purposes to identify the snippet.
Once you have named it, paste the code into the Code Editor by pressing Ctrl+V.

4. Save the Snippet
Now scroll to the bottom of the page and click the ‘Save Changes and Activate’ button to save the snippet.

6.2. Method 2: Add the Code in the functions.php file of your Theme
In the 2nd method, I’ll paste the code into the theme’s functions.php file. Please follow the following steps to paste the code.
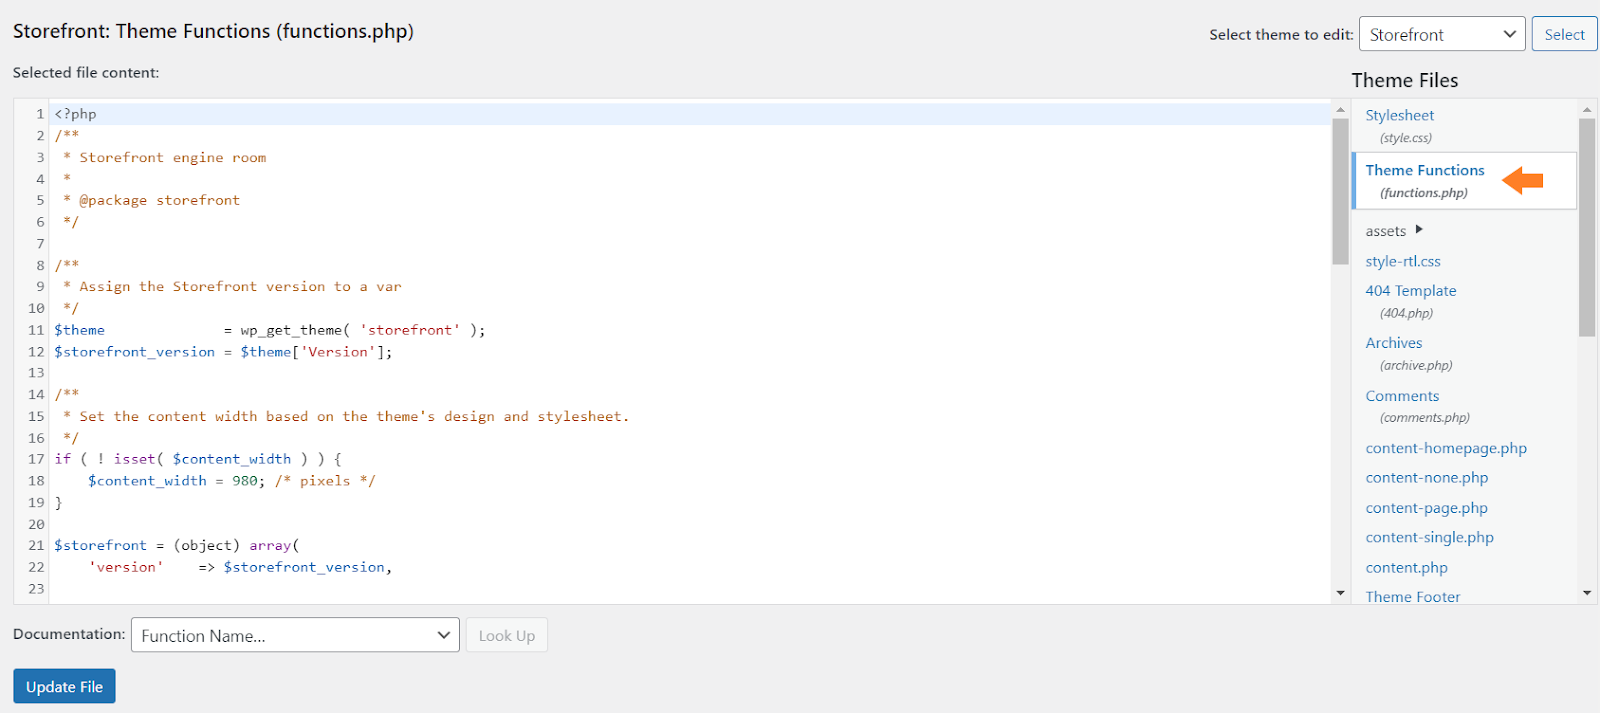
Navigate to Appearance » Theme File Editor from your WordPress admin dashboard.

2. Select the functions.php File
By default, your activated theme will be selected. You just need to click the functions.php file, and the file’s code will be displayed in the code editor.
3. Paste the Code
Now scroll to the end of the file’s code and paste the code.
Note: If you update the theme, this code will be removed, so I recommend pasting the code using the plugin.

7. Final Results
No matter which method you choose to paste the code to your store, the final results will be the same.
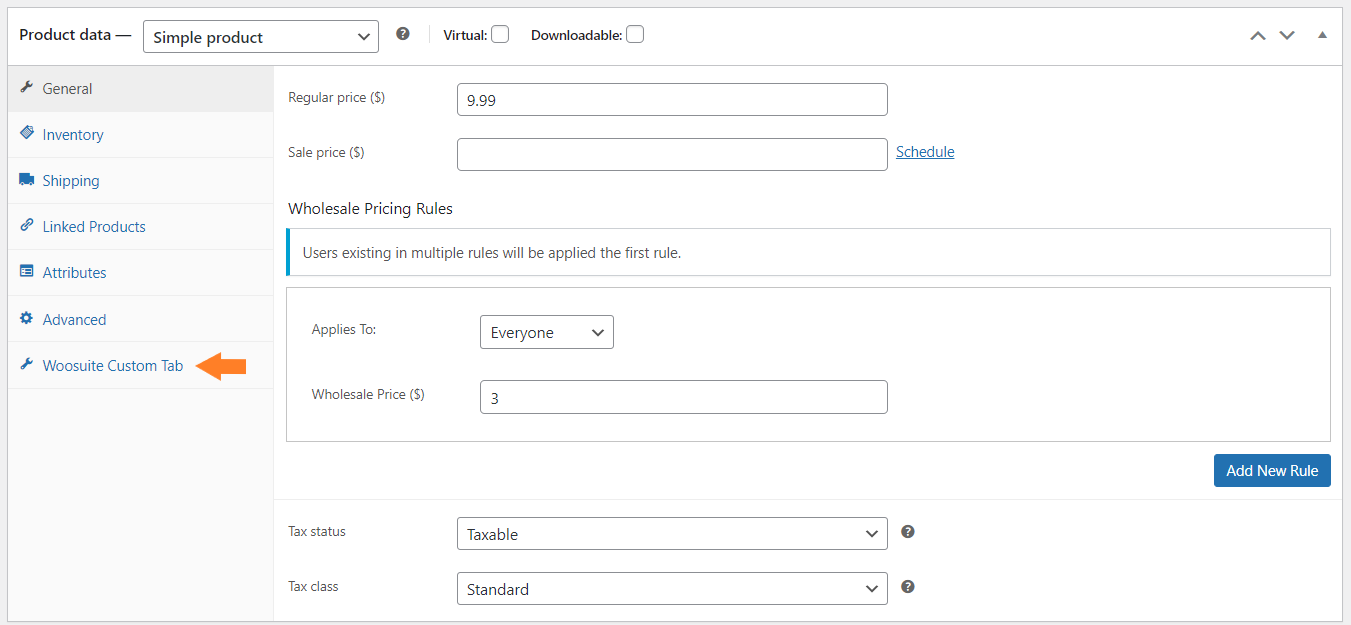
Once the settings are saved, edit any product available on your WooCommerce store and scroll to the product data section. You’ll see the ‘Woosuite Custom Tab’ below the ‘Advanced’ tab.
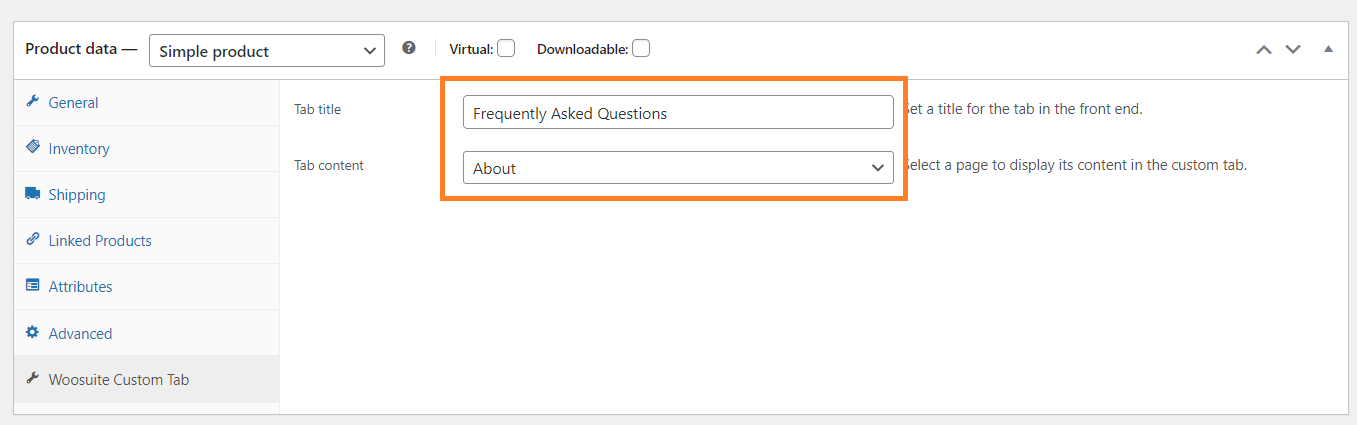
Once you click the tab, you’ll be able to add the custom tab title that will be displayed on the front end. You can also select the page from the dropdown to display its content on the front end in the tab.
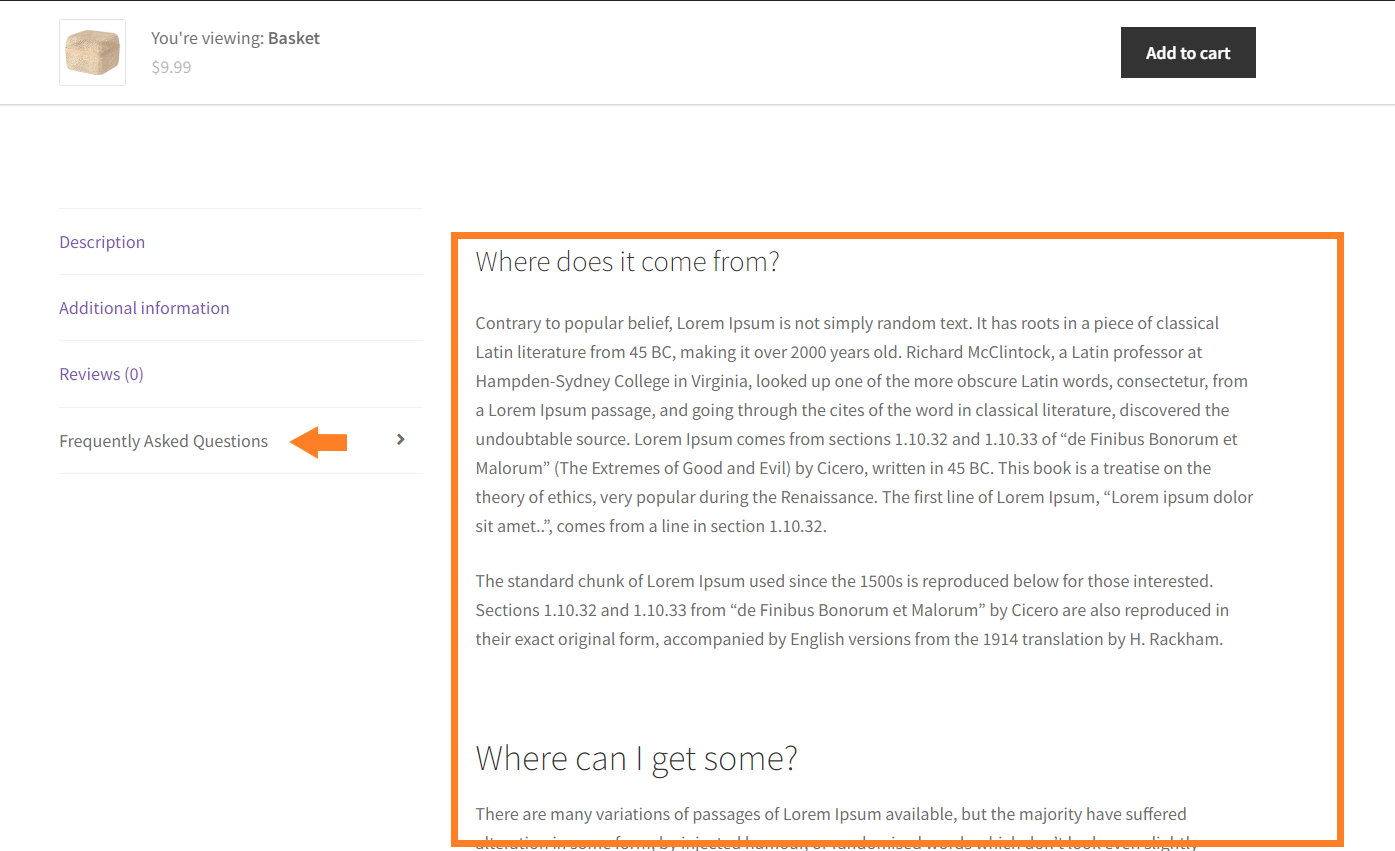
Once you update the product and visit the product page, you’ll notice that the tab has been added on the front end.
Ending Thoughts
That’s it for today’s article.
I hope this article was helpful to you and you were able to add custom WooCommerce tabs to your store. Please let me know if the code doesn’t work. I’ll be happy to revise it for you.


