Whether you sell fabrics, custom furniture, or other products requiring measurement-based pricing, adding a measurement price calculator will help you offer a convenient shopping experience.
In today’s article, I’ll walk you through the step-by-step process to create a WooCommerce measurement price calculator. Finally, I’ll share some more tips that you can use to increase customer engagement and sales.
So without any further ado, let’s jump into the tutorial.
On This Page
How to Create a Woocommerce Measurement Price Calculator?
Below, I’ll show you 2 different ways to add a measurement price to the WooCommecrce store; in the first method, you will have more flexibility to create complex formulas, discounts, and conditional calculations.
Method 1: Using AovUp Product Addon
To add a WooCommerce measurement price calculator in my demo store, I’ll use the AovUp Product Add-Ons & Extra Options plugin. It will allow you to create a custom pricing formula to calculate the price, add different types of custom fields to your products, and modify them as per your requirements.
Note: Make sure to install and activate the plugin to follow along with this tutorial.
I’ll use the curtain example to allow customers to enter the measurements, and the price will be calculated accordingly. I’ll also add a few options, like fitting type and handles, and charge extra.
You can create any product you want; the process would be the same. You will just need to adjust the fields and the formula accordingly.
Follow the following steps to create a measurement price calculator in your WooCommerce store.
1. Create a New Product
The first thing you need to do is add a new product to your store. You can also edit an existing product.
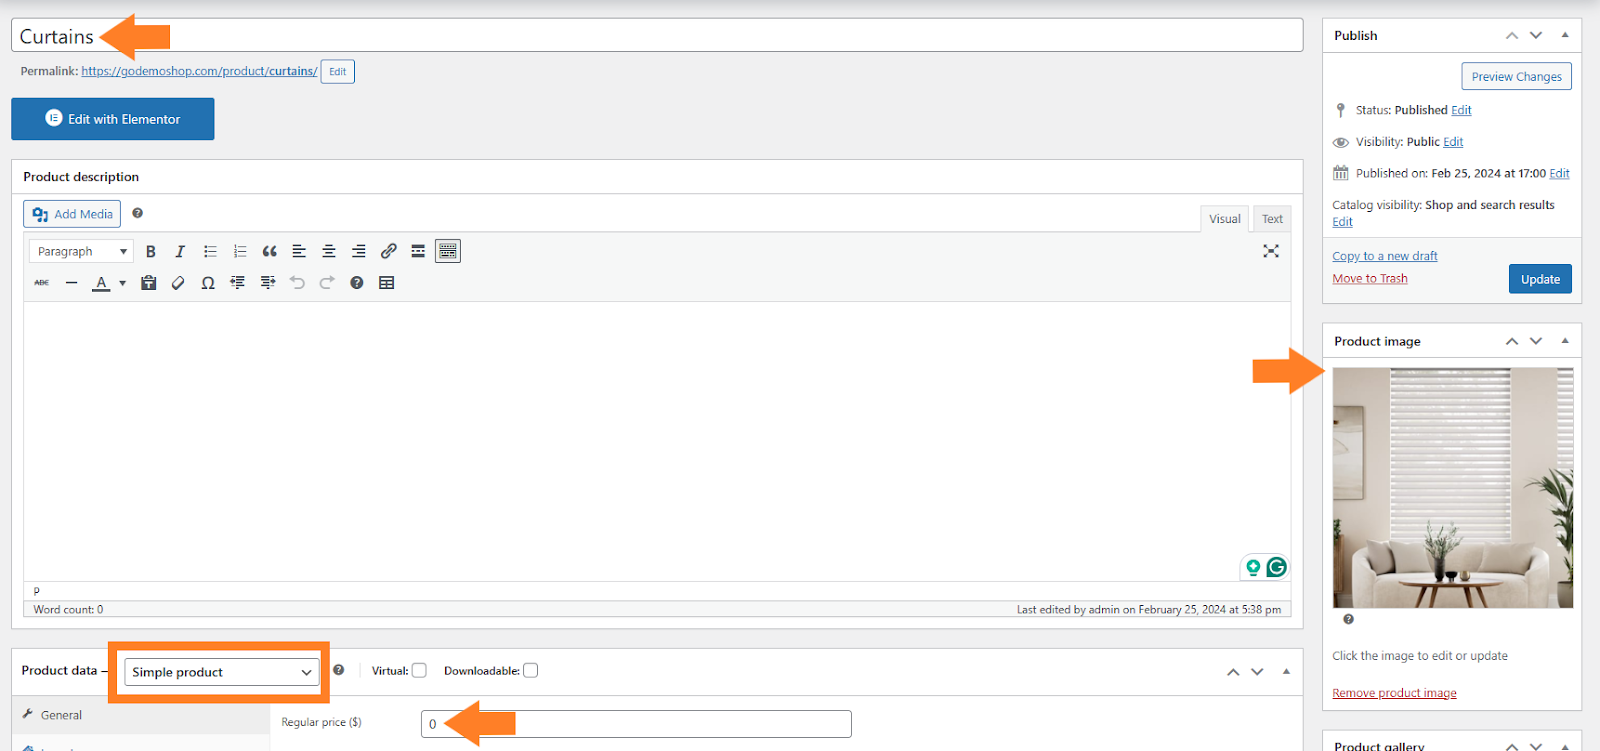
But ensure the product type you have added to your store is simple, and you do not create variations. We’ll use the plugin to add options and calculate its price.
I’ll add a new product to my store. To do so, navigate to Products > Add New from the WordPress dashboard.
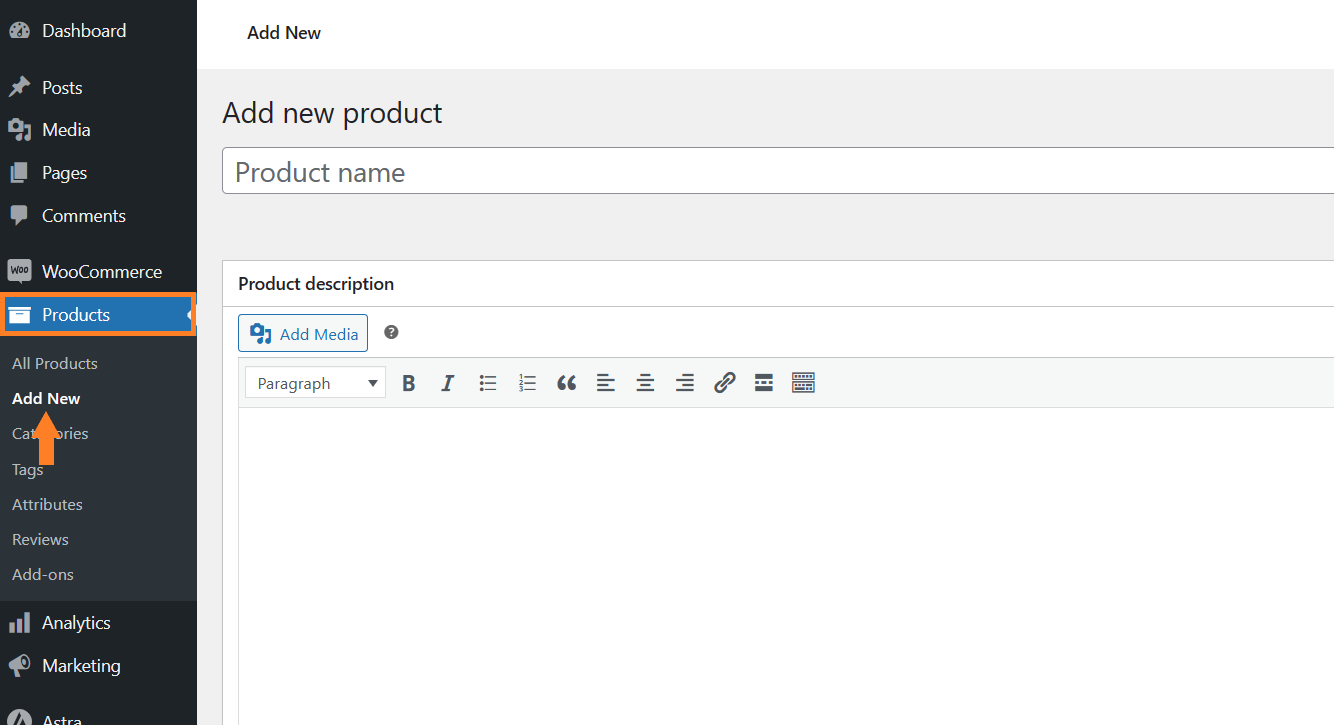
1.1. Add the Product Details
Once you click it, you’ll be redirected to the page where you can add the details and publish the product.
Create a simple product and add the product title, image, and price. You can also add a description if you want. There are several other options that you can configure from there.
Note: The price you enter here will be the base price, and the options we create later in this article will have separate prices.
I have added the 0 as the base price. It depends on you whether you want to charge a base price.
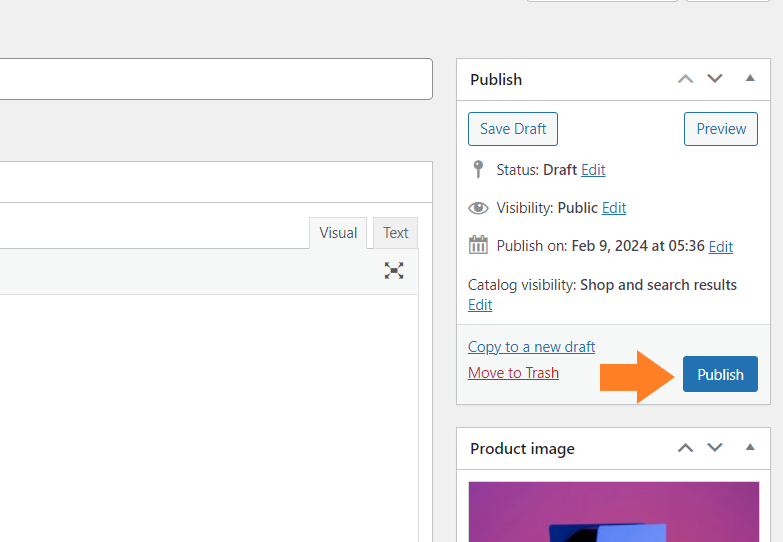
1.2. Publish the Product
Once you have added the necessary details, click the blue ‘Publish’ button at the top right corner of your screen to publish the product.
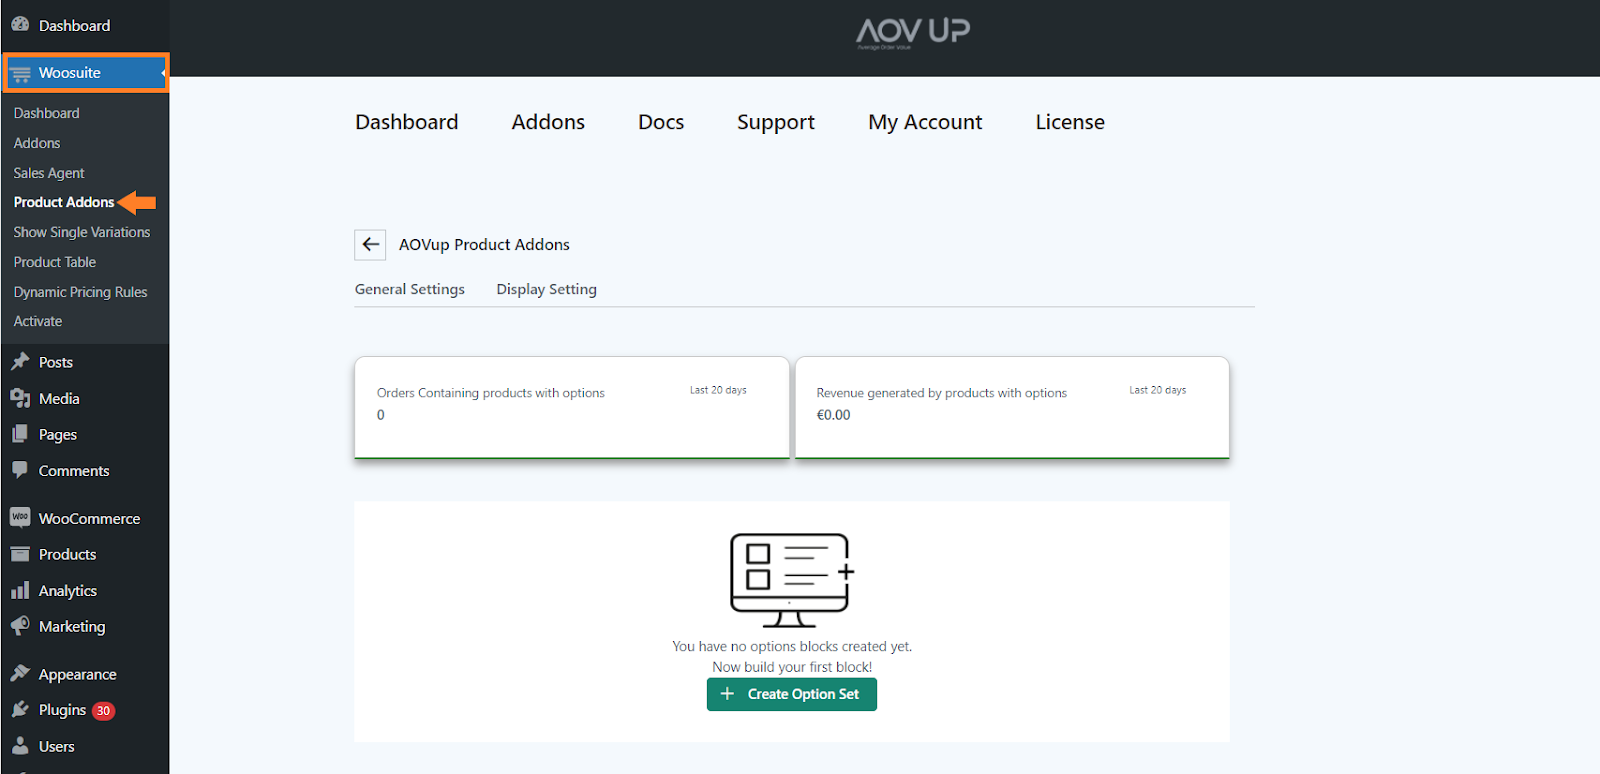
After creating the product, we need to add options to allow customers to enter the measurement they want to purchase and calculate the price accordingly.
Your use case might be different, you’ll need to add the options depending on it.
To do so, navigate to AovUp > Product add-ons from your WordPress dashboard.
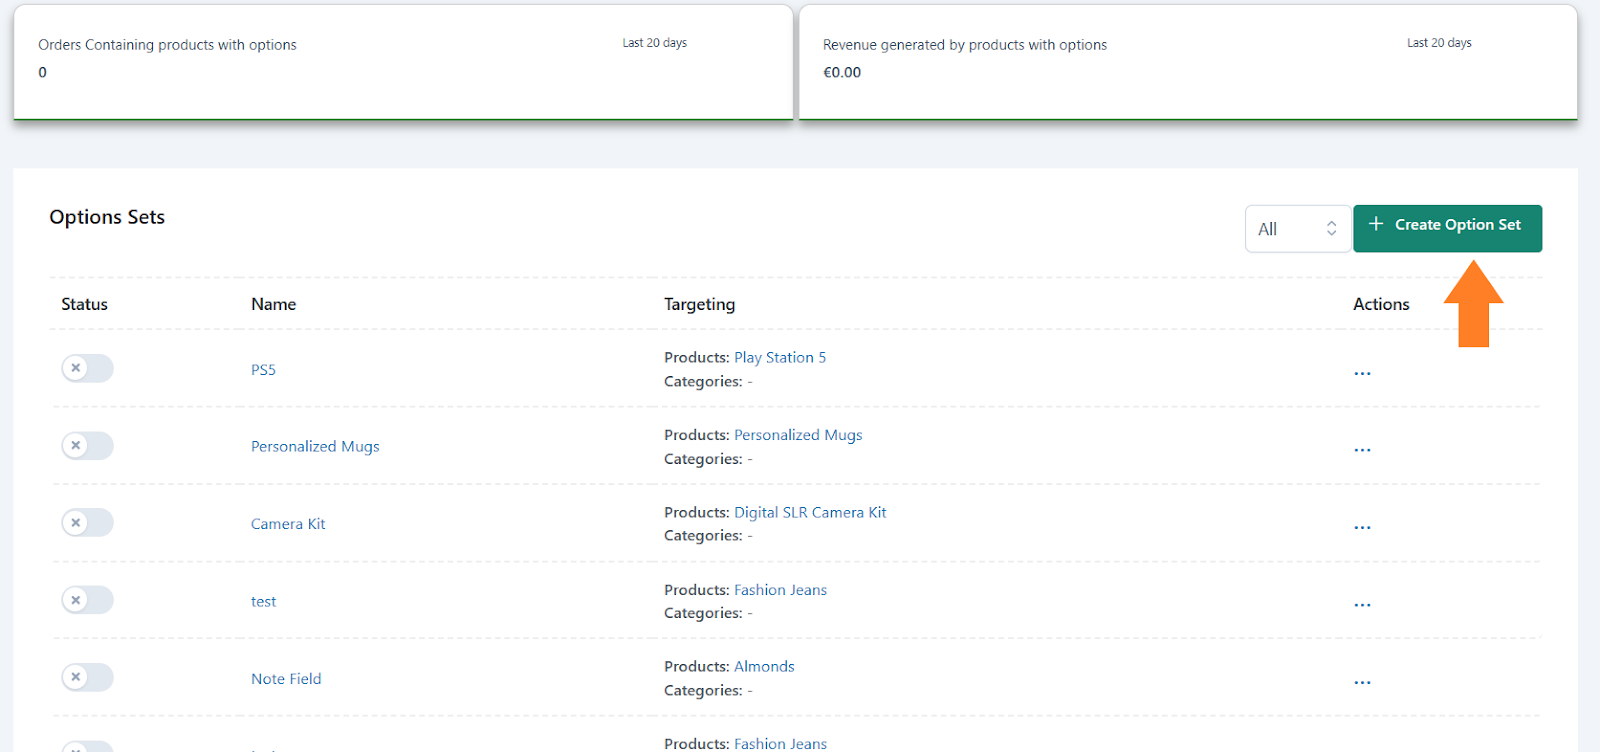
3. Create an Option Set
Next, we need to create an option set and add different fields to make it easy for customers to enter the length and width.
Click the ‘Create Option Set’ button to add an option set.
3.1. Add the Option Set Name
After clicking it, you will see a new interface with different settings. In the ‘Option set name’ field, add the block name. It could be anything you want, but you may want to keep it as descriptive as possible.
It’ll help you if you are working with different option sets.
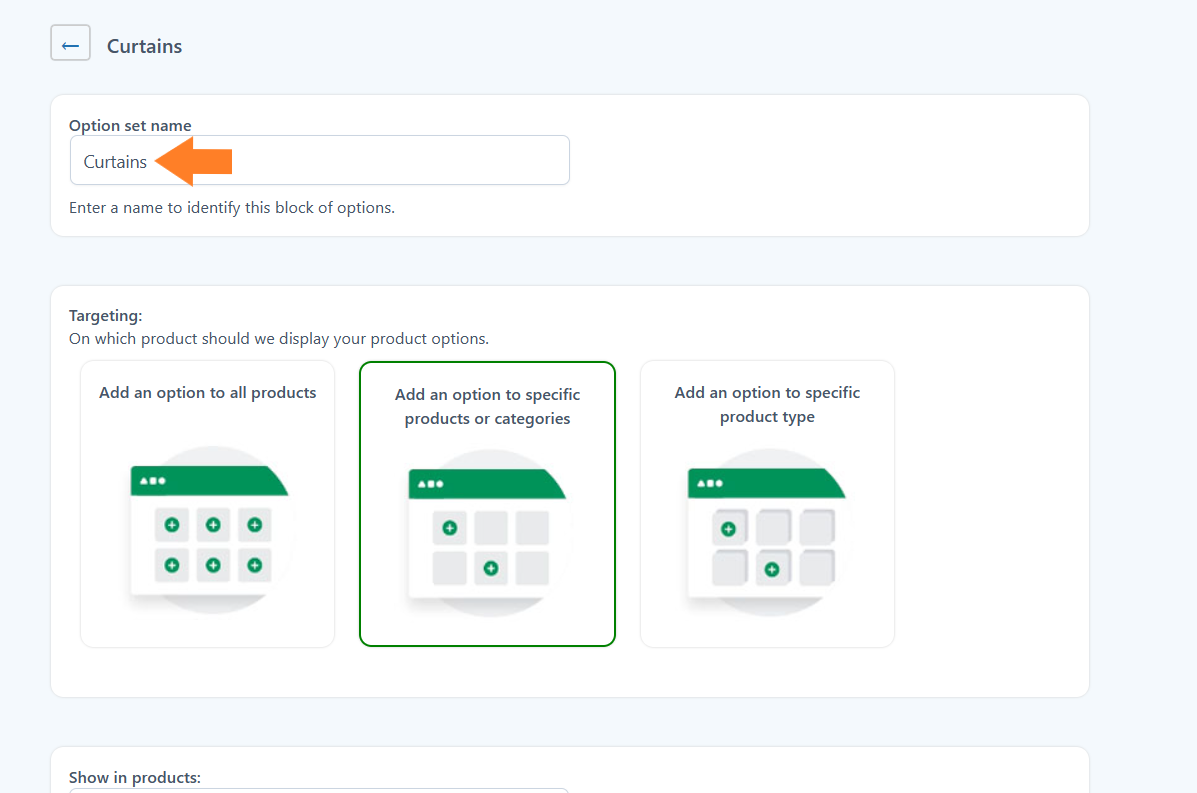
3.2. Select the Product
Next, you need to select the product to which you want to add different fields. You have three different options:
- Add an option to all products.
- Add an option to specific products or categories.
- Add an option to a specific product type.
You can select any of them depending on your goals. However, in this tutorial, I only want to display this option set for the product I created above.
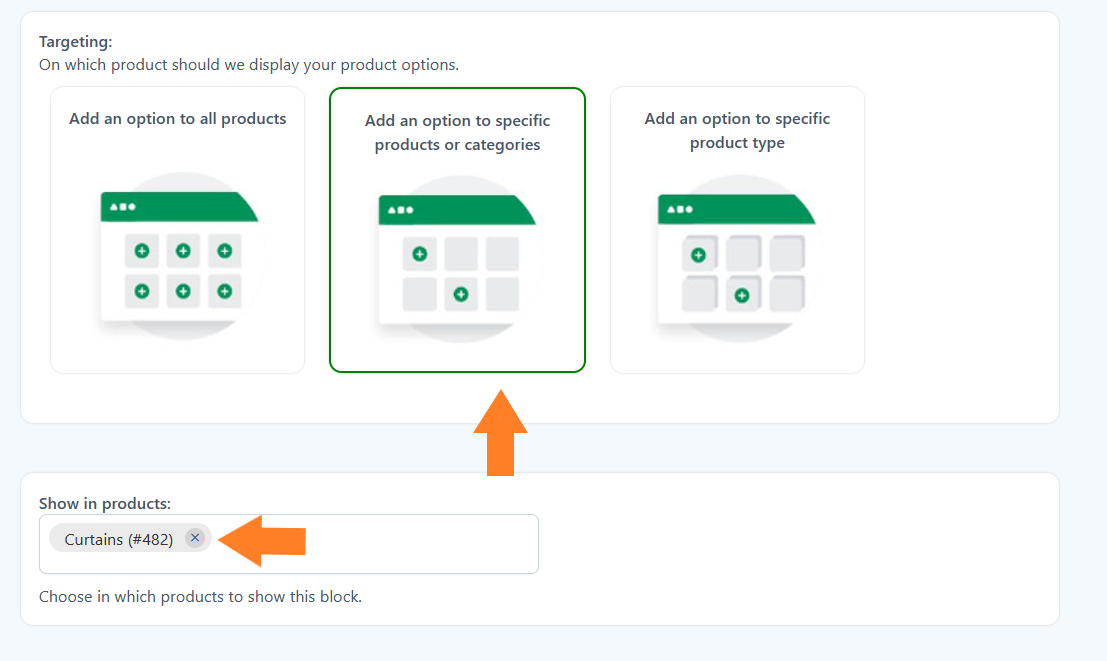
- I’ll select the ‘Add an option to specific products or categories’ option by clicking its image.
- Once you select it, two new fields will appear below it, from which you can select the products and categories. I have selected a product from the ‘Show in Products’ dropdown.
4. Create Measurement Fields (Length and Width)
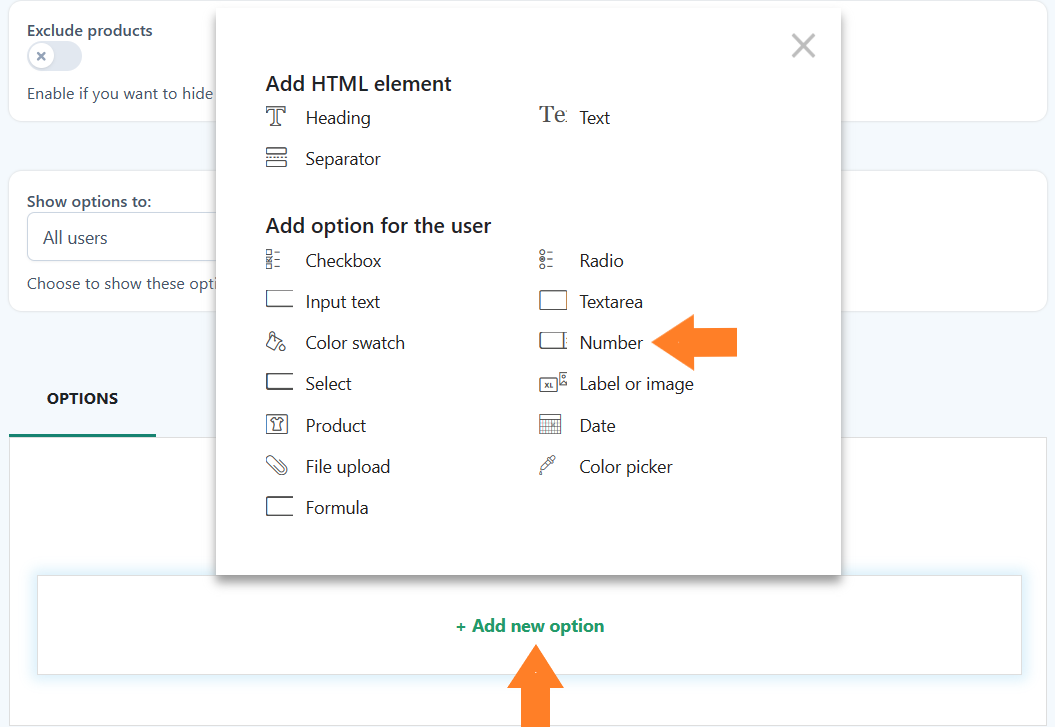
Next, we need to add number fields to the option set to allow customers to enter the measurement they want to purchase.
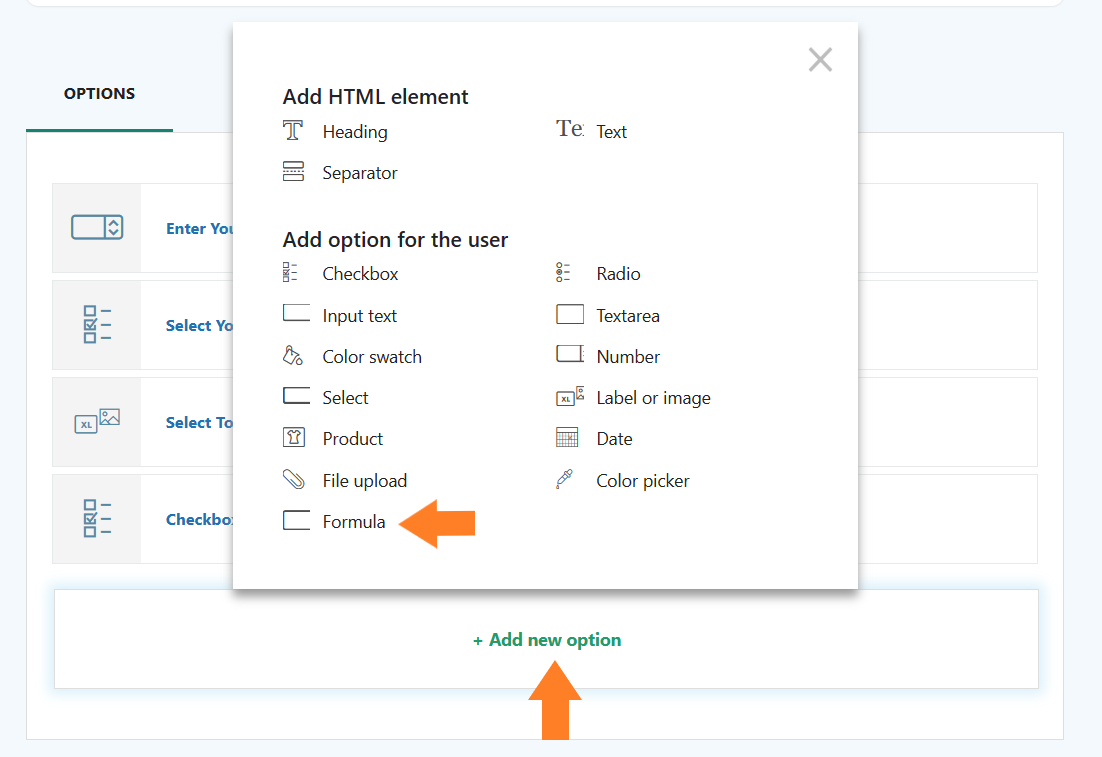
The plugin gives you a variety of options to fulfill your requirements. The following is the list of fields or options you can add using this plugin.
- Heading
- Text
- Separator
- Checkbox
- Radio buttons
- Input text
- Textarea
- Color Swatch
- Number
- Select
- Label or image
- Product
- Date
- File Upload
- Color picker
- Formula
I’ll add a Number field. To do so, click the ‘Add New Option’ button at the bottom of the page and select the field.
4.1. Add the Option Title
A new popup will slide in from the right side of your screen. From that popup, you can configure the field’s styling and other options.
These will be the same for most of the fields.
First, add the option title in the ‘Title’ field. It will be displayed on the front end. You can also add the description, which will be displayed before the option.
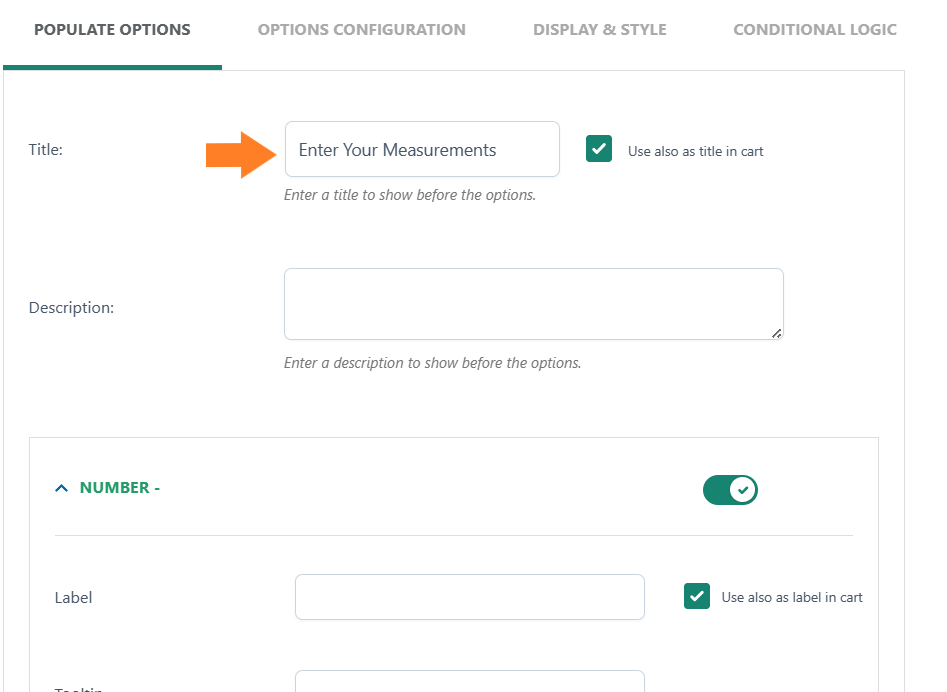
4.2. Add the Field Label
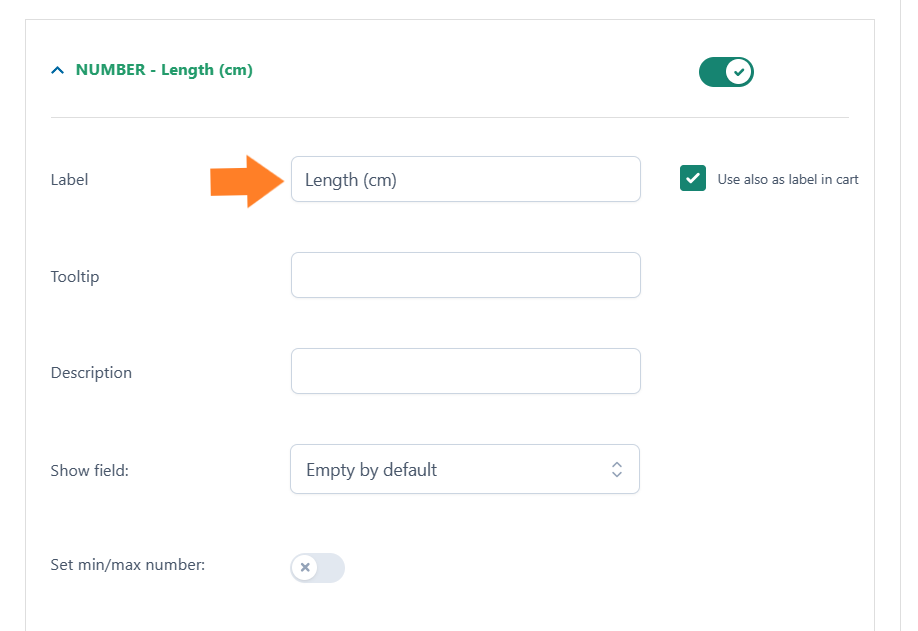
Next, add a field label in the ‘Label’ field. I have added ‘Length (cm)’ as the field label. You can also add a tooltip and description.
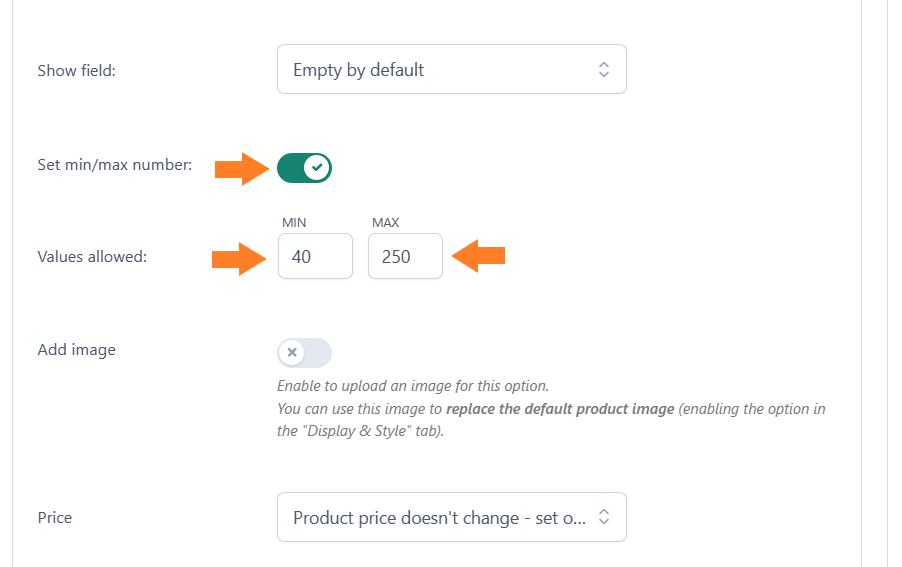
4.3. Set a Minimum and Maximum Length
You may also want to set the minimum and maximum measurements you want to sell.
Toggle the ‘Set min/max number’ to enable it. I have added 40 in the Min field and 250 in the Max field to allow customers within these measurements.
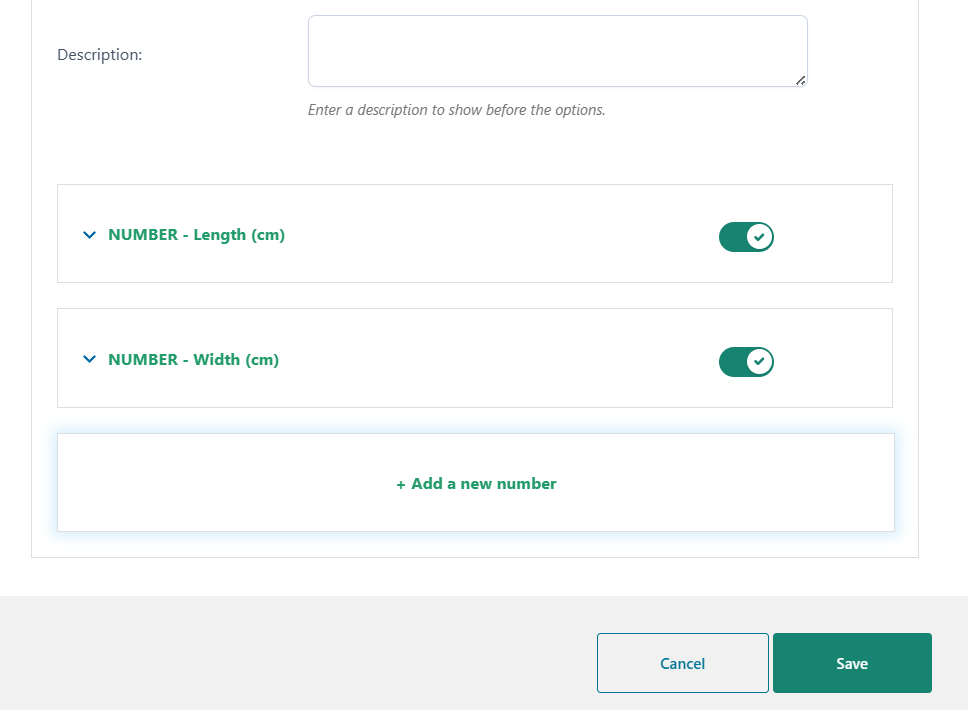
4.4. Add a Width Field
Once you have added the length field, we also need to add a width field to get the complete measurements from customers.
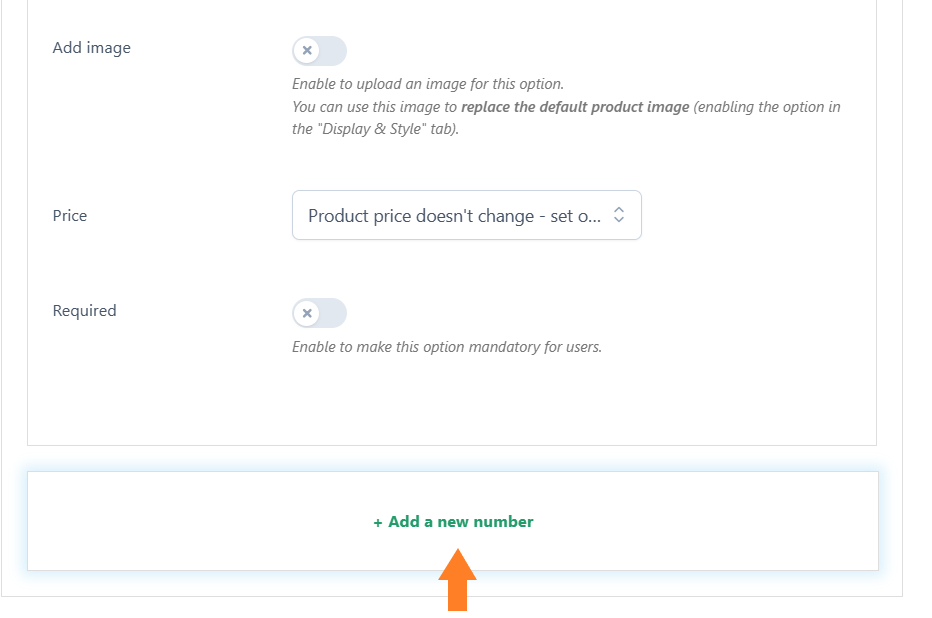
To do so, click the ‘Add a New Number’ button at the bottom of the popup.
Once added, you can configure it, add its label, and set the measurement limits. I have already configured it.
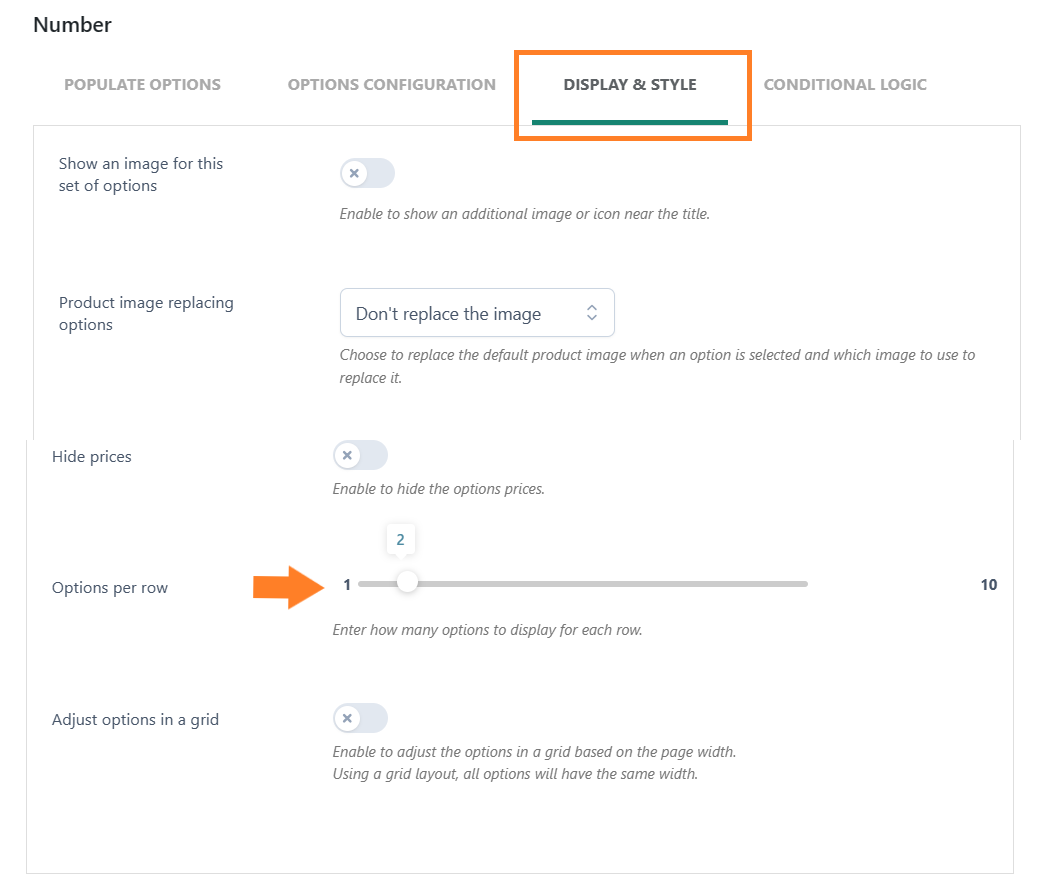
4.5. Configure the Fields Layout
As we have added two number fields, both will be displayed in a separate line. However, I want to stack them and display them in a single row.
To do so, we need to adjust its styling.
Click the ‘Design & Style’ tab within the popup and scroll to the ‘Options Per Row’ option. Set the slider to the number of options you want to display in a single row.
I want to display two options in a row, so I have set the slider to two.
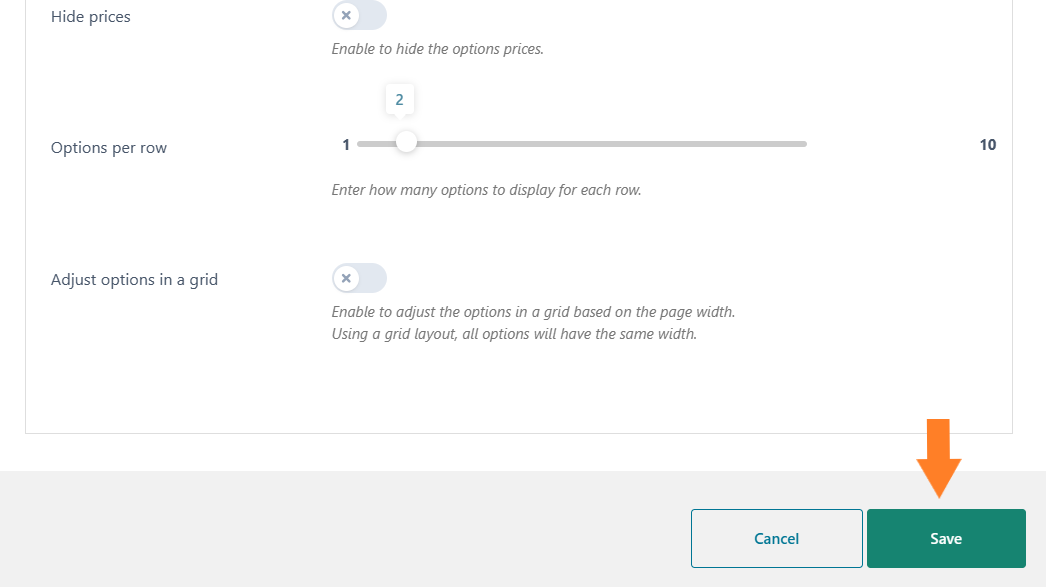
4.6. Save Settings
Finally, click the ‘Save’ button within the popup at the bottom right corner of your screen to save the settings.
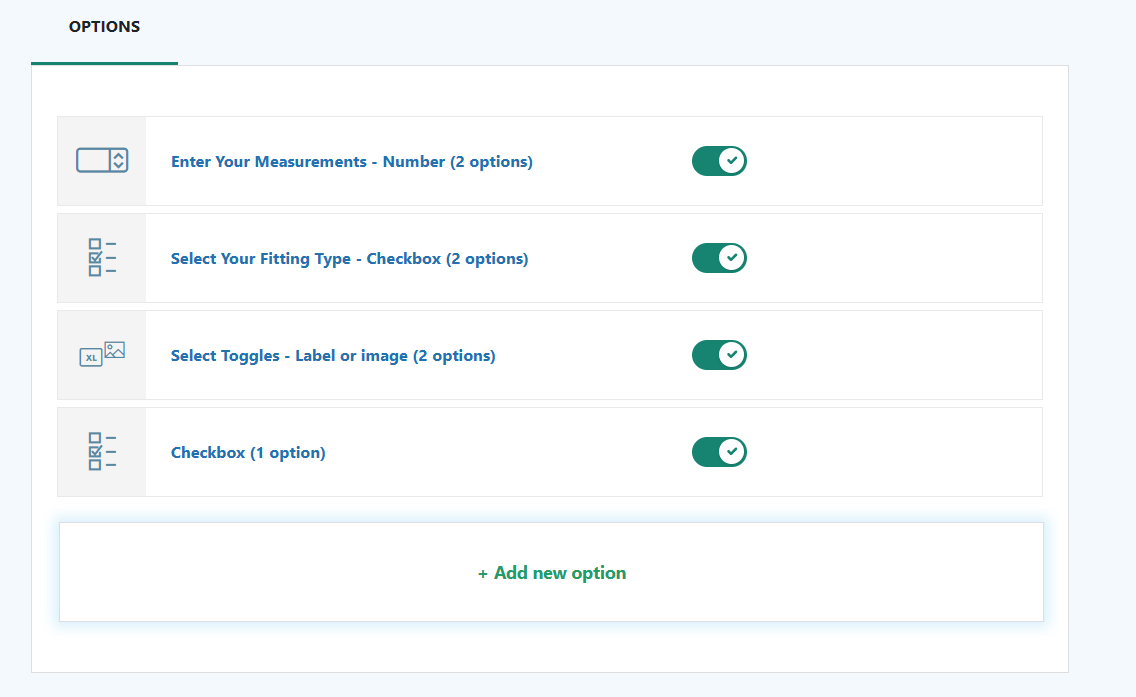
5. Add Additional Options or Addons
You can also add additional addons or options to the product to increase the average order size and give more value to your customers.
For example, I want to give customers an option to select the fitting styles and the toggles. I can charge extra for each option.
I have already added these options.
- I have used the checkbox field to add two options for a fitting type option set. You can also set an additional price for each option.
- To add toggle options, I have used the label or image field and added two different toggle options. I have set a $15 price for one of them.
- I have also added a checkbox field to allow customers to purchase sure-fit protection at an additional cost.
6. Add WooCommerce Measurement Price Calculator
After adding the necessary options, we must create a custom pricing formula to calculate the price based on the user’s desired measurements.
To create it, click the ‘Add New Option’ and select the Formula field.
6.2. Select the Price Type
A new popup will slide in from the right side of your screen. You can create a custom pricing formula and other options from that popup.
I am not adding any title or label for it.
To set the price rule type, you have three options:
- Price doesn’t change (Print Only)
- Product price increase – set formula
- Product price decrease – set formula
You can select the one that best matches your requirements, but I want to increase the product price, so I have selected the ‘Product price increase – set formula’ option from the Price dropdown.
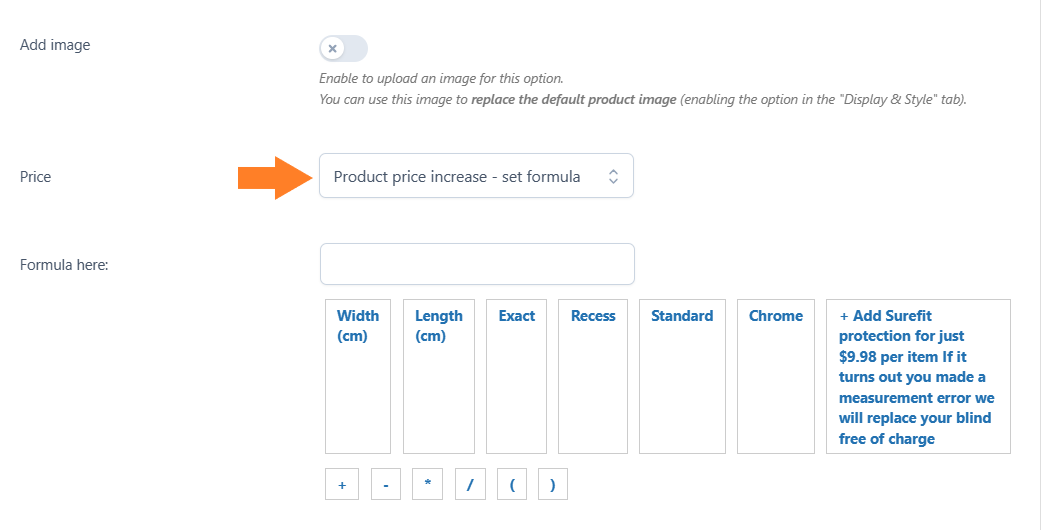
6.2. Create Measurement Price Calculator
Next, the formula field will show you all the fields you have added to this option set. You can create your custom formula using the fields to calculate the price. I want to charge per square meter. I’ll use the following formula:
( [Length(cm) * Width(cm)] / 10000) * Price per square meter
Note: I’ll use the price per square meter as $55.
Once done, don’t forget to click the ‘Save’ button at the bottom right corner of your screen to save the settings.
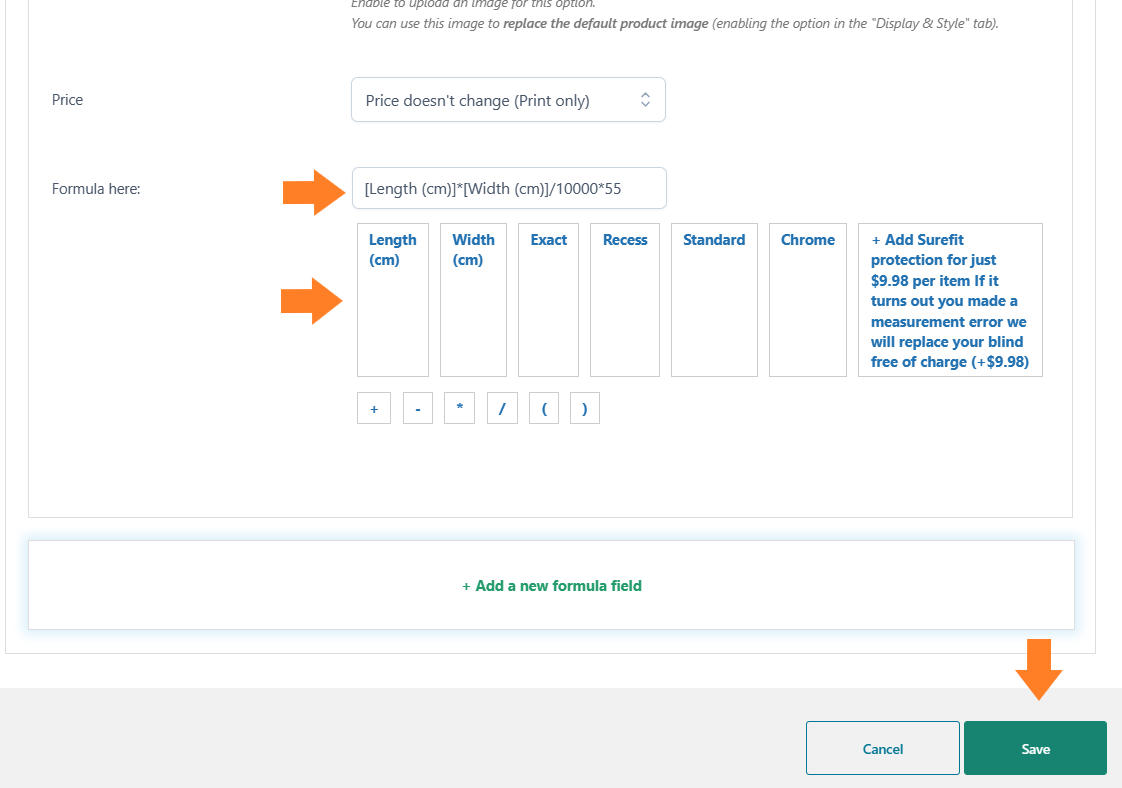
I have created one more formula field and changed the per-square-meter price to 40. I want to charge a different price based on the fitting type the customer selects.
7. Add a Conditional Logic (Optional)
If you want to add a conditions logic to the fields, you can do that easily. For example, I have added two different types of fitting options. I could create a separate pricing formula for one fitting type (Exact) and a different formula for the second fitting type (Recess).
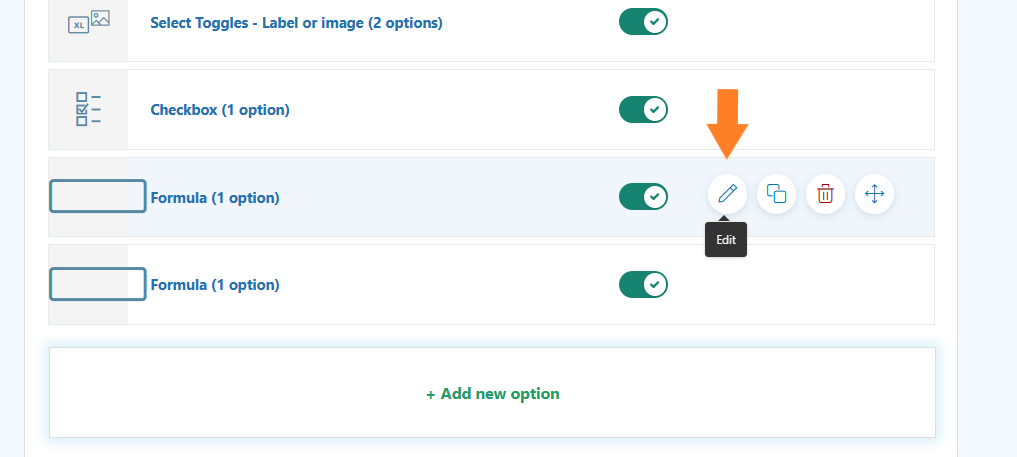
I could add a conditional logic to apply each pricing formula when a specific condition is fulfilled. To add conditional logic to the formula field, edit the field by clicking the pencil icon.
7.1. Enable the Conditional Logic
To enable the conditional logic, click the ‘Conditional Logic’ tab and toggle the ‘Set conditions to show or hide this set of options’ option.
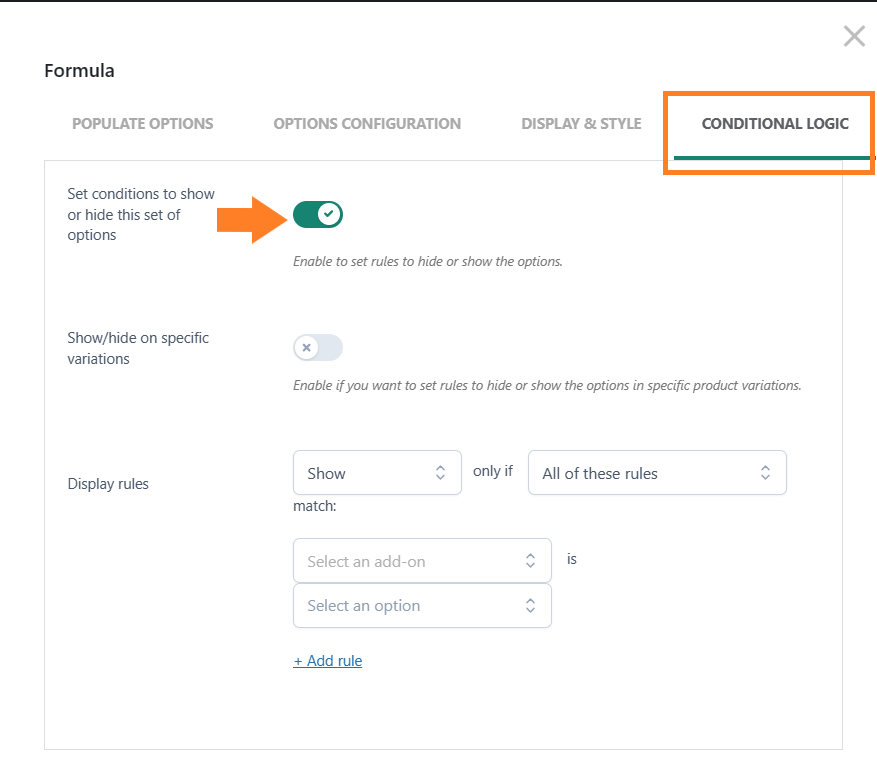
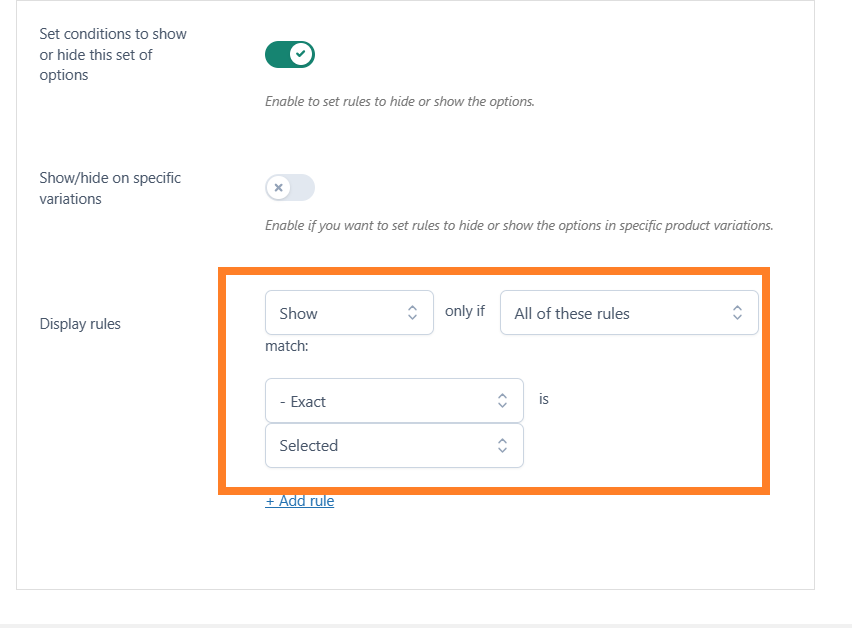
7.2. Add a Conditional Logic
Next, only apply the formula if a specific option is selected. If the ‘Exact’ fitting type is selected, I only want to apply this formula.
I have configured the logic accordingly.
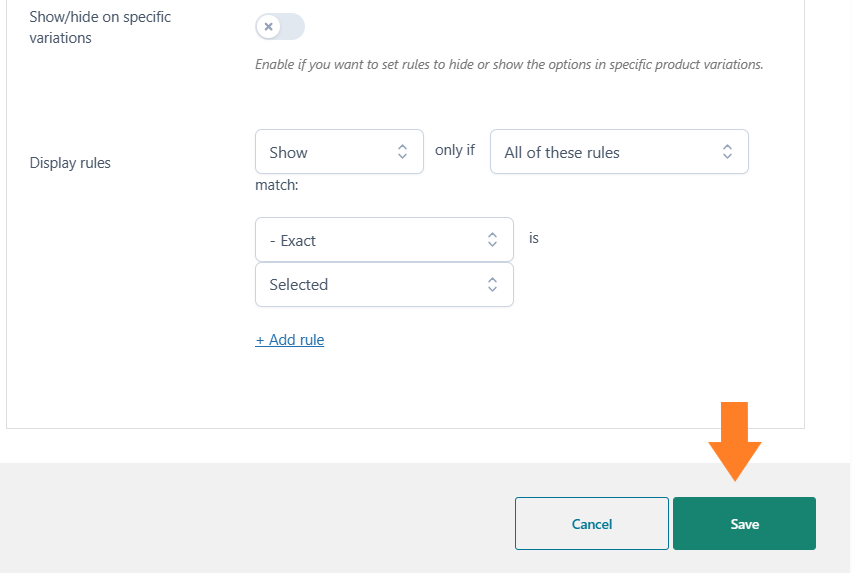
7.3. Save Settings
Once done, click the ‘Save’ settings option at the bottom of the popup to save the settings.
8. Final Results
Let’s test the final results.
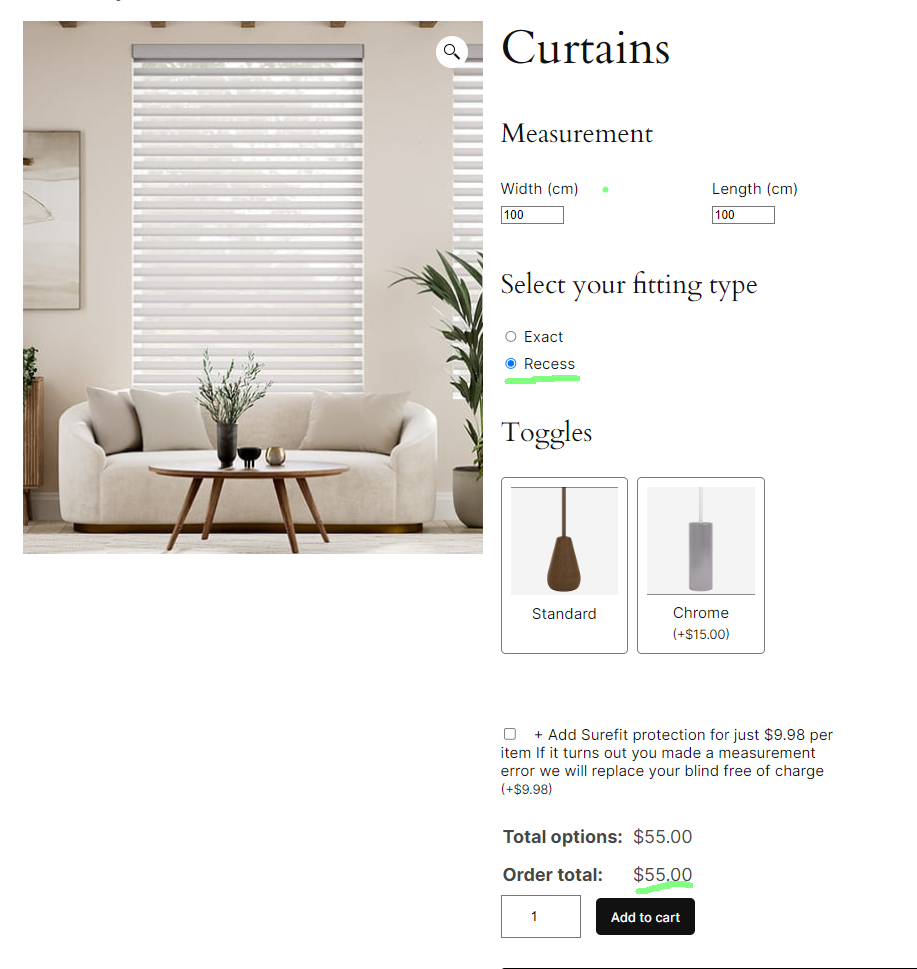
In the image below the price is per square metre is calculated at $40 since we selected the exact fitting option.
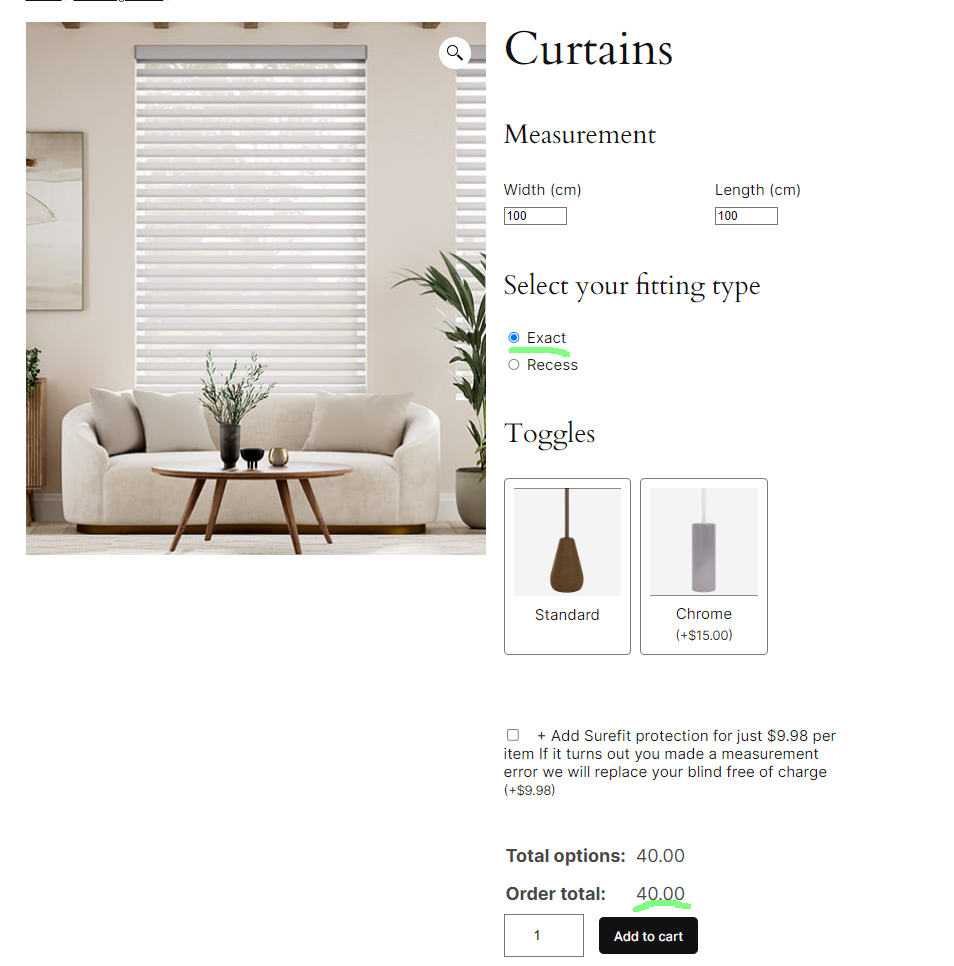
Note: below, when I select the fitting type as ‘Recess’, it’ll be calculated based on 55 (per square meter price).
Method 2: Using Flexible Quantity
I’ll use the Flexible Quantity – Measurement Price Calculator for WooCommerce plugin to create the WooCommerce measurement price calculator.
It also has a pro version with extended and advanced features to help you create a more complex and accurate pricing calculator.
The following are the steps to create a WooCommerce measurement price calculator.
To install the plugin, navigate to Plugins » Add New from your WordPress admin dashboard and search for the plugin name in the search field.
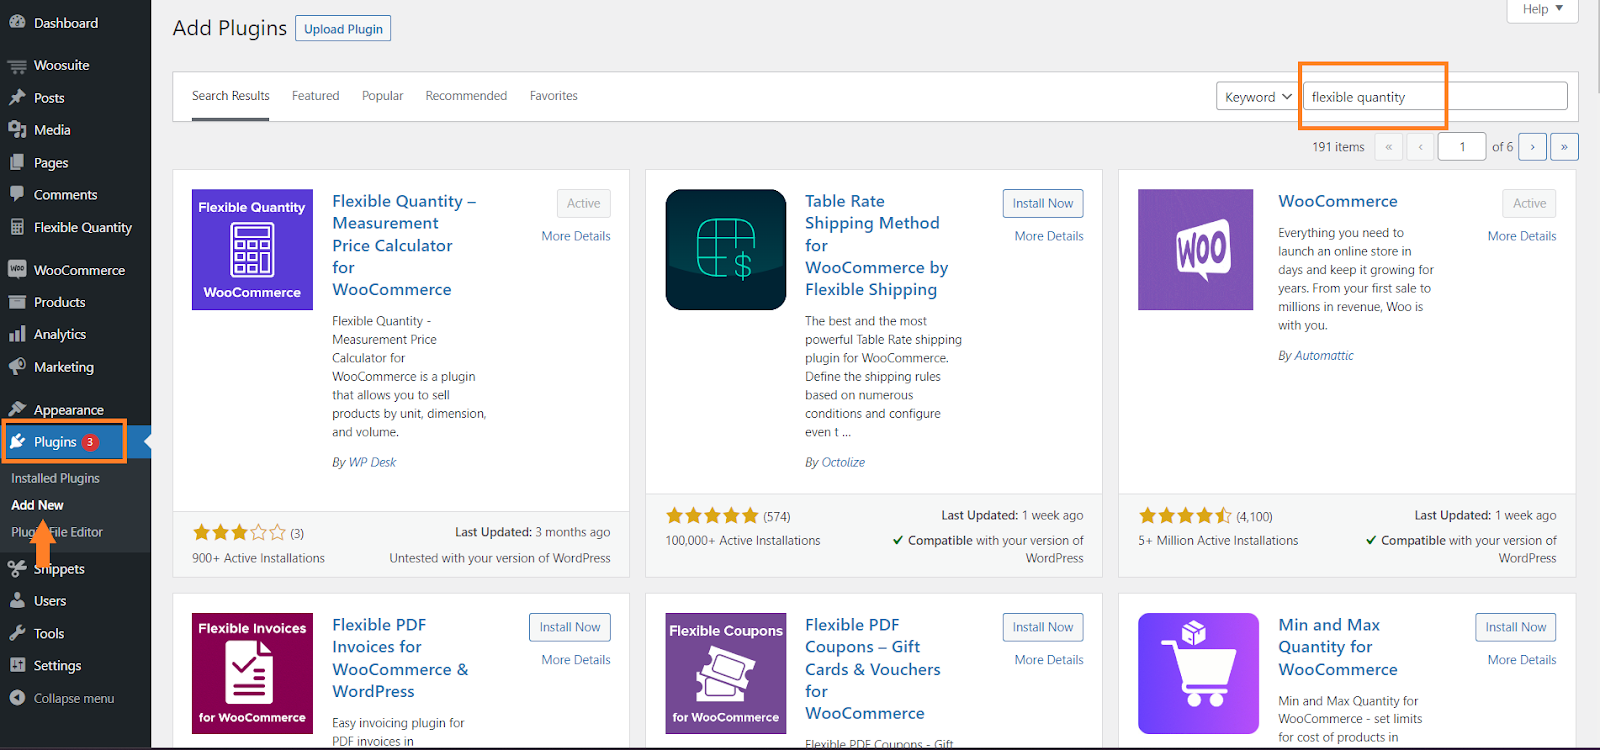
Install and activate the very first plugin from the search results. You will see the ‘Install Now’ button on the plugin, and once you have installed the plugin, it will be replaced with the ‘Activate’ button.
Click the button to activate the plugin.
I have already installed and activated the plugin, so it is showing the active button over it.
2. Create a New Product
Once the plugin is installed and activated, we need to create or add a new product to our WooCommerce store. You can also edit an existing product and add a measurement price calculator.
But for this tutorial, I’ll be creating a new product. You can follow the following steps to create a new product.
2.1. Navigate to Products
Navigate to Products » Add New from your WordPress admin dashboard to add a new product to your store. It will take you to the page where you can add the product details.

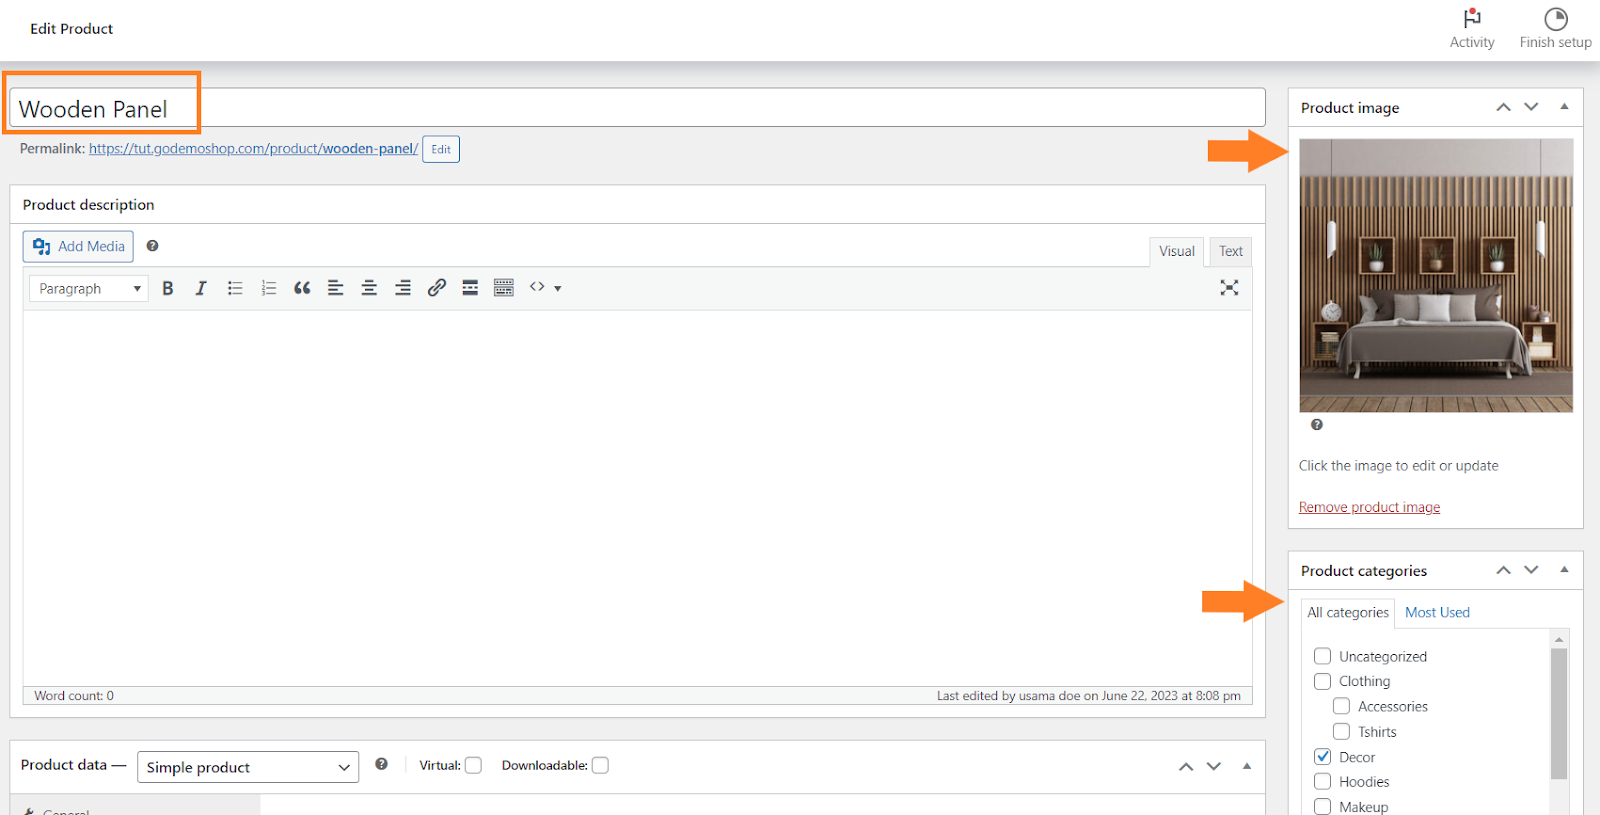
2.2. Add Product Name, Image, and Category
On the product edit page,
- Add the product name in the ‘Product Name’ field.
- Add the product image by clicking the ‘Set Product Image’ link in the product image section. If you want, you can also add the product image gallery.
- Finally, select the product category from the ‘Product Categories’ section on the right side of your screen.
3. Create a Measurement Price Calculator
Next, you need to scroll down to the ‘Product Data’ section and click the ‘Flexible Quantity’ tab. From this tab, you can create a measurement price calculator.
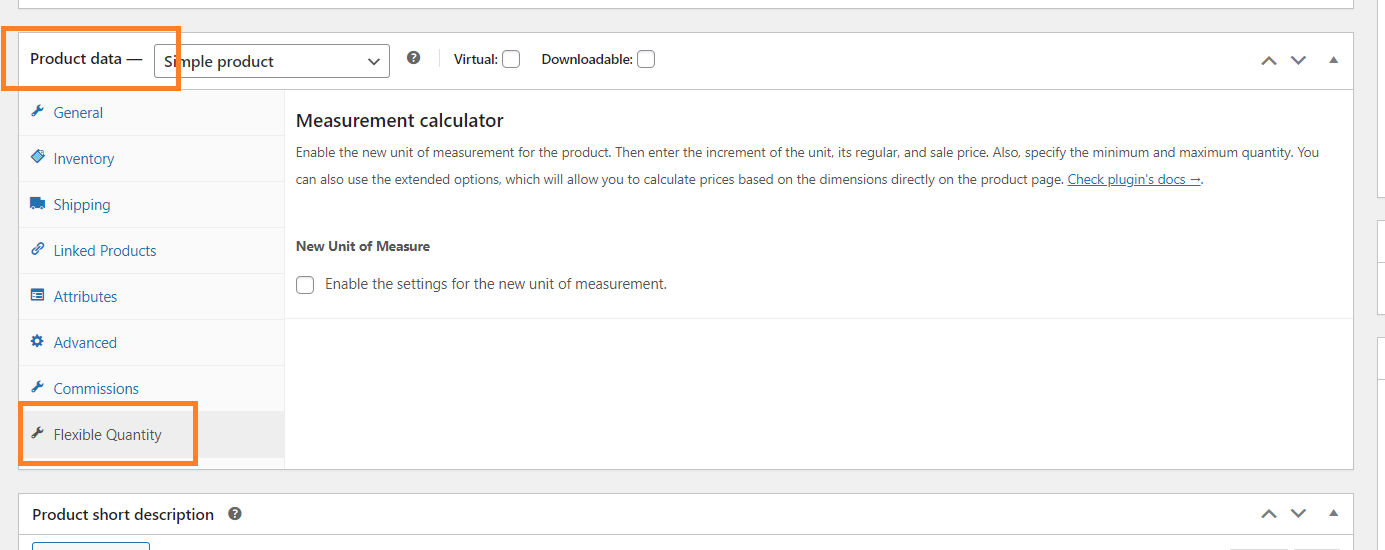
3.1. Enable the Measurement Price Calculator
To enable the price calculator, check the ‘Enable the settings for the new unit of measurement’ option.

3.2. Add Unit Field Label
Next, you need to add the unit field label. It could be the measuring unit. You can add different types of labels, but it depends on the selected unit of measure.
In the ‘Unit Field Label’ I have added ‘Square meters’ as the label.

3.3. Select the Unit of Measure
After that, from the ‘Unit of Measure’ dropdown, select the unit. You can select the unit based on the following,
- Other
- Weight
- Dimension
- Area
- Volume
- Volume (LxWxH)
- Custom
Each condition has several units, and you can select the one that best suits according to your needs. I have selected the unit based on the ‘Area’ condition, that is, ‘sq m’.

3.4. Add the Price
In the next field, you need to add the unit’s price. You can also add a sale price.
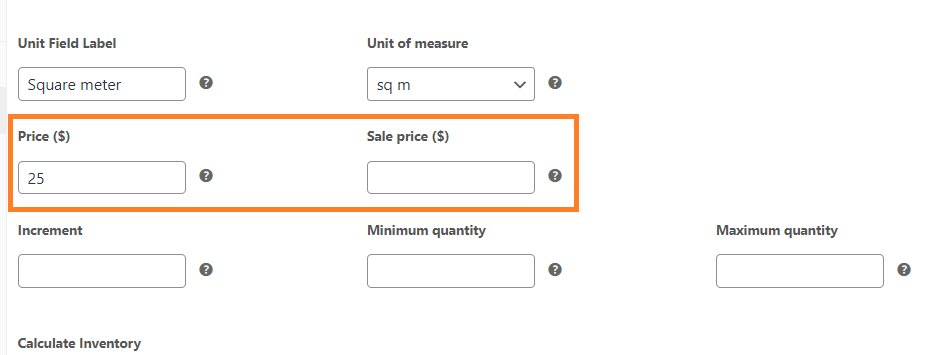
You need to configure the above-mentioned basic settings to create a measurement price calculator. However, you can play with other settings like increment, minimum quantity, and maximum quantity to manage the stock.
You can also select a new unit, such as weight, size, area, or volume. Of course, you can now sell various items with varying units of measurement. As a result, you can provide a variety of package alternatives as well as flexible and precise quantity measurements.
Note: You can also purchase the premium version of the plugin to get advanced features.
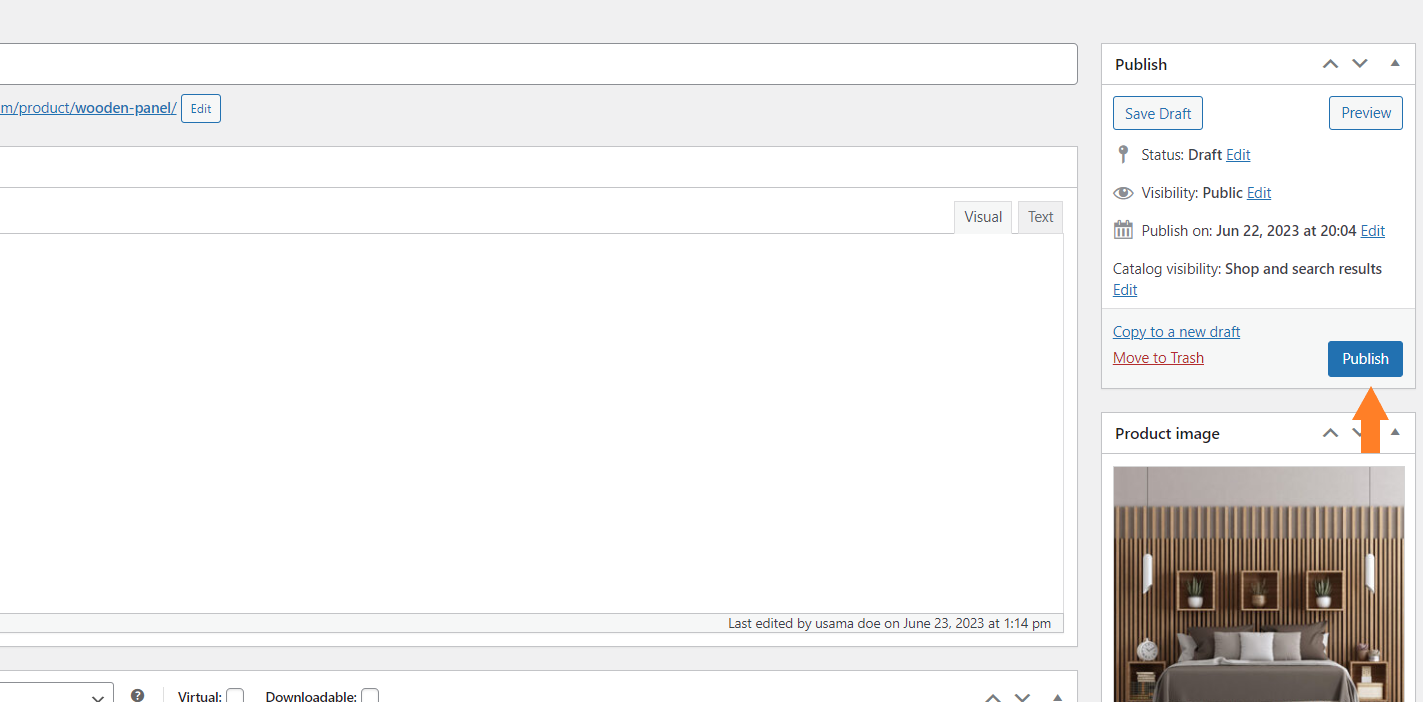
4. Publish the Product
Once you are done with the configuration, scroll to the top of the page and click the blue ‘Publish’ button to publish the product.
5. Final Results
Once the product is published, let’s visit the product page to see the measurement price calculator in action.
After publishing the product, you’ll see a link that says ‘Visit Product’ at the top of the product edit page. Click it to visit the product page.
You can also click the product permalink to visit the product page.

Once on the product page, you’ll see that you can now purchase the product based on the area(sq m). Each unit costs $25, as we specified at the backend.
I have entered ‘10’ in the quantity field, so I am getting a $150 price.

Conclusion
That’s it for today’s article. I hope this article was helpful to you and you were able to create a measurement price calculator.
By the way, if you sell to b2b customers you might want to tax-exempt customers that qualify, you can achieve that by following this guide.


