Looking for methods to offer shipping discounts in your WooCommerce store?
Shipping discounts are an excellent strategy to increase sales at your eCommerce store. It makes your consumers happy and encourages them to buy more items and services from you.
Also, customers who want to save money search for coupons or shipping discount offers at the final checkout. This goal can be easily achieved by using the ‘Conditional Shipping and Payments‘ Plugin that smartly provides free shipping options with specific conditions locked in it.
This method provides businesses with consistent results and customers with a positive shopping experience.
Also, helps the store owners to attract more consumers from their competitor’s website that doesn’t offer a shipping discount.
To help you out, we’ve created this guide to teach you how to create a shipping discount in WooCommerce from scratch.
(We’ve also added relevant screenshots with each step to better understand.)
Let’s go!
On This Page
Why Should You Offer Shipping Discounts in WooCommerce?
Offering shipping discounts to your customers is one of the most effective ways to increase sales from your WooCommerce store. People will be more likely to buy your products and services if you provide these discounts.
Not only this, but the shipping discounts also help the store owners to recover abandoned cart sales. Most of the time, buyers will check out rather than leave their items in the cart.
Aside from free shipping discounts, WooCommerce allows you to provide a variety of shipping discounts.
For example, you can offer a percentage-based or fixed price discount on the total order amount, create shipping deals for registered users, and so on.
Another great advantage of using shipping discounts is to build customer loyalty. Customers tend to return more and shop with you in the future.
Now, let’s look at how you can use WooCommerce to give shipping discounts.
Offering WooCommerce Shipping Discounts Using’ Conditional Shipping and Payments’ Plugin
The easiest way to create WooCommerce shipping discounts is by using the Conditional Shipping and Payments plugin.
It’s one of the greatest Woosuite plugins you can install and activate on your website. The plugin is quite versatile, allowing you to offer various shipping discounts.
The Conditional Shipment and Payments plugin allows you to easily restrict the shipping methods, shipping locations, and payment gateways that might be available for your customers.
Moreover, you can control the availability of free shipping, flat rate shipping, and other shipping options.
Now, let’s get started and see how you can use the WooCommerce Shipping and Payments plugin to offer shipping discounts that benefit both customers and retailers.
How to Create Shipping Discounts in WooCommerce?
Since we’ll be using the Conditional Shipping and Payments plugin for creating shipping discounts, first, we need to install and activate the Conditional Shipping and Payments plugin.
Let’s see how.
Step 1: Installing and Activating Woosuite Plugin
First, you’ll need to download the Woosuite plugin to enable shipping discounts on different user roles. After downloading it, upload and activate the plugin to your device.
You can upload the plugin at Plugins > Add New.
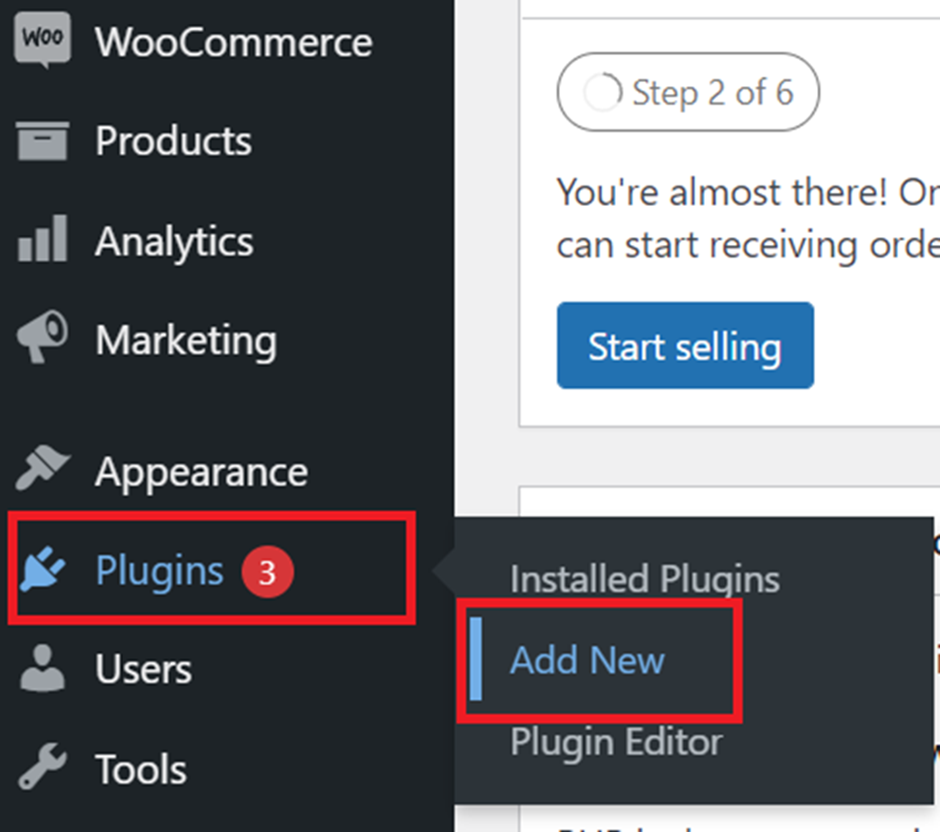
Now click on “Upload Plugin,” and select a file you downloaded (Woosuite plugin) and click “Install Now.”

After installing the plugin, activate it.
Step 2: Install Conditional Shipping and Payments Plugin
We will use the Conditional Shipping and Payments plugin to create the shipping discounts in WooCommerce for our online store. You can install this plugin under the Woosuite dashboard.
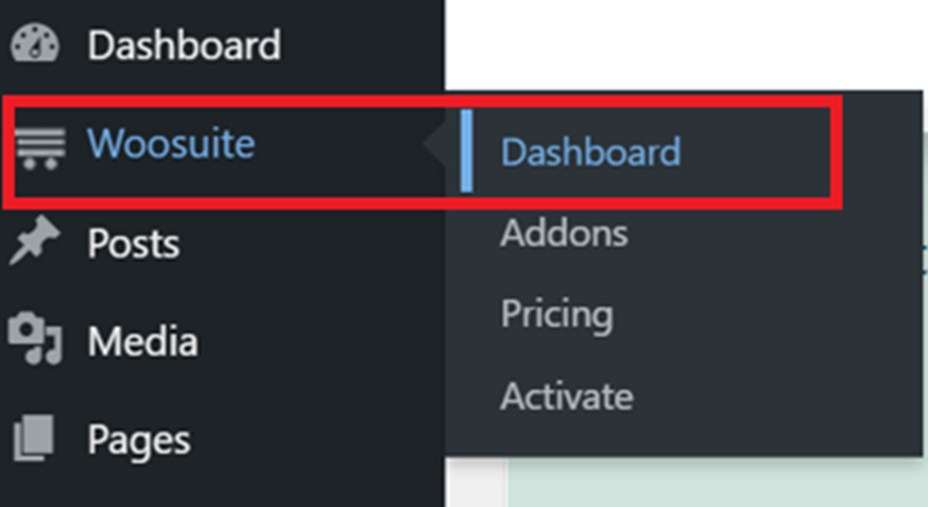
Navigate to the Woosuite Dashboard, click “Addons,” then find the “Conditional Shipping and Payments” plugin and click on “Install Now” to install it.
Once the plugin installation is finished, you need to activate it.

Step 3: Setup Shipping Zones in WooCommerce to Offer Shipping Discounts
This step will create shipping zones in WooCommerce and specify regions where you’ll provide shipping discounts.
If you want to create a shipping discount, we recommend doing the math such that it’s only available to customers who spend more than X amount on their order. That way, you won’t lose money on any order due to shipping costs.
To enable the free shipping option, head over to the dashboard and navigate to the WooCommerce > Settings section as shown.

Now under the WooCommerce settings, click the ‘Shipping’ tab, where you will see an option to add a shipping zone.
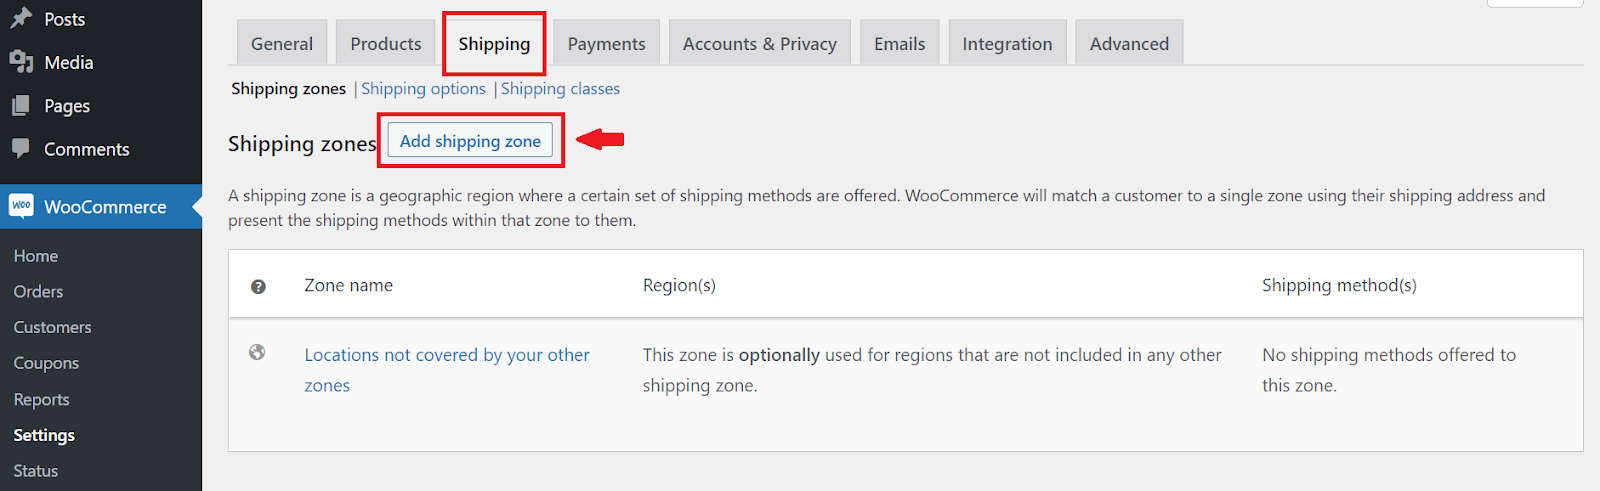
You’ll see a field to enter your zone name and a dropdown to select zone regions on the next screen. Once you enter and choose the desired options, click the ‘Add shipping method’ button.
For example, I would like to create free shipping for US and Indian customers only. So, I will name it Free shipping in the US & India.
Now, choose the region where you want to provide a free shipping option. For example, I will select the United States (US) and India from the Zone Region dropdown menu. You can always choose according to your requirements.
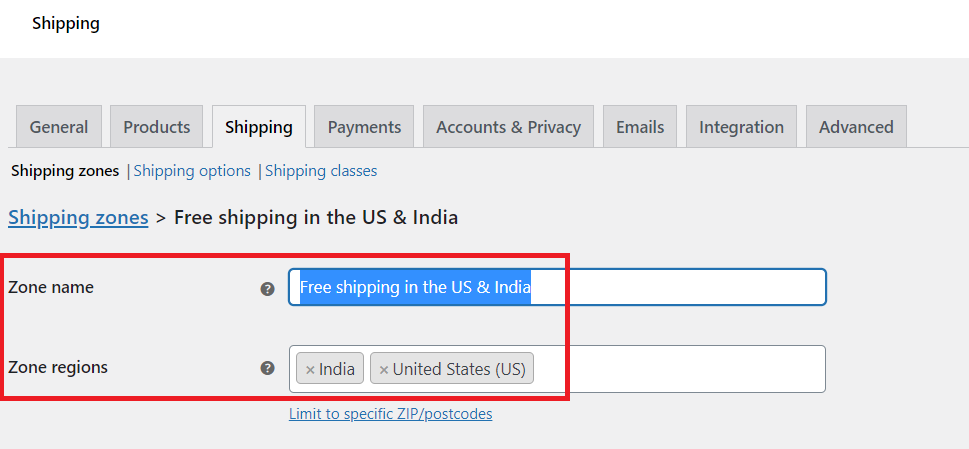
Now click on the ‘Add Shipping Method’ button as shown.

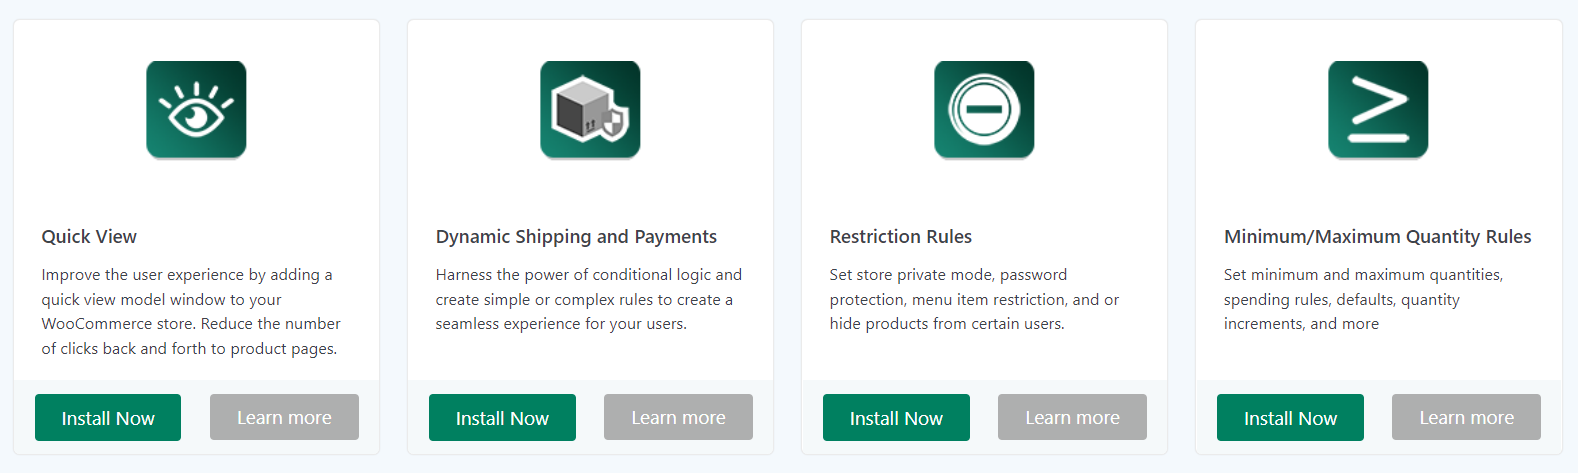
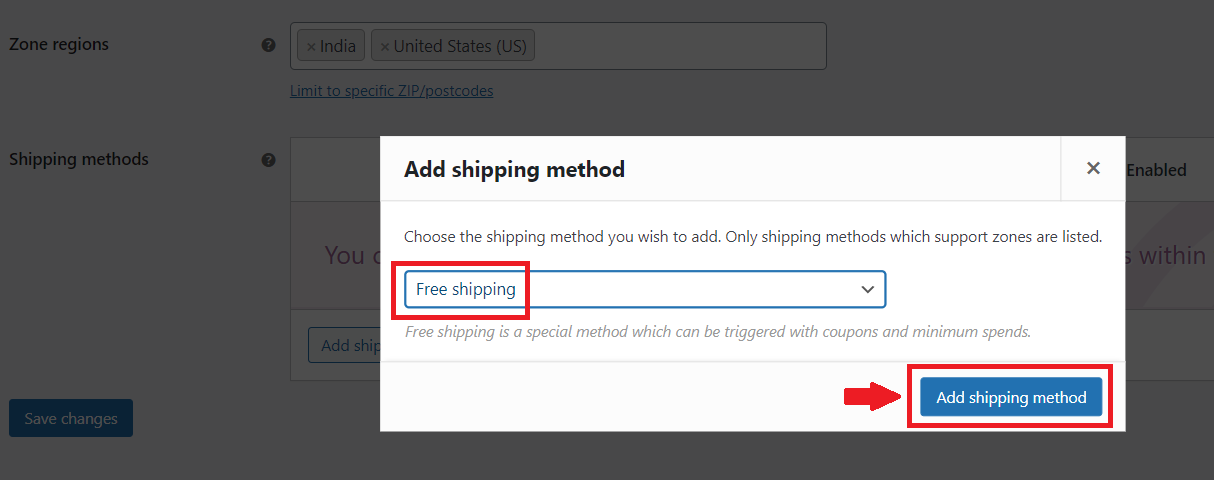
In the dropdown menu, you’ll find a variety of shipping options. Your WooCommerce store might include a flat rate, free shipping, or local pickup option.
We’ll select ‘free shipping’ from the dropdown menu in this scenario. Click on ‘Add shipping method’ to create a free shipping option.
Your free shipping method will be added to the shipping zone. To create a rule for creating free shipping discounts for a specific user role for an order amount X, you will need to configure the Free Shipping method by clicking on the ‘Edit’ button.

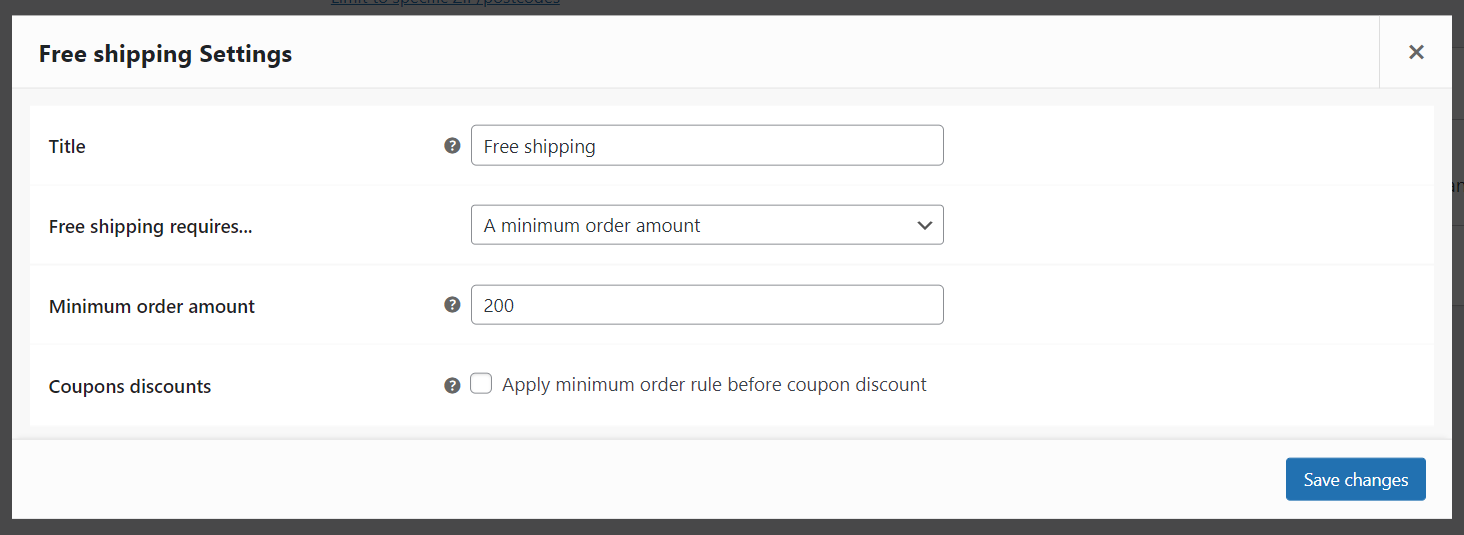
Here, select the ‘Free shipping requires’ option to ‘A minimum order amount,’ and enter the ‘Minimum order amount.’
For example, if you want to offer free shipping on orders above or equal to $200, enter $200. You can add them accordingly. After that, click on ‘Save changes.
Step 4: Creating A Rule to Exclude the Shipping Discount for Users with An Order Amount Under X
(*X can be any order amount)
Since we have created the Free shipping option, the next step would be to exclude users from the selected zones from getting shipping discounts under X order amount.
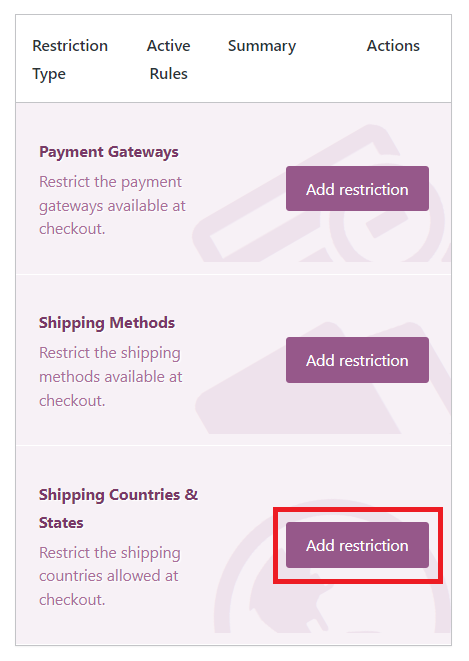
For this, we’ll use the Conditional Shipping and Payments plugin settings. You can visit the Conditional Shipping and Payments plugin setting by clicking on the ‘Shipping and Payments’ option under the Woosuite dashboard.

Now click on ‘Add restriction’ under the ‘Shipping Countries’ section.
This page contains multiple options. We’ll configure them one by one.
Short Description: Enter a name you want to assign to this rule. You can name it ‘WooCommerce Shipping Discounts.’ This is not visible to customers; you can name anything of your choice.
Exclude Countries: Select the countries that you want to restrict at the time of checkout. To do this, we will select the “India,” “United Kingdom,” and “United States” options from the dropdown list.
Exclude States/Regions: Select the states or regions that you want to restrict at the time of checkout. To do this, we will select the “India – Haryana,” “India – Uttar Pradesh,” and “United States – California” options from the dropdown list.
Add Condition: In the ‘Add Condition’ dropdown, select ‘Cart Total.’ In the next column, select the sign < (less than) or >= (greater than equal to) and set the amount to $200. This condition will only allow free shipping to users from the above-selected zones or regions if their cart total or order amount is greater than equal to $200.
All these restrictions work when all the defined conditions are matched.
Next, click on “Save Changes” to bring this rule into effect.

Now, we have completed all the required changes. Let’s see whether our shipping rule is working fine or not.
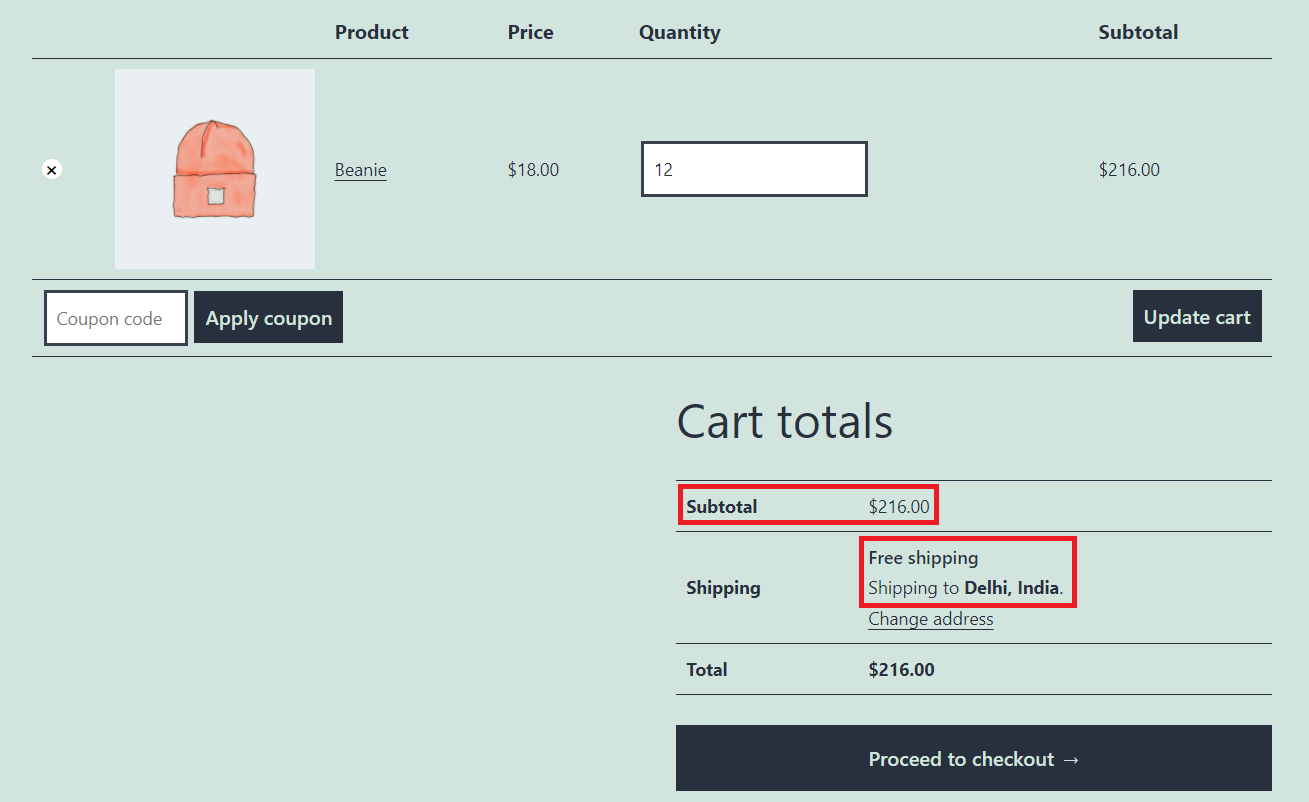
To check this, I added products worth more than $200 to my cart and selected a shipping address as Delhi, India. As you can see, it is showing Free Shipping as the order amount is worth more than the value ($200) set. This image shows that it’s working correctly.
On the other hand, let’s see what happens if the cart amount is less than $200 with a shipping address as Delhi, India.

Conclusion
This article shows how we used the Conditional Shipping and Payments plugin for setting up shipping discounts for your WooCommerce store.
We hope that this tutorial has helped you create the shipping discounts as per the amount and user role for your WooCommerce store.
You can comment below in the comments section for your queries.


