In the world of e-commerce, efficient order management is crucial for customer satisfaction and streamlined operations. One way to achieve this is by setting up a WooCommerce order cut-off time.
By implementing a specific deadline for order placement to process the order the same day, you can ensure timely processing and shipping while effectively managing inventory.
This comprehensive guide will walk you through the steps to set up the WooCommerce order cut-off time, enabling you to optimize your online store‘s operations and enhance customer experience.
So, without any further ado, let’s jump into the tutorial.
On This Page
What is Meant By Order Cut-Off Time?
Order cut-off time refers to a specific time set by store owners or administrators, after which they do not accept orders for same-day processing or delivery. This cut-off time is important for managing operational efficiency and setting accurate customer expectations.
For example, if a store sets an order cut-off time of 5 PM, they won’t accept new orders after that time for same-day processing. Any orders placed after 5 PM, will be processed on the next day.
It represents the latest time at which customers can place an order to ensure that it is processed and shipped on the same day. Implementing a cut-off time aims to establish a clear timeframe for order fulfillment and manage logistical processes efficiently.
By defining this cut-off time, store owners can effectively handle inventory, processing times, and shipping schedules, ensuring that customer orders are fulfilled on time.
How to Setup WooCommerce Order Cut-Off Time?
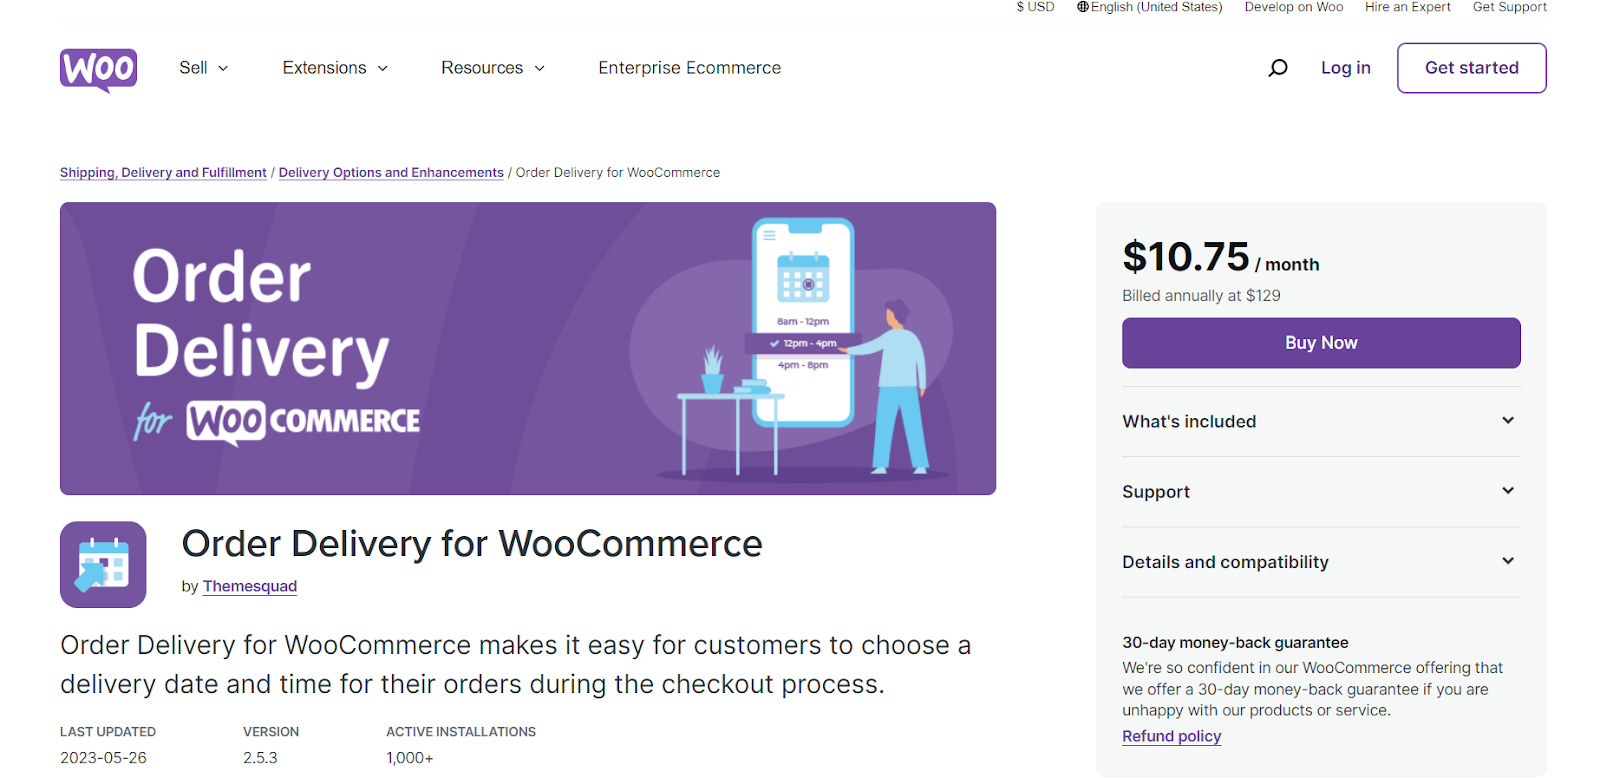
I’ll use the Order Delivery by WooCommerce plugin to set up the order cut-off time in WooCommerce. It is a premium extension that you can download from the WooCommerce store.
The following steps will help you set up the WooCommerce order cut-off time.
1. Install and Activate the Plugin
First, you need to download the Order Delivery by WooCommerce plugin from the official WooCommerce store. It is a premium plugin that will cost you around $129 per year.
Once you have purchased it, you’ll get a zip file to download.
After downloading the plugin, navigate to Plugins > Add New from your WordPress admin dashboard and click the Upload button.
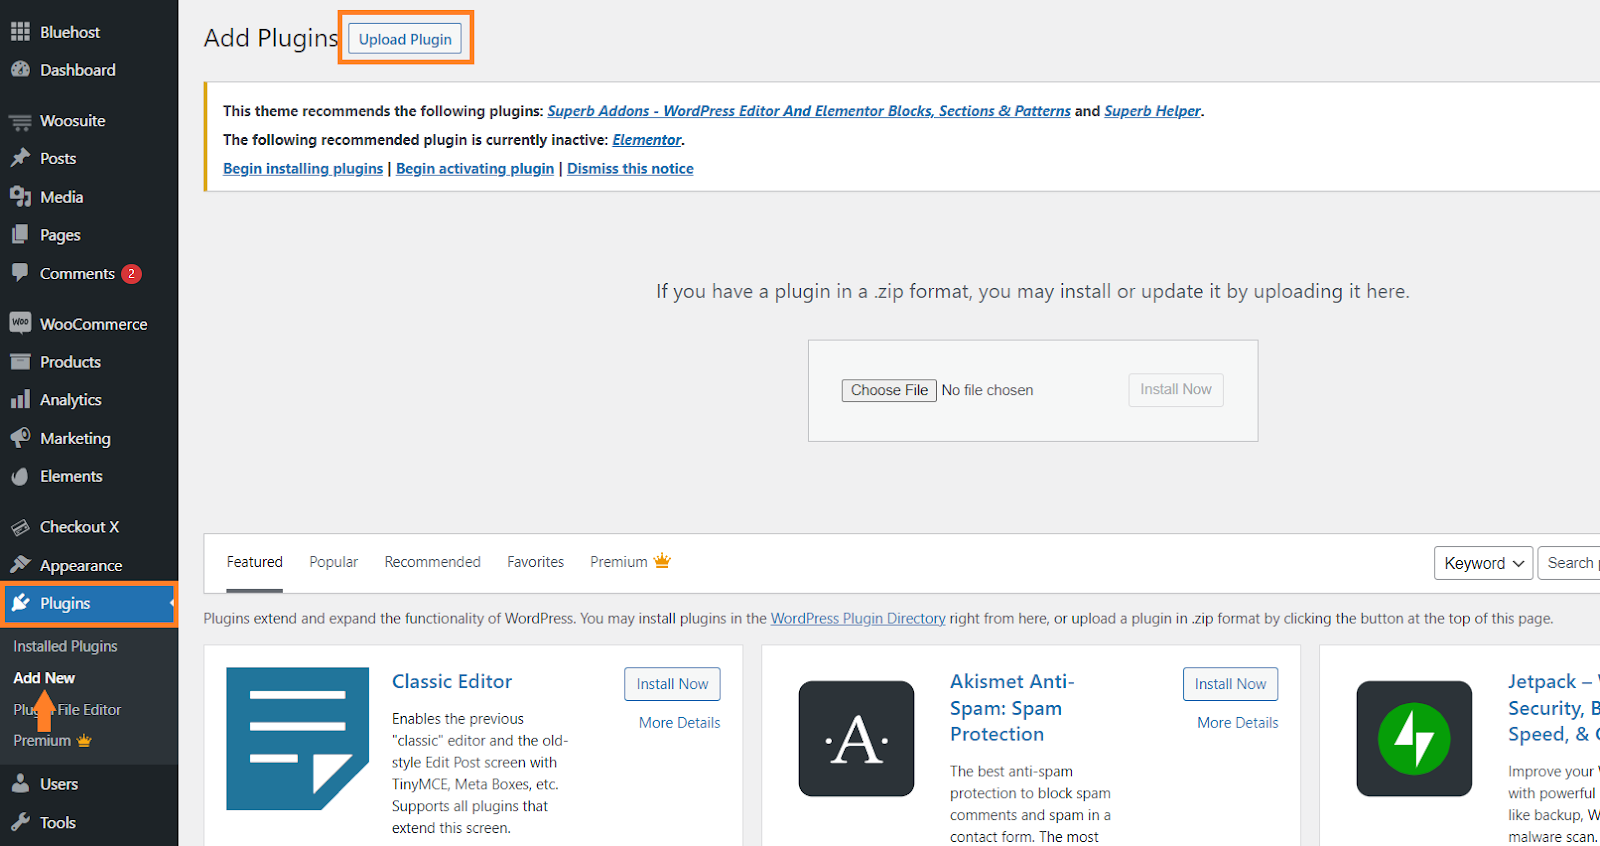
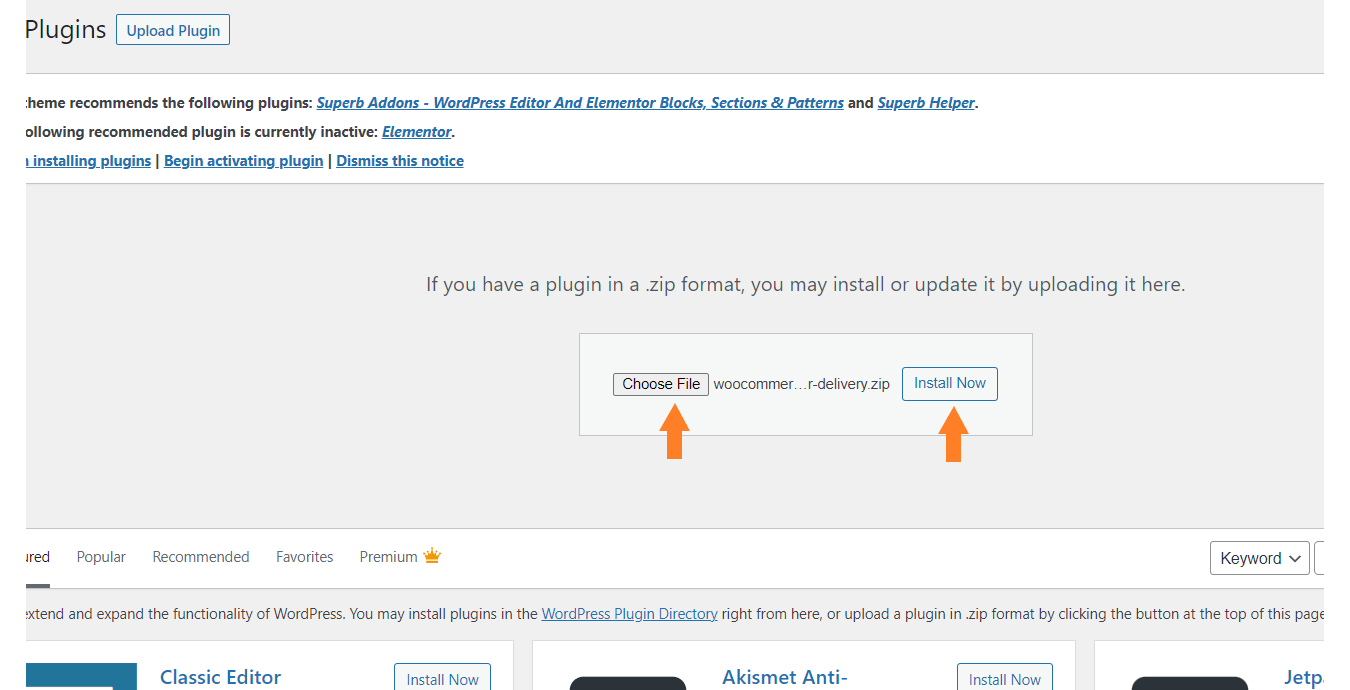
Now, click the ‘Choose File’ and select the plugin’s zip file from your computer. After that click the ‘Install Now’ button to install the plugin.
Once it is installed, click the ‘Activate’ button to activate it.
2. Configure the TimeZone
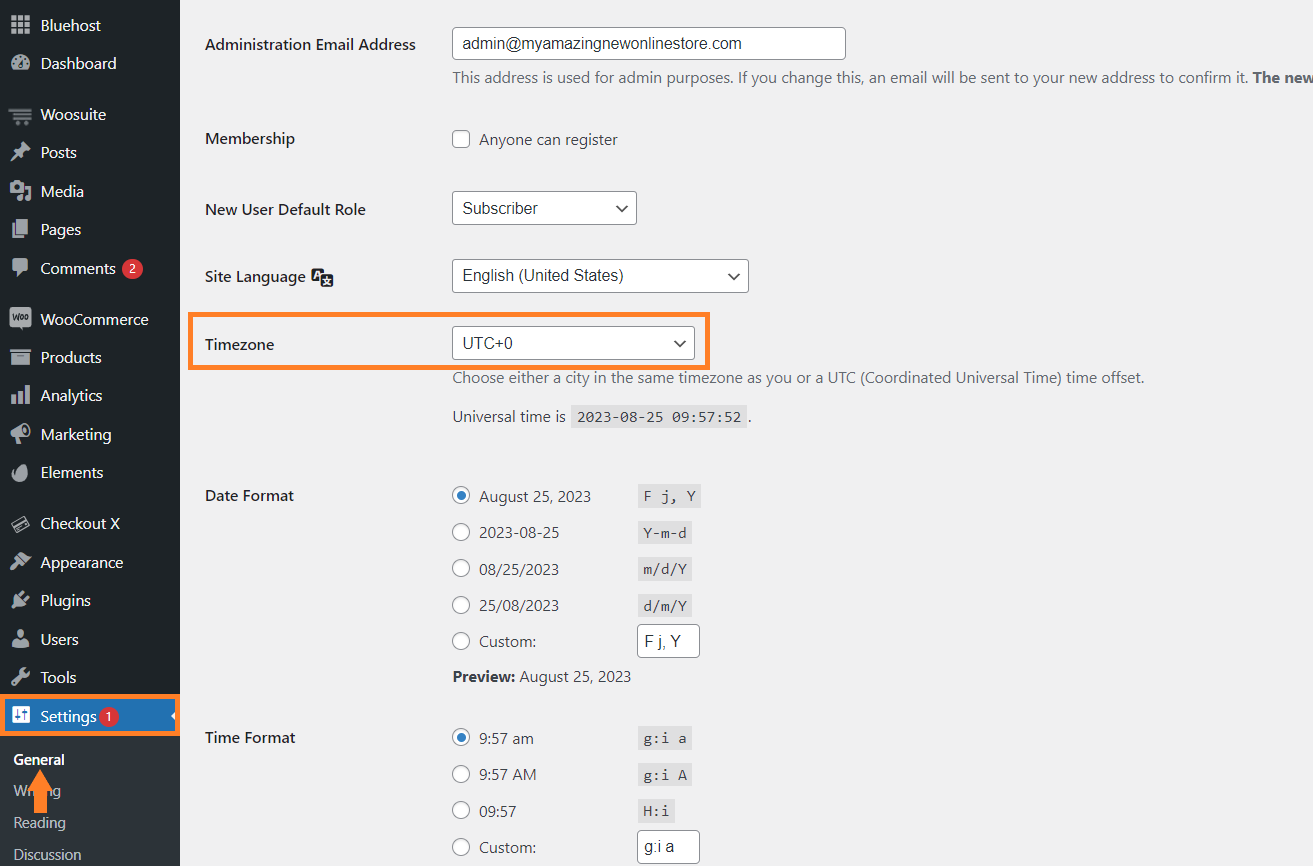
Once the plugin is installed and activated, navigate to Settings > General from your WordPress dashboard and scroll to the ‘TimeZone’ option.
You need to select the timezone that suits best your needs as the plugin will work according to the timezone selected here.
3. Add a Next Day Shipping Method
After configuring the timezone, you need to ensure that you have added a shipping method to your store that will allow users to get their delivery on the next day.
For example, If users place the order today, they’ll receive it tomorrow(the next day).
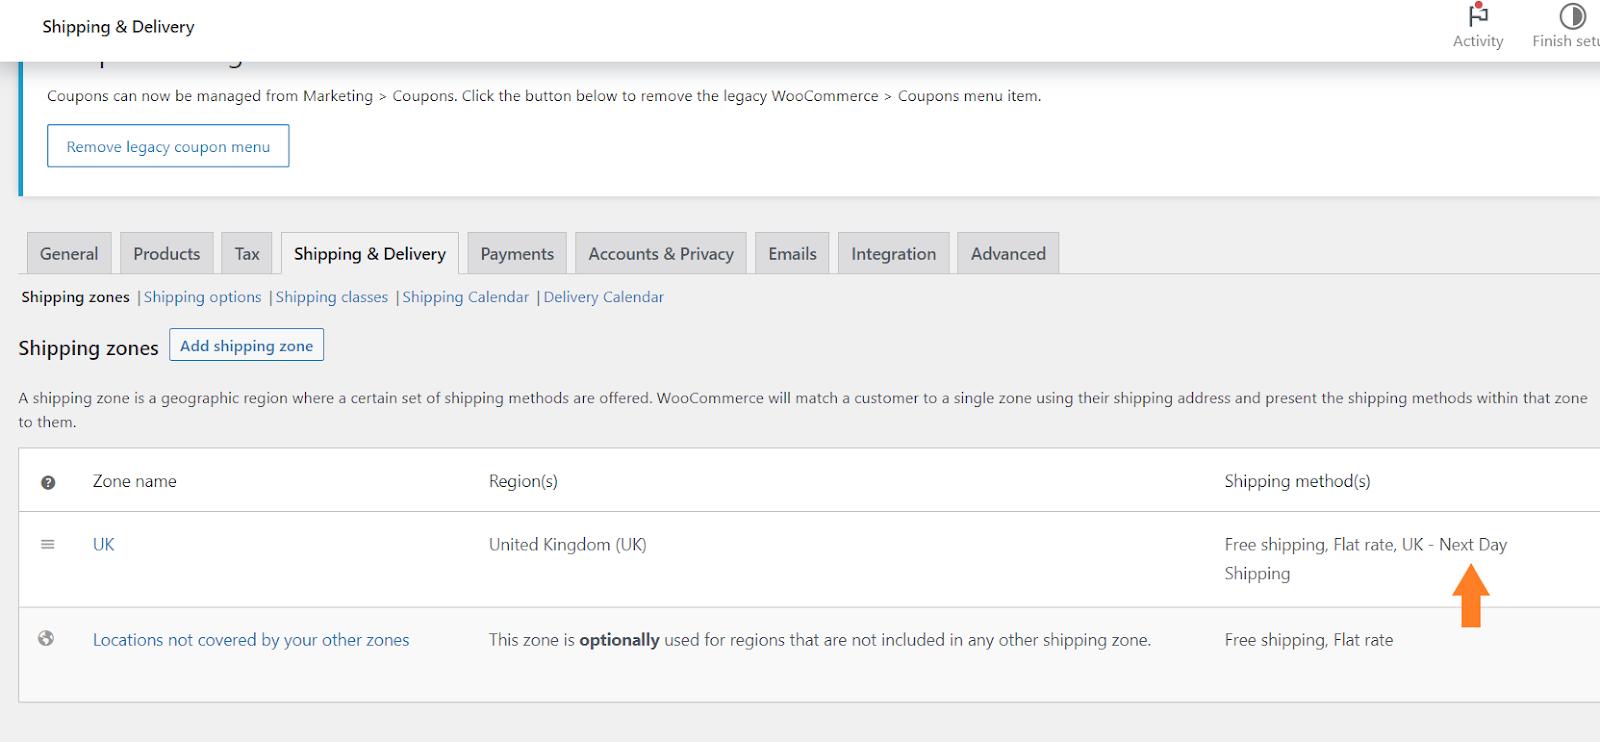
To add the shipping method, navigate to WooCommerce > Settings > Shipping & Deliveries from your WordPress dashboard and ensure you are in the ‘Shipping Zones’ section.
If you have created multiple zones, you need to edit the zone for which you want to offer next-day shipping. But I have created only one zone, so I’ll edit it and add the next-day shipping method to it.
Note: I am not going to show you how to add a shipping method to WooCommerce, but you can follow the following tutorial to learn about it.
4. Setup the WooCommerce Order Cut-Off Time
The next step is to set the order cut-off time. The plugin will allow you to set a time limit for a specific day to deliver the orders to the customers the next or the same day.
For example, If you have set the cut-off time for Friday as 5 PM, then any customer that will place the order after 5 PM, will get the delivery a day after tomorrow. The plugin will also show a message to let them know that their order will be delivered the day after tomorrow.
To set this up on your store, navigate to WooCommerce > Settings > Shipping & Deliveries from your WordPress dashboard and ensure you are in the ‘Shipping Options’ section.

4.1. Add Order Cut-Off Time
Scroll to the ‘Shipping Days’ section and here you can add the cut-off time for each day. You can also select the time limit to process the order the same day and deliver it on the next day.
To show you an example, I have added the cut-off times for each day.
Note: As of the day, I am creating this tutorial, the weekday is Friday, so to show you the plugin’s proper working, I have enabled the ‘Saturday & Sunday’ delivery days as well.
It means, if any user places the order before the cut-off time, will get their product on the next day and if they place the order after the cut-off time, they’ll get their order a day after tomorrow.
In case you do not work on weekends, when customers order on Friday after the order cut-off time, they will receive their order on Tuesday. And if they place the order before the cut-off time on Friday, they’ll receive their order on Monday.
You can set the cut-off times as you want.

4.2. Save Changes
After setting the cut-off times, scroll to the bottom of the page and click the ‘Save’ button to save the settings.
Be sure to save the settings as if you move to the next step without saving the settings, you’ll need to set the cut-off times again.
5. Configure the Delivery Ranges
After setting the cut-off time for each weekday, you need to add a delivery range and select the shipping method that users will need to select to get their order the next day.
The plugin has created a default delivery range of 2-3 days, and it will work only for the shipping methods that are not selected in any other range that you’ll create.
For example, if you offer ‘Flat Rate, Free Shipping, and Next Day Delivery’ shipping methods, and you want to allow customers to get the delivery on the next day only if they select the ‘Next Day Delivery’ shipping method.
So, you need to add a delivery range and select the ‘Next Day Delivery’ shipping method to it.
Any user, that will select any other shipping method, will fall in the default delivery range which means they’ll get their order in 2-3 days. You can also change the default delivery range.
Note: Don’t worry if you are finding it hard to understand right now, but continue with the tutorial as upon seeing the final results, you will get a better understanding of how this works.
For this tutorial, I’ll take the above example. Click the ‘Add Delivery Ranges’ button from the ‘Delivery Ranges’ section.

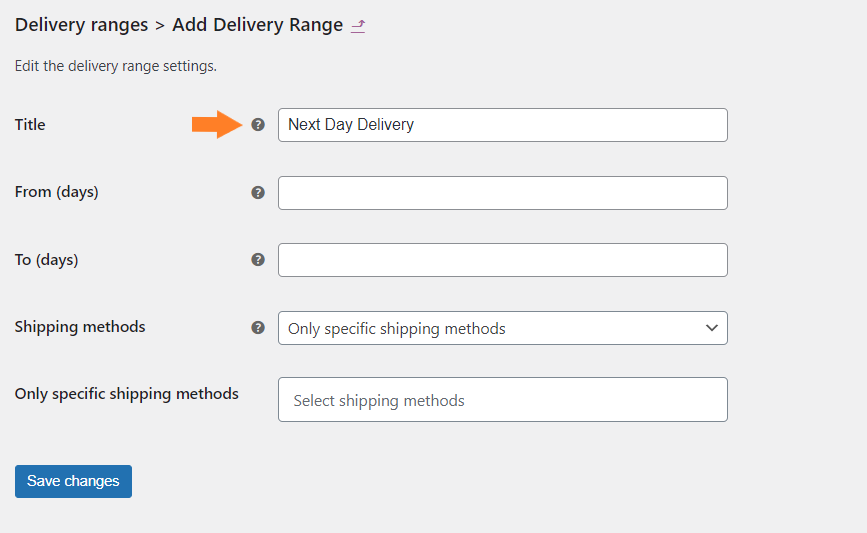
5.1. Add the Title
In the ‘Title’ field, give a name to it. Users will see this title on the checkout page.
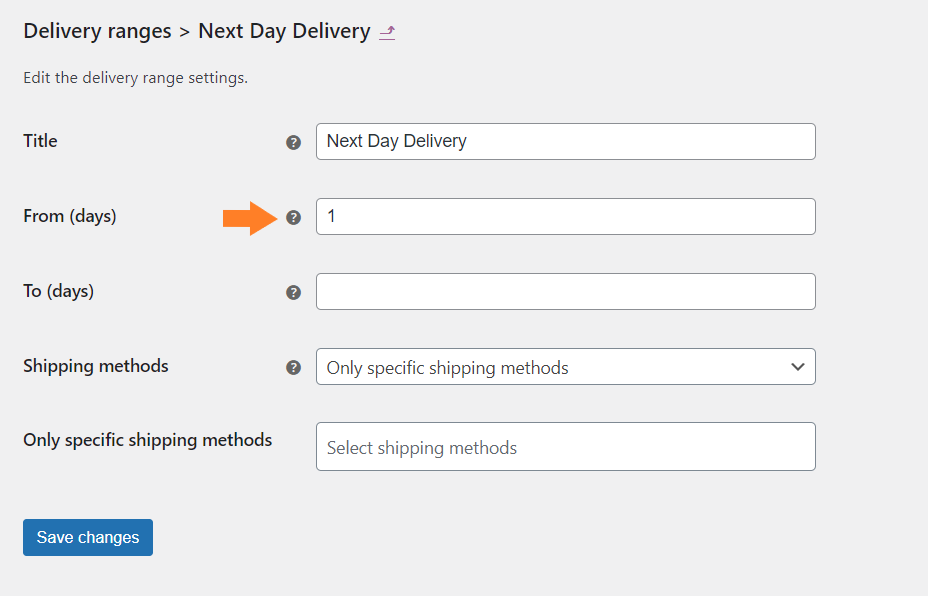
5.2. Add From Days
In the ‘From(days)’ field, you need to add the minimum number of days to deliver the order. I’ll add a one in this field which means the customers will get their order on the next day.
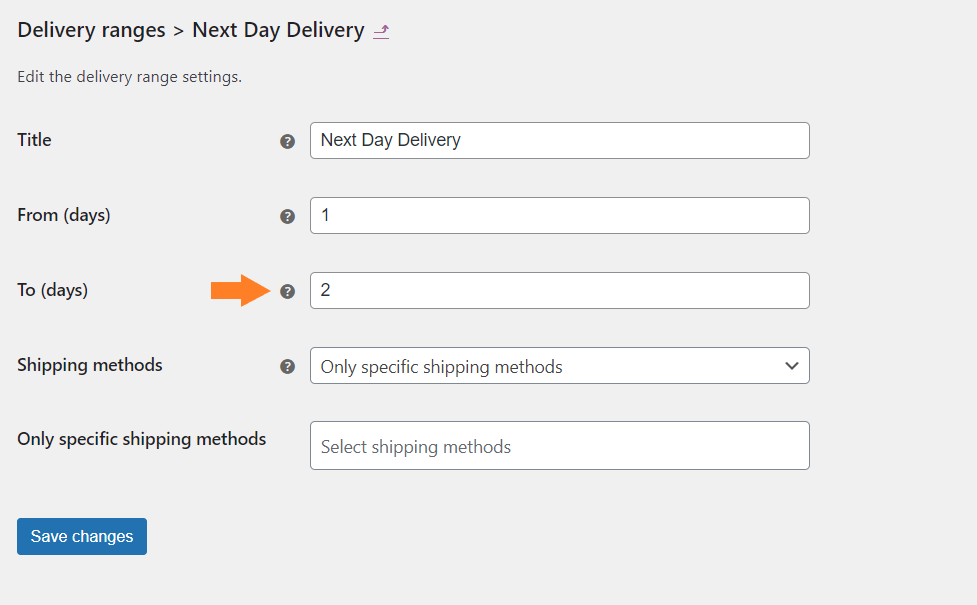
5.3. Add To Days
In the ‘To(days)’ field, add the maximum number of days to deliver the order. I am adding two to it.
5.4. Select the Shipping Methods
Now, you need to select the shipping methods for which you want to allow the next-day delivery.
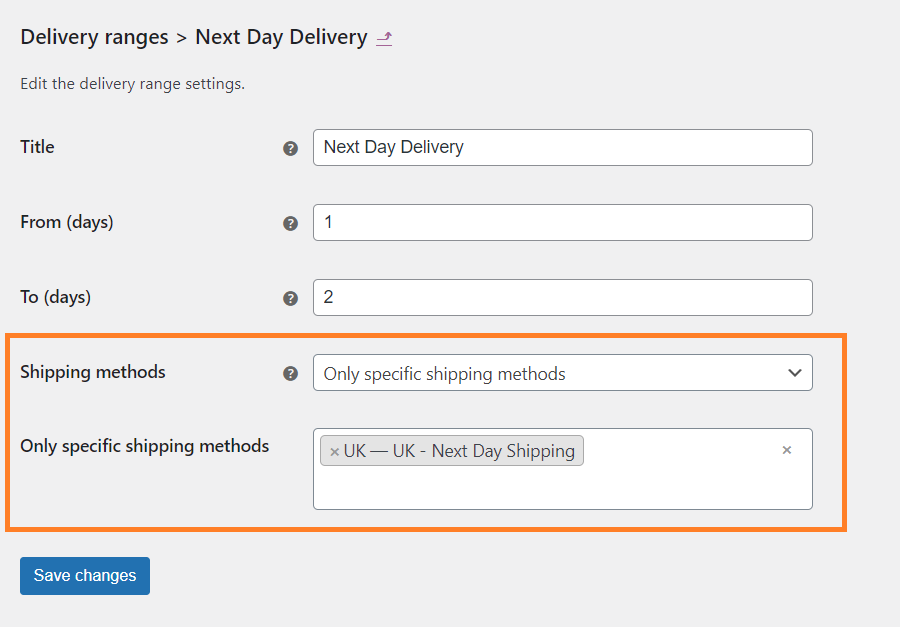
If you want customers to select a specific shipping method to get the order delivered the next day ensure to choose the ‘Only Specific Shipping Methods’ option from the ‘Shipping Methods’ dropdown.
After selecting this option, a new field named ‘Only Specific Shipping Methods’ will appear below it. You need to select the shipping method through which the users can get their order on the next day.
For example, I have added three shipping methods to my demo store, one is free shipping, the second is flat-rate shipping, and the third shipping method is next-day shipping.
I want to deliver the customer’s order the next day, so I’ll select the ‘Next Day Shipping’ shipping method from the ‘Only Specific Shipping Methods’ field.
Now, if customers have selected the next-day delivery shipping method on the checkout and placed the order before the cut-off time, they’ll get their product delivered the next day.
And if they place the order after the cut-off time using the same shipping method, they’ll receive their order a day after tomorrow.
Note: The shipping methods that are not selected above, will be covered by the default delivery range. In my case, the free shipping and the flat rate method will be covered by the default delivery range and if a user places the order using any of these shipping methods(no matter, if they are ordering before the cut-off time or after it) they’ll get their order in 2-3 days(you can change these default delivery range.).
Also, if you want to deliver the order the next day despite the selected shipping method, ensure to select all the available shipping methods from the ‘Only Specific Shipping Methods’ field.
5.5. Save Changes
Once you have configured the delivery range, click the ‘Save’ button to save the settings.

6. Configure the Message Location
The plugin displays a message to let customers know about the delivery date and the time it will take to deliver the order on the checkout page.
You can change its location.
To do so, first, you need to click the ‘Shipping Options’ settings to go back to the plugin’s general settings.

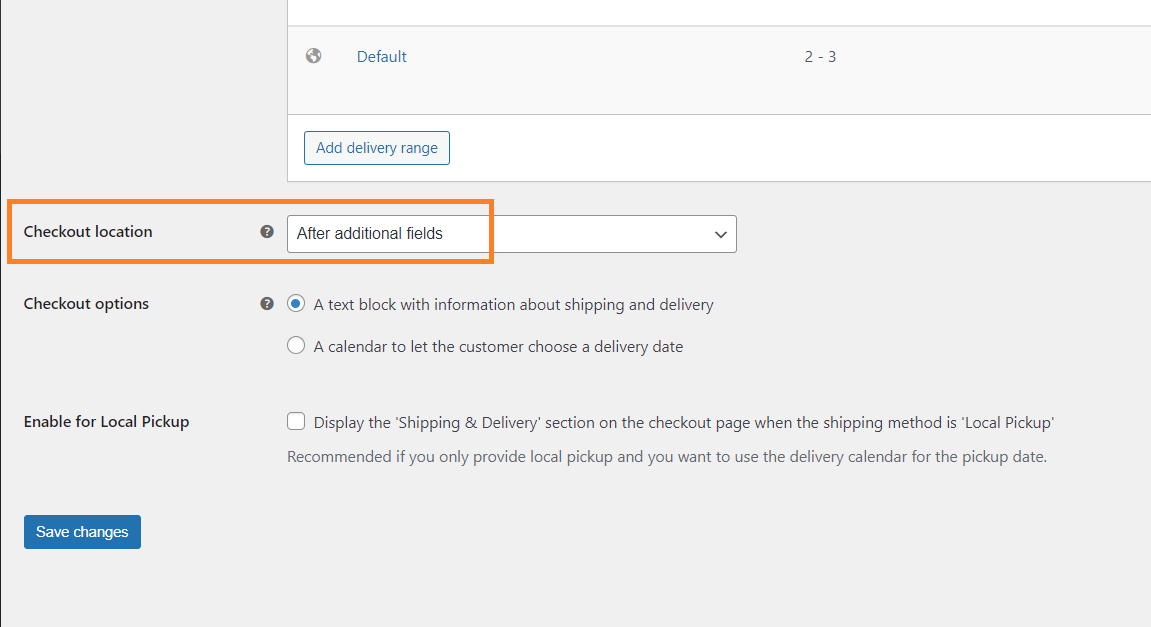
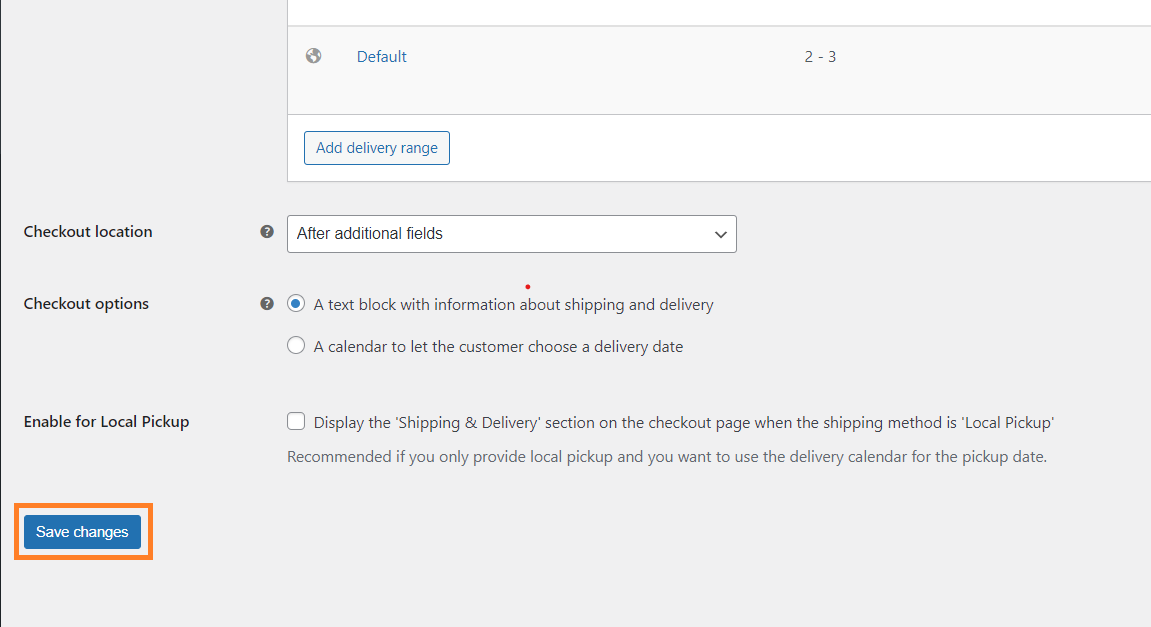
6.1. Select the Checkout Location
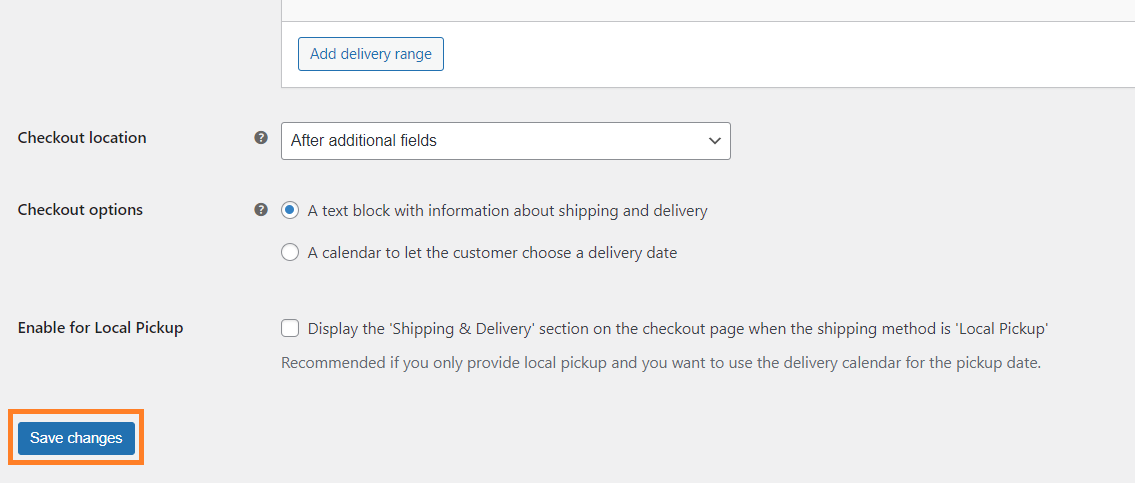
Once you are in the plugin’s general settings, scroll to the bottom of the page and select the position of the message from the ‘Checkout Location’ field. You can select the location that suits best your needs.
I have selected the ‘After Additional Fields’ option.
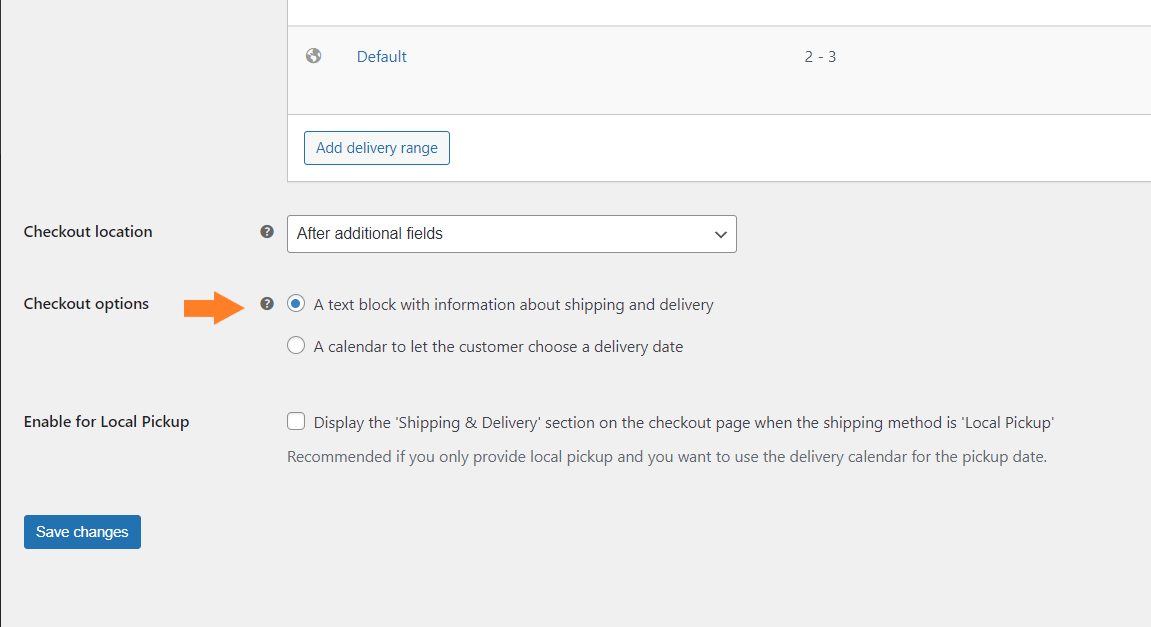
6.2. Select the Checkout Options
We want to show a message on the checkout page to let customers know about the shipping and delivery information.
So, make sure you have selected the ‘A text block with information about shipping and delivery’ option.
6.3. Save Changes
Finally, click the ‘Save Changes’ button to save the settings.
7. Final Results
Now, let’s test the final results.
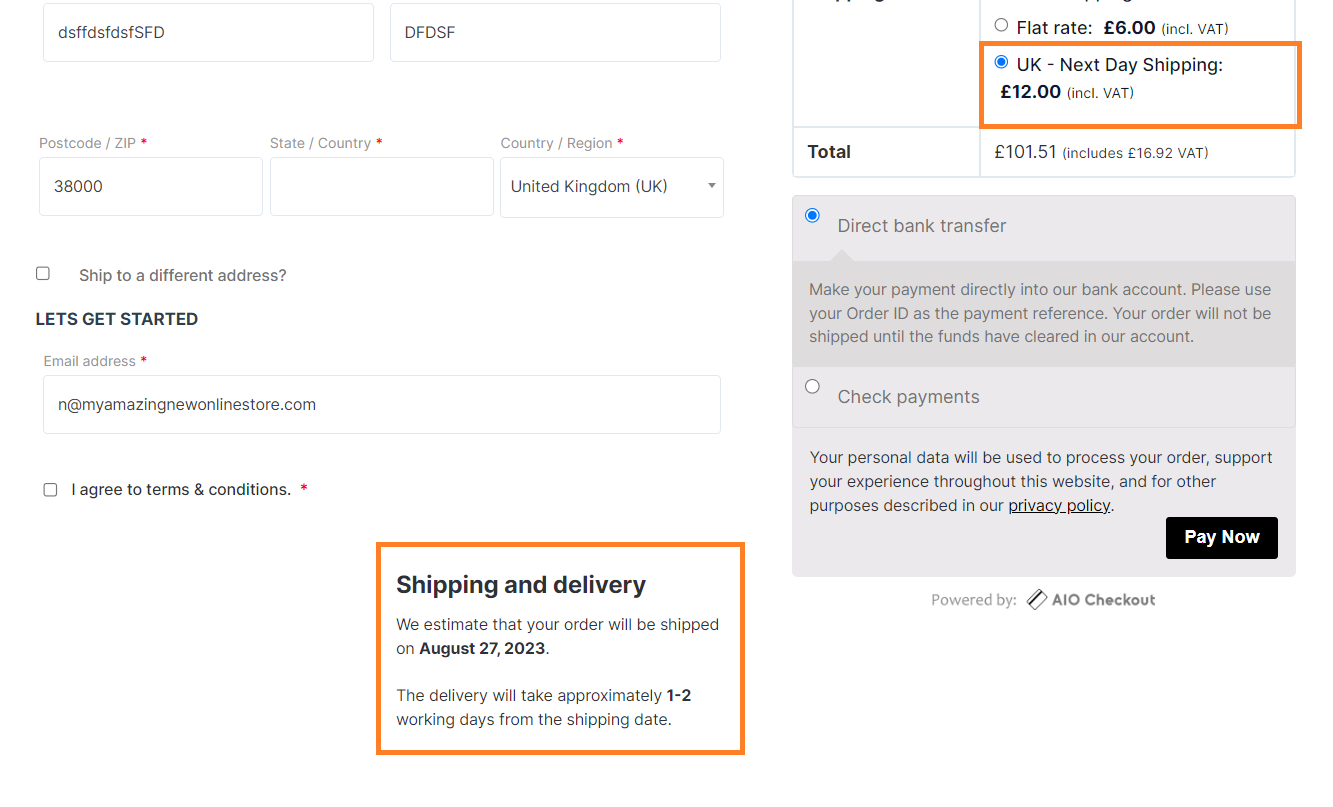
Results After Cut-Off Time
To test it, I added a product to my cart and visited the checkout page. As you can see in the below screenshot I selected the ‘Next Day Shipping’ shipping method but I could see a message that the order will be delivered on 27 August.
Note: As of today the date is 25 August.
It is because I am placing the order after the cut-off time which means any order placed after the cut-off time will be processed on the next day and delivered a day after tomorrow.
Results Before Cut-Off Time
Now, when I placed the order before the cut-off time, I could see the message that the order would be delivered on 26 August. Any order placed before the cut-off time will be processed today and the customers will receive it the next day(tomorrow working day).
It means, the order cut-off time that we added above is working perfectly fine and now you can focus on other important aspects to complete the order delivery.

Conclusion
That’s it for today’s article.
I hope this was helpful to you and you were able to set up the WooCommerce order cut-off time. It will help you manage same-day order processing and next-day deliveries. You can also configure the cut-off times for the same-day delivery.
I suggest you test the settings before making it live to avoid any confusion.
However, if you want to close the checkout temporarily after a specific date or after getting a specific number of orders, you can do that by following this tutorial.


