Allowing customers to add a tip at the checkout is a great idea to increase your potential earnings. In this modern era, leaving a tip has become a tradition.
WooCommerce by default doesn’t allow your customers to leave a tip at checkout but with the help of WooCommerce tip plugins, you can add this feature to your store.
In today’s article, I’ll walk you through the step-by-step process to allow customers to add or leave a tip at the checkout. So, without any further ado, let’s jump into it.
How to Add a Tip at WooCommerce Checkout?
I’ll use the WPC Order Tip for WooCommerce plugin to allow customers to leave a tip at checkout. It is a free plugin that you can download from your WordPress dashboard or the WordPress repository.
It also has a premium version that if you want you can purchase it.
The following are the steps to allow customers to add a tip at the checkout.
1. Install and Activate the WPC Order Tip for WooCommerce
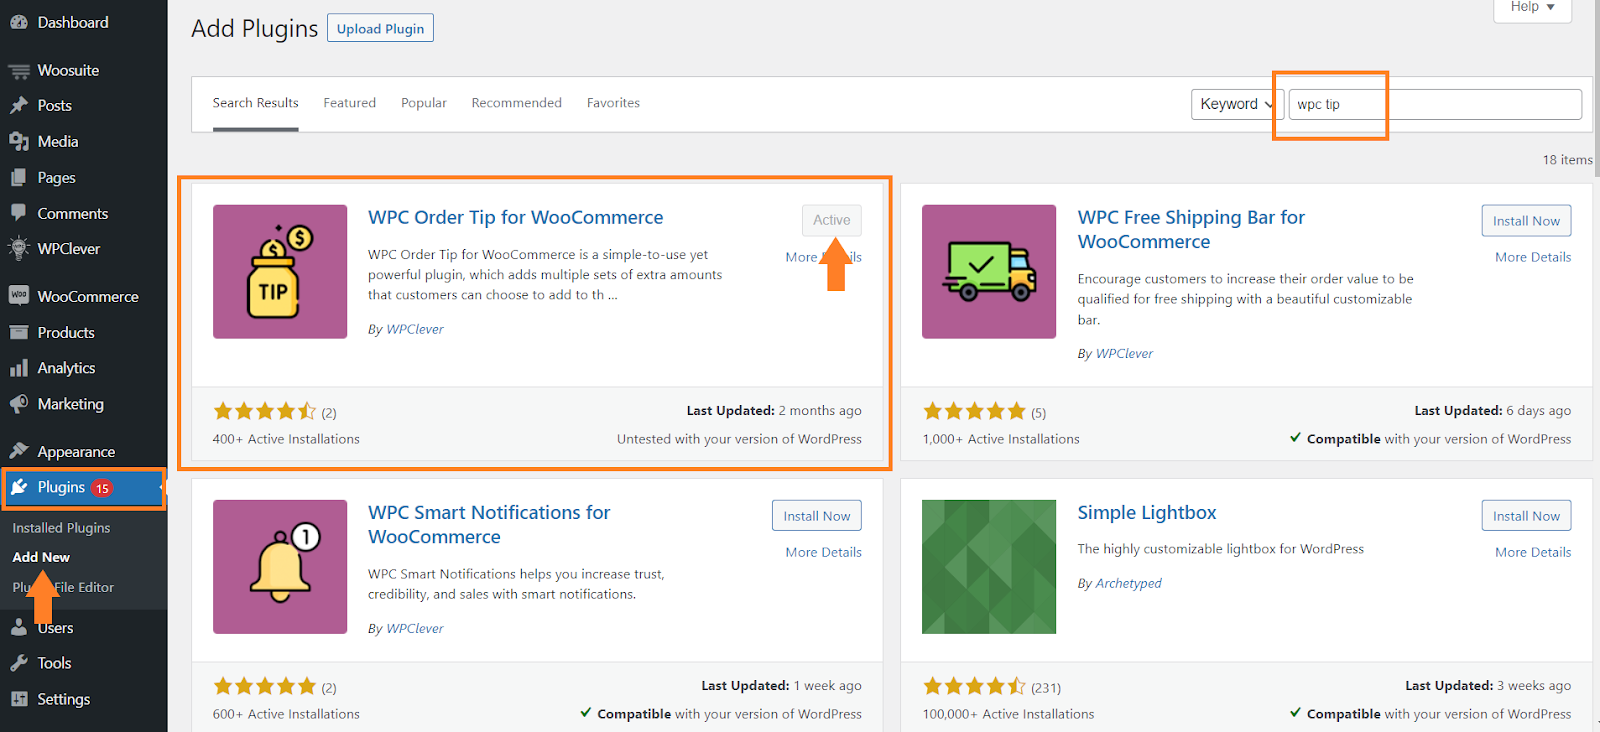
To install the plugin, you need to navigate to Plugins > Add New from your WordPress dashboard and search for the ‘wpc tip’ in the search field.
You’ll get the plugin at the very top, click the ‘Install Now’ button to install it. Once you have installed the plugin, you’ll see the ‘Activate’ button instead of the Install now button.
To activate the plugin click the ‘Activate’ button. I already have installed and activated the plugin so I can see that it’s active.
Once the plugin is installed and activated, the next thing you need to do is navigate to WPClever > Order Tip from your WordPress dashboard.
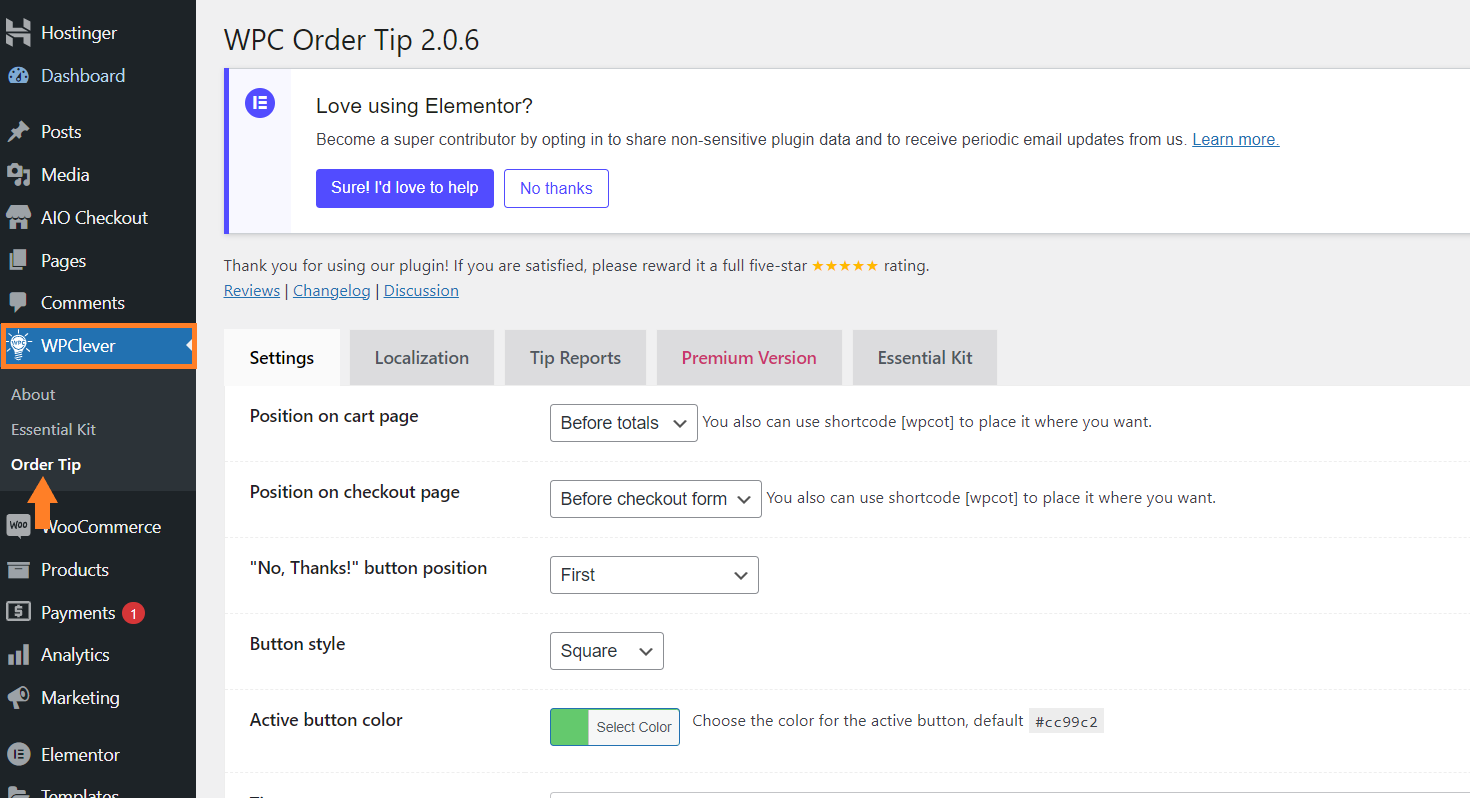
3. Select the Position of Tip Section on the Checkout Page
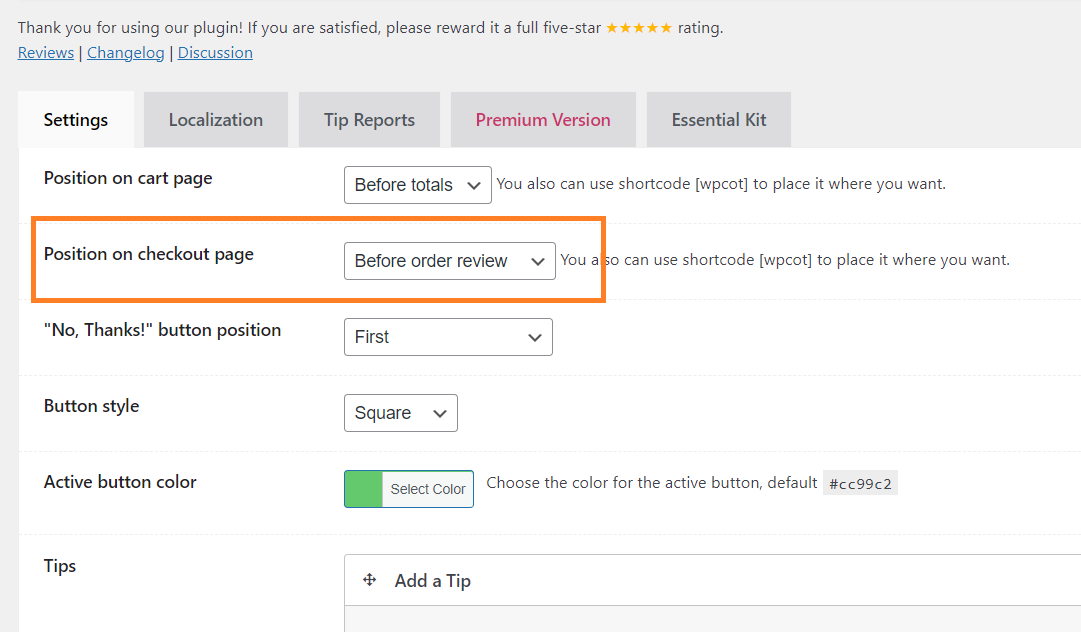
Make sure you are in the plugin’s ‘Settings’ tab. From the ‘Position on checkout page’ dropdown, you can select the tip section’s position on the checkout.
You can add the tip form at 6 different positions on the checkout page. I recommend you test each tip section’s position and use the one that suits best your needs.
But for this tutorial, I have used the ‘Before Order Review’ position to display the tip section which means it will be displayed before the order summary.
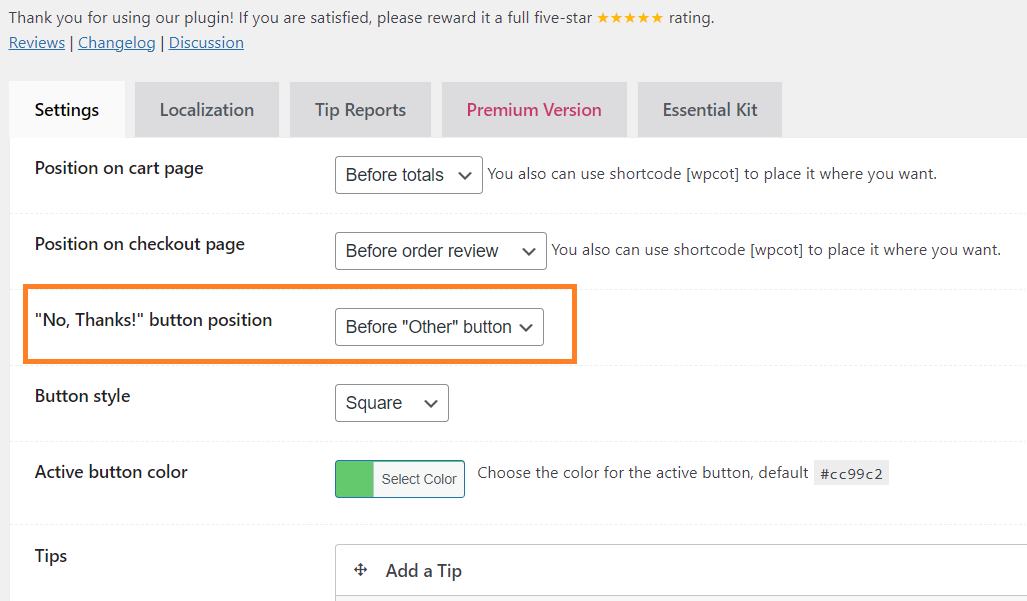
4. Select the No Thanks Button Position
After that, select the ‘No Thanks’ button position. It is the button that users can click if they don’t want to leave a tip.
There are three different button positions you can select from, but I have selected the ‘Before Other Button’ position.
You can also play with the other available settings like the button style and the active button color to match your brand. I am leaving them to default.
5. Configure the Tips
After making the adjustments to the positions and style, the next thing to do is to add a tip. By default, a tip section has already been created.
You can customize the existing tip rule or you can create a new one. You can also create multiple tips sections by clicking the ‘Add Tip’ button.
I’ll edit the default one.
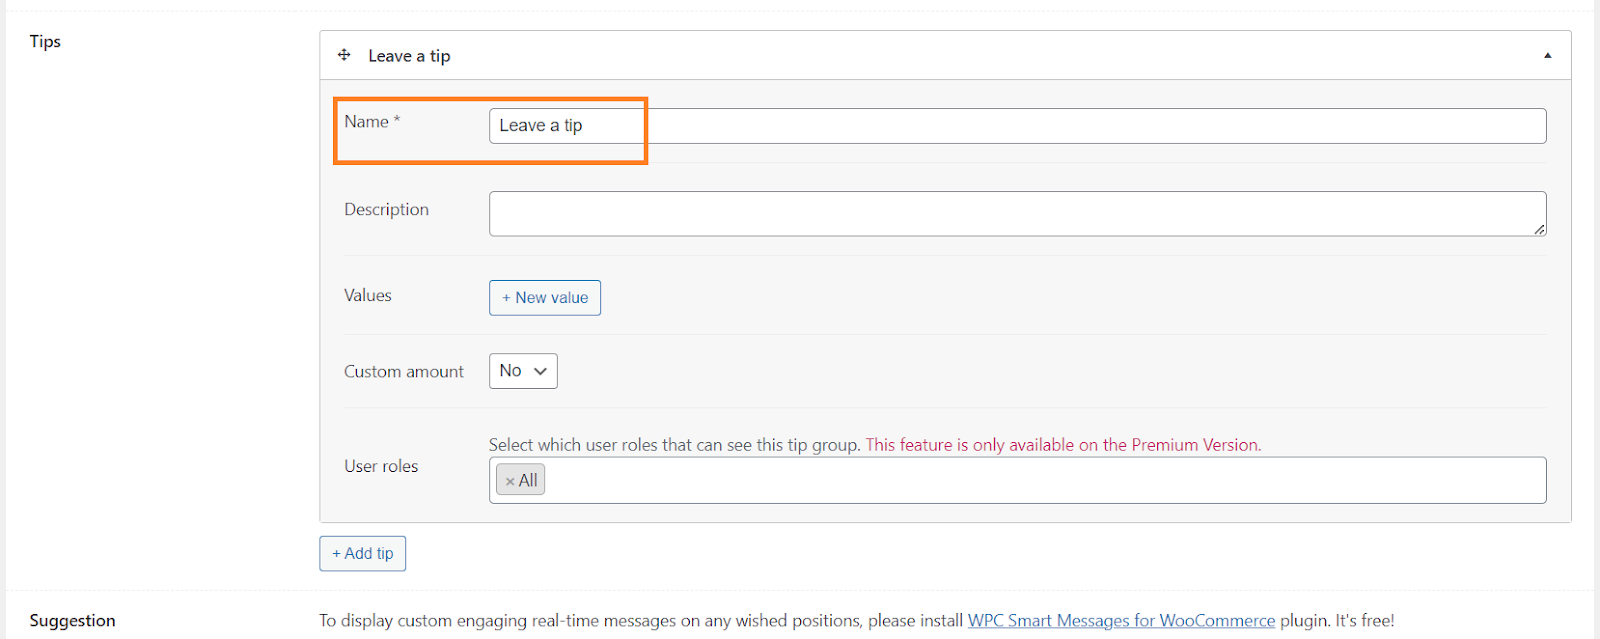
5.1. Change the Name
In the ‘Name’ field, replace the ‘Default’ with the name you want to display on the checkout page.
I’ll simply add the ‘Leave a Tip’ to this field.
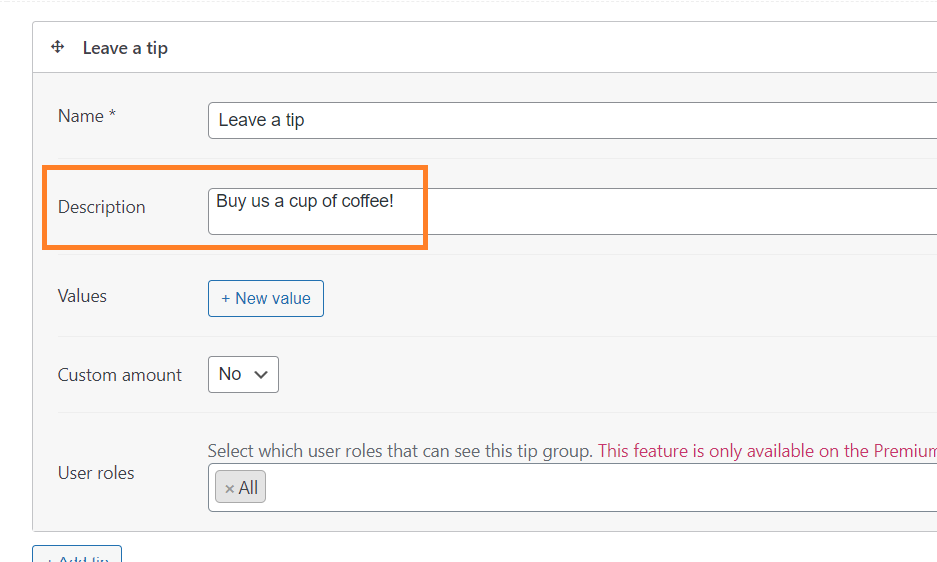
5.2. Add the Description
In the ‘Description’ field, you can add the description or the text. I have added ’Buy us a cup of coffee!’ but it depends on you if you want to add it or not.
You can also leave this field empty.
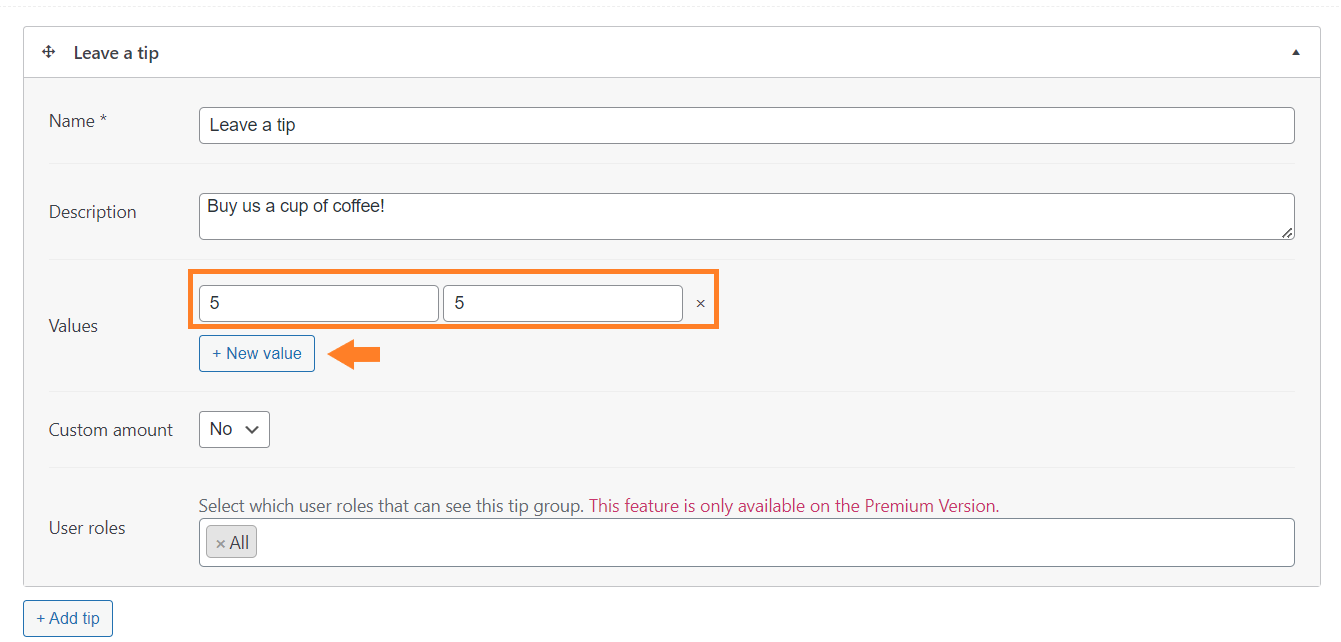
5.3. Add Tip Values
Next, you need to add the tip values. You can add as many values as you want. To add a value, click the ‘New Value’ button.
Once you click it, two new fields will be added above it. One of them will be the ‘Label’ field and the other one will be the ‘Value’ field. In the ‘Label’ field, you need to add the label that you want to show on the checkout page.
While in the ‘Value’ field, you need to add the tip amount.
I recommend you keep both the values the same for users to understand what it mean. For example, If you want your customers to leave a 5$ tip, you can add ‘5’ in both fields.
Note: The currency depends on your store’s default currency.
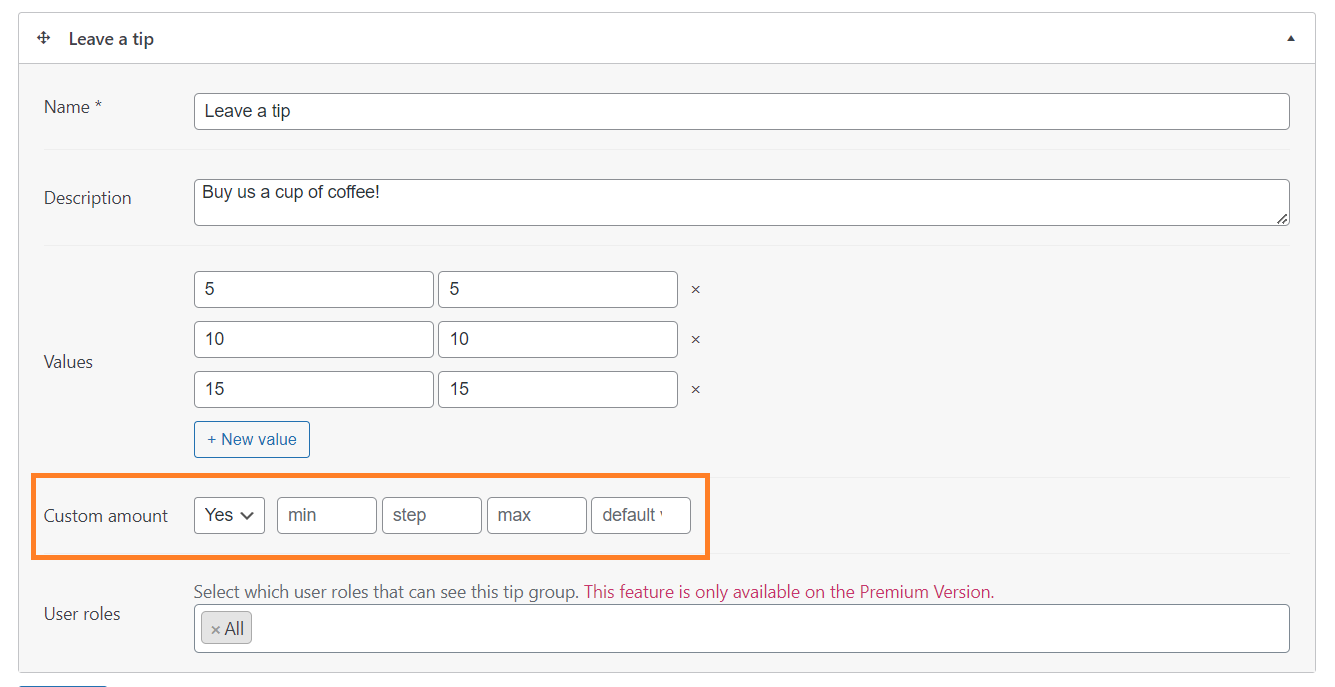
You can also add multiple tip values. You just need to click the ‘New Value’ button and add the tip label and value.
I have added multiple tip values but you can add them according to your needs.

5.4. Allow Custom Tip Amount
If you want your customers to leave a custom tip amount you can enable this from the ‘Custom amount’ dropdown by selecting ‘Yes’ from the dropdown.
Once you select it, a few other fields will also be created but I’ll leave them up to you to play with them and configure them according to your needs.
6. Save Changes
Once you have adjusted the tip values, scroll to the bottom of the page and click the ‘Save Changes’ button to save the settings.

7. Final Results
Once the settings are saved, let’s test the final results.
To test the results, I added a product to my cart and visited the checkout page. As you can see in the screenshot below I could see the tips section above the order summary section.
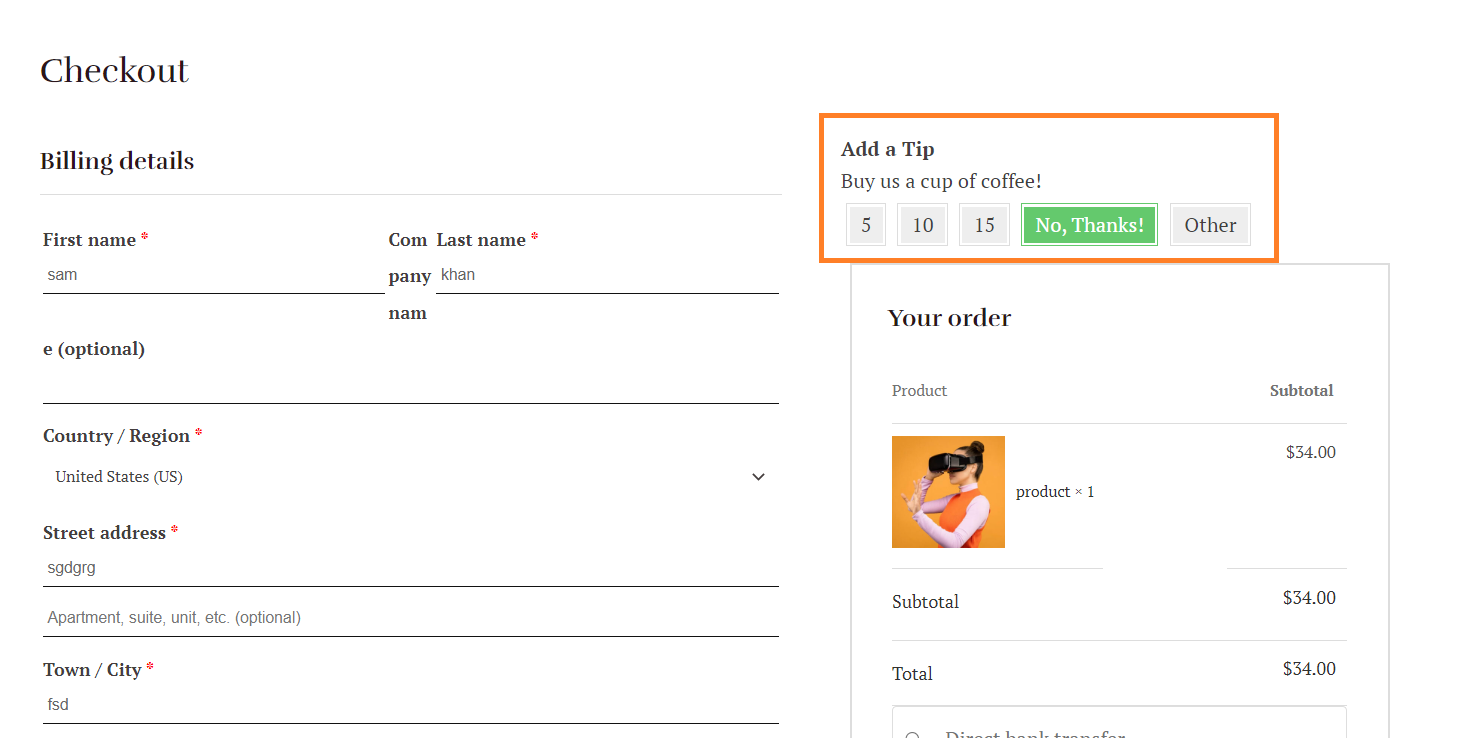
And, when I clicked the ‘Other’ button, it opened a field below it, where I could add the custom tip amount and click the ‘Add’ button to add the tip to the order total.

Conclusion
That’s it for today’s tutorial.
I hope it was helpful to you and you were able to learn something from it. Remember it is not about generating extra income, but it is more about the customer’s trust and your continuously improving efforts to provide exceptional customer experience.


