Adding a product image slider in WooCommerce is an excellent way to improve the customer experience and allow them to see the product more closely and from different angles(images taken from different angles).
You cannot create a gallery using the default WooCommerce settings, you need to use a WooCommerce product image slider plugin.
In today’s article, I’ll introduce you to a very user-friendly and helpful product image slider plugin that will help you add an image slider in WooCommerce without any hustle. I’ll walk you through the step-by-step process to do so.
Here’s a preview of what we’ll create:

Without any further ado, let’s straight jump into the article.
On This Page
- 1 How to Add the Product Image Slider in WooCommerce?
- 1.1 1. Install and Activate the WooCommerce Additional Variation Images Plugin
- 1.2 2. Navigate to Additional Variation Images
- 1.3 3. Configure the Product Image Slider
- 1.4 4. Control the Slider’s AutoPlay and Other Settings
- 1.5 5. Enable the Product Image Slider
- 1.6 6. Adjust the Thumbnail Slider Display Position
- 1.7 7. Save Changes
- 1.8 8. Final Results
- 2 Conclusion
How to Add the Product Image Slider in WooCommerce?
To add the image slider, I’ll use the WooCommerce Additional Variation Images plugin by AovUp. It is an advanced plugin with the most easy-to-use and user-friendly interface that even a beginner can understand and use.
The following are the steps to add the product image slider in WooCommerce.
1. Install and Activate the WooCommerce Additional Variation Images Plugin
Note: You can skip this step if you have already installed and activated the WooCommerce Additional Variation Images plugin.
To install the WooCommerce Additional Variation Images plugin, you will need to install the Woosuite Core plugin and activate it with the help of a license key following this guide.
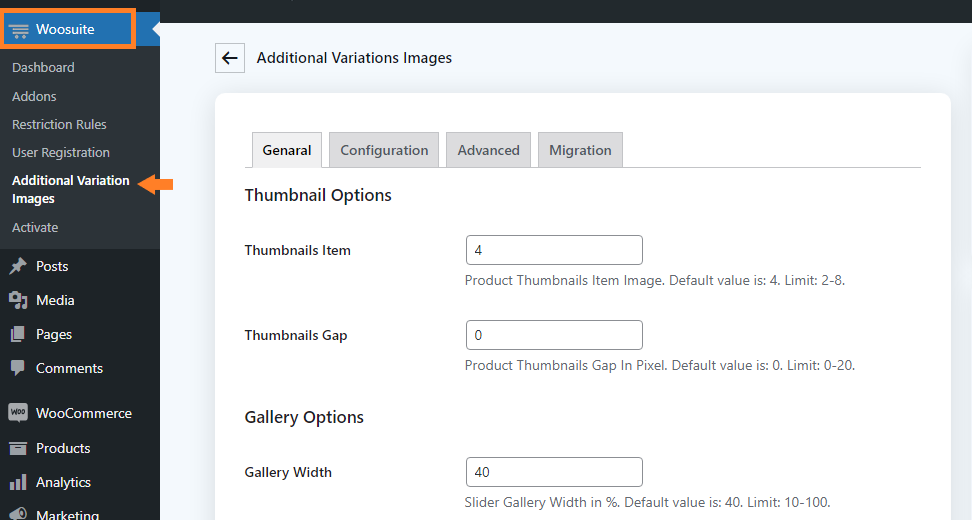
Once you have installed and activated the plugin, navigate to the Woosuite > Additional Variation Images from your WordPress admin dashboard.
You can edit the gallery width for different devices, edit the shop page thumbnail column, control the image slider, and much more.
3. Configure the Product Image Slider
Once in the plugin’s general settings, you can play with the product image slider options like changing its width and number of images in the slider and much more.
The following are the important things that you need to configure to create a good product image slider on the front end.
3.1. Change the Thumbnail Items
The first thing you may want to change is the number of thumbnails or images visible to the user(without clicking the arrow buttons).
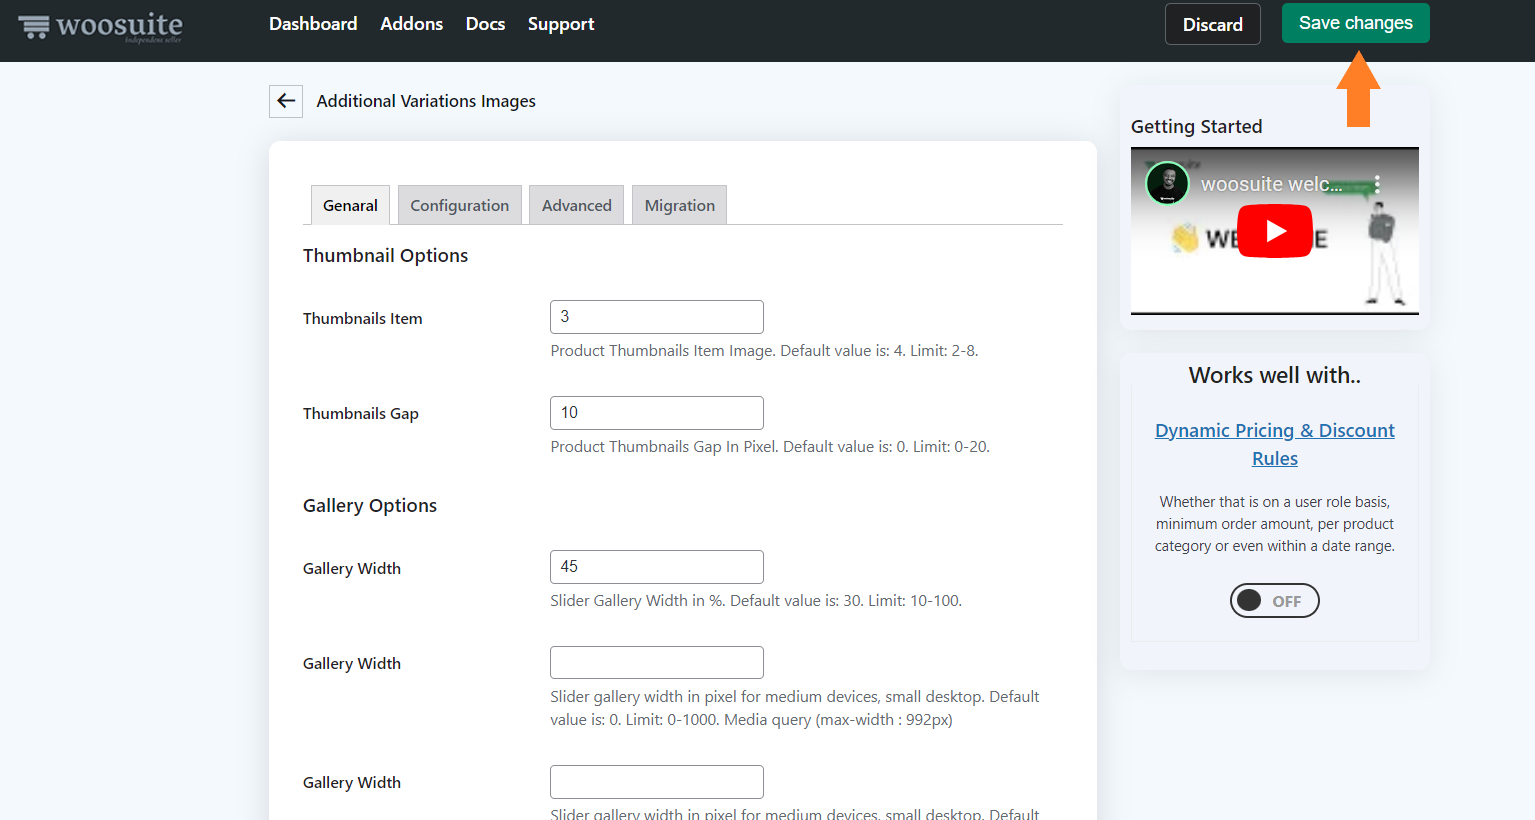
It entirely depends on your needs and the product image size. For my demo store, I have added ‘3’ in the ‘Thumbnail Items’ field as I want users to see 3 images at once but they can click the arrow buttons to see more images.
Its default value is ‘4’, if you want you can leave it to default and check things on the front end. Also, you can add any value that is between 2 and 8.

3.2. Change the Thumbnail Gap
The next thing you may want or need to change is the thumbnail gap. It’s the gap between the slider images. For example, if you have set it to 10px, there will be a 10px gap between the slider images/thumbnails.
Its default value is ‘0’ but you can add any value that is between 0 and 20 px. You don’t need to write ‘px’ in the field, it will automatically be considered in pixels(px).
For this tutorial, I have added ‘10’ in the ‘Thumbnails Gap’ field to add a 10px gap between the product images/thumbnails.

3.3. Configure the Slider’s Width
Finally, you need to configure the image slider’s width on the product page. One of the best things about the WooCommerce Additional Variation Images plugin is it allows you to control the slider width on different devices.
It gives you three different ‘Gallery Width’ fields:
- The first field controls the width of the gallery or slider in percentage(%). If you have set this, you don’t need to play with the other width options. Its default value is ‘30’ means 30% width but you can add any value that is between 10 and 100.
- The second gallery width field controls the slider width on the desktop in pixels. Its default value is ‘0’ but you can add the value that is below 1000 px. It will only be applied if the screen’s size is below 992 px or 992 px.
- The third gallery width field controls the slider width on tablets and small desktops in pixels. Its default value is ‘720’ but you can add the value that is below 1000 px. It will only be applied if the screen’s size is below 768 px or 768 px.
- The fourth field controls its width on mobile phones or extra small devices in pixels. Its default value is ‘320’ but you can add a value that is below 1000 px. It will only be applied if the screen’s size is below 480 px or 480 px max.
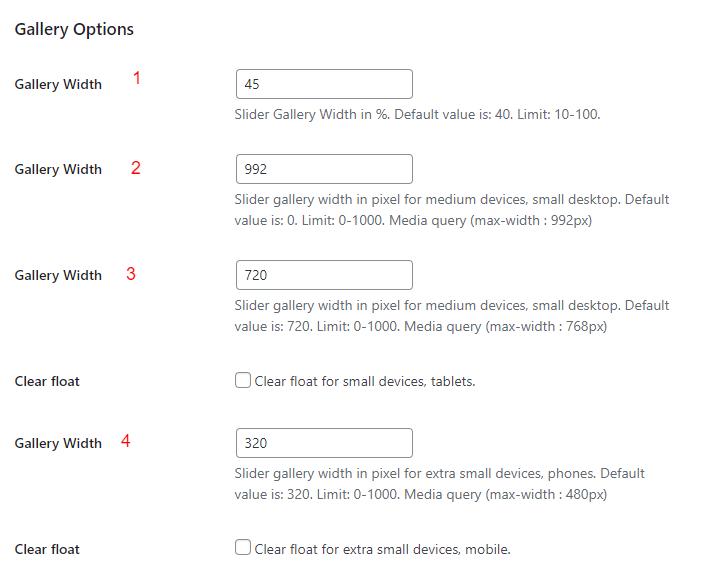
It is up to you, which one you want to use. But for this tutorial, I am using the gallery width in the percentage (%) field to add the gallery/slider width. It will control the product slider width for all the devices so you won’t have to do it configure its width manually for each screen size.
I have added ‘45’ in the first ‘Gallery Width’ field that will control the slider’s width in %. This means that the slider will take the 45% of the screen size. You can leave the rest of the fields empty.

3.4. Save Changes
Before moving on to the next step, make sure to click the green ‘Save Changes’ button at the top right corner of your screen to save the settings.
4. Control the Slider’s AutoPlay and Other Settings
Till then, we have configured the product image slider’s width but we also need to adjust its auto speed, arrow icons, and a few other things.
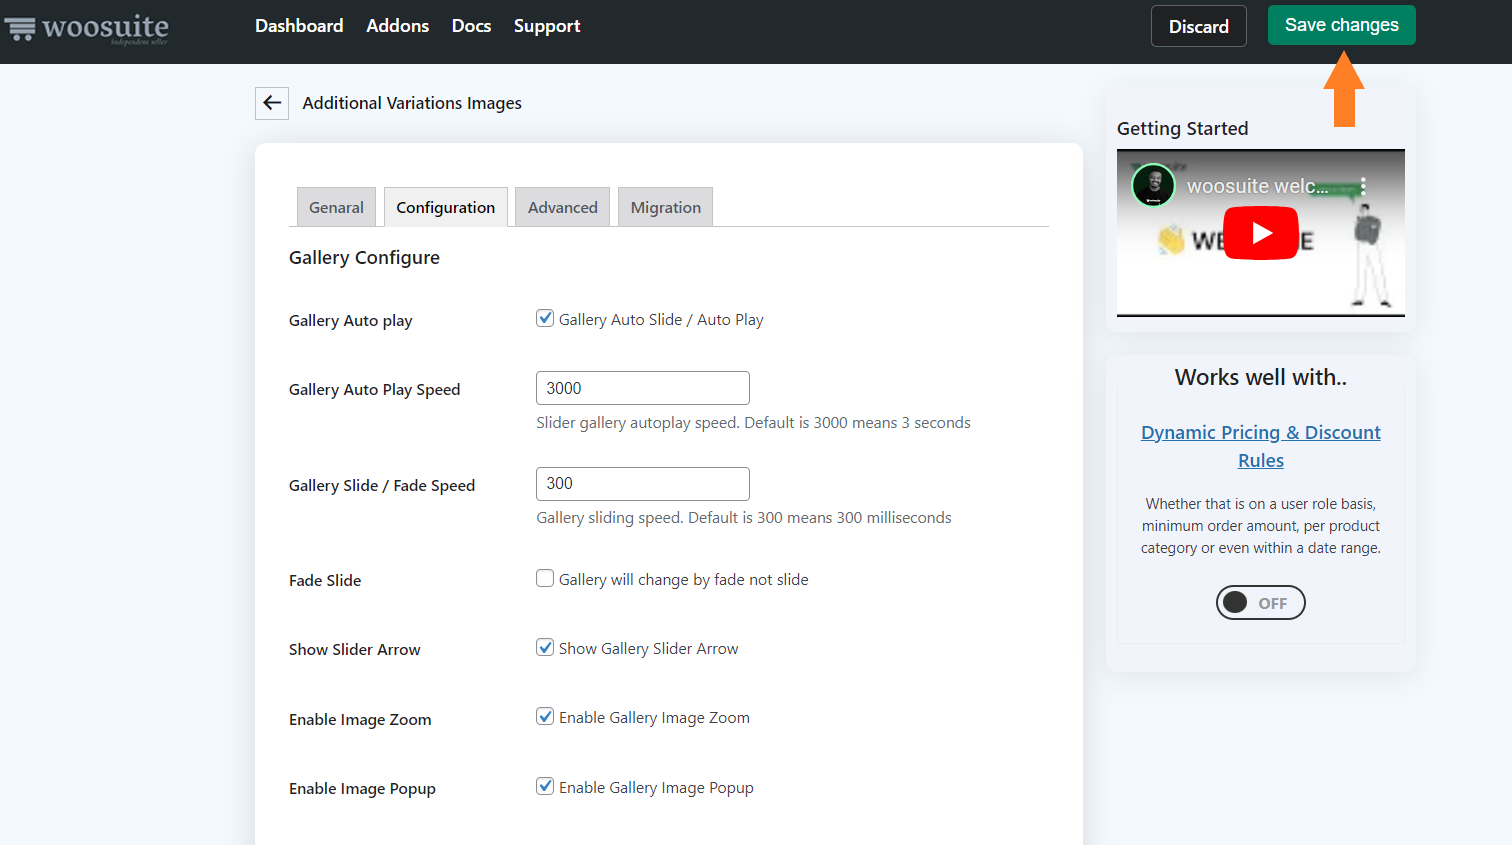
To do so, click the ‘Configuration’ tab at the top.

4.1. Enable the Slider AutoPlay
The first setting you may want to enable is the ‘Slider AutoPlay.’ Enabling it will make the slider change the images automatically after a specific time.
To enable it, you just need to check the ‘Gallery AutoPlay’ option.
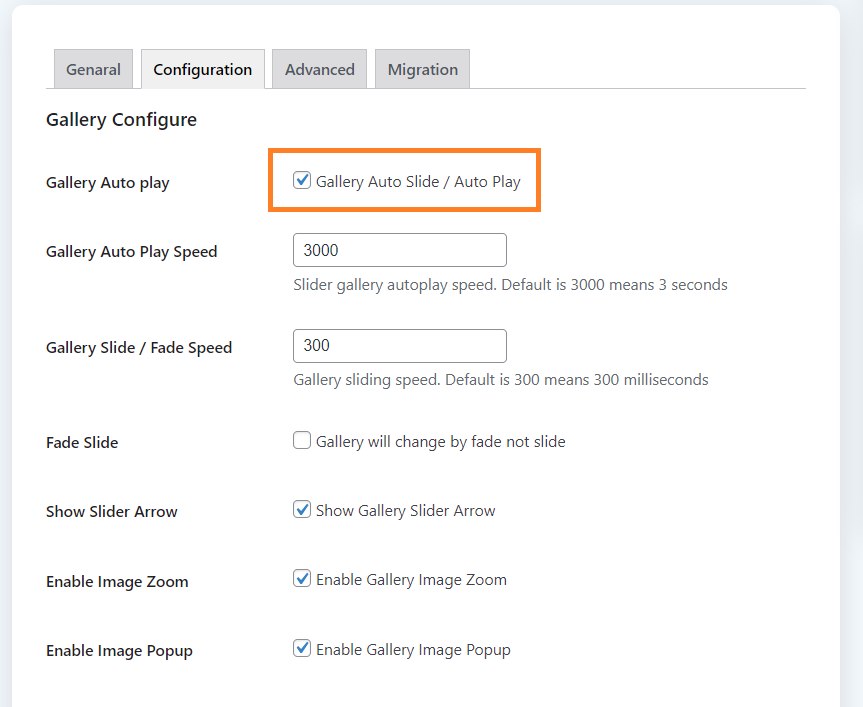
4.2. Configure the AutoPlay Speed
After enabling the autoplay, you may want to adjust the autoplay speed. This is the speed or the time after which the next image or slide will be displayed.
Its default value is 3000 which means the next slide will appear after 3 seconds. You can adjust this speed according to your needs.
Just remember that 1000 = 1s. So, you can add value according to this. For example, if you want the slider to move after 5s then make sure you add 5000 in the ‘Gallery Auto Play Speed’ field.
I am leaving it to the default value.

5. Enable the Product Image Slider
You can play with the other available settings, but as we want to add a product gallery slider, make sure you enable the ‘Enable Thumbnail Slide’ option.
It will display the gallery images in a slider below the main product thumbnail/image.
You can also enable the ‘Show Gallery Thumbnail Arrows’ to allow the customers to click the arrow to change the slide image.

6. Adjust the Thumbnail Slider Display Position
Next, you also want to change the gallery slider position. By default, it will be displayed below the main product image but you can configure it to match your choice and site design.
You can select from three positions.
- Left
- Right
- Bottom
For this tutorial, I have selected the ‘Left’ position from the ‘Thumbnail Display Position’ dropdown to display the product image slider on the left side of the main product image.

7. Save Changes
Once you have made the necessary adjustments, click the green ‘Save Changes’ button at the top right corner of your screen to save the settings.
8. Final Results
Once the settings are saved, let’s test the final results.
To test it, visit any product page and you’ll see the product image slider. As I had set its position to the left so I could see that the slider was on the left side of the product image.
Also, it was moving after 3 seconds and only 3 images were being displayed as we adjusted the settings above.
You can make different settings depending on your requirements.
Note: You will only see the slider if you have added the product gallery image to the product. If not, you first need to edit the product and add the gallery images to it.
Conclusion
That’s it for today’s article.
I hope it was helpful to you and you were able to add a product image slider to your WooCommerce store. With the help of this plugin, you can adjust the width of the slider for different screen sizes and play with other available settings to match your needs.
Here are a few other tutorials that will help you to learn about the other settings of this plugin.
- How To Add Additional Variation Images In WooCommerce
- How to Customize the WooCommerce Product Image Size
- How to Disable the Zoom on Hover in WooCommerce
- How to Add Video to WooCommerce Products
Ready to get started? Download the WooCommerce Additional Variation Images plugin now!


