You might have encountered different types of errors as a WordPress site owner. Some of them can be fatal for your site.
To fix the error, you need to know what caused the error, and your error log can help explain what’s causing the error.
WordPress wp-config file not only contains essential WordPress details like database credentials and other WordPress settings.
This file also helps as a debugging tool and enables you to find and fix the errors.
In today’s article, I’ll explain the step-by-step process to turn on the WordPress error log using the debug mode so you can find and fix the errors on your site.
On This Page
- 1 Why Do You need to Turn on WordPress Error Logs?
- 2 How to Turn on WordPress Error Log?
- 3 Conclusion
Why Do You need to Turn on WordPress Error Logs?
WordPress is open-source software, and many users have installed or created third-party plugins and themes, which can cause compatibility and other fatal PHP errors.
If users see any type of error on the front end, it can affect the user experience because users may get scared by seeing the PHP fatal error message or any other error.
To avoid such issues, you should turn on the WordPress error logs. Enabling the logs will inform you about these errors on your WordPress site. Sometimes, these errors are hard to find and fix, especially if you are a non-techy person.
Turning on the WordPress error logs will give you the error codes and when they occurred. It will also tell you the error’s root cause, which will help you move forward to fix it.
After finding the error cause, you can eliminate it or contact the plugin or theme support team to fix it.
When you automate the process of error recording on your website, it will be much simpler for you to keep an eye on any errors that may arise on your website.
Because of this monitoring, you should be able to quickly repair any issues that arise before they may harm your site’s reputation or visitors’ experience.
Now let’s dive in to see how to turn on WordPress error logs using the debug mode.
How to Turn on WordPress Error Log?
WordPress has built-in error logs functionality, which is often turned off by default. Due to this, you don’t see any error messages on the WordPress dashboard or front end.
You need to turn on the WordPress debugging mode to see the error logs.
You can do it in two ways:
- Method 1: Using a plugin
- Method 2: Using a WordPress debug mode(custom code).
As this tutorial focuses on turning on the WordPress error logs using the debug mode, I’ll stick to it.
People often get scared when they hear about doing something with custom code. But don’t worry. You just need to follow the steps explained in this tutorial and copy and paste the code.
Note: You should create a site backup while editing any WordPress core file. It is always recommended to do so as there are always chances of things going wrong, so backup ensures your site is safe.
Method 1: Turn on Debug Mode Using a Plugin
This is the easiest method to turn on the debugging mode in WordPress. You can follow the following steps to do so.
1. Install the WP Debugging Plugin
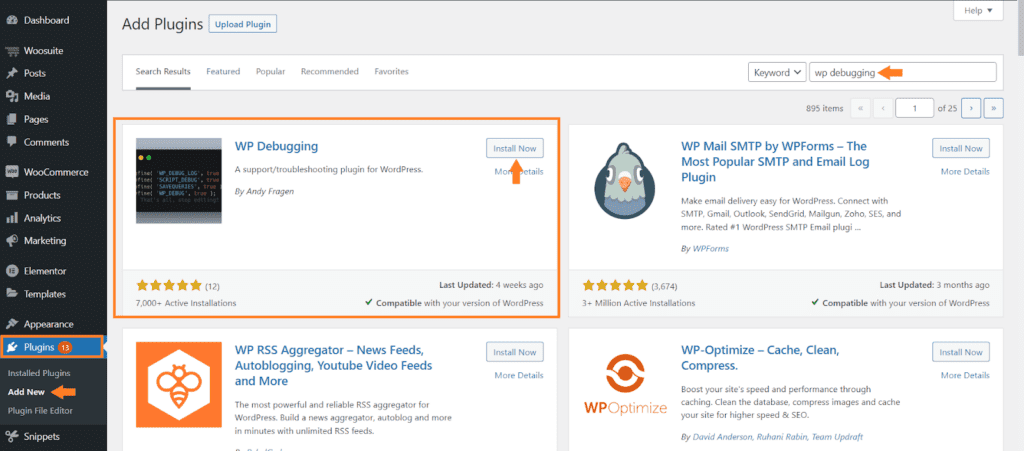
To install the WP Debugging plugin, navigate to Plugin » Add New from your WordPress admin dashboard and search for ‘wp debugging’ in the search bar.
Once you get the plugin, hit the Install button to install it.
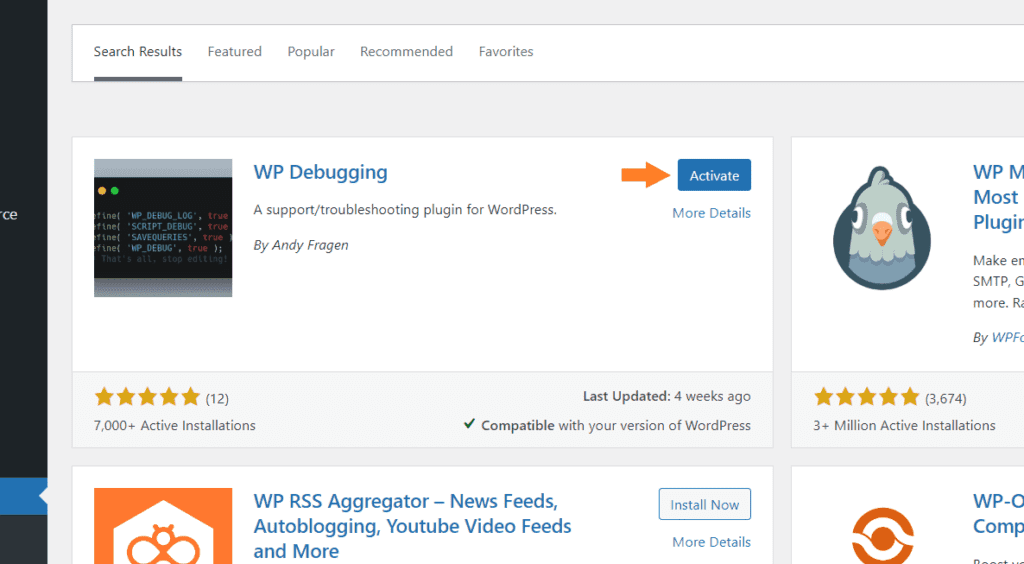
Once the plugin is installed, the install button will be replaced with the ‘Activate’ button. To activate the plugin, click the ‘Activate’ button.
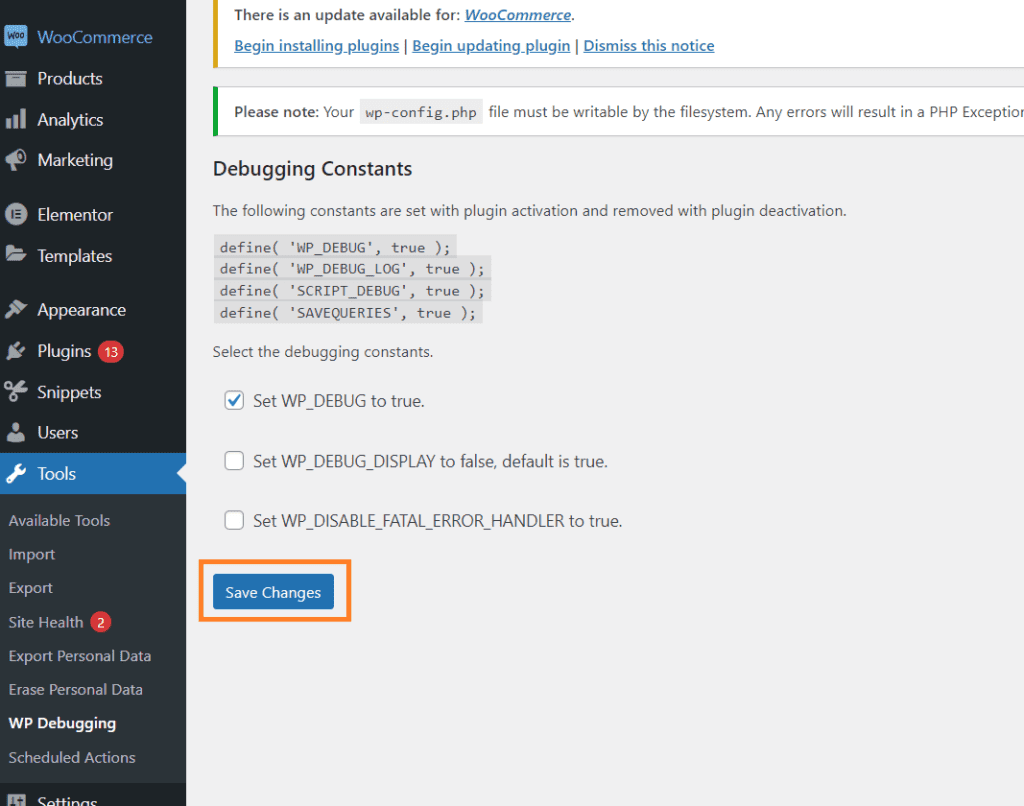
Once the plugin is installed and activated, navigate to Tools » WP Debugging from your WordPress dashboard.

3. Set WP_DEBUG to True
Now you need to Set WP_DEBUG to true by checking the checkbox behind it to enable the debug mode in WordPress.

4. Save the Settings
After that, don’t forget to click the ‘Save Settings’ button to save the settings.
5. View the Debug File
Once you save the settings, you’ll see the ‘Debug Quick Look’ settings at the top admin bar. Hover your mouse over it and click the ‘View File’ to view the debug file.
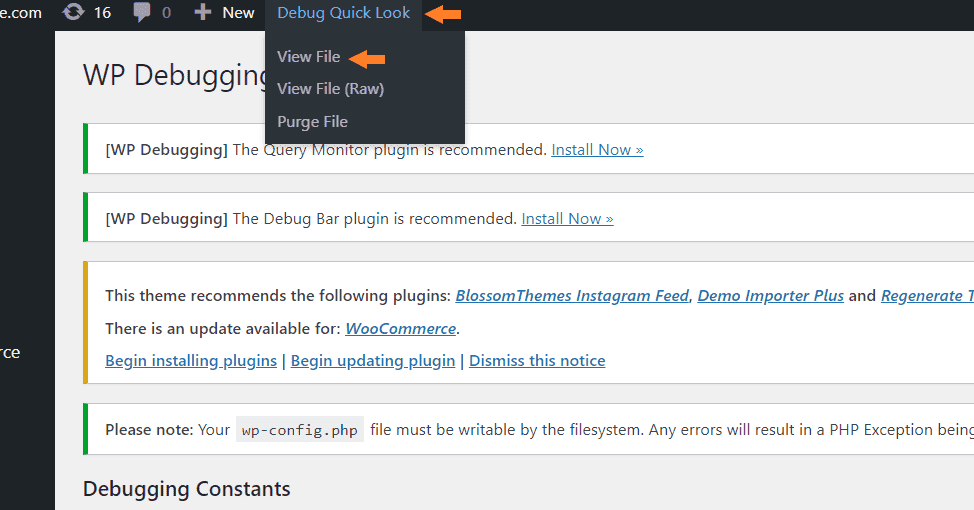
Once you click it, you can view the debug file in a new tab.
Method 2: Editing WordPress WP-Config File
The second method to enable WordPress to debug mode is manually editing the wp-config.php file. It is a difficult method as compared to the first method.
But with the proper guidance, you can pull it off.
Follow the following steps to turn on the WordPress error log manually.
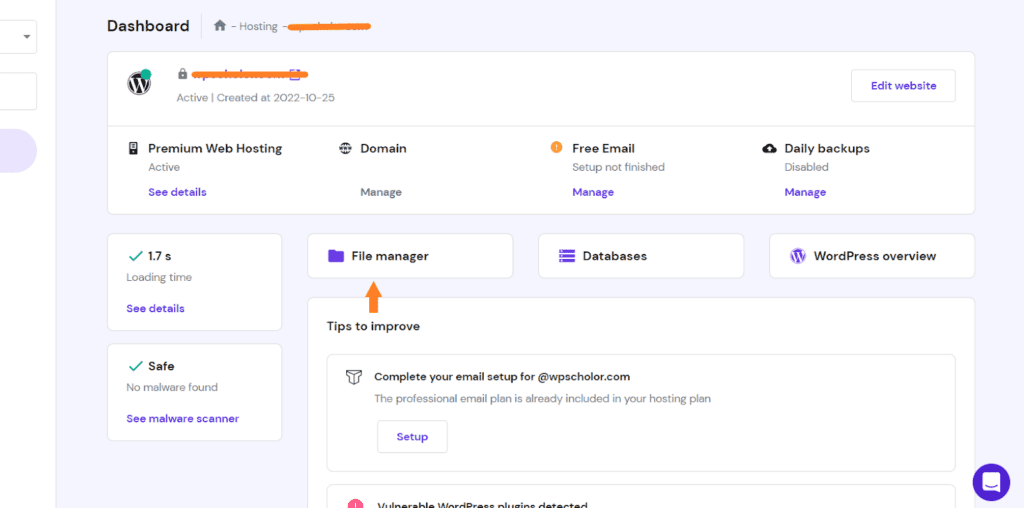
To edit the wp-config.php file, we need to navigate to the file manager from your hosting provider. Each hosting platform allows you to access the file manager, but the steps to access it may differ.
I am using the Hostinger hosting platform, so I have the File Manager on the hpanel dashboard. If you are using a different hosting platform, you may get a cpanel to access the file manager or another option.
You can use the FTP software if you do not have the cpanel or access to your file manager. The following steps will help you.
1.1. Install FTP Software
First, we need to access the WordPress files. There are several ways to do so, but I recommend using the FTP(File Transfer Protocol) software. It is used to excess the files of any site and edit them.
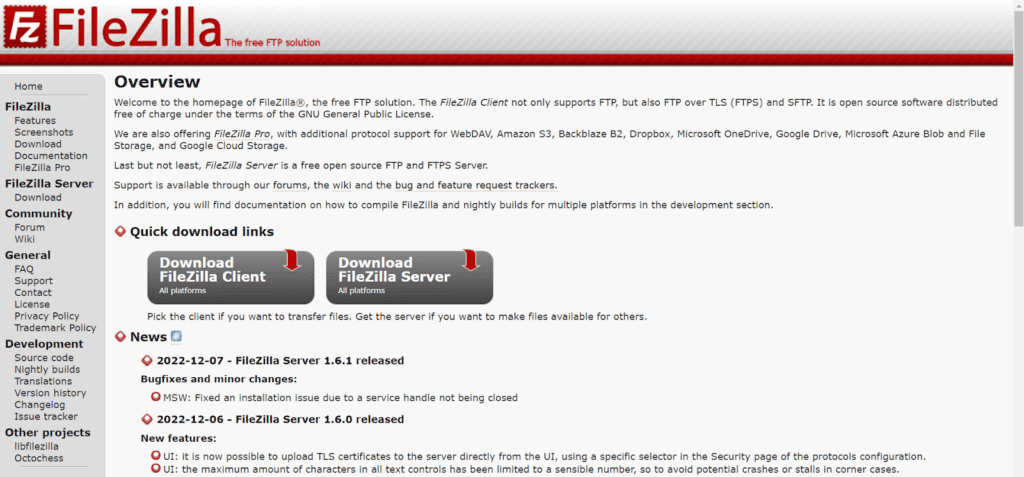
I’ll be using FileZilla to access the website files.
You can download the FileZilla Client software from the official site and install it on your computer. I have already installed it.
1.2. Connect to Your Site/Host Via FTP
After installing it, open the FileZilla software by double-clicking the software icon, and you’ll see a blank screen.
You’ll need the FTP address provided by your web host and your FTP username and password to access your site via File Transfer Protocol (FTP).
Your hosting account information will include your login credentials. If you request, the host may provide information on where the FTP address is stored. It’s also possible to get in touch with them directly.
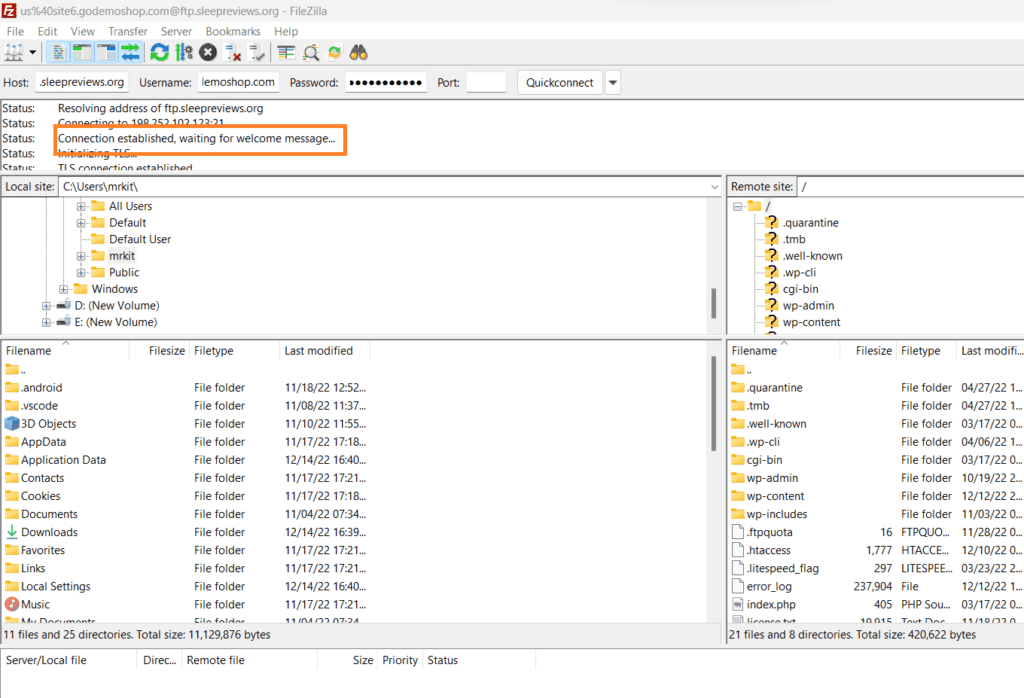
Once you have all the details, please fill in the information inside the FileZilla and connect with your host. Once the connection is successful, you’ll see a similar message as in the following image.
3. Edit the WP-Config File
Now, you have two ways to edit the wp-config file. I’ll explain both of them.
3.1. Using the File Manager
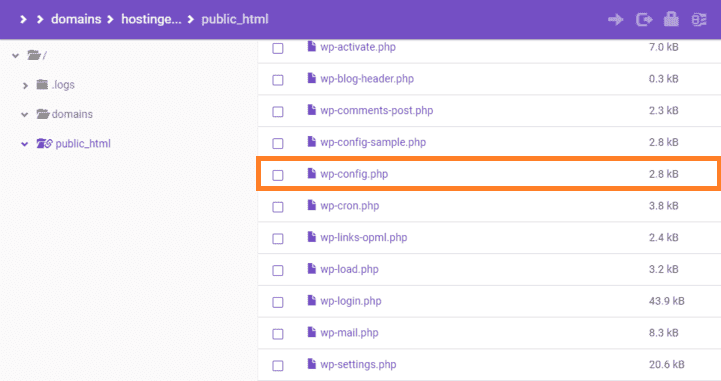
If you want to use the file manager to edit the wp-config file, once you have navigated to the ‘File Manager’ from your hosting dashboard, you need to click it.
It will take you to the site files. You need to click the public_html from the sidebar and search for the wp-config.php file. Once you find it right-click the wp-config.php file and select Edit to edit it.
3.2. Using the FTP
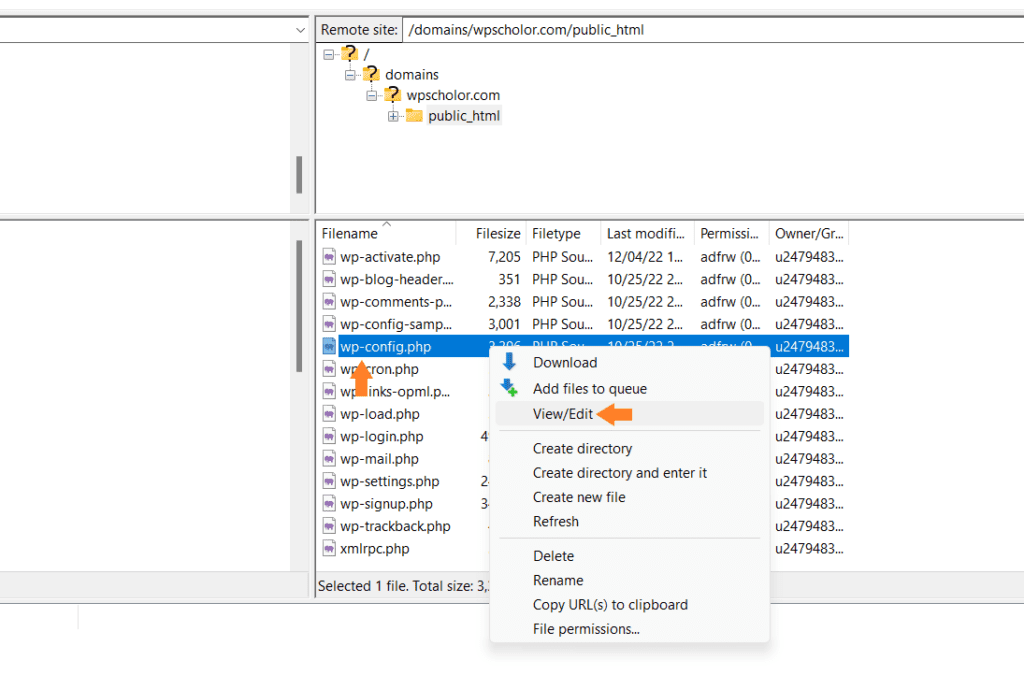
Once connected to your site using the FTP, we need to edit the wp-config.php file. You can find it in the right panel of the FileZilla screen inside the root folder of your site.
To edit the file, right-click on it and select ‘Edit/View File’ from the options. It will open the file in your computer’s default text editor.
4. Enable the Debugging Mode
Now look for the line that says, ‘That’s all, stop editing! Happy blogging.’
After that, you need to paste the following code below that line.
define( ‘WP_DEBUG’, true );
Note: Please follow the Add Code Snippet to WordPress guide to learn more about adding code to WordPress.
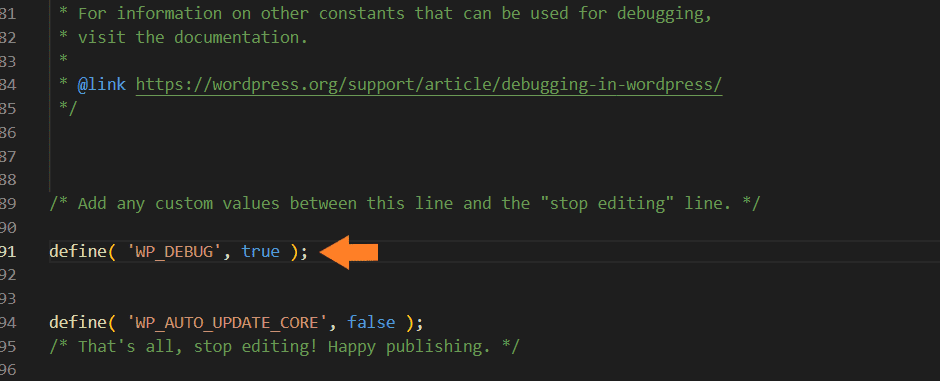
Sometimes, the code is already added but is set to ‘false.’ If that is the case, you just need to replace the ‘false’ with ‘true’ to enable the debugging mode in WordPress.
5. Turn on WordPress Error Log
After enabling the debugging mode, you also need to turn on the WordPress error log. You and your users will see the error messages if you don’t enable it. It is okay for you (admin) to see the error messages, but your customers should not see them.
It will affect the user experience and may scare them.
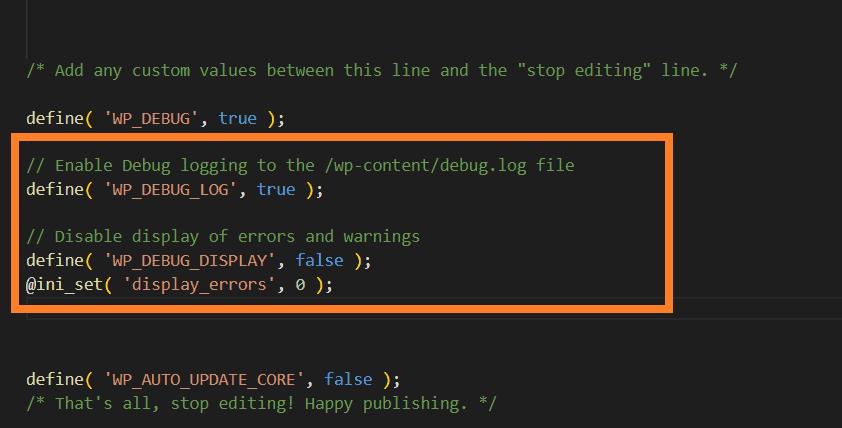
To turn off the error messages on the front end, you need to paste the following code below the debugging code you pasted in the previous step.
// Enable Debug logging to the /wp-content/debug.log file
define( ‘WP_DEBUG_LOG’, true );
// Disable display of errors and warnings
define( ‘WP_DEBUG_DISPLAY’, false );
@ini_set( ‘display_errors’, 0 );
The first line of code instructs WordPress to store all its error messages in a log file known as debug.log.
The second snippet instructs WordPress to hide any error messages displayed to the public.
Once the code is pasted, please save the file and upload the wp-config.php file to your site.
6. Review the WordPress Error Logs
To review the WordPress error logs, you will need to log into your WordPress account and navigate to the pages on your site that were generating errors or warnings.
The issues that have arisen in the past won’t be recorded in the new error log that you have created. Therefore, if you are looking to troubleshoot a particular issue, you will need to revive it by interacting with the component or carrying out the action that triggered it in the first place.
This is a necessary step in the process. This should cause WordPress to record the problem in its database.
After that, you will need to access your website using an FTP client or file manager within the cPanel of your WordPress hosting service.
After you have successfully connected, navigate to the /wp-content/ folder, and once there, look for a file named debug.log within that directory.

You can view, download, and edit this file. It will include all errors, warnings, and alerts from WordPress logs.
Conclusion
Errors & warnings can affect the user experience and your SEO rankings. If your site has a lot of errors, then Google will decrease your SEO rankings and impact your revenue.
Please follow the Internal Server Errors to fix the different kinds of errors.
Here’s the revised and short summary of the above steps.
- Access the WordPress files.
- Edit the wp-config.php file.
- Review the WordPress error logs.
There are a lot of things you can do to improve the user experience. The following guides can be beneficial for you to improve the customer experience.


