Do you want to automatically set your orders in WooCommerce to completed?
You have landed at the right place!
To do so, you’ll need to use the custom code or a plugin (free or paid).
This is helpful if you are dealing with virtual products and customers can get the order immediately because it can be a headache to manually change the order status of every order.
I’ll focus on autocompleting WooCommerce orders in today’s article using custom code. The code will help you to change the order status of every order on your site to ‘completed,’ once it is paid.
So without any further ado, let’s jump into the tutorial.
On This Page
AutoComplete the WooCommerce Orders
First, I’ll explain the code, and then I’ll show you the two ways to add the code to your site so that the autocomplete WooCommerce orders feature works on your site.
Let’s understand the code.
1. Action Hook
To automatically change the status of the WooCommerce orders to ‘completed’ requires using the action hook that refers to specific points in the WooCommerce. Following is the hook that you should use.
add_action( 'woocommerce_thankyou', 'auto_complete_woocommerce_order' );2. Callback Function
After that, we need to write the callback function that we passed in the action hook to autocomplete the WooCommerce orders.
Note: Please keep in mind that the function’s name should be the same as the above hook. If you change the function name in the hook, then ensure you also change the function name in the following code.
Also, you can replace the ‘completed’ with another status you want, like ‘payment processing.’
function auto_complete_woocommerce_order( $order_id ) {
if ( ! $order_id ) {
return;
}
$order = wc_get_order( $order_id );
$order->update_status( 'completed' );
}
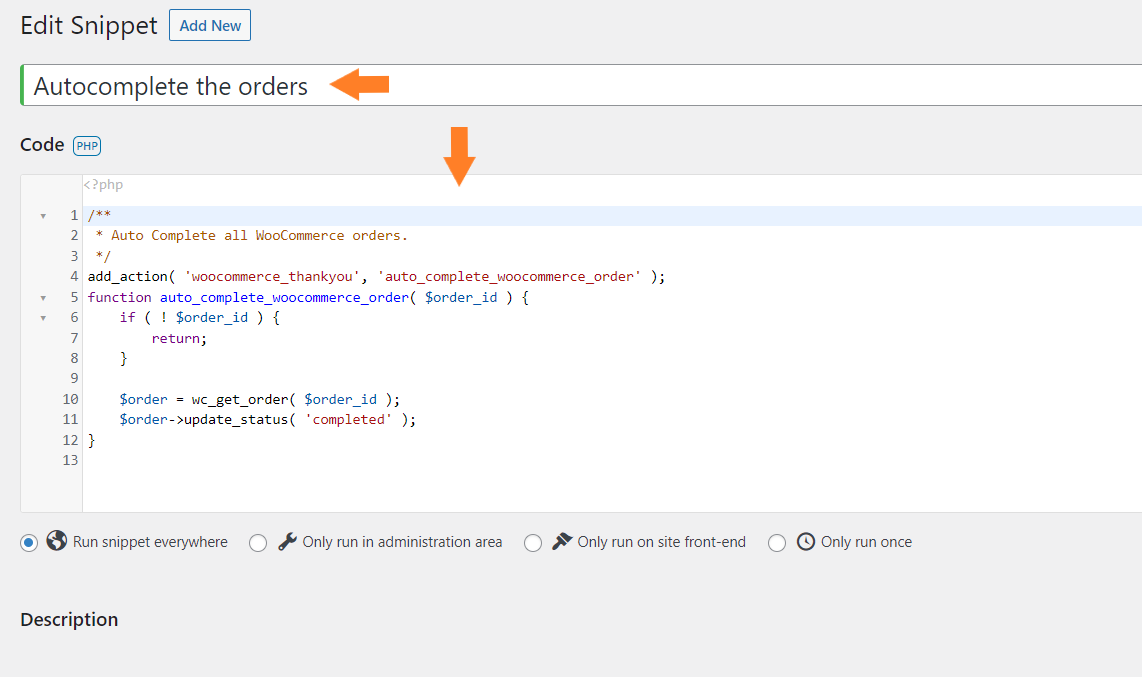
The final code will look something like this.
add_action( 'woocommerce_thankyou', 'auto_complete_woocommerce_order' );
function auto_complete_woocommerce_order( $order_id ) {
if ( ! $order_id ) {
return;
}
$order = wc_get_order( $order_id );
$order->update_status( 'completed' );
}
3. Paste the Code to Your Site
Now that you have understood the code, you need to paste the code to your site to autocomplete the WooCommerce orders.
To add the code to the site, we have two methods.
- Using the Plugin
- By editing the Themes functions.php File
I have explained both methods in the How to Add a Code Snippet to WordPress article. Please follow that tutorial to learn more about adding code to WordPress.
I have added the code using the plugin.
4. Final Results
No matter which method you choose to paste the code to your store, the final results will be the same.
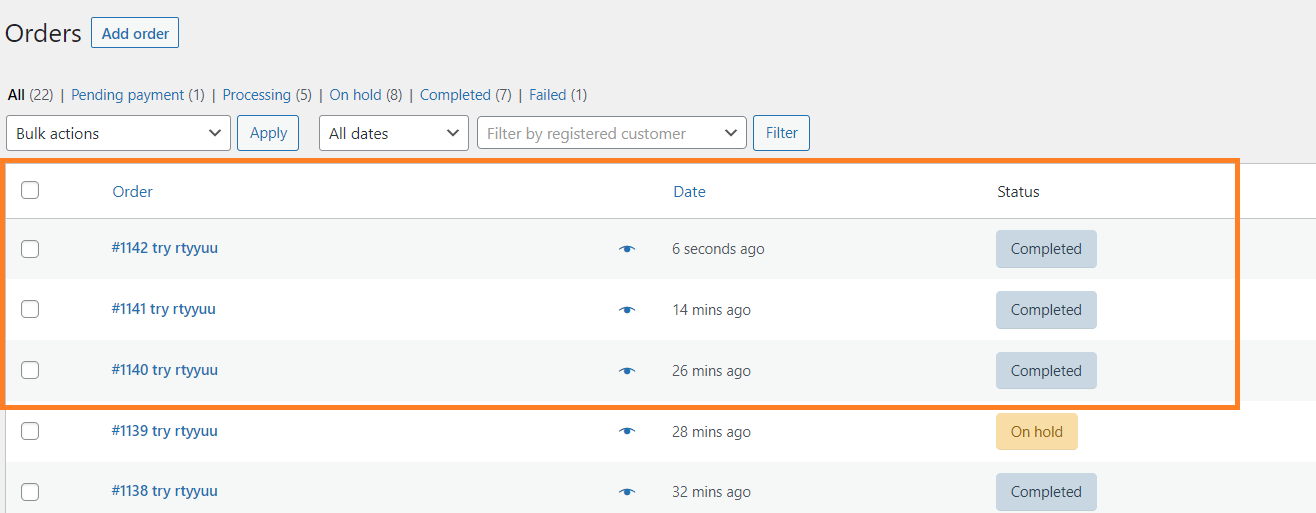
To test it, I placed a fake order on my store, and when I visited the orders section from the backend, it was marked as ‘completed’ automatically.
Note: Please remember that the orders placed after adding the code to your site will be marked as ‘completed’ while the orders before will not be autocompleted. You will need to change the order status of those orders manually.
Conclusion
That’s it for today’s article.
I hope this article was helpful to you and you were able to autocomplete the WooCommerce orders. Please let me know if the code doesn’t work. I’ll be happy to revise it for you.


