WooCommerce is the most used eCommerce plugin due to its amazing features and ease of use. Webhooks are one of its features that is very helpful if you want to send a notification to any URL.
These are useful for connecting to other apps and sites that support webhooks. It is not much difficult to create WooCommerce webhooks, but still, some users often need clarification about it.
In today’s article, I’ll explain everything you need to know about WooCommerce webhooks. I’ll also explain how to create the WooCommerce hooks and test them.
So, without any further ado, let’s jump into it.
On This Page
What are WooCommerce Webhooks?
An app can use webhooks to direct or notify another app to perform an action automatically. It’s an easy way to keep all your accounts in sync and up-to-date.
It was launched back in July 2014 with WooCommerce 2.2. Webhooks allow you to trigger events anytime you make changes to your store’s orders, products, coupons, or customers.
WooCommerce actions are another integration point for webhooks. These are triggered only when an activity happens on your site.
Webhooks can also be utilized with WooCommerce actions. For example, you can create a webhook that will be used every time a product is added to the cart using the woocommerce_add_to_cart action.
Webhooks simplify WooCommerce integration for third-party apps.
Benefits of Using the WooCommerce Webhooks
Following are a few benefits of using WooCommerce webhooks.
- Webhooks can interface with third-party APIs and services.
- Webhooks can control WooCommerce’s built-in plugin.
- WooCommerce stores and displays information (website owner and client) based on developer preferences.
- Webhooks lets you collect consumer data, monitor activities, and act swiftly using custom programs.
Now that we know about webhooks and their benefits, let’s dive in and see how to create a webhook.
How to Create WooCommerce Webhooks?
To create a webhook, you don’t need to install any extra plugins. WooCommerce completely got you covered here.
You can follow the following steps to create the WooCommerce webhooks.
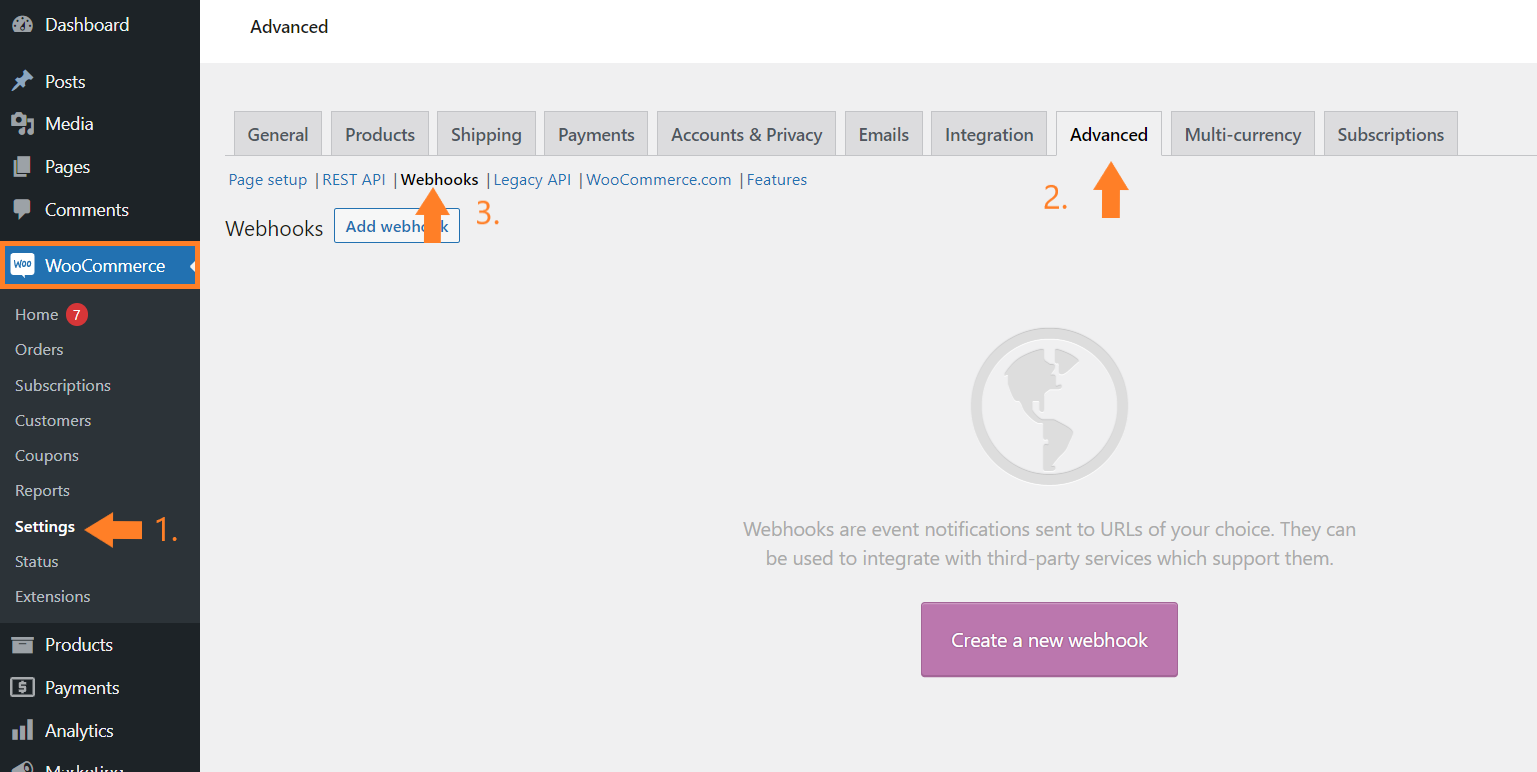
To create a WooCommerce webhook, you must first navigate to WooCommerce » Settings » Advanced » Webhooks from your WordPress admin dashboard.
2. Create a New WooCommerce Webhook
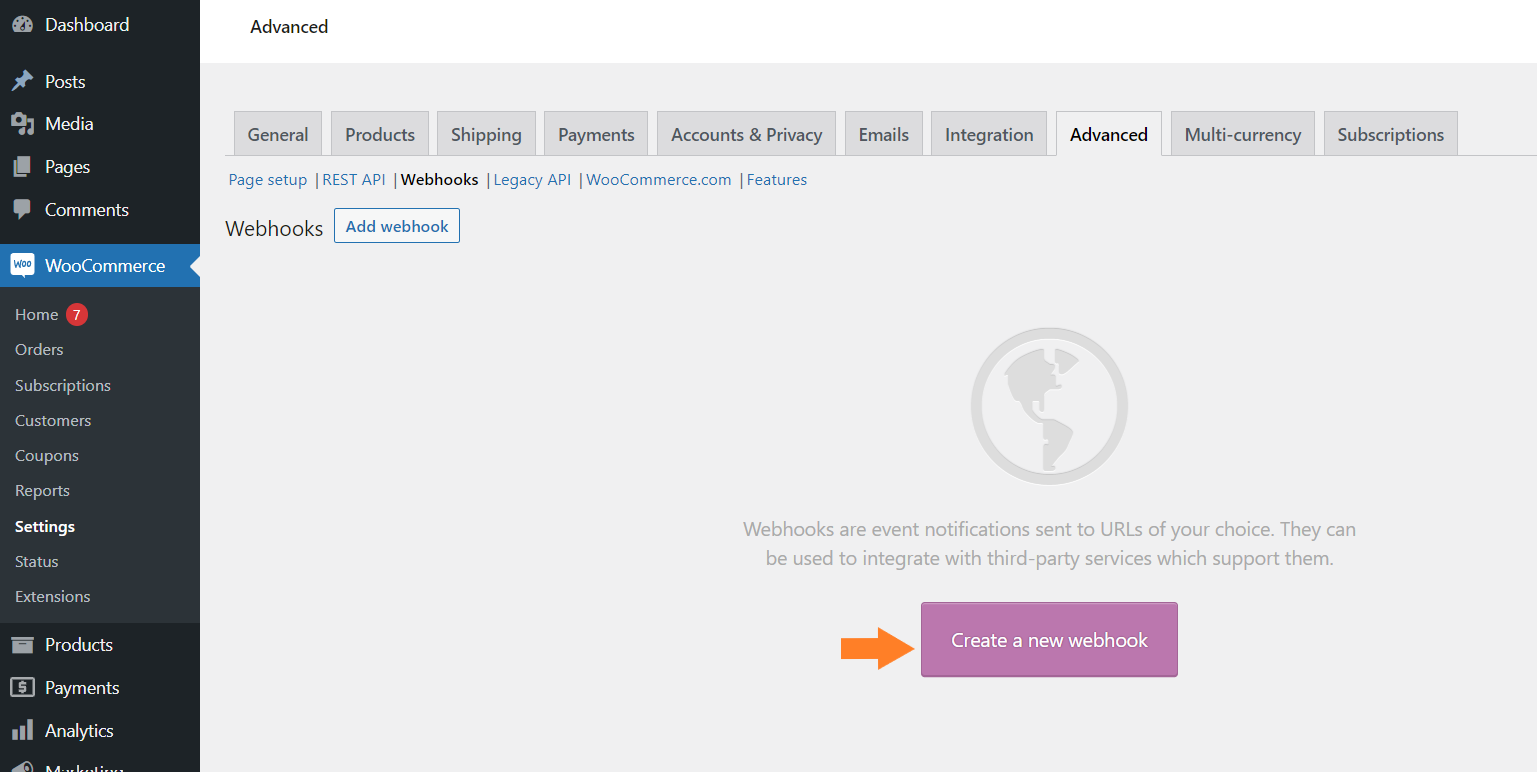
Once you are in the WooCommerce webhook settings, click the purple ‘Create a New Webhook’ button in the middle of the screen.
Note: You’ll only see this button if you are creating the webhook for the first time. Otherwise, you’ll have to click the blue-bordered ‘Add Webhook’ button on the top left side of your screen.
After clicking the button, you’ll see a form that you need to fill out to create a webhook.
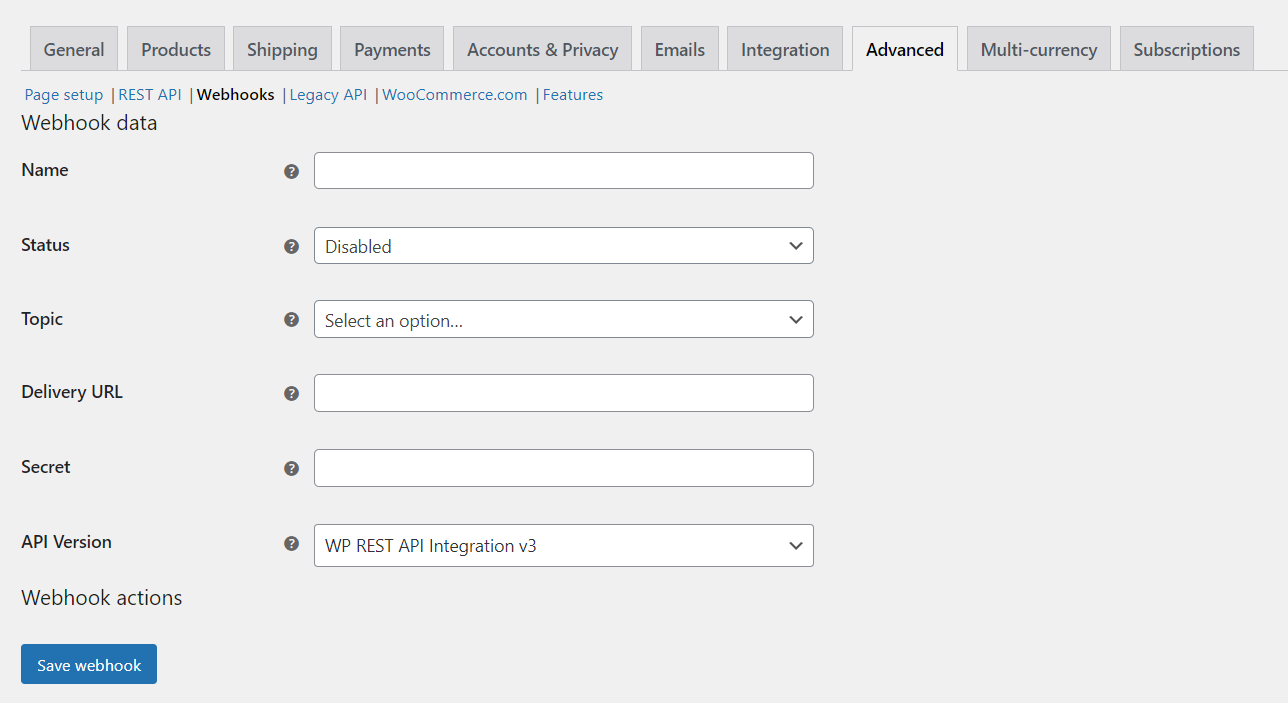
3. Fill Out the Webhook Data Form
Following are the steps to fill out the webhook data form.
1. In the ‘Name’ field, please enter any webhook name. It can be a ‘test’ or your name or anything. But it is good to name it according to the event you’ll be creating.
2. You’ll get three options from the ‘Status’ field. Please select ‘Active’ from the dropdown.
3. In the ‘Topic’ field, please select the event when the webhook is fired. You can select the topic of your choice from the dropdown, but I have selected ‘Product Created’ from it as I want to trigger the webhook when a new product is added to WooCommerce.
4. In the ‘Delivery URL’ field, you need to enter the URL where the webhook payload will be delivered.
For testing purposes, you can create a new request bin from the RequestBin website. Keep the tab open, as we’ll need it later.
5. Go back to the webhook data and select the ‘API Version.’ I am keeping it to the default. You can also leave the ‘Secret’ field empty, as it’ll be created automatically once you save the webhook.
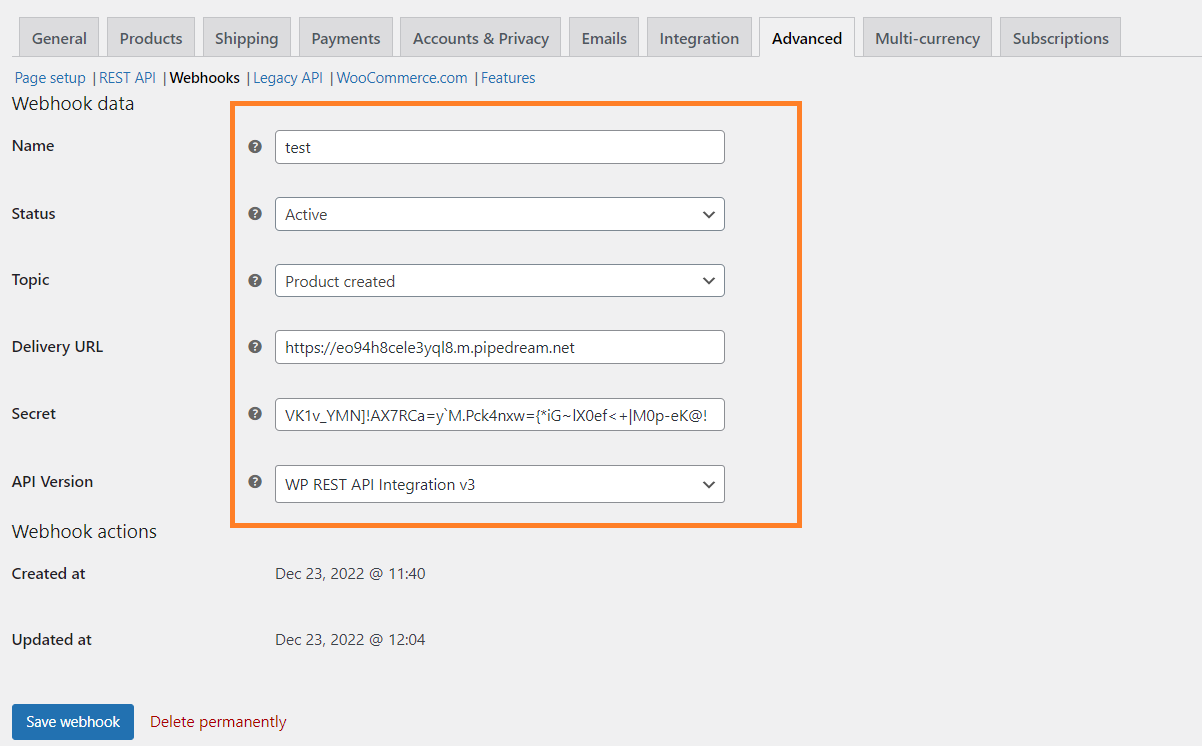
4. Save the Webhook
After filling in the form, please click the blue ‘Save Webhook’ button at the bottom left of your site to save the webhook data.

How to Test a Webhook in WooCommerce?
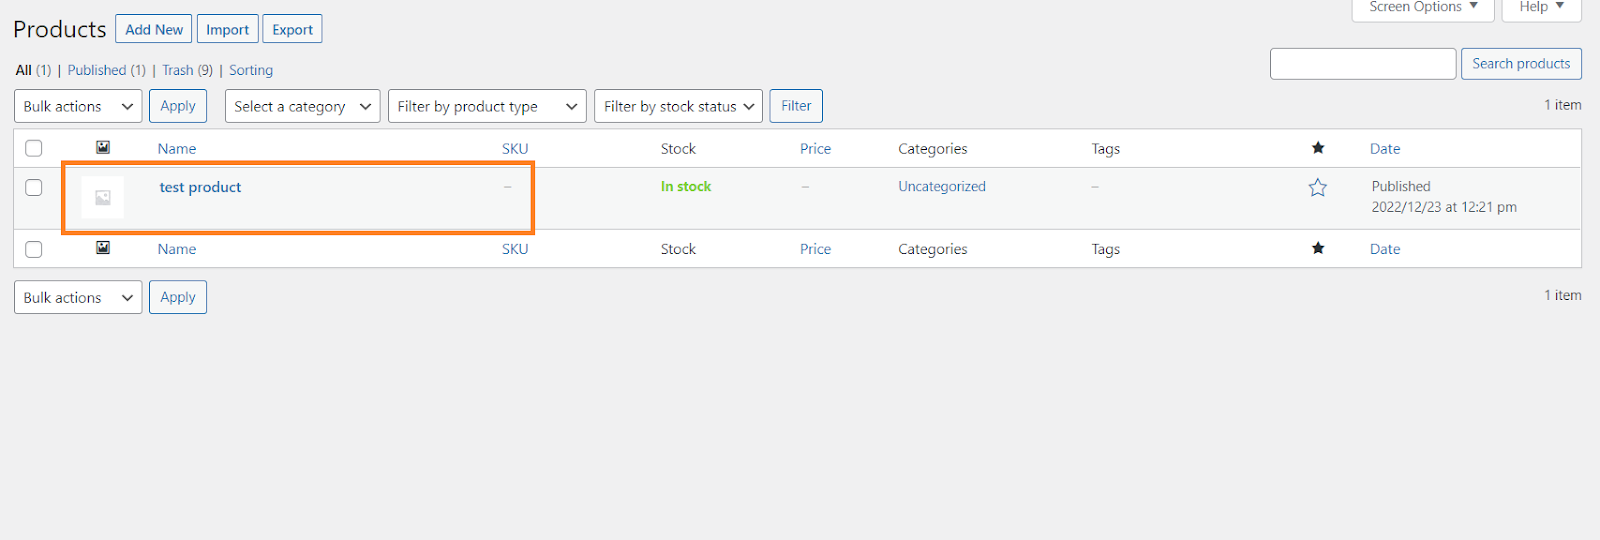
To test the WooCommerce webhook, I created a new product in my WooCommerce store as I triggered the webhook upon the new product creation.
Note: If you selected a different topic, you’d need to edit or create that event to trigger the webhook. For example, If you have chosen the topic ‘Order Update,’ you need to change the order status to fire the webhook.
Now, if you navigate to WooCommerce » Status from your WordPress admin dashboard and click the Logs tab, you’ll see that the webhook has been fired.
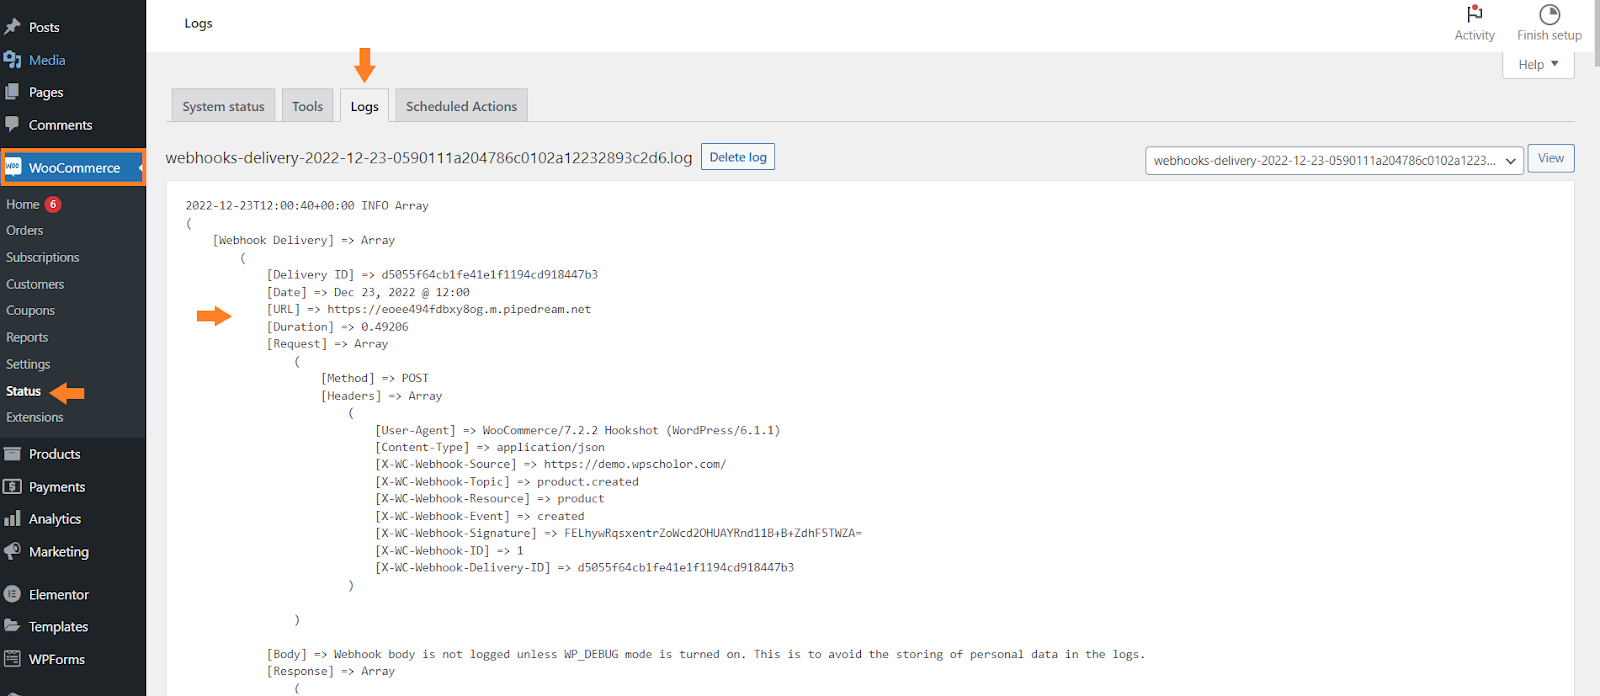
Logs show delivery and server response, making integration and debugging easier.
Frequently Asked Questions
Following are a few frequently asked questions by users on Google about WooCommerce webhooks.
Does WooCommerce have Webhooks?
Yes, WooCommerce have webhooks. Webhooks were introduced in 2014 in WooCommerce 2.2. With webhooks, you may set off events whenever you modify your store’s orders, items, coupons, or customers.
How Do I Test a Webhook in WooCommerce?
To test a webhook in WooCommerce, you first need to create a WooCommerce webhook and then trigger it using the event you set while creating it.
After that, you can navigate to WooCommerce » Status from your WordPress admin dashboard and click the Logs tab, you’ll see that the webhook has been fired(If configured according to the process mentioned above).
Following are some prominent request collectors and testing tools.
- Action Scheduler
- RequestBin
- WooCommerce Logs
How do I use webhook in WordPress?
Navigate to WooCommerce » Settings » Advanced » Webhooks from your WordPress admin dashboard and click the Add webhook button.
A short form will appear for you to fill out. Select an operation and its associated fields to be sent to the URL. When the action is triggered, an HTTP POST request will be sent to the URL.
How do you add Webhooks in stripe WooCommerce?
To configure Stripe, navigate to WooCommerce » Settings » Payments » Stripe. You can grab your webhook endpoint URL from the Settings > Account details section.
Then, depending on the mode being configured, head to Developers » Webhooks in your Stripe Dashboard and click Add endpoint. You can save your information from webhooks by filling out the form.
Are webhooks better than API?
Webhooks are used to send information in response to an event automatically, without input from other programs. Because they are a subset of APIs, webhooks are severely limited compared to APIs and can only send data. APIs offer greater flexibility.
What is the Alternative to Webhooks?
The best alternatives to webhooks are Zapier, Hookdeck, and Reviewshake.
Conclusion
That’s it for today’s article.
I hope this article was helpful to you and you were able to create WooCommerce webhooks and connect your WooCommerce store to other apps. Using Webhooks effectively is crucial.
I’ll see you next time with another great article.


