WordPress allows you to change the dashboard’s language in multiple languages, but it will not change any plugin or theme’s language. That language will only apply to the WordPress dashboard.
But what if you also want to change the plugin’s language? Is there a way to do so?
Fortunately, there is an excellent and easy way to translate your WordPress theme and plugins to any language you want.
In today’s article, I’ll walk you through the step-by-step process of translating the WordPress plugin or theme to any language using a POT file. This tutorial will answer all your queries and provide the answers most simply.
So without any further ado, let’s jump into the tutorial.
What is a POT File?
POT stands for ‘Portable Object File,’ and it contains the list of all the text lines used in the plugin or theme in the English language.
It is usually provided by the plugin or theme author. Not all the plugins will have this file, so they are not translation ready yet.
If your plugin or theme doesn’t have the POT file, you can contact the author and ask them to provide a POT file that will have all the text lines used in the plugin or theme in the English language.
Using this file, you can easily translate the WordPress plugins or themes to any language you want.
Note: Translations are stored in the languages folder within the theme or plugin. If the theme or plugin is already translated to a specific language, then it will have the .po and .mo files.
The format of the two files is different MO files are compiled and are easy for computers to read PO files are easy for people to read. The MO files are where WordPress gets its translations.
These files will have the translations you will do yourself, and only you can use those translations on your site.
Now that we know about the POT and other files let’s dive in and translate a plugin using the Loco Translate plugin.
WordPress Translation Using POT File
I’ll use the Loco Translate plugin to translate the WordPress theme and plugins to a different language. You’ll have to translate each text to a specific language manually.
You can automate the process using the Google, Deepl, Lecto, and Microsoft translator APIs.
Please follow the following steps to translate a WordPress plugin or theme.
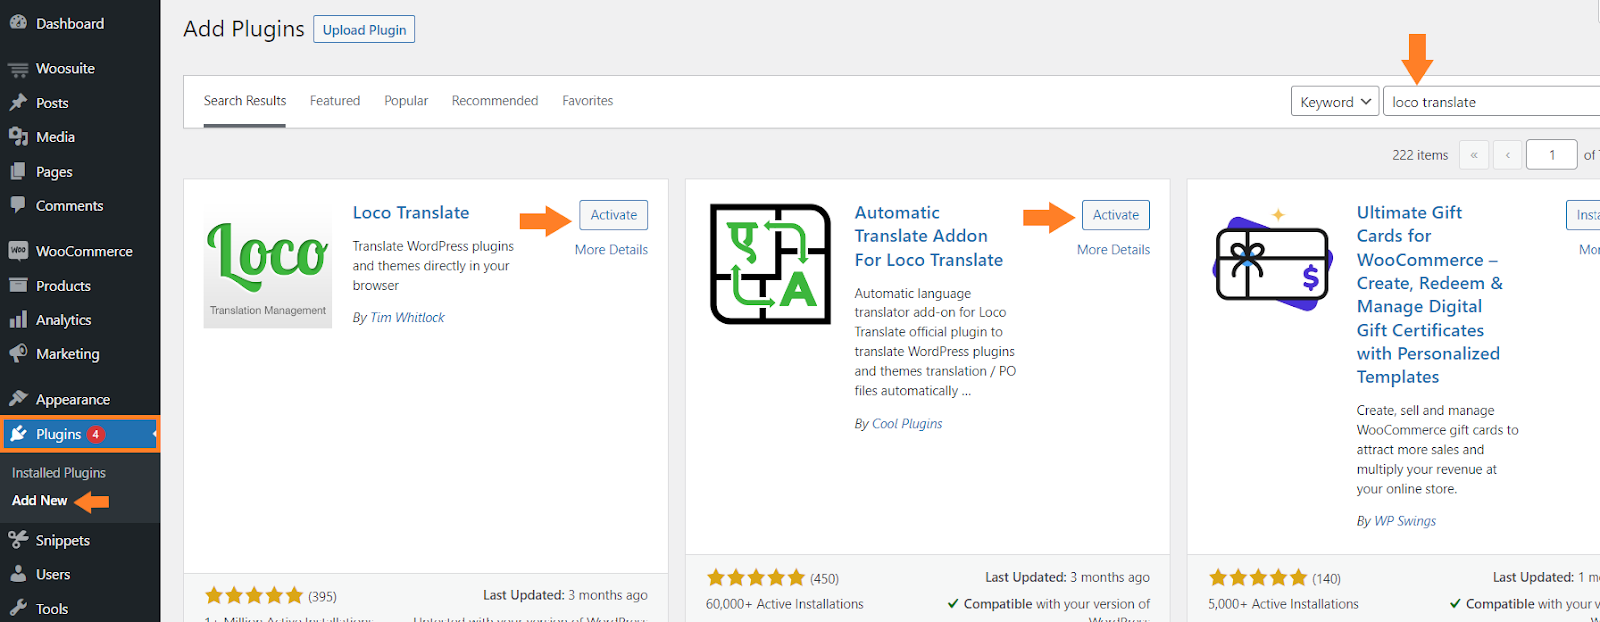
1. Install and Activate the Loco Translate Plugin
Navigate to Plugins » Add New from your WordPress admin dashboard and search for ‘loco translate’ in the search bar.
You’ll get the plugin; please click the ‘Install Now’ button to install it. Once the plugin is installed, the install now button will be replaced by the ‘Activate’ button.
Click the ‘Activate’ button to activate the plugin.
Once you search for it, you’ll also get the Automatic Translate Addon For Loco Translate plugin next to the main plugin. You also need to install and activate it to do automatic translations without using any API.
I have installed both plugins in my store. I just need to activate them.
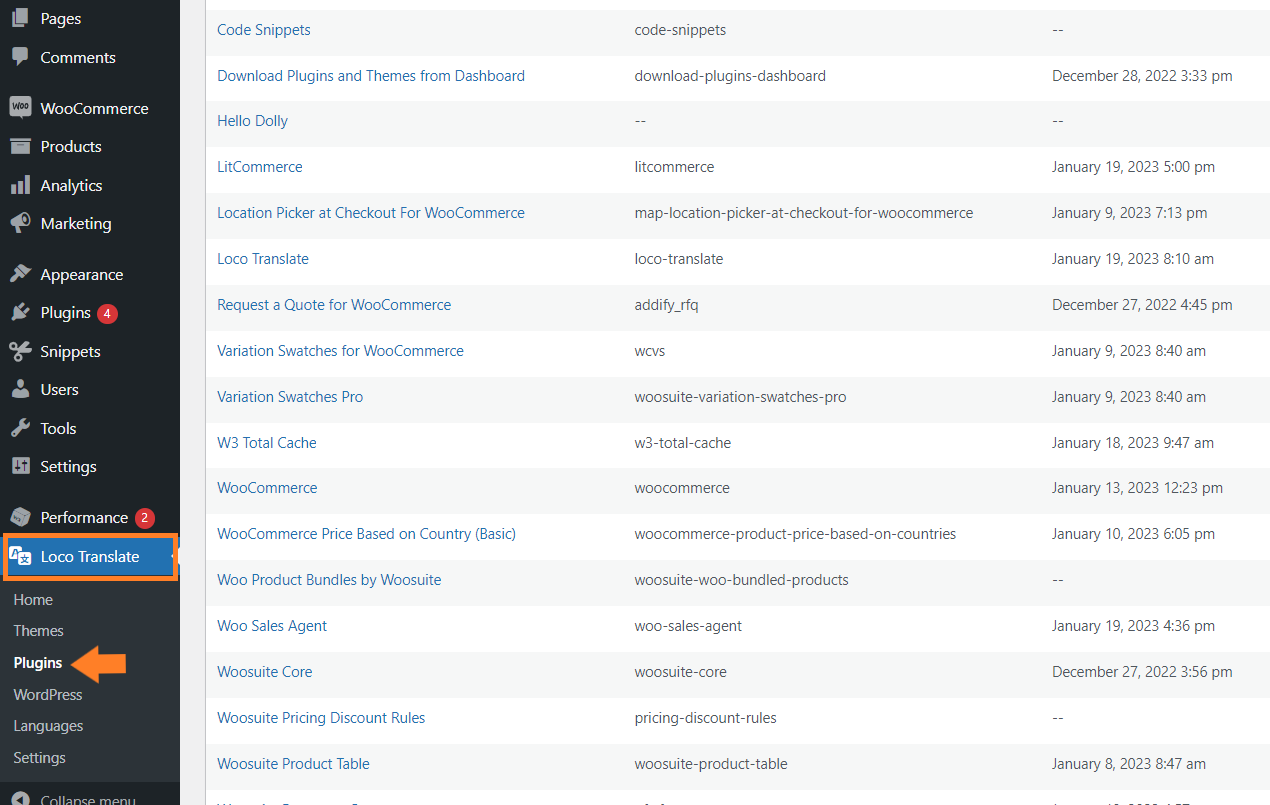
Once both plugins are installed, a new ‘Loco Translate’ tab will be created in the left sidebar of the WordPress dashboard.
Navigate to Loco Translate » Plugins from your WordPress admin dashboard.
Note: For this tutorial, I’ll be translating a plugin, but if you want to translate a WordPress theme, you’ll navigate to the Loco Translate » Themes from your WordPress admin dashboard.
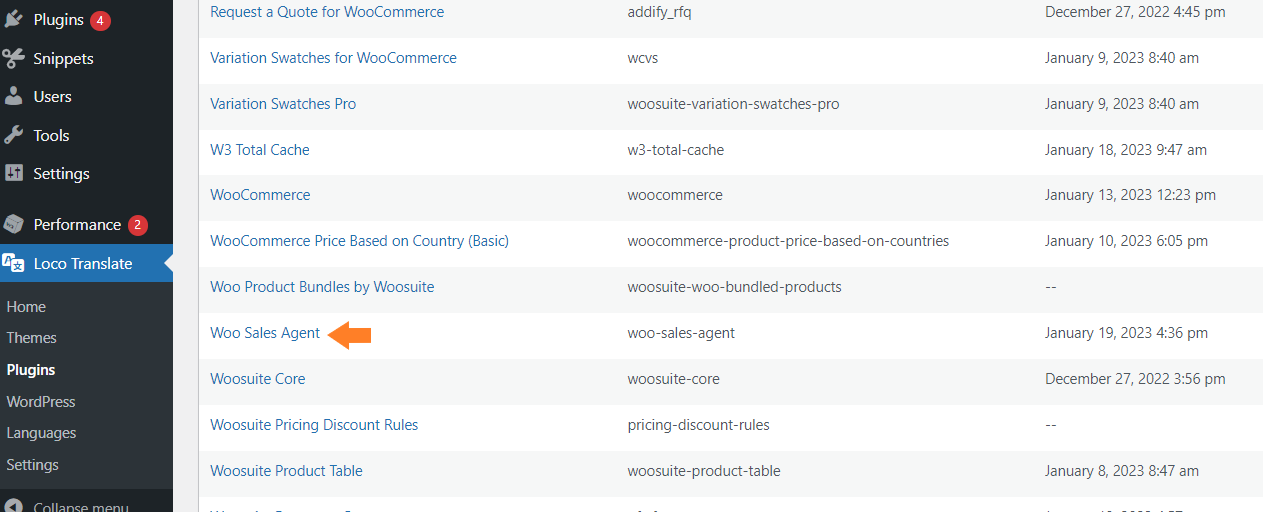
3. Select the Plugin to Translate
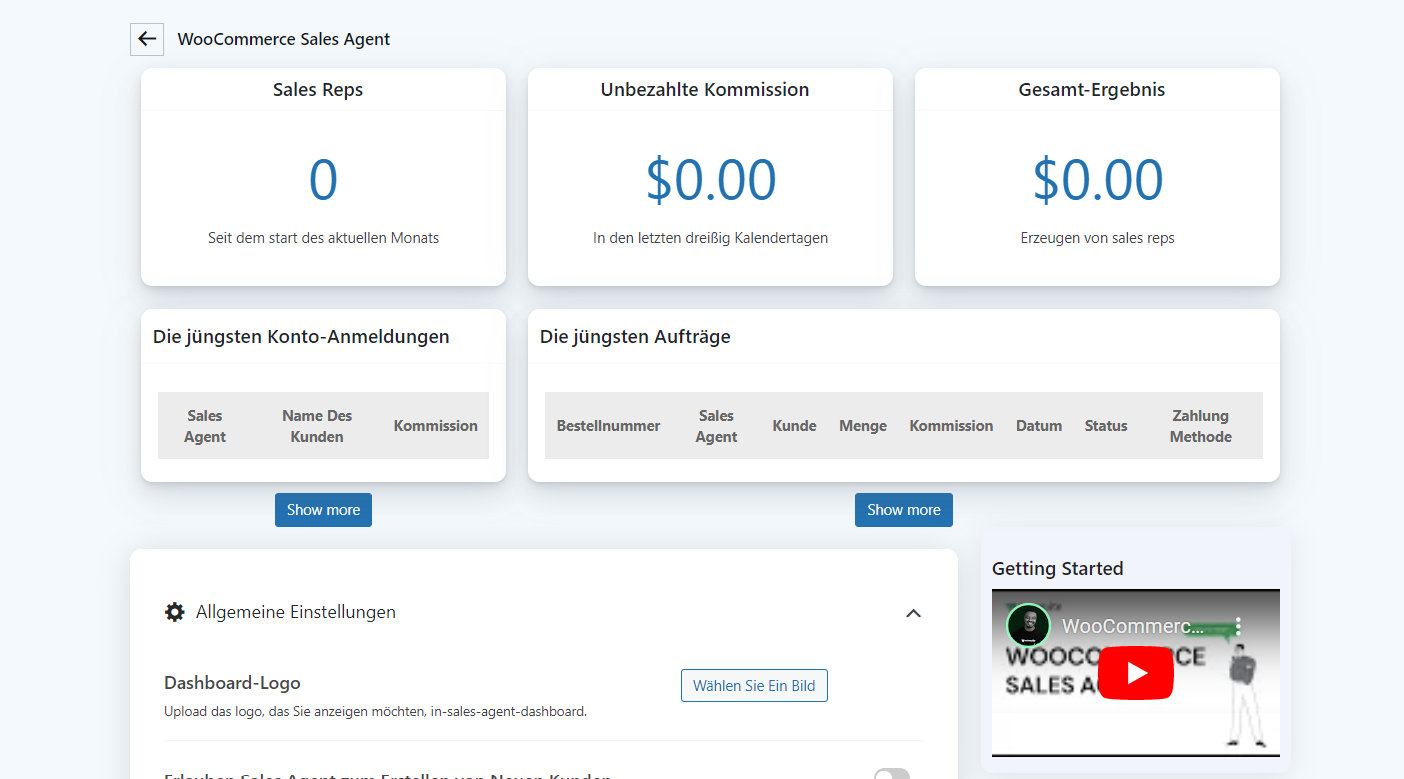
You can select any plugin you want to translate to your native or any language you want. But for this tutorial, I’ll translate the WooCommerce B2B Sales Agent plugin.
This plugin is for creating and managing sales agents for your WooCommerce store to improve sales.
You just need to find the plugin you want to translate from the list and click it.
4. Click the New Language
Once you select the plugin to translate, you’ll be redirected to the page where you’ll see the existing translations and create new ones.
I have tested the plugin before, which is why I can see an existing translation. But to show you the complete process, I’ll create a new language translation by clicking the ‘New Language’ below the main bar.

5. Choose the Language
Now you need to select the language to which you want to translate the plugin. You’ll get two options.
- WordPress Language
- Custom Language
If there’s a language that is not included in the WordPress language dropdown, you can add it in the custom language.
I am selecting the ‘German’ language from the WordPress language dropdown for this tutorial.

6. Start the Translation
Once you have selected the language, you can select the location where the translation file will be saved. By default, it will be saved in the plugin’s language folder. You can change it if you want.
After that, click the blue ‘Start Translating’ button at the bottom of the page to start the translation.

7. Automatic Translate the Plugin
Once you start the translation, you’ll be redirected to a page where you can do the manual translation. This may take a lot of time if the plugin has various text lines.
You can automate the process, but you’ll need an API to do so.
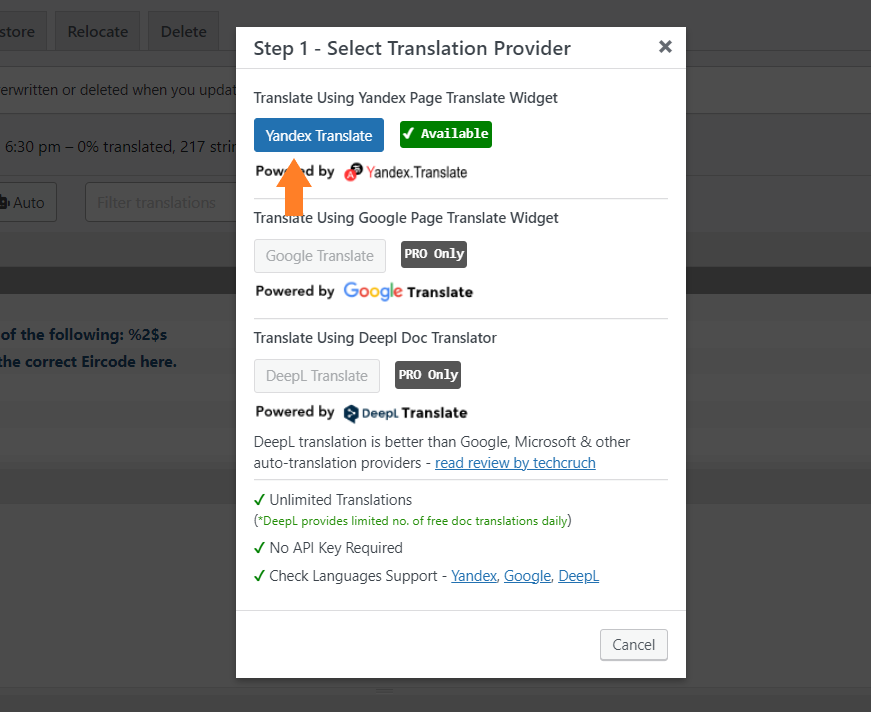
But the addon we installed will help you to translate the plugin automatically in a few clicks. The addon will add a new ‘Auto Translate’ button. Please click it.

7.1. Select Translation Provider
Once you click it, a popup will appear from where you need to select the translation provider. The free version of the addon allows you to use the Yandex Translation.
If you want to use Google Translate or Deepl Translate, you’ll have to purchase the pro version of the addon.
I am sticking with the free version for this tutorial, so I am using the Yandex Translation by clicking it.
7.2. Start Automation
After that, you’ll be redirected to the page, which will have all the strings of the selected plugin that needs to be translated to translate the complete plugin.
You can start the automatic translation by clicking the ‘Translate’ button at the top left corner of your screen.
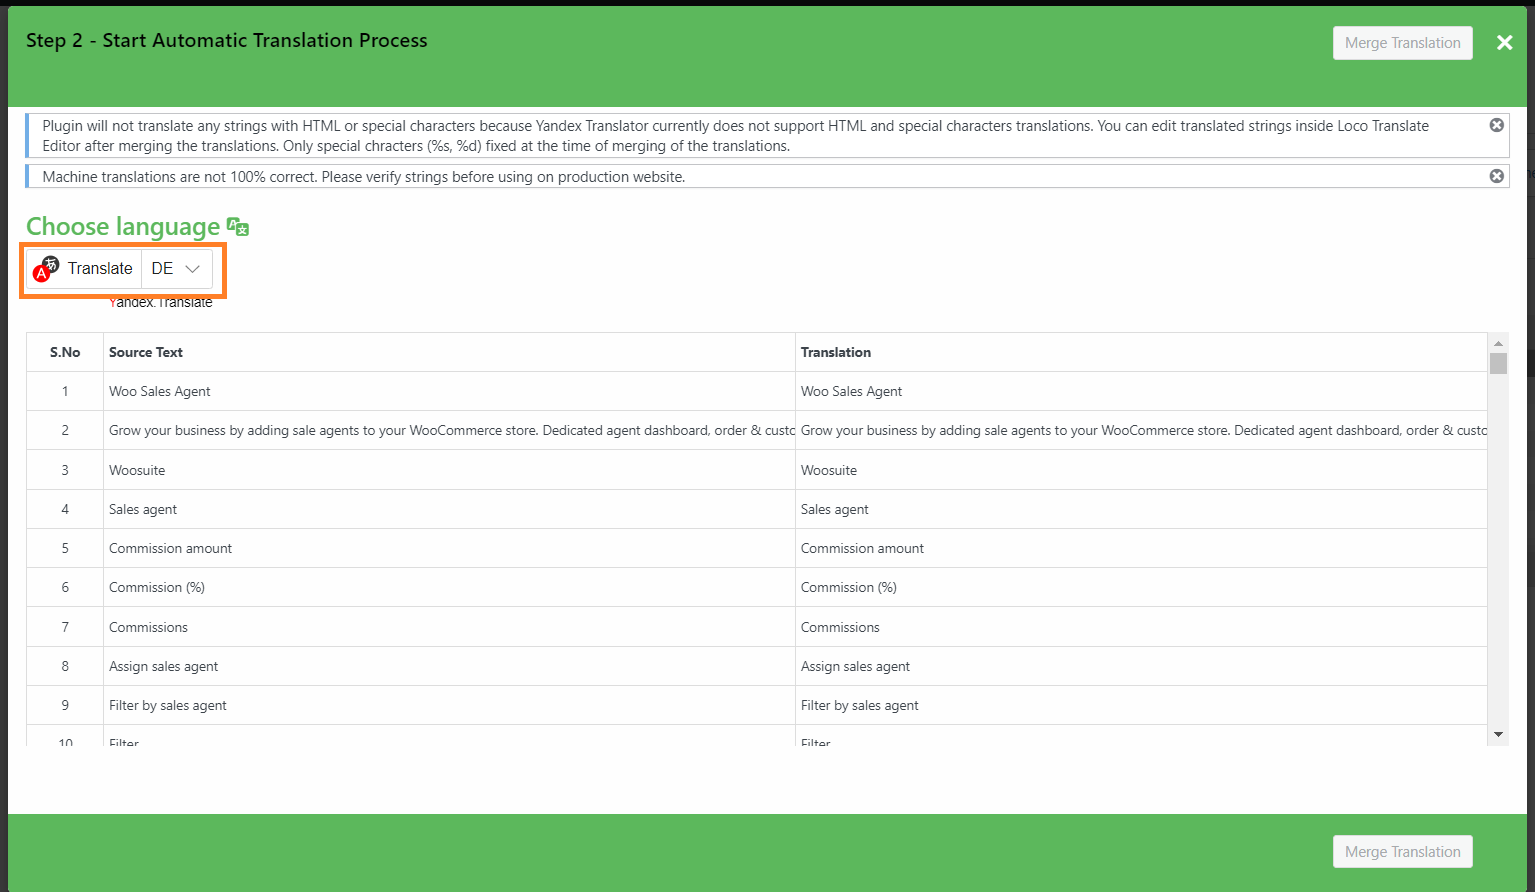
7.3. Merge the Translation
Once you click the button, it’ll take a few minutes to complete the translation. Once the translation is complete, please click the blue ‘Merge Translation’ button at your screen’s bottom right or top right corner to save the translation.

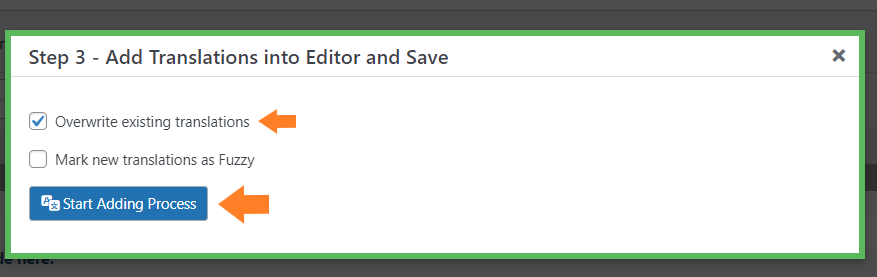
7.3. Add Translations into the Editor and Save
Merging will take some time. Once the merging is complete, you need to add the translation to the editor and save it.
You’ll see a popup after merging the translation. You just need to select the ‘Overwrite any existing translations’ and click the ‘Start Adding Process’ button to translate the plugin.
Doing this will overwrite any existing plugin translation in the same language.
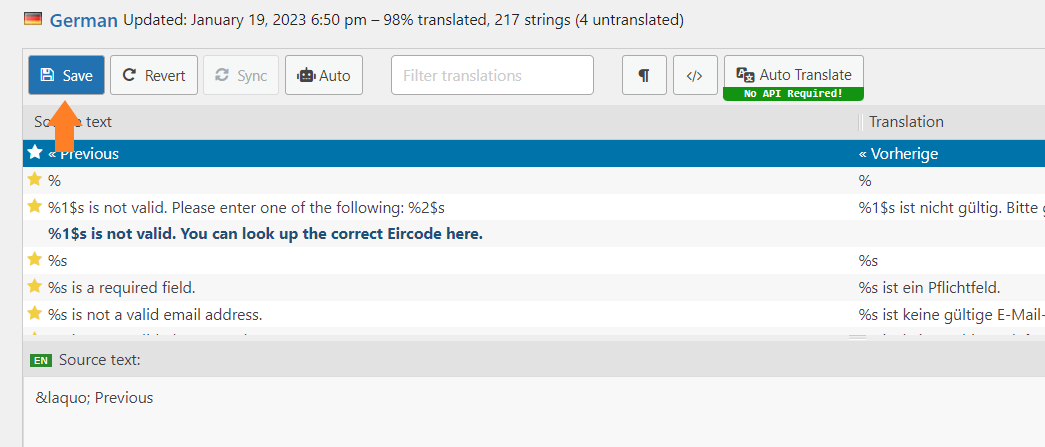
7.4. Save Translation
After that, click the ‘Save’ button to save the translation.
8. Final Results
The translation has been saved. Now you can test it.
To test it, you first need to change the WordPress language by navigating to Settings » General from your WordPress admin dashboard and selecting the language from the ‘Site Language’ dropdown.
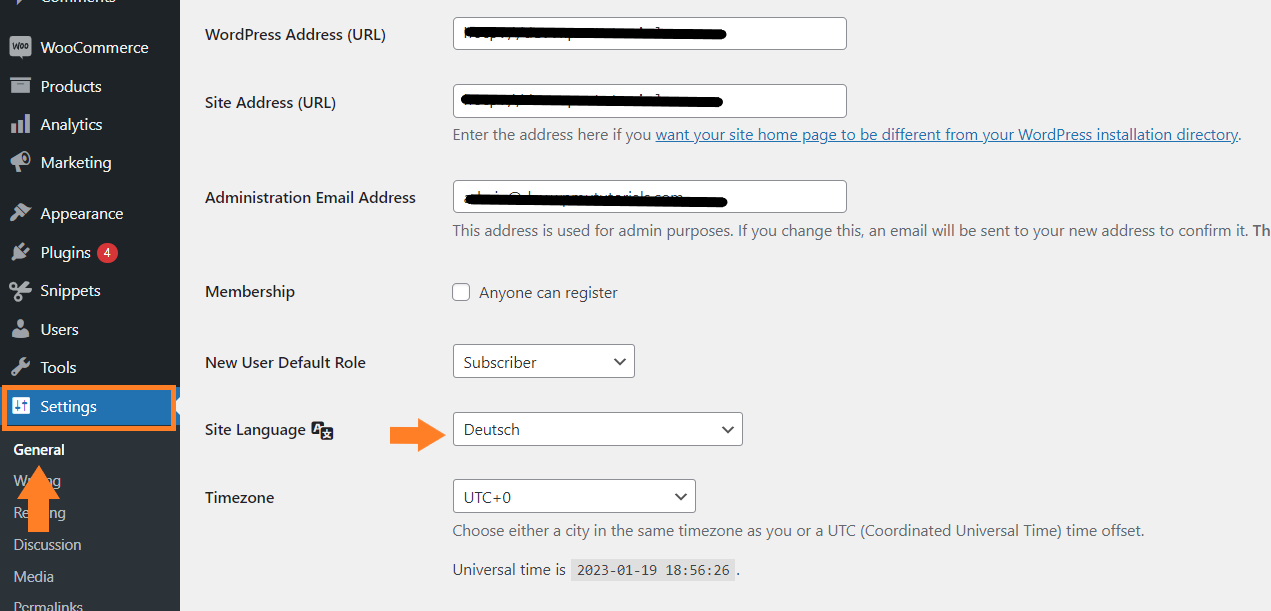
Once you save the settings, the WordPress dashboard will be translated into the selected language. If you visit the plugin’s dashboard or settings, you’ll notice that the plugin has also been translated into German.
Conclusion
That’s it for today’s article.
Now you know how to translate a WordPress plugin or theme using a POT file and the Loco Translate plugin. Remember, you can only translate the plugin using the Loco Translate plugin if it has a POT file.
Here’s the summary of the tutorial.
- Install the Loco Translate and its addon plugins.
- Choose the language.
- Start the automatic translation.
- Save the translation.
I have translated the WooCommerce B2B Sales Agent plugin for this tutorial. You can also translate the other Woosuite plugins.


