Creating multiple carts per user in WooCommerce allows customers to add products from different suppliers to a separate cart without disturbing the customer experience.
This article will guide you through the step-by-step process of creating multiple carts per user in WooCommerce. After reading this tutorial, you can quickly improve the customer experience and organize the cart.
Without any further ado, let’s jump straight into it.
On This Page
How do you create WooCommerce multiple carts per user?
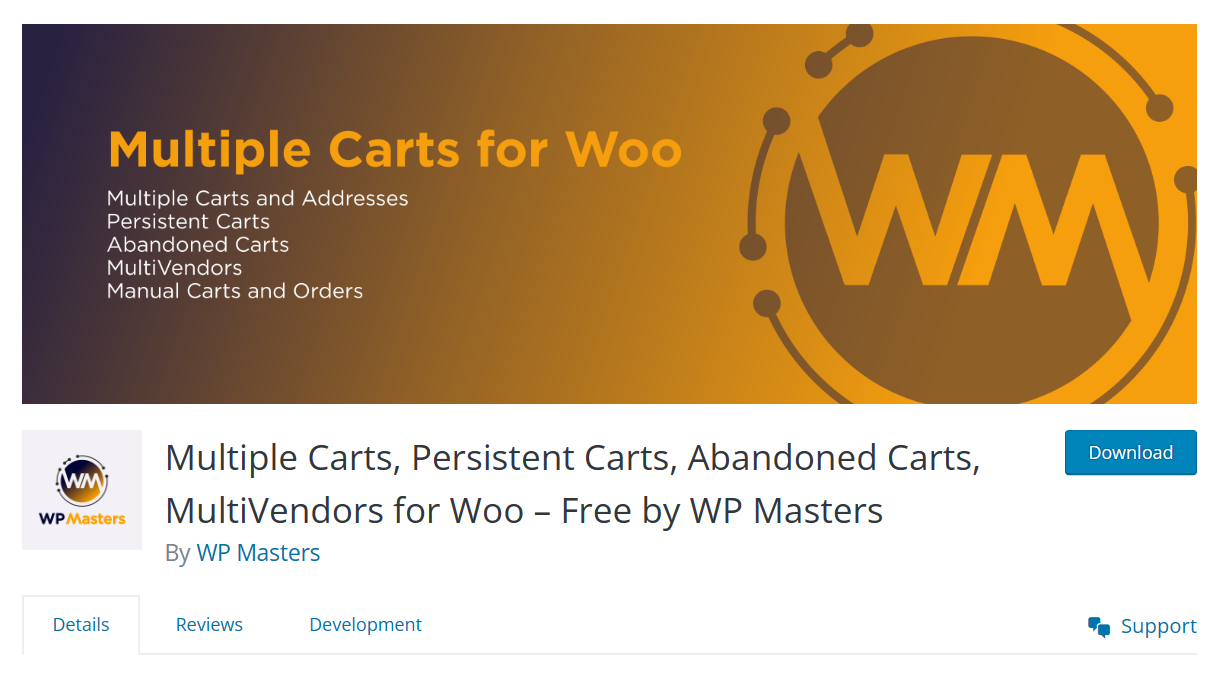
I’ll use a free plugin named ‘Multiple Carts for WooCommerce’ to add this feature to one of my demo stores. It will also help you to recover abandoned carts by sending email notifications after 3 days.
Use Case:
Imagine you have a store where you sell some dropship products from AliExpress for which you don’t need to worry about shipping and some products for which you own the inventory and need to ship them to customers.
You may want to create different carts for both types of products. This way, you can ensure clarity in the fulfillment process, especially when products are sourced from different locations or follow different logistics workflows.
Note: If each supplier is offering different shipping solutions, you need to restrict the shipping options, and to do so, you need to use the WooCommerce Restriction Rules plugin.
1. Install and Activate the Multiple Carts Plugin
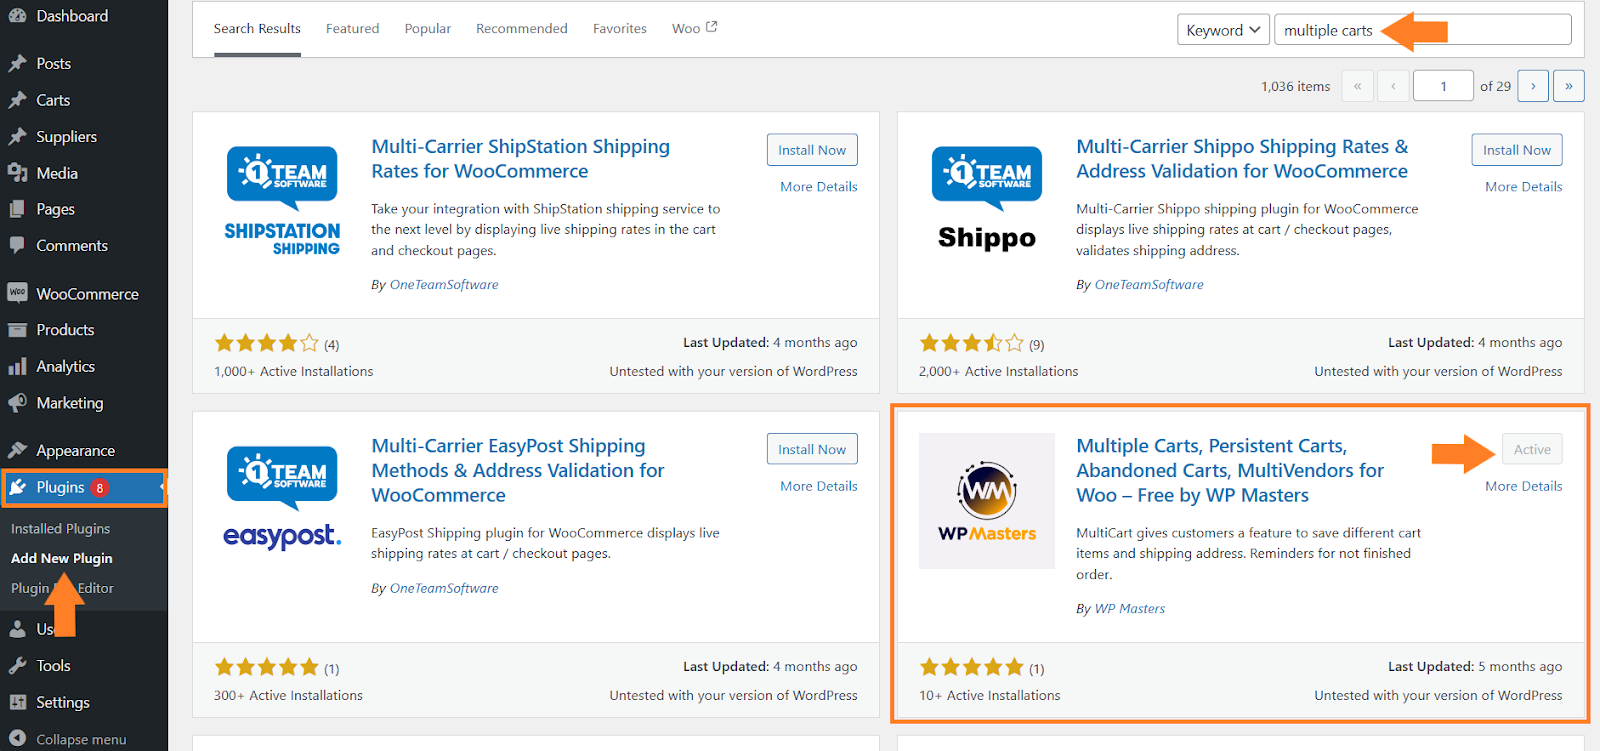
First, you must install and activate your store’s ‘Multiple Carts for WooCommerce’ plugin. To install it, navigate to Plugins < Add New from your WordPress dashboard and search for the plugin’s name in the search bar.
You need to install the plugin whose author is WP Masters.
Click the ‘Install Now’ button to install it; once it is installed, it will be replaced with the ‘Activate’ button. Click it to activate the plugin.
Note: I have already installed and activated the plugin, so I see the ‘Active’ button instead of Install now and Activate buttons.
2. Add Suppliers to Your WooCommerce Store
After installing the plugin, we need to add suppliers to our store. In the later steps, we will assign these suppliers to the products so that a new cart will be created whenever a customer adds a product from a different supplier.
For different supplier products, different carts will be created per user.
To add a supplier, navigate to Suppliers > Add New from your WordPress dashboard and add the supplier name in the title field.
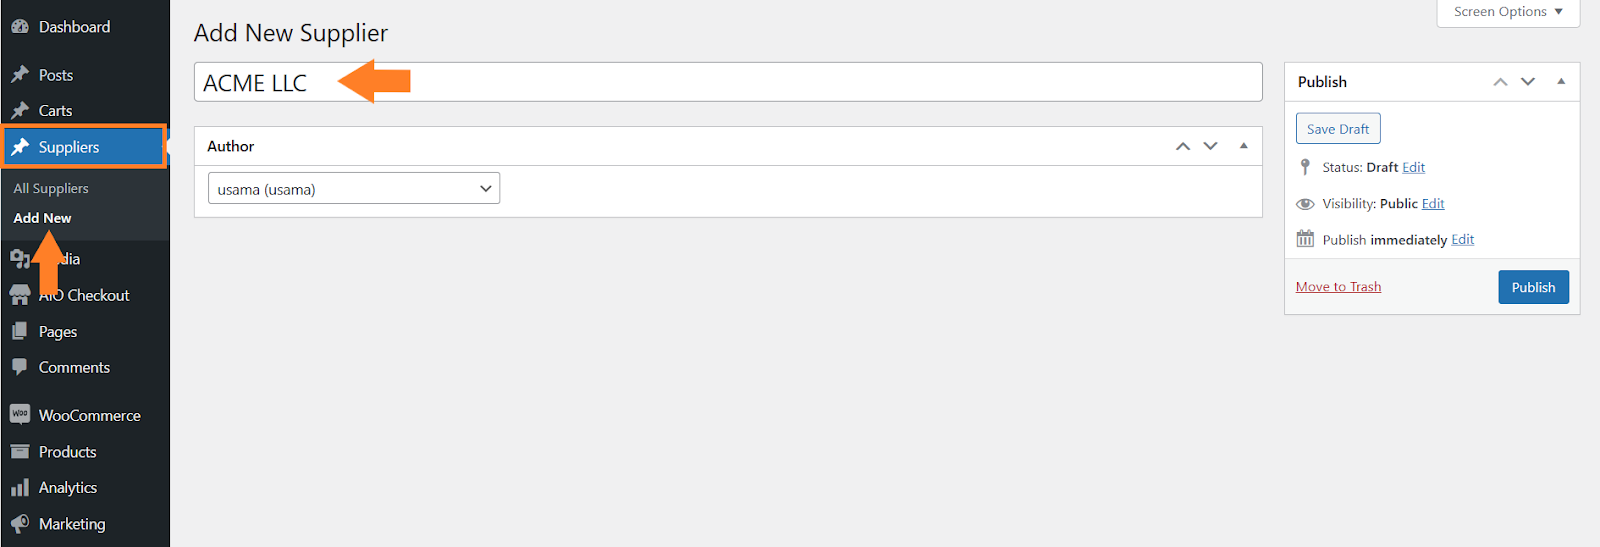
2.1. Publish the Supplier
After that, click the blue ‘Publish’ button to publish the product.

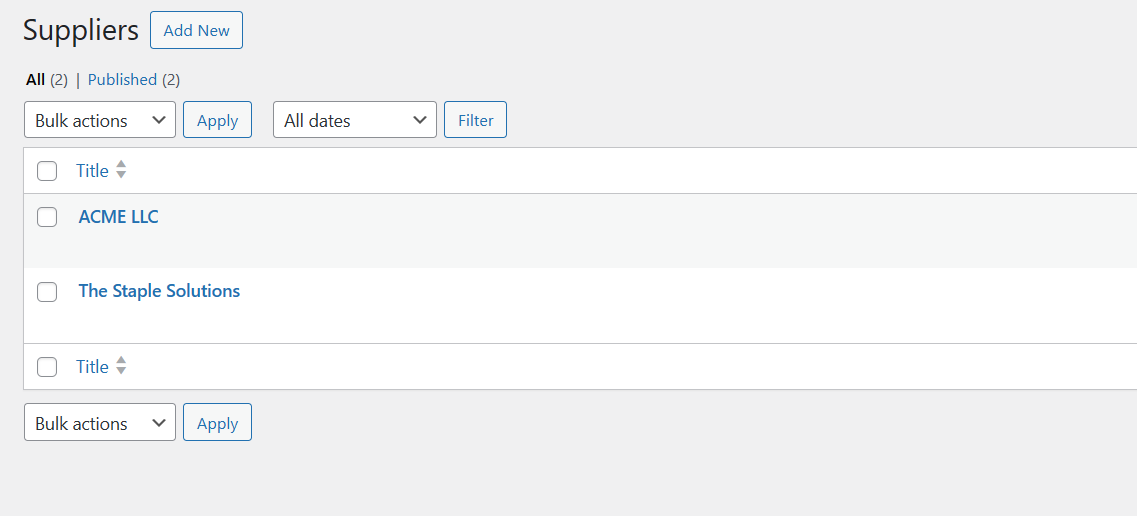
2.2. Add More Suppliers
After creating one supplier, you can add more suppliers by following the same process. I have added two suppliers for this tutorial. It will make it easy to understand how it’s working.
3. Assign Products to Suppliers
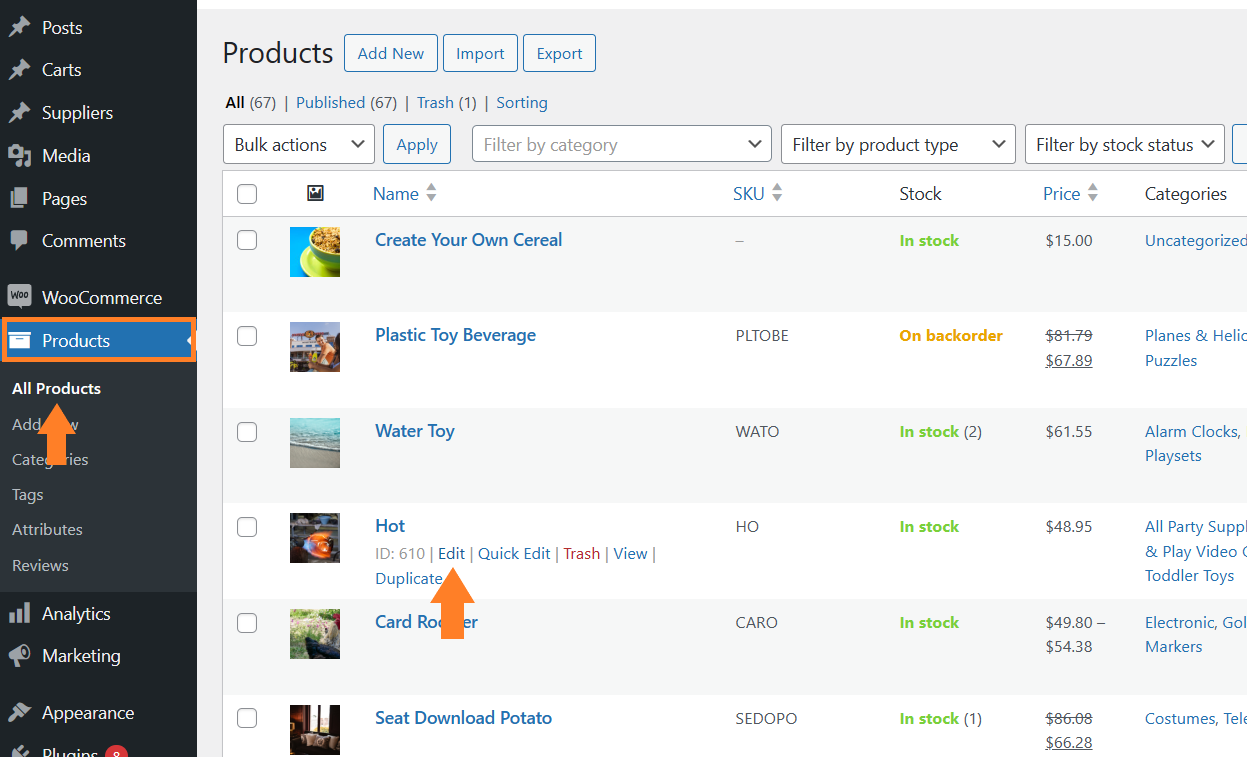
Once you have created the suppliers, we need to link or assign products to the supplier. To do so, navigate to Products > All Products from your WordPress dashboard and hover your mouse over the product you want to edit.
You’ll see the ‘Edit’ button below the product name. Click it to edit the product.
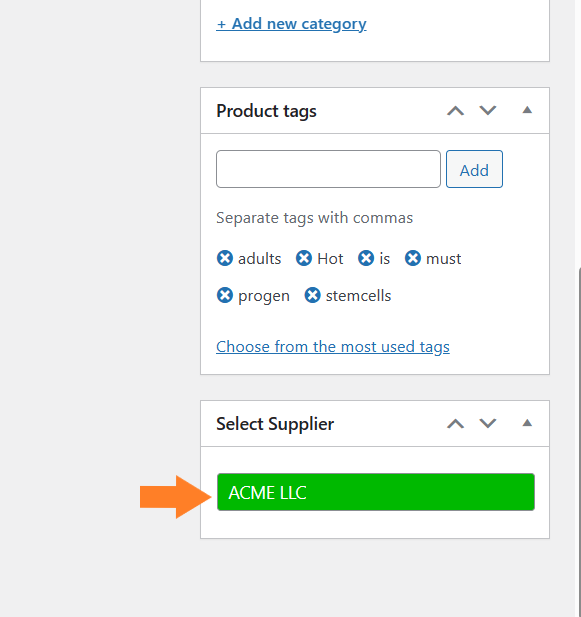
3.1. Select the Supplier
Once on the product edit page, scroll to the bottom, and you will see the ‘Select Suppliers’ section from which you can select the product’s supplier.
I have selected one of the suppliers from the dropdown. A new cart will be created with the supplier’s name whenever a customer adds this product to the cart.
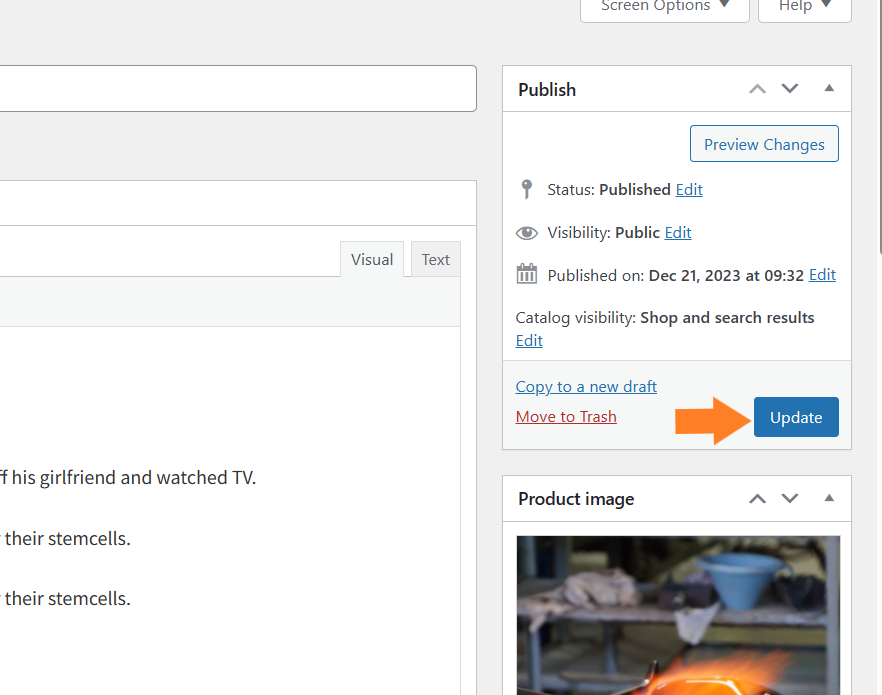
3.2. Publish the Product
Once the supplier is selected, scroll back to the top and click the blue ‘Update’ button to update the product.
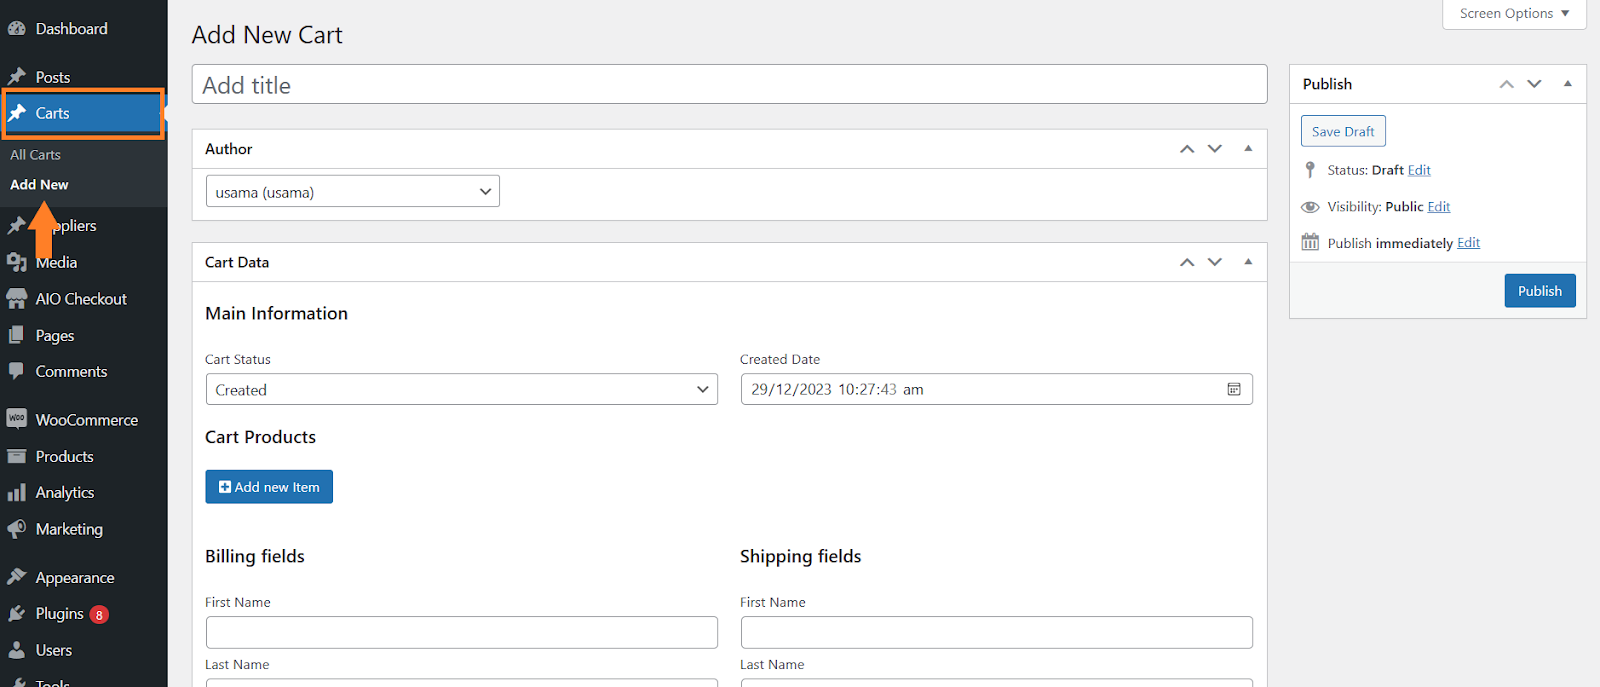
4. Create Carts Manually (Optional)
This plugin allows you to create carts from the backend manually. This is super helpful if you take orders on-call or in person. You can easily create carts with different customer details for those orders.
This will help you keep your orders organized at the backend.
To create a cart manually, navigate to Carts > Add New from your WordPress dashboard and fill in the details. You can add as many items as you want to the cart, select the cart status, and add the billing and shipping details.
5. Final Results
Once done, let’s test the final results.
To test it, I visited my store page, added a few products (without a supplier selected at the backend) to my cart, and visited the cart page. As you can see in the screenshot below, the products were added to a single cart and it got saved.
It is because I had not selected the supplier at the backend for any of those products. That is why, it created a cart with a ‘No Supplier’ name.
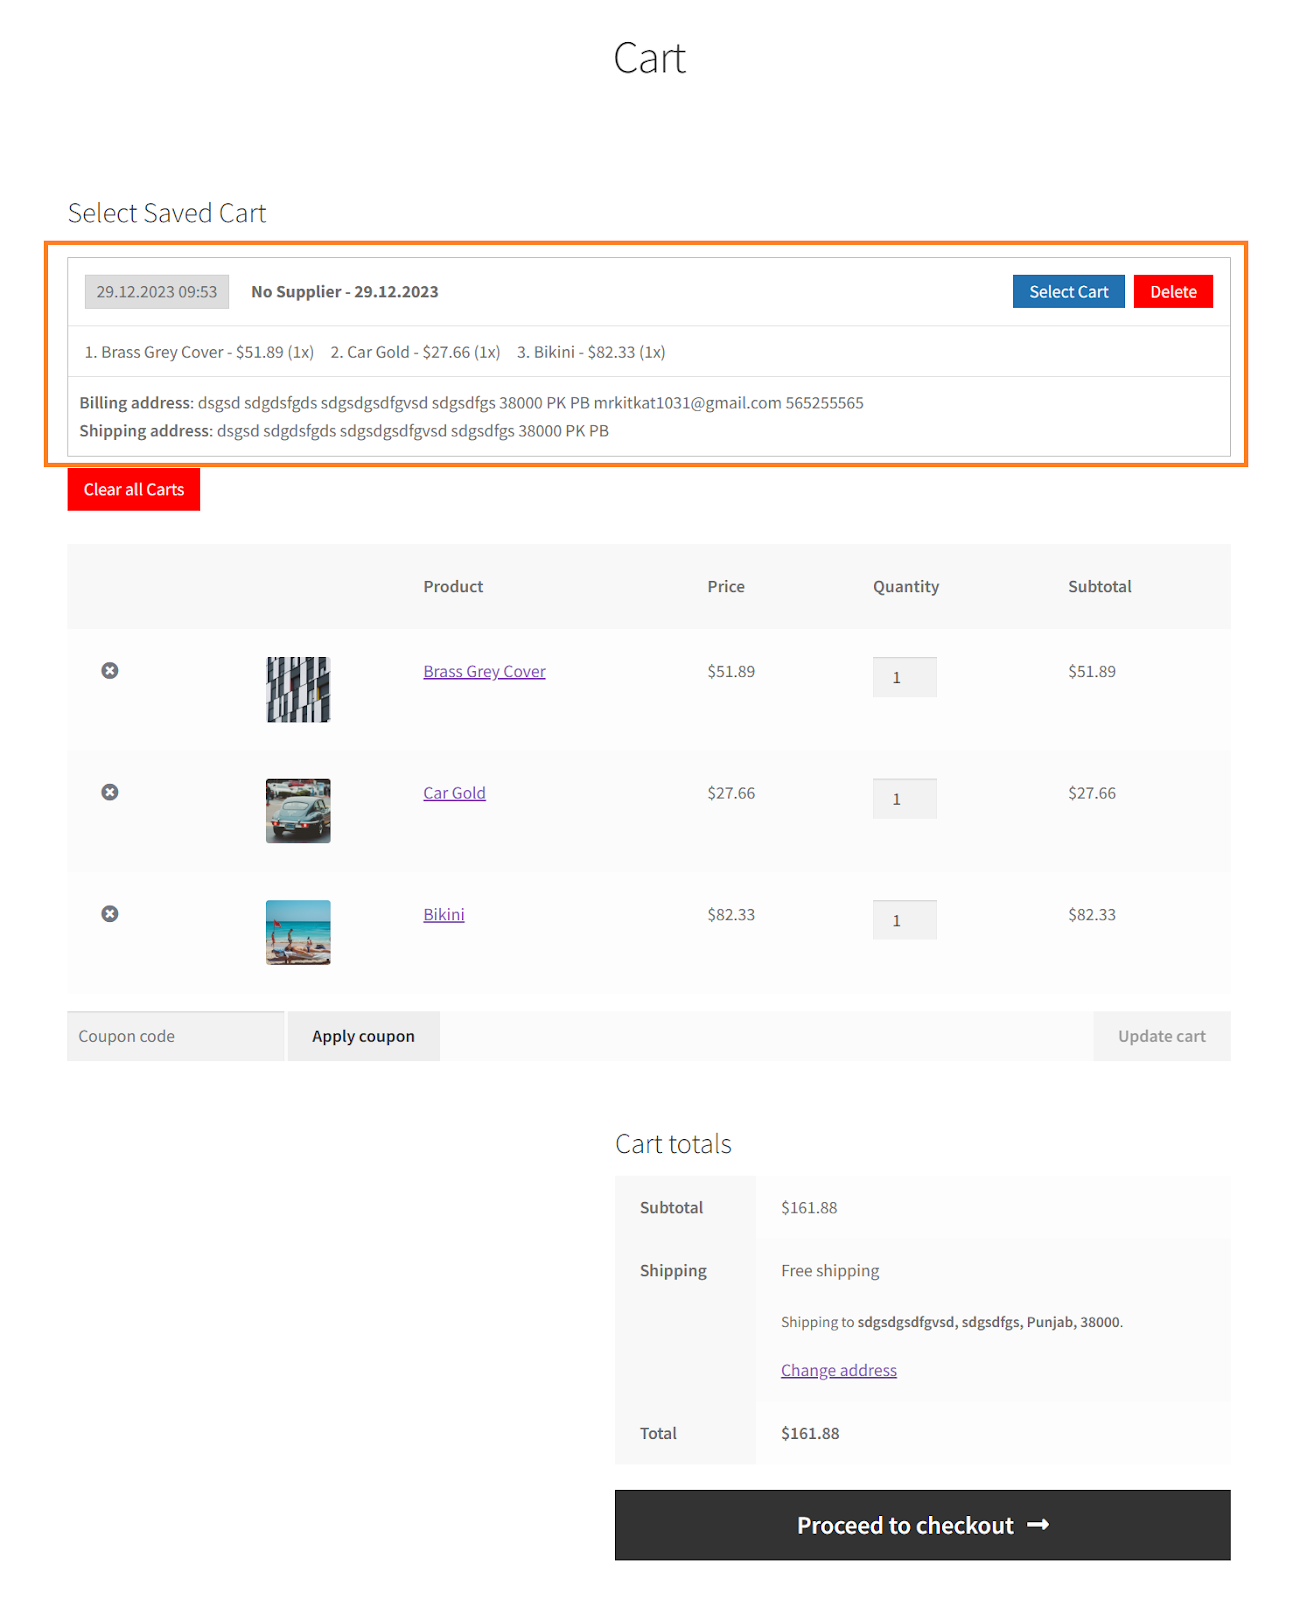
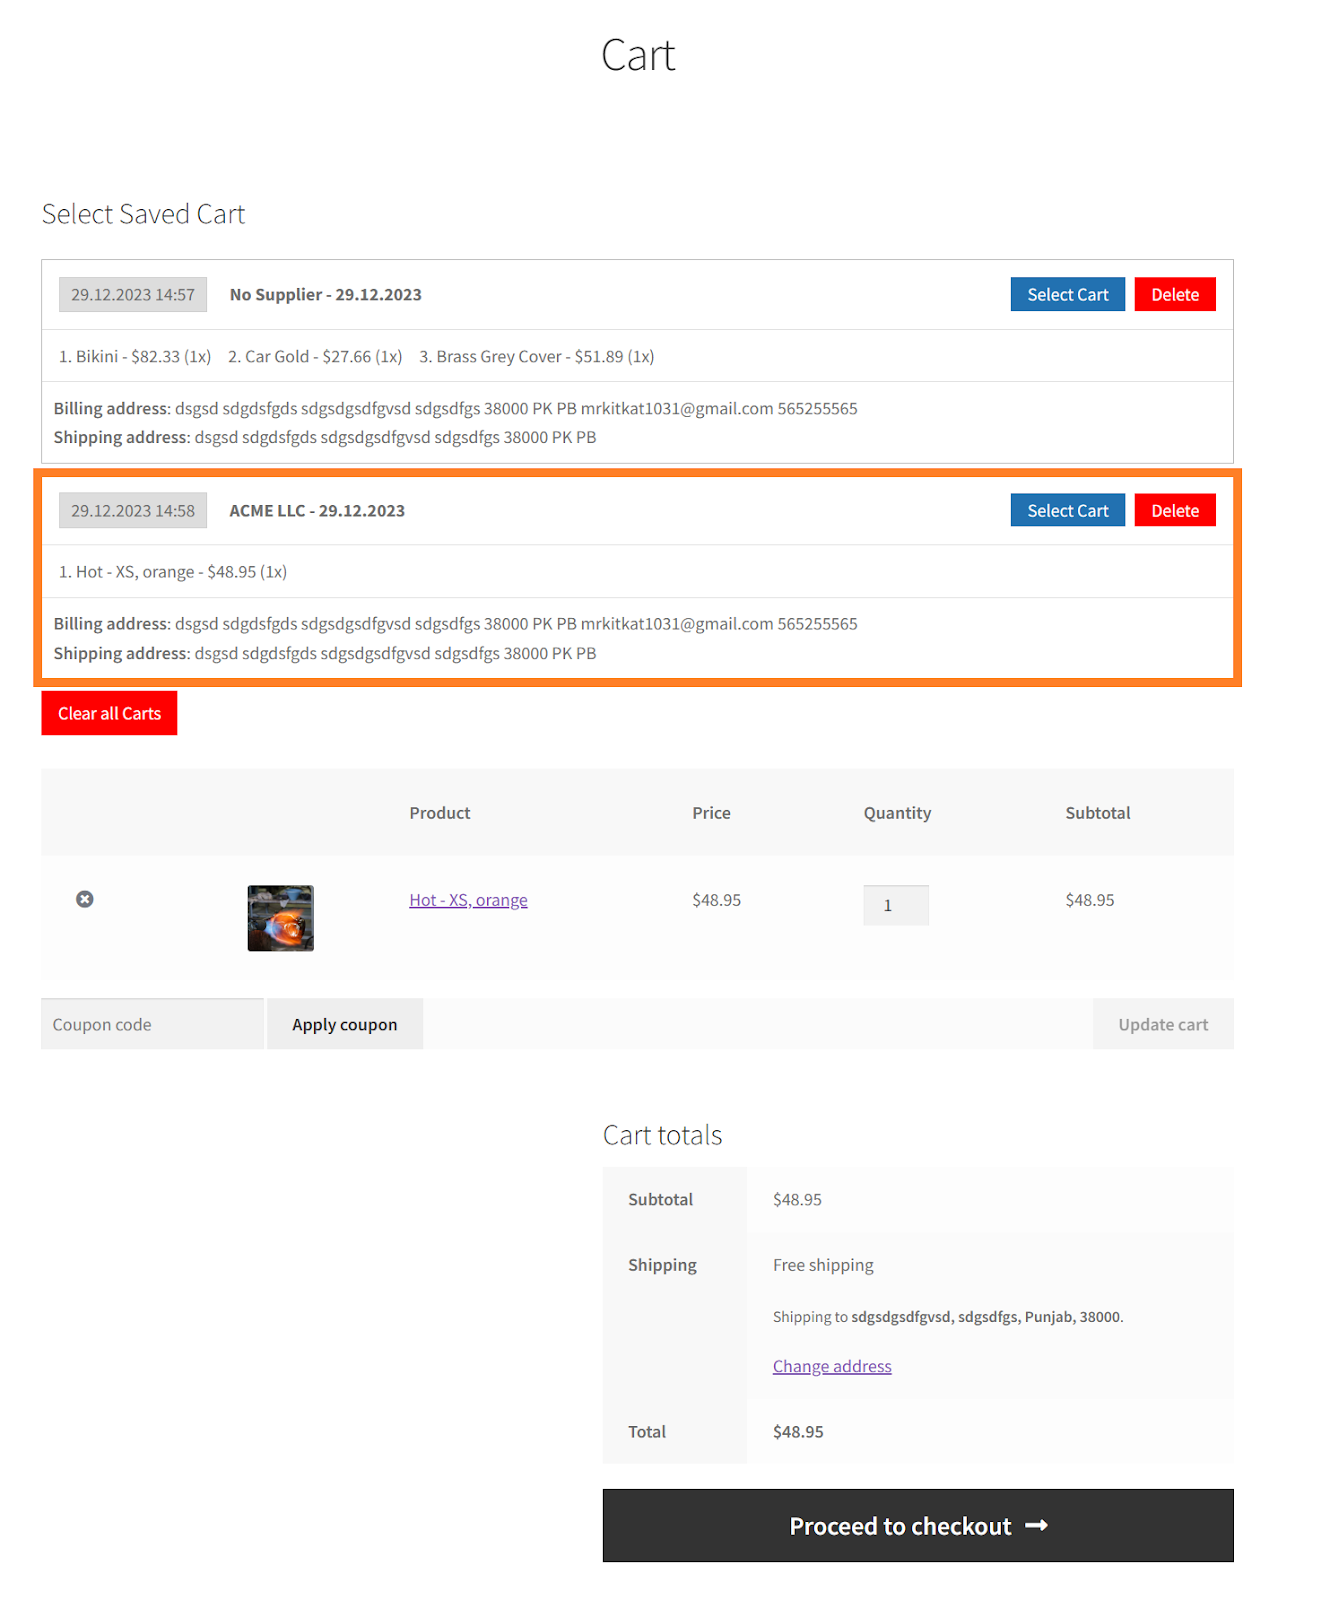
After that, I revisited my store page, added the product (for which we selected a supplier at the backend) to my cart, and revisited the cart page.
This time, I could see two carts, one with the name of the supplier and the other one with no supplier name. I could select any cart by clicking the ‘Select Cart’ button and then complete the checkout as usual.
Similarly, if I add one more product (supplier specified at the backend) to my cart, it will go to a new cart and I will have three carts.
The idea is simple, products from different suppliers will go to different carts for each user. This way, customers can create multiple carts in WooCommerce and keep things organized.
Conclusion
That’s it for today’s guide.
I hope it was helpful to you and you were able to implement multiple carts per user based on the supplier of the product. Adding this feature to your online store will improve the customer experience and help you increase conversion rates and reduce cart abandonments.


