Do you want to restrict shipping by the state in WooCommerce?
If yes, then you’ve landed at the right place!
WooCommerce does allow you to restrict shipping to specific countries, but it doesn’t allow you to restrict shipping by state. To do so, you probably need to use many lines of custom code, which could be very difficult for you if you do not have any technical or coding experience.
But don’t worry. Thanks to the Conditional Shipping & Payments plugin by Woosuite.
In today’s article, I’ll explain the step-by-step process to restrict shipping by the state in WooCommerce. The plugin will also help you add payment gateway and shipping method restrictions.
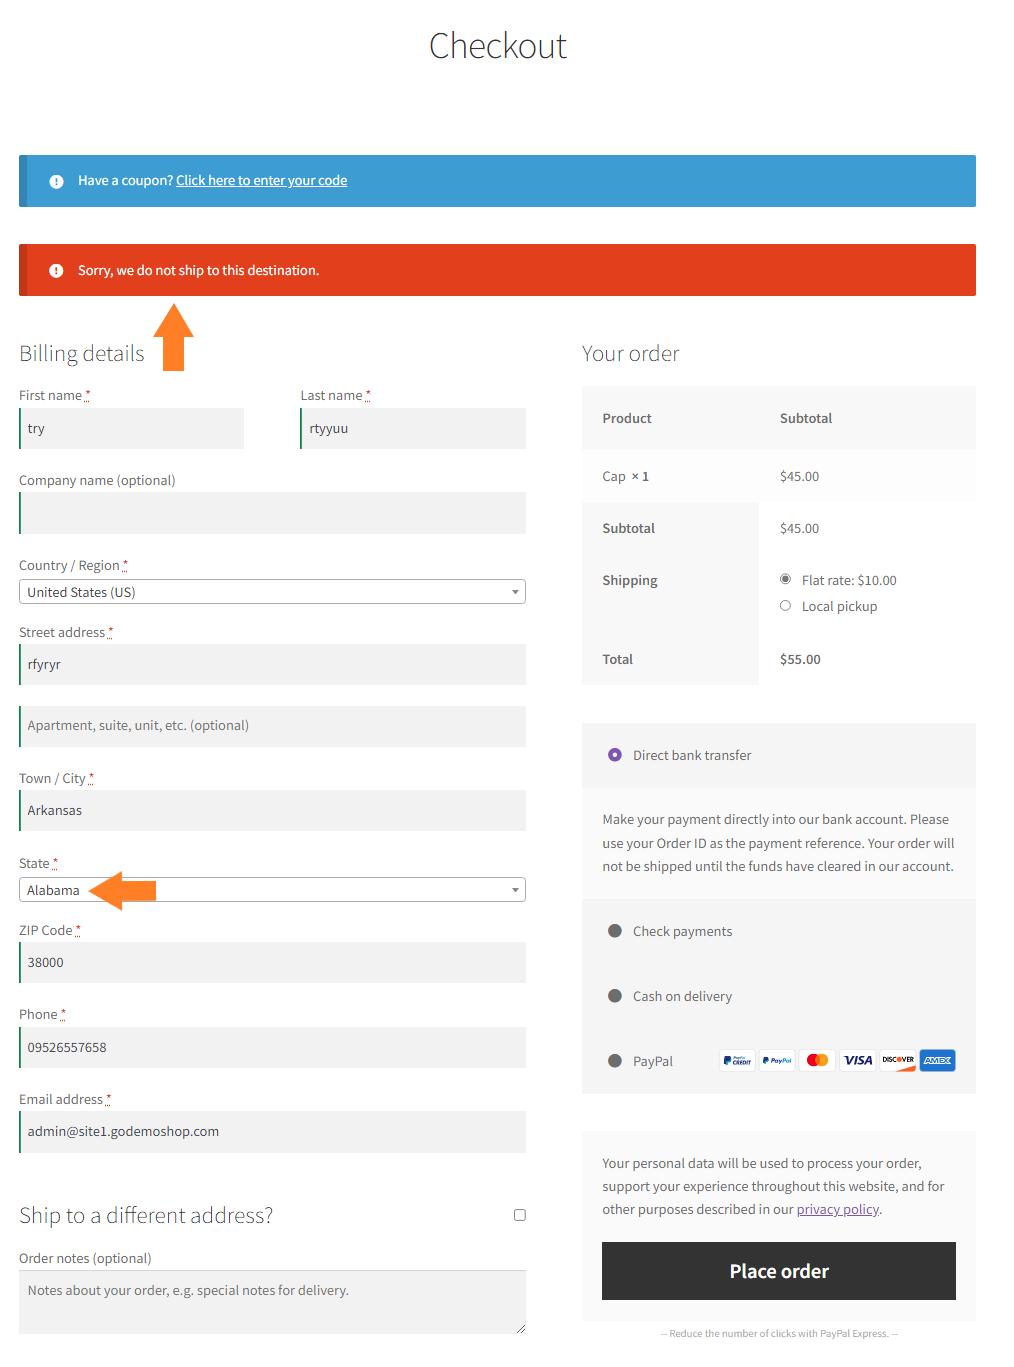
Let’s take a quick sneak peek at the final results.
On This Page
What is Meant by Restrict Shipping By State in WooCommerce?
Restrict shipping by the state means limiting the selling and shipping to specific states of a country. It is usually helpful for local businesses.
Let’s understand this with a scenario.
Let’s say you have a local store and only want to sell to a few states and do not allow the users to place orders from other states. Usually, users from all over the country can place orders in WooCommerce.
Now, if you cancel the orders or do not ship to the locations, it can cause you to lose the reputation of the business by words of mouth.
To avoid such situations, you need to restrict shipping by the states in WooCommerce so that you only sell to the states that you’ll select. Users from other states and countries won’t be able to place the order.
So without further ado, let’s jump into the tutorial.
How to Restrict Shipping By the State in WooCommerce?
To restrict shipping by the states in WooCommerce, you don’t need to be technically an expert. You need to follow the steps in this tutorial, and you’ll achieve your goal without using any piece of custom code.
1. Install and Activate the Conditional Shipping and Payment Plugin
Note: You can skip this step if you have already installed and activated the Conditional Shipping and Payments plugin.
To install the Conditional Shipping and Payments plugin, you will need to install the Woosuite Core plugin and activate it with the help of a license key. We have created a Quick Start Guide for you to figure out how to install and activate the Conditional Shipping and Payments plugin.
Once the plugin is installed and activated, navigate to the Woosuite » Shipping & Payments from your WordPress admin dashboard.
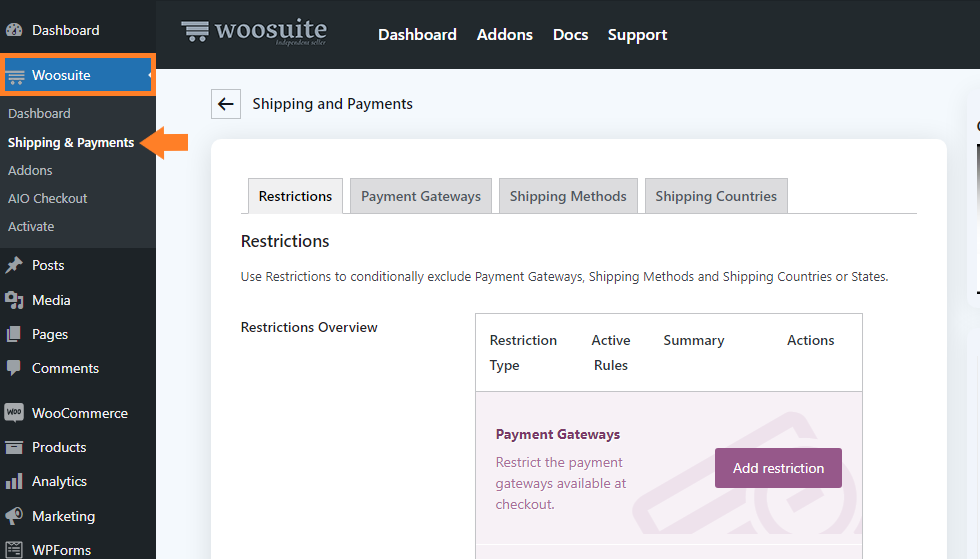
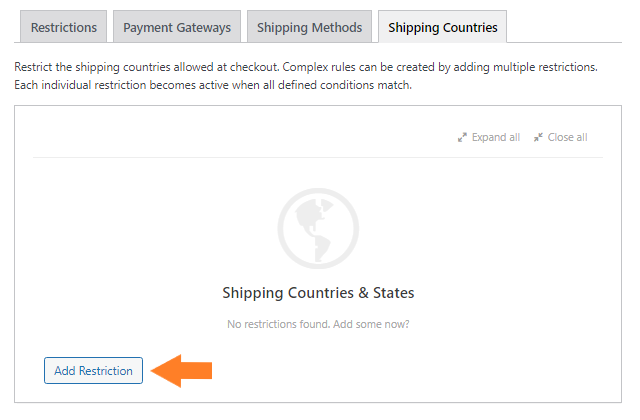
3. Click the Shipping Countries Tab
Click the “Shipping Countries” tab from the plugin’s settings to add a shipping restriction by state and limit the shipping in WooCommerce.

4. Add a Shipping Restriction by State
To add a shipping restriction by the state in WooCommerce, click the “Add Restriction” button.
Once you click the button, a new rule will be added, and you can customize it to match your requirements so that the users from the selected states won’t be able to place the order in your store.
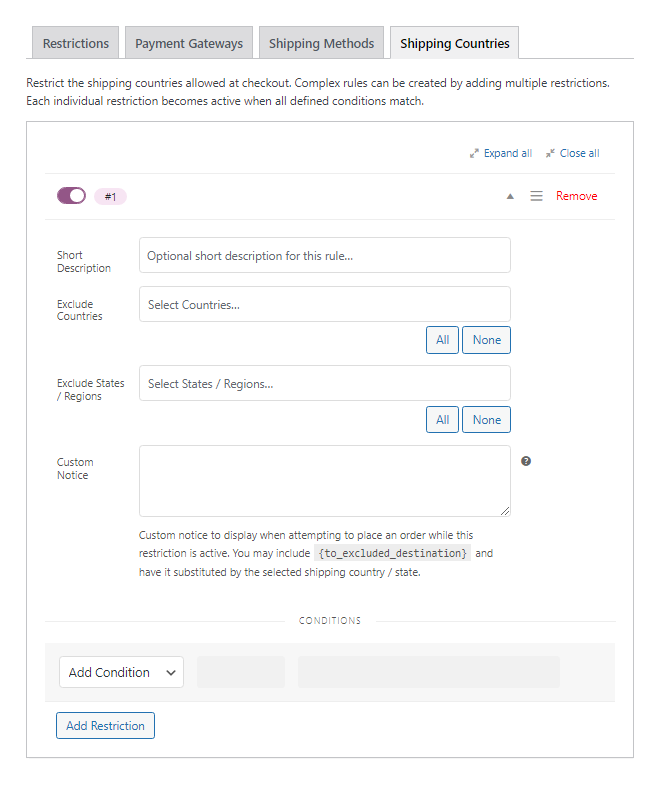
4.1. Add a Short Description
First, we need to add a short description of the rule we are creating in the “Short Description” field. Adding the explanation is unnecessary, but it will be helpful if you have created multiple rules.

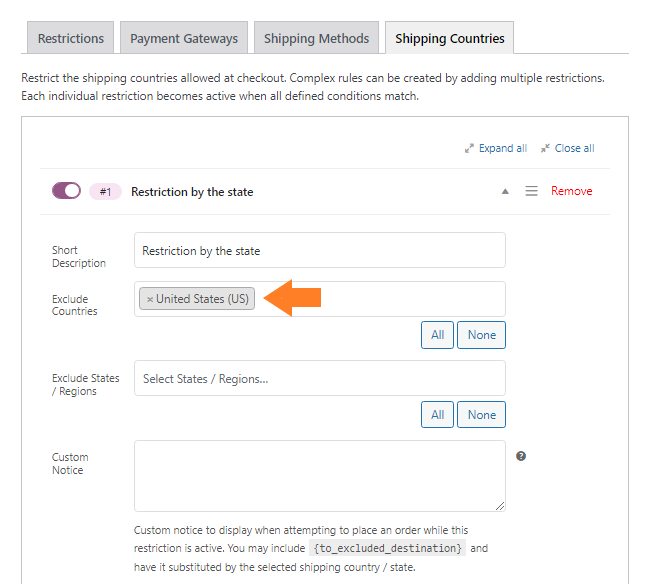
4.2. Select the Countries
From the “Excluded Countries” dropdown, you need to select the countries where you want to restrict the shipping by the state. You can select multiple countries. Selected countries will be excluded from the shipping, and users won’t be able to place orders.
For this tutorial, I have selected the “United States” from the dropdown as I do not want to ship to a few states of the USA.
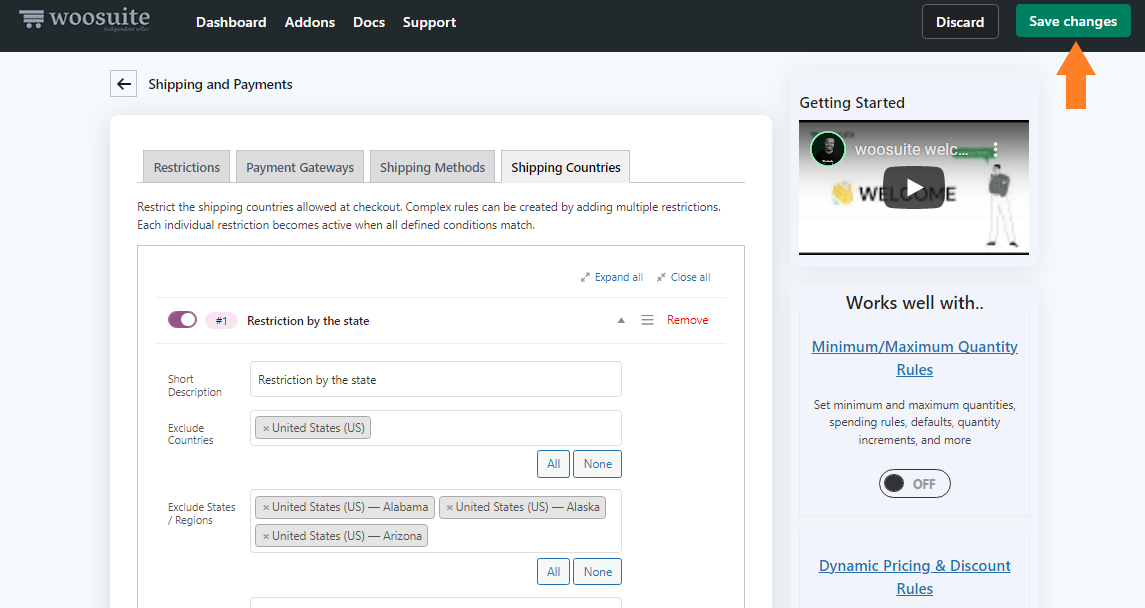
4.3. Exclude the States
Now from the “Exclude States/Regions” dropdown, you need to select the states of the country you selected in the previous step. Remember that the users from the selected states won’t be able to place orders on your site.
I have selected a few states from the “Exclude States/Regions” dropdown so that the users from the selected states will not be able to palace orders on my site while others can seamlessly place the orders and complete the checkout process.

4.4. Add a Custom Note
In the “Custom Note” field, add a custom note that will appear to the users when they try to place the order from the states we selected in the previous step.
You can leave it blank if you want to use the default notice.
I am adding a custom note for this tutorial.

Adding conditions from the “Conditions” dropdown can also create advance restrictions.
For Example: You can add a condition based on the “Cart total” so that the shipping restriction by the state will only be applied if the cart total matches the condition you added.
I am not adding any conditions for this tutorial, but it depends on your requirements.

5. Save Changes
Once you have added the restriction, click the green “Save Changes” button at the top right corner of your screen to save the changes and apply the restriction rules.
6. Final Results
Now let’s test the rule.
To test it, visit your store’s checkout page and add the billing state as one of the selected states. You’ll notice that when you click the “Place Order” button, a notice will appear at the top, and you won’t be able to place the order.
Wrapping Up
That’s it for today’s article. Now you know how to restrict shipping by the state in WooCommerce.
Using the Conditional Shipping & Payments plugin, you can add various limitations to payment processors and shipping methods.
I hope this article was helpful to you. If you have any questions, you can ask them in the comments section below. I would love to answer all your questions.
Alternatively, you can contact our customer support for quick help. They typically reply within an hour or less.
Download the Conditional Shipping & Payments plugin and build something great at your store!


