In this digital world, online shopping is getting more popular daily, and eCommerce businesses seek different ways to reach their audience. Having a mobile shopping app is one of those ways.
In today’s article, I’ll share the benefits of turning your WooCommerce store into an app and different methods.
This article will highlight every aspect of converting your WooCommerce into an app. I’ll mention three different methods to do so, and you can choose any of them depending on your business requirements and budget.
On This Page
- 1 Benefits of Turning Your WooCommerce Store Into an App
- 2 How to Turn WooCommerce Into an App?
- 2.1 1. Turn WooCommerce Into an App: Using a Plugin
- 2.2 Advantages and Disadvantages of Using a Plugin
- 2.3 2. Turn WooCommerce Into an App: Using a Third-Party App Builder
- 2.4 Advantages and Disadvantages of Using a Plugin
- 2.5 Difference Between Plugin and Third-Party App Builder
- 2.6 3. Turn WooCommerce Into an App: Hire a Developer
- 3 How to Improve the Customer Experience on Your WooCommerce Store?
- 4 Conclusion
Benefits of Turning Your WooCommerce Store Into an App
Converting your WooCommerce into an app gives you several benefits. The following are a few benefits of them:
- Enhanced User Experience: Turning your WooCommerce store into an app offer a more user-friendly and easy-to-use interface than websites. It helps in providing customers with a more seamless and personalized purchasing experience.
- Improved engagement: Turning your WooCommerce into an app can help increase customer engagement through push notifications, personalized promotions, and other features that encourage users to interact with your store more frequently.
- Increased sales: By doing so, you can drive more sales by making it easier for customers to browse, purchase, and track their orders, leading to higher conversion rates and increased revenue for your business.
- Brand building: By creating an app, you can build brand awareness and loyalty by providing a platform for customers to engage with your brand more easily and frequently.
- Competitive edge: By offering a mobile app, you can differentiate yourself from your competitors and stay ahead of them.
Now that we know the benefits of converting the WooCommerce store into an app let’s dive into the different methods without further ado.
How to Turn WooCommerce Into an App?
The following are a few methods to help you convert your store into an app:
- Using a plugin.
- Using a third-party app builder.
- Hiring a developer.
I’ll dive into each method, but I will focus on the first method, using a plugin. Ensure to research and consider the benefits and drawbacks of each method before deciding which method to use to make sure it suits your requirements and your budget.
1. Turn WooCommerce Into an App: Using a Plugin
The best way to turn your WooCommerce store into an app is by using the plugin. It is a cost-efficient and easy-to-do method. You don’t need much knowledge of code to create an app using this method.
The following steps will help you create an app for your WooCommerce store.
1.1. SignUp For AppMySite
To turn your WooCommerce store into an app, we need to use AppMySite. With the help of this plugin, you can create your app in no time.
AppMySite is a WordPress plugin that will help you to create apps without using the code or hiring a developer. It gives you an easy-to-use app builder that allows you to customize every aspect of your app.
You can preview your app in the side window. It allows you to create both IOS and Android apps without much hustle.
It is a subscription service that offers a free trial with limited functions and features. First, you need to go to their site and create your account.
I have signed up and created an app for my store to test it.
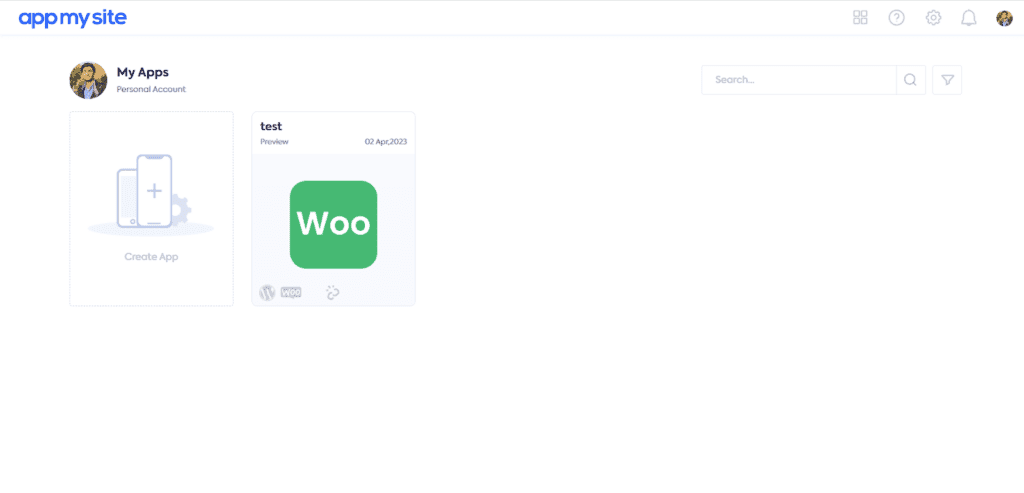
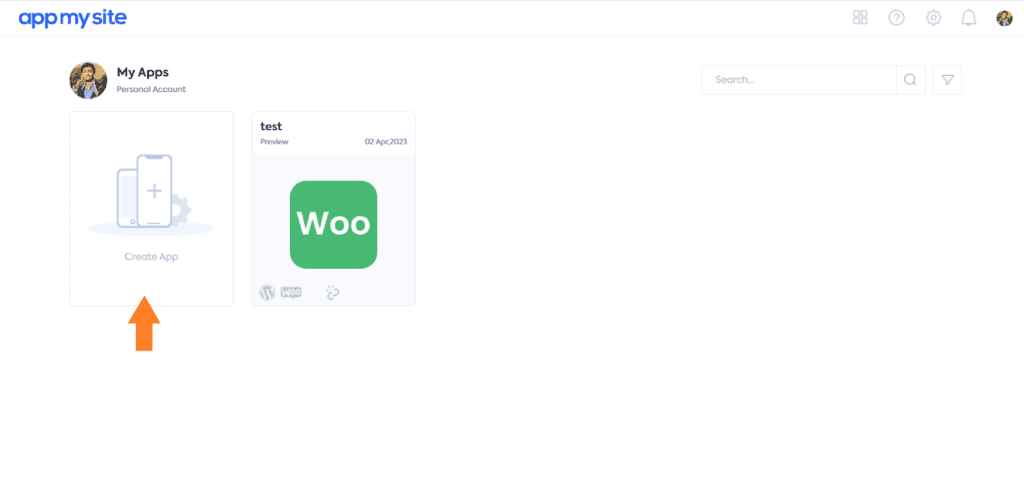
1.2. Create an App
Once signed up, click the ‘Create App’ box to create your first app.
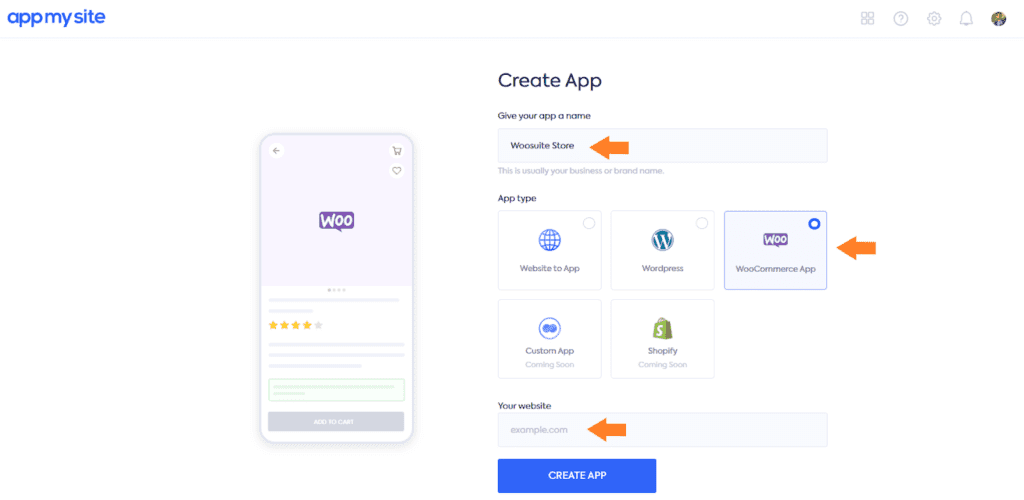
It will take you to a page where you can add the app name, select the app type, and add a link to your WooCommerce store. Remember, it only works with the https protocol.
Note: Ensure to select the ‘WooCommerce App’ from the App Type section.
1.3. Create WooCommerce App’s Dashboard
Next, you need to create the dashboard of your WooCommerce app. You can create and customize the dashboard according to your choice or keep the feel the same as your WooCommerce store.
You get a lot of freedom in customization. You can customize the app icon, app name, launch page, login/signup page, app menu, and more.
In your app’s dashboard section, you can create seven different sections.
- App Icon
- Launch Screen
- Login & Sign Up
- Color Theme
- Home Screen
- Bottom Bar
- Menu
You can also decide whether you want to create the app for IOS or Android. You can create it for both platforms within a few clicks.
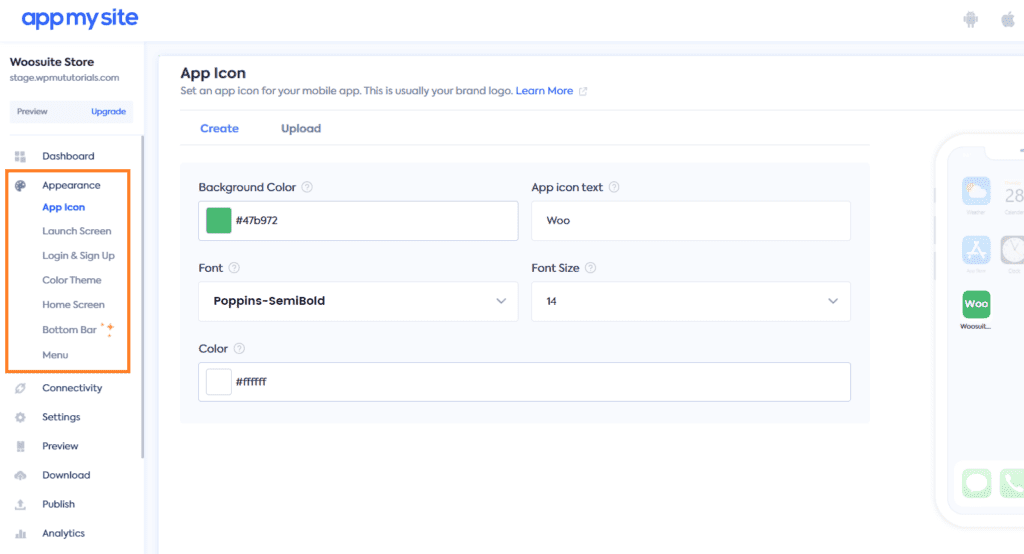
1.3.1. Edit the Site Icon
The following is the screen to edit the app icon. You can upload the image, add text to the icon, change the colors, fonts, and more. You can also preview the changes in the side window.
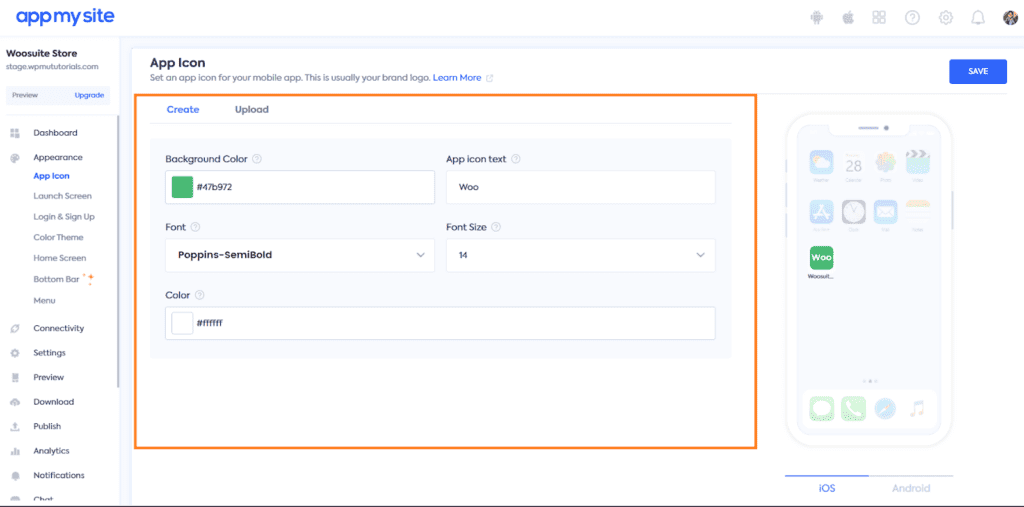
Once you are done with making the changes, don’t forget to click the blue ‘Save’ button at the top right corner of your screen to save the settings.
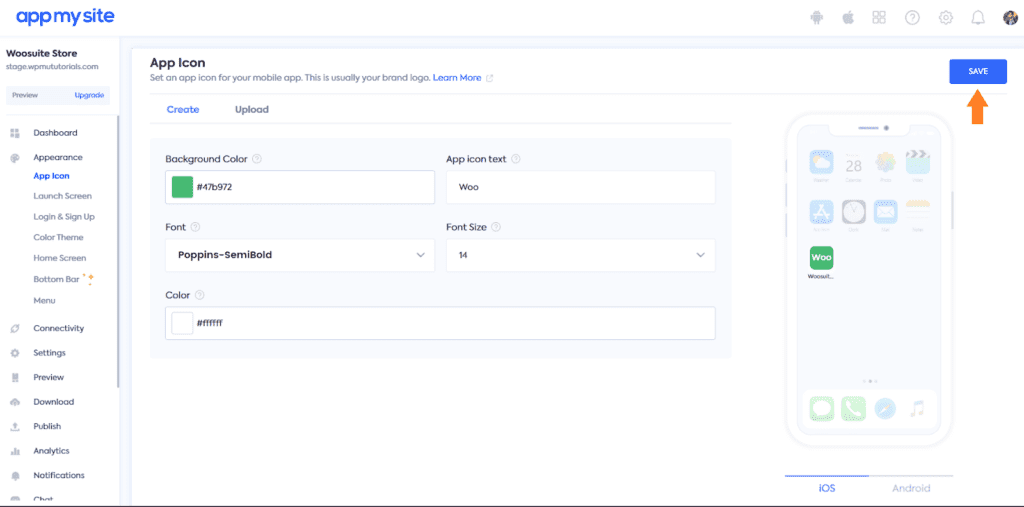
Once you click it, you’ll be redirected to the next section of your site. Like the app icon section, you can customize each section of your WooCommerce app and build an app that matches your requirements.
1.3.1. Edit the Launch Screen
On the next screen, you’ll be able to edit and customize the launch screen of your app. I have already customized it a bit according to my choice.
You can edit and change the colors according to your site’s color scheme.
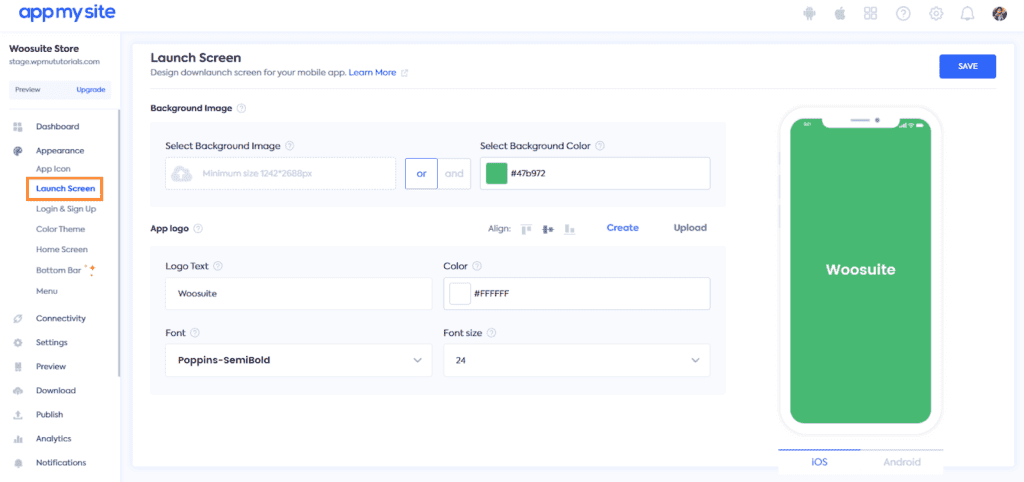
Don’t forget to save the settings before you move on.
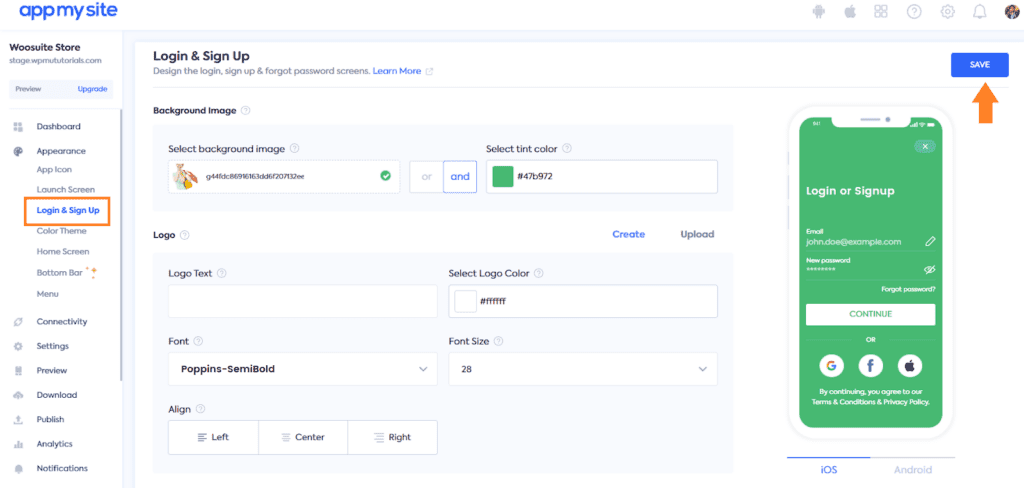
1.3.3. Edit the Login & Sign Up
Once you save the settings, you’ll be redirected to the next page, where you can customize the colors and fonts of your mobile app’s login & sign-up page.
You’ll get a lot of options to customize each part of the login & sign-up page. You can customize it according to your choice and hit the ‘Save’ button to move on to the next part.
1.3.4. Select the Color Theme
You need to select the color theme of your mobile app. You’ll get different options for changing the font family, font size, text color, and button colors. You can play with the settings and match them with your site’s theme and look.
I have already customized the settings to meet my requirements.
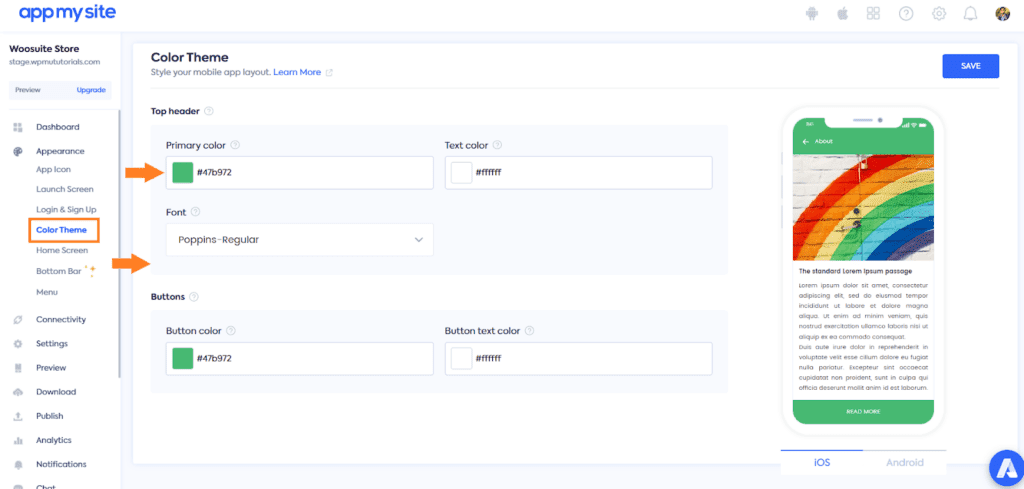
Don’t forget to save the settings to move on to the next part.
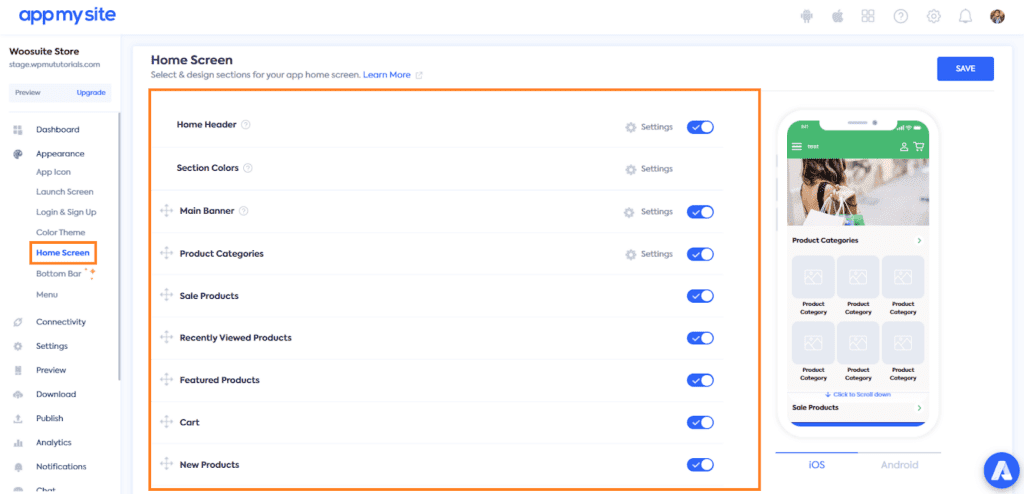
1.3.5. Edit the Home Screen
Next, you’ll need to edit the home screen of your app. As we are turning the WooCommerce store into an app so, by default, the home page will have the products and the categories. You can add and remove the sections you want.
You’ll find several sections you can customize, enable or disable from the app’s home screen. You can dive into each setting and customize your app’s home screen.
I have already made a few tweaks, so I’ll continue with them. Once you are done with the changes, don’t forget to save the settings to move on to the next part.
1.3.6. Edit the Bottom Bar
Next, you’ll need to edit the bottom bar. You can decide whether or not you want to show it to the app users.
You can edit, enable and disable five built-in items according to your choice. Unfortunately, if you want to add another item in the bottom bar, you won’t be able to do so.

You can select the item type by expanding the item and selecting the item type from the ‘Item Type’ dropdown. You’ll get many options in the dropdown, and you can choose the appropriate one depending on the item you want to create.
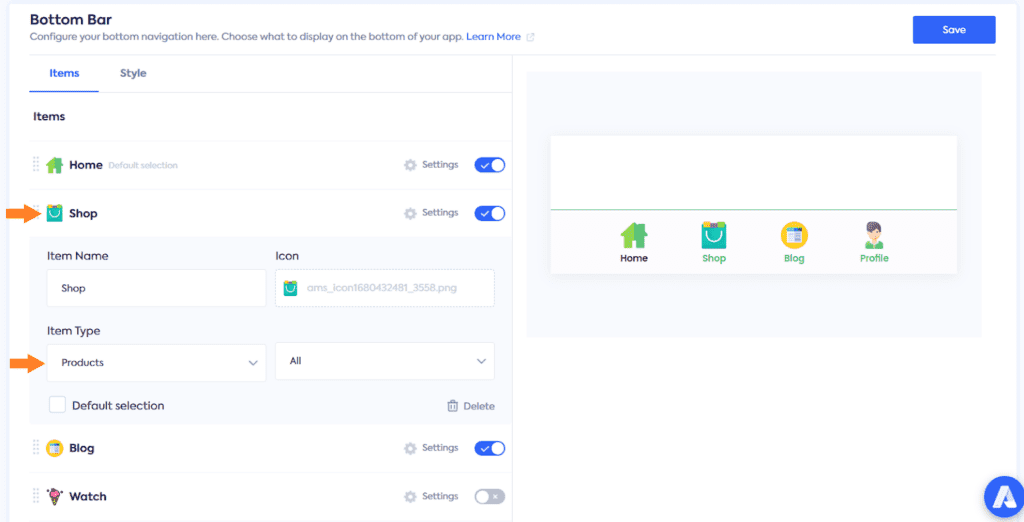
Don’t forget to save the settings to move on to the next part.
1.4. Connect the App To Your WooCommece Store
Next, you’ll need to connect your app to your WooCommerce store to sync the products and other data. AppMySite gives you a free plugin to install and activate to your store and verify the connection.
The following are the steps to connect the app to your WooCommerce store.
1.4.1. Install and Activate the AppMySite Plugin
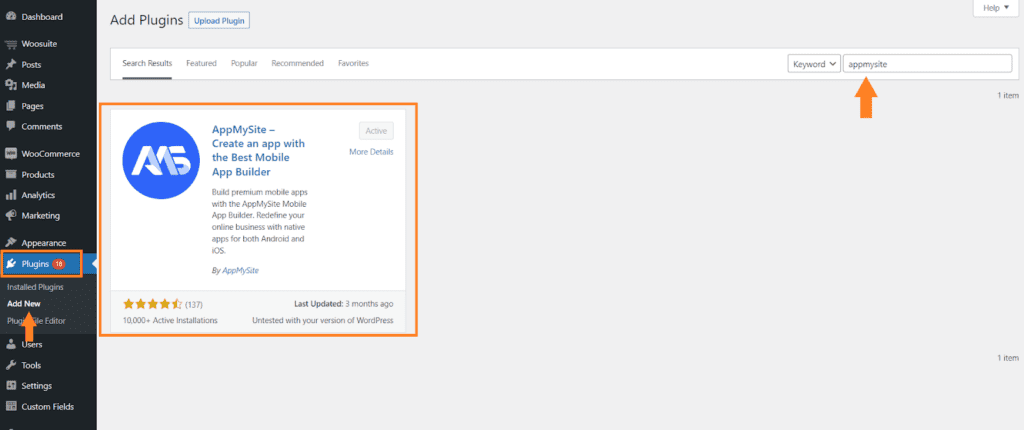
Navigate to Plugins » Add New from your WordPress admin dashboard and search for the ‘appmysite.’ Once you get the plugin, click the ‘Install’ button. Once it is installed, the install button will replace by the ‘Activate’ button. Click it to activate the plugin.
1.4.2. Verify the Connection
Next, you must verify the connection to see your app’s content in your WordPress dashboard and sync the website and app.
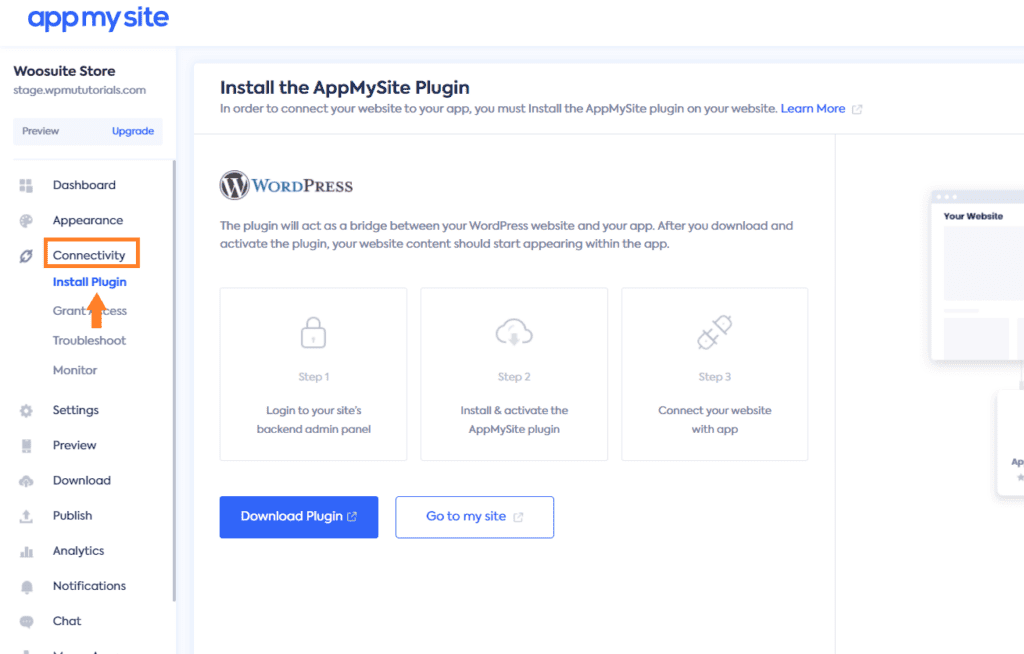
To verify the connection, head back to the AppMySite dashboard, and click the ‘Install Plugin’ under the ‘Connectivity’ section.
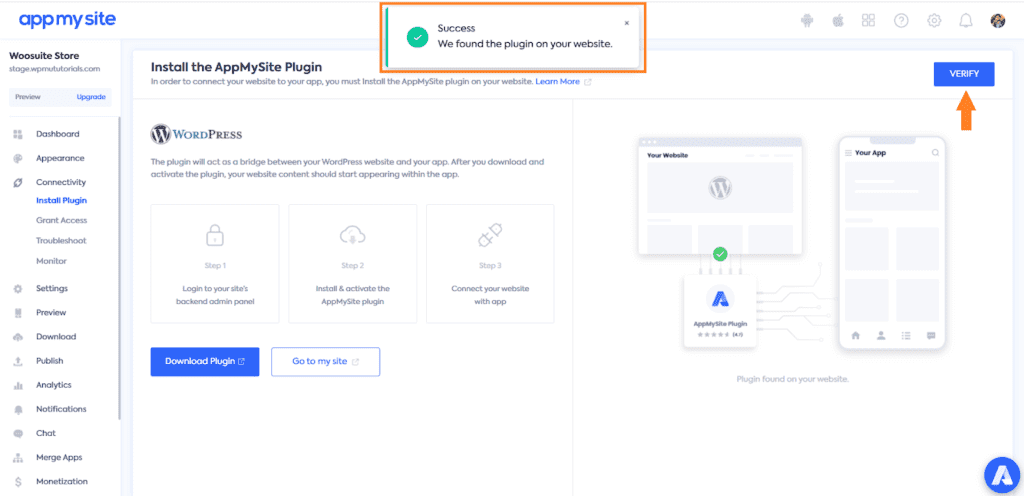
Now, click the blue ‘Verify’ button at the top right corner of your screen to verify the connection. Once the connection is successful, you’ll see a pop-up success message.
1.4.3. Get the WooCommerce REST API Details
Once the connection is successful, you’ll need to grant access to your WooCommerce store. Now if you are converting a non-WooCommerce site into an app, you’ll need to grant access using the Administrator Username and Password.

But as we convert the WooCommerce store into an app, we also want the product and product categories to sync on both platforms. That is why we must grant access using the WooCommerce Rest API credentials.
To get the credentials, follow the following steps.
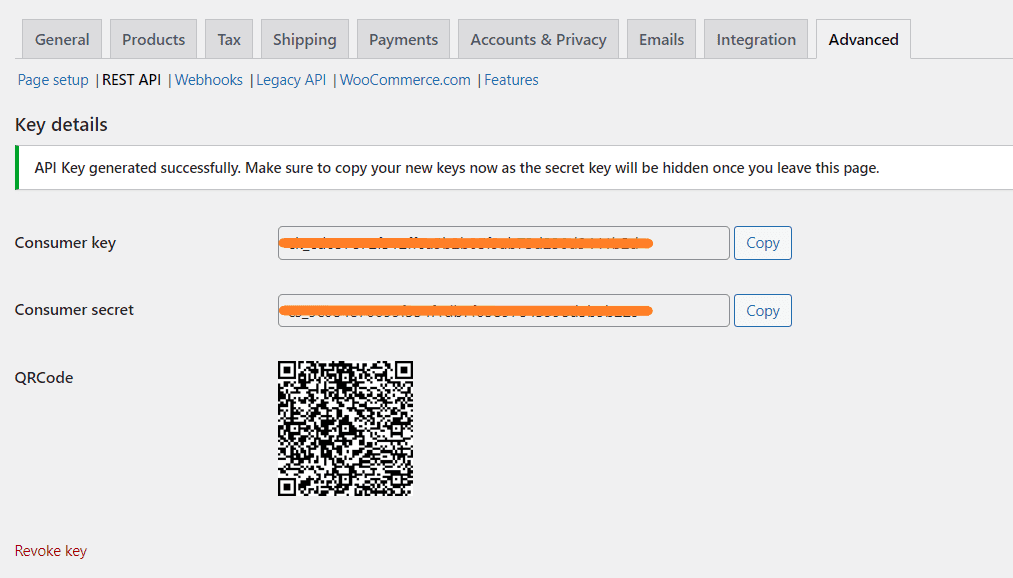
- Navigate to WooCommerce » Settings » Advanced » REST API from your WordPress dashboard and create a new API key by clicking the ‘Add New’ button.
- Once you click the button, you’ll redirect to the API creation page, where you can select the API Permissions. Ensure you select Read/Write from the Permissions dropdown.
- Finally, click the ‘Generate API Key’ button to generate the API key.

After that, you’ll get the API credentials that you can use to grant access to your site and synchronize the app and website.
1.4.4. Grant Access to Your WooCommerce Store
Head back to your AppMySite dashboard and follow the steps to grant access using WooCommerce API.
- Ensure you are in the ‘Grant Access’ section and expand the ‘WooCommerce’ tab.
- Enable the ‘Grant Access with WooCommerce REST API’ option.
- Enter the API details that you copied in the previous step.
- Click the ‘Verify’ button to verify access.
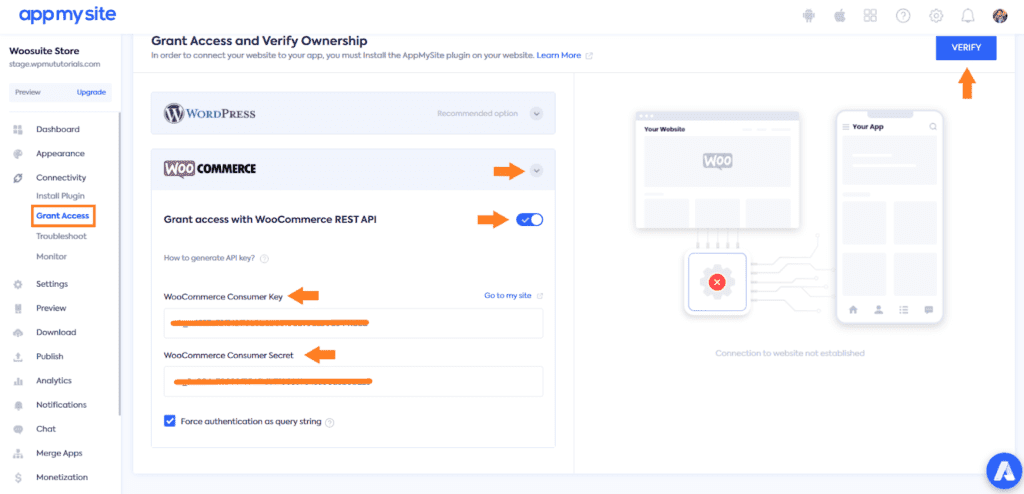
Once the API connection is successful, you’ll see a pop-up success message.
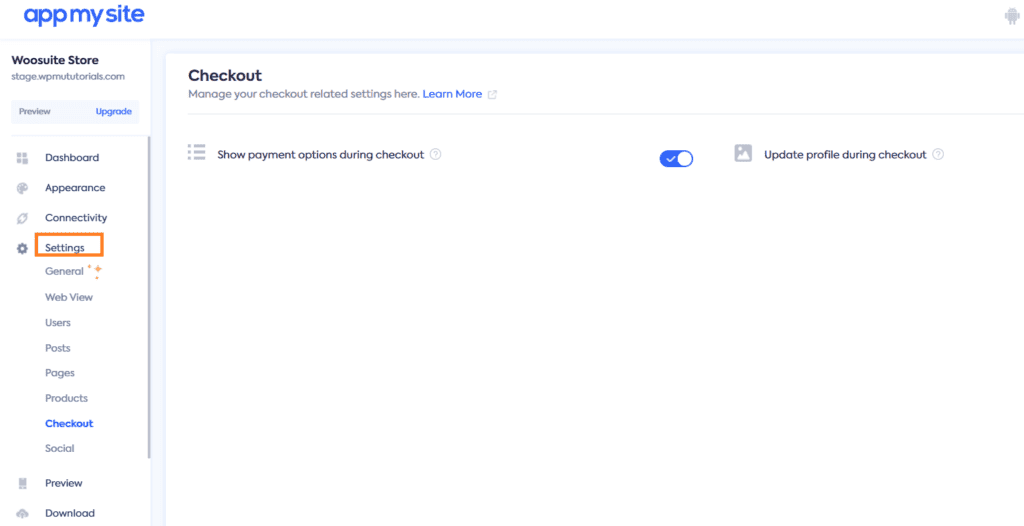
Note: Once the connection is successful, you can create a top menu for your mobile app by going into the Menu section under the Appearance tab.
You can further play with the options in the Settings tab to customize the product, shop, category, cart, and checkout pages.
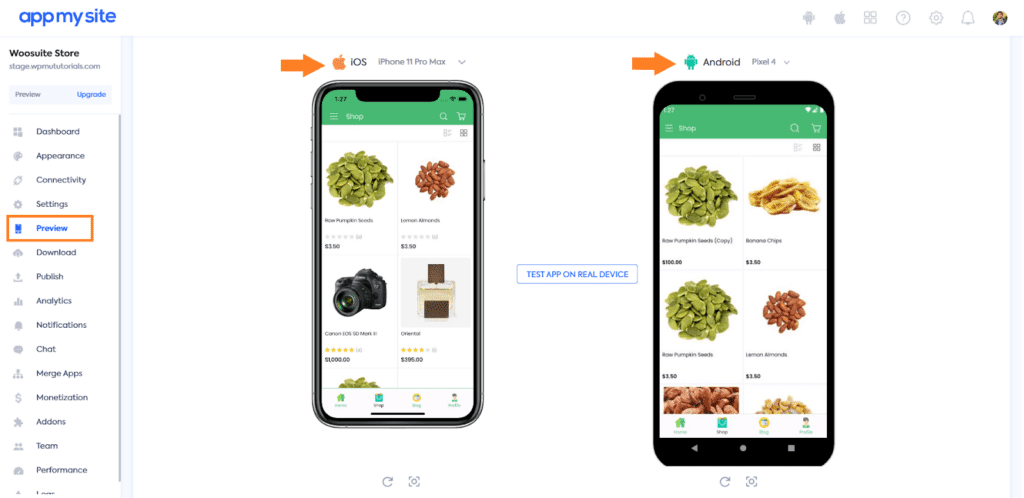
1.5. Preview and Publish Your App
Next, you need to preview your app on IOS and Android to see how it will look on actual devices. You can also preview it on real devices.
To preview the app, click the Preview tab from the left option’s panel in the AppMySite dashboard. You can select the IOS and Android devices to preview the app from there.
You can also download the app to your device and preview and test its features.
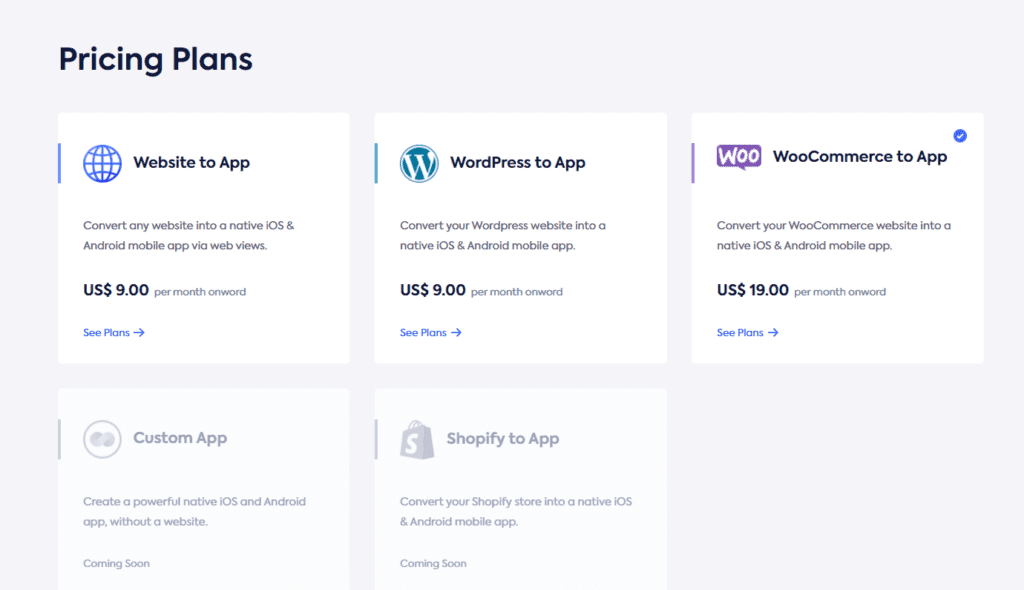
Finally, you can go to the Publish tab and publish your app on Play Store and App Store. Please remember that to publish the app, you’ll need to purchase the subscription, which will cost you $19 per month.
The plugins like AppMySite will help you to quickly launch your app and get to the marketing stuff to increase brand awareness and sales.
But you should remember that these plugins will not provide you with complete freedom of customization. Such plugins are budget friendly and can help you build a standard regular app.
But if you want to add some custom features or change something the plugin doesn’t allow, you’ll need to consider a developer (If you don’t know the coding). It is always up to your budget and requirements to decide which way to go.
Advantages and Disadvantages of Using a Plugin
The followings are the advantages and disadvantages of turning your WooCommerce store into an app using a plugin.
Advantages
- Fast and affordable method.
- Easy to use.
- Seamless integration with WooCommerce.
- Automatic plugin and data updates.
Disadvantages
- Limited customizations.
- Dependency on plugin updates, compatibility, and support.
- Limited features.
That being said, let’s move on to our second method to turn WooCommerce into an app.
2. Turn WooCommerce Into an App: Using a Third-Party App Builder
The second method to turn your WooCommerce store into an app is using a third-party app builder. Third-party app builders are online platforms allowing you to create apps for IOS and Android apps.
Several third-party app builders are available online to help you convert your WooCommerce store into a mobile application—for example, BuildFire, Appy Pie, Flutter, and more.
You can sign up with any app builders, select the template, connect your store, and get started with your app.
For this tutorial, I’ll use BuildFire to create an application for my WooCommerce store. You can use any available app builder depending on your budget and requirements.
The following are the steps to turn your WooCommerce store into an app.
2.1. Sign Up For a Third-Party App Builder
First, you need to sign-up for any page builder, depending on your budget and requirements. You can quickly research the famous app builders and select the one best suits your requirements.
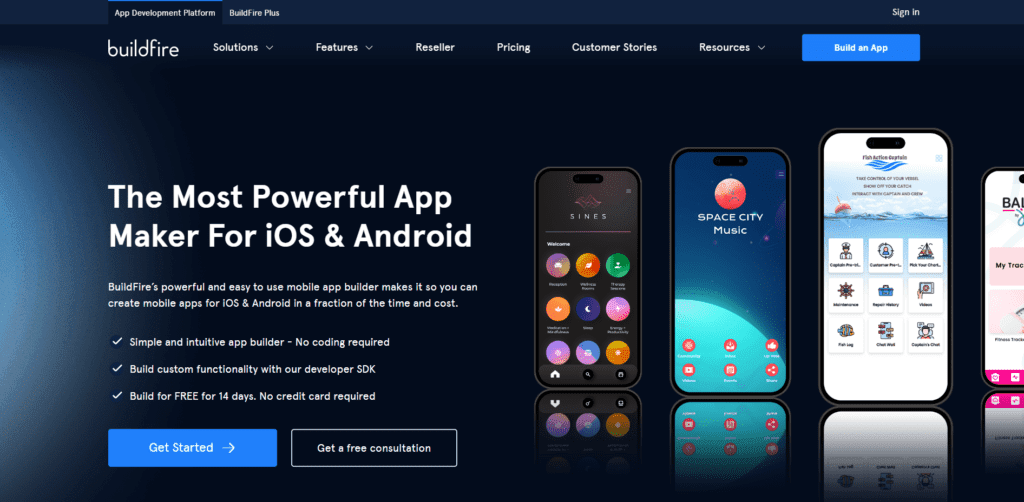
I have signed up for BuildFire as it is the easiest to use. On top of that, they also give you a free 14 days trial, and you won’t need to provide your card details till then. It allows you to turn your WooCommerce store into an app quickly.
You need to click the ‘Get Started’ button to get started.
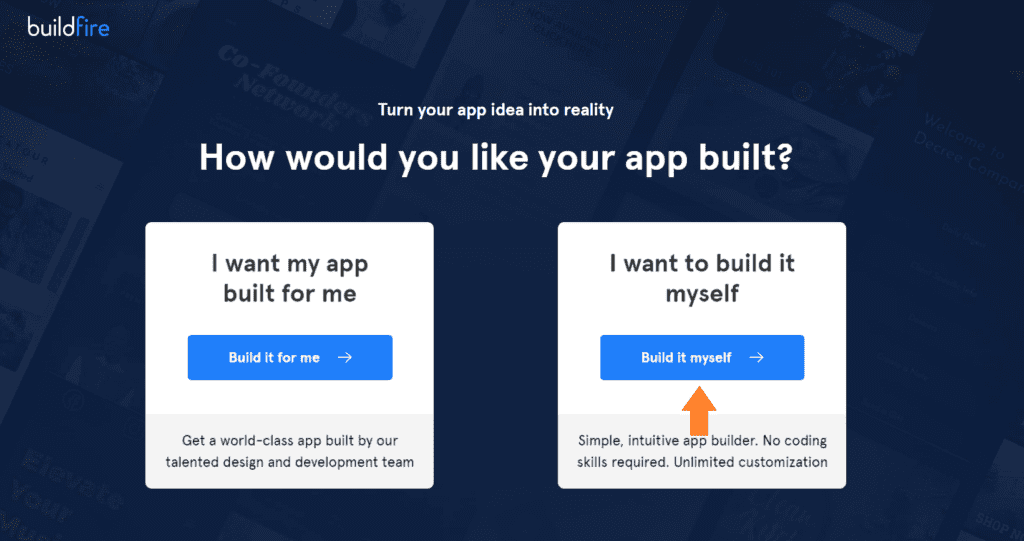
On the next screen, you’ll be asked whether you want to hire a team member and let them develop your app or you want to build it by yourself. You can also hire them to make you an app.
But, for this tutorial, I’ll create it by myself, so I have clicked the ‘Build it Myself’ button.
2.2. Select a Template or Start From Scratch
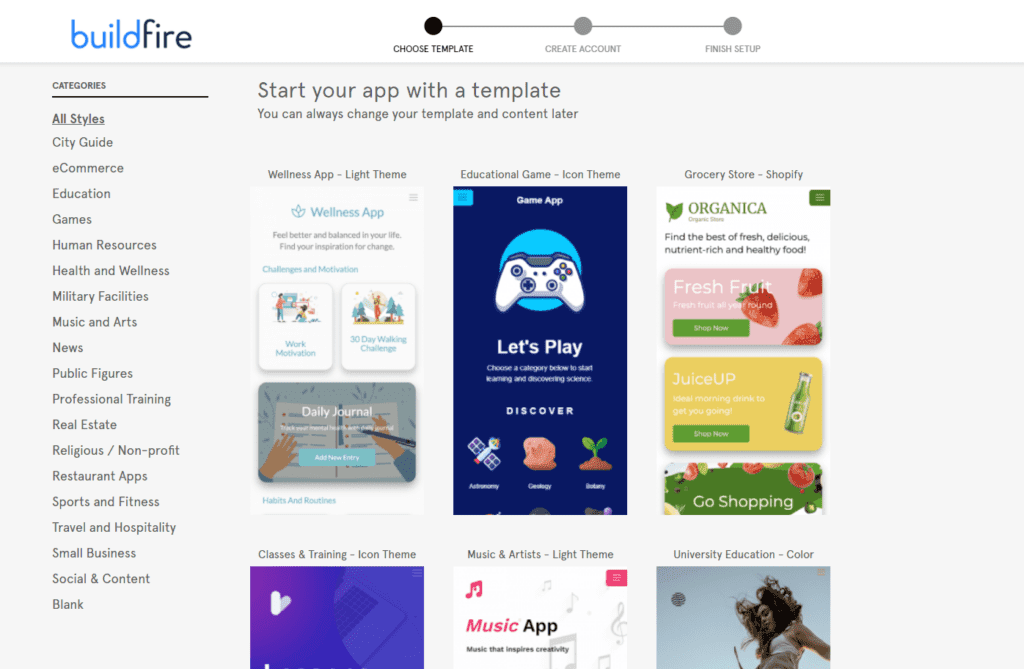
After that, you’ll see a few app templates that you can use to get started quickly. Those are all professionally developed app templates.
You can start with a blank template and design your app from scratch. I’ll use a template for this tutorial. But the choice depends on your experience and requirements.
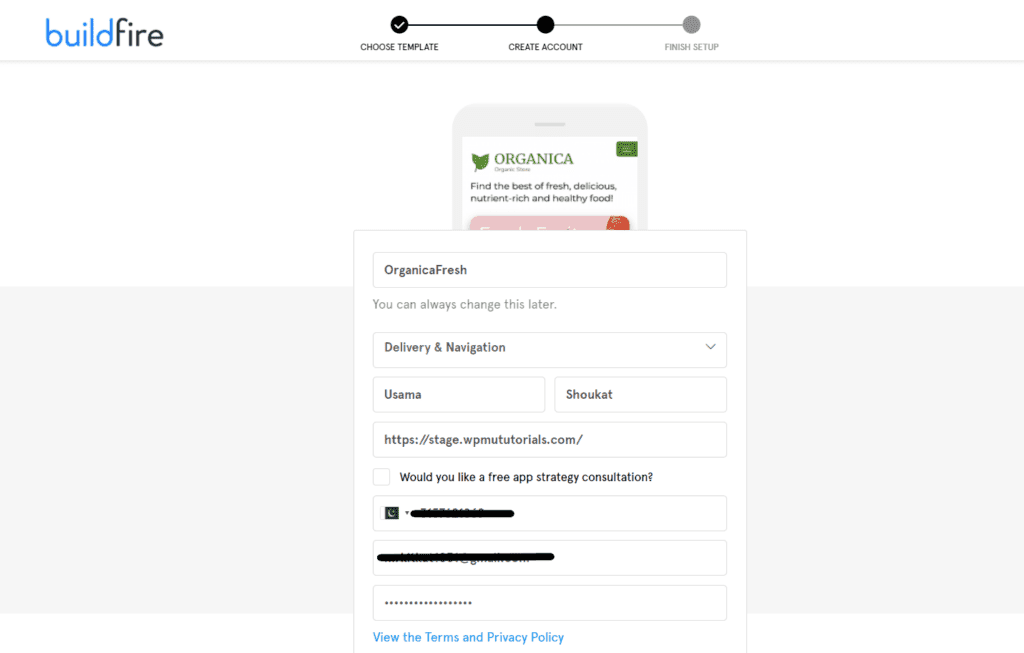
2.2.1. Create Your Account
Once you have selected the template, the next step would be to create your account. You need to give the necessary information to create your account.
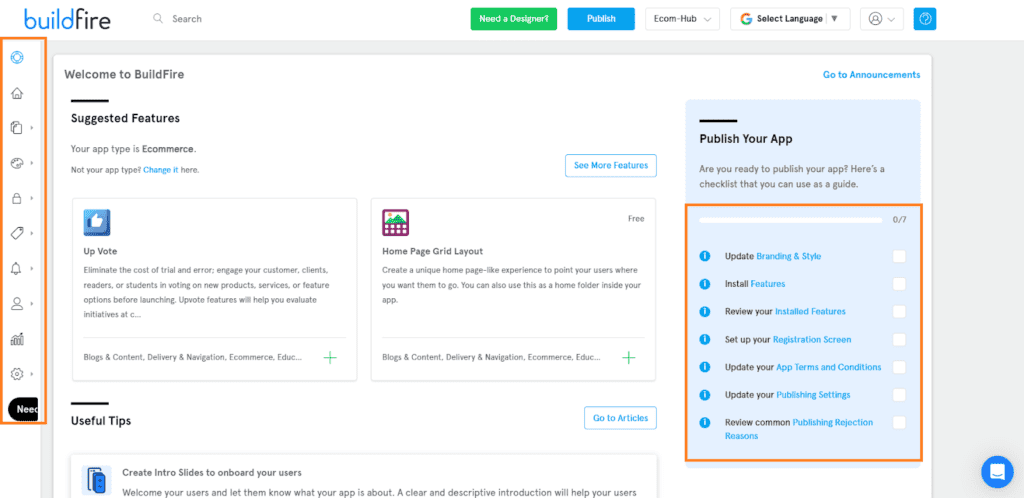
2.2.2. Understand the Dashboard
After that, your app will be created. Now you can edit and change the branding, style, and more to match your brand and website.
You will need to play with the settings to figure things out, but it won’t be that difficult. Things will be similar to the ones in the first method. This will not be difficult if you know how to use WordPress or any other CMS like Shopify or Wix.
One of the best things is you can select the app’s language. I have highlighted where you can start making changes to the app.
2.3. Connect Your App To Your WooCommerce Store
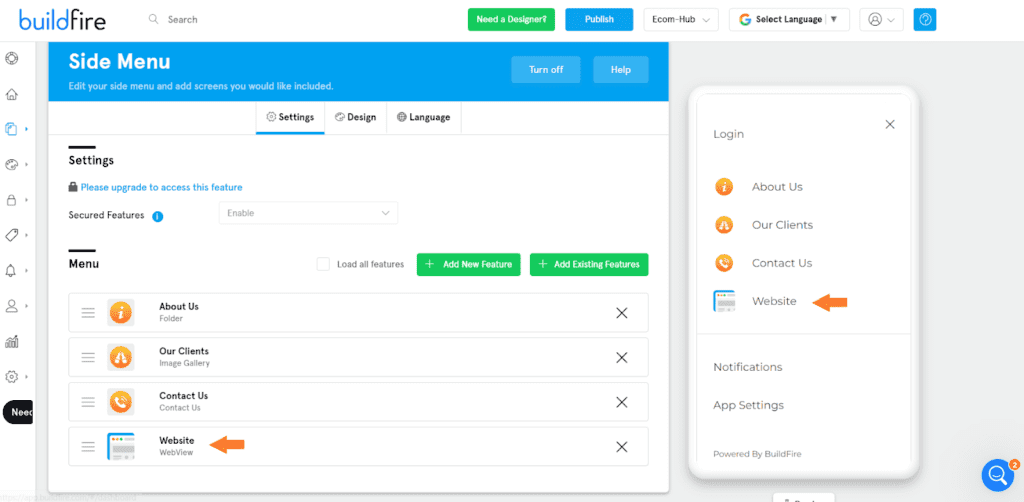
Unfortunately, BuildFire being a third-party app builder, doesn’t allow direct and seamless integration with WooCommerce. You can install the WebView feature from the BuildFire marketplace and add your store’s URL. It is a free feature to install.
It will fetch the products from your store and show them in your app. You’ll need to add the WebView in the app’s side menu so users can access it easily.
To completely integrate your WooCommerce store with your app, you’ll need to hire a developer for a custom solution, or you can find a third-party WooCommerce plugin that allows the integration between your site and the app.
Zapier is the most popular integration service, but unfortunately, it also doesn’t allow you to integrate WooCommerce with your BuildFire app. But you can contact the support and ask them to help you integrate your BuildFire app with WooCommerce.
Remember, you’ll need an upgraded account to contact them and ask them to add BuildFire to the app integration list.
You can also look for the BuildFire alternatives that integrate with WooCommerce without much hustle.
2.4. Publish Your App
Next, you need to preview your app and make any changes if you want. You can preview your app while making the changes.
You’ll need to purchase one of their subscriptions to publish the app. The pricing is relatively high, and you may not be able to afford it, but it gives you the much customization freedom you may not get with any plugin.

Advantages and Disadvantages of Using a Plugin
The followings are the advantages and disadvantages of turning your WooCommerce store into an app using a third-party app builder.
Advantages
- Easy to use.
- Fast deployment.
- Excellent features.
- Ability to do more customizations.
Disadvantages
- High pricing.
- Fewer customizations than hiring a developer.
- Limited integration options.
- Maybe no integration with WooCommerce, and you’ll need to find a custom solution.
Difference Between Plugin and Third-Party App Builder
Using a plugin like AppMySite WooCommerce app builder means the plugin is designed to integrate seamlessly with your WooCommerce store and provide features and functionality specific to WooCommerce. The plugin may also offer specialized features such as integration with WooCommerce payment gateways and managing orders and products from within the app.
The third-party app builders may not be specific to WooCommerce, but you can still use them to create your app. The app builder may provide many features and customization options, but integrating it with your WooCommerce store may be more challenging than the WooCommerce dedicated app builder.
A dedicated WooCommerce plugin can provide a more tailored and integrated solution. At the same time, a third-party app builder can offer more customization options and features outside of WooCommerce-specific features.
3. Turn WooCommerce Into an App: Hire a Developer
Hiring a developer is the third way to turn your WooCommerce store into a mobile application. It will give you complete control over the design, features, and functionality.
Android developers are experts in coding and can code to give life to your thoughts and functionalities regarding your mobile app. Finding a good and skilled developer will require a good amount of research.
Choosing a good and reliable developer is very important. You can hire freelancers from online marketplaces like Upwork, Fiverr, Toptal, or Guru. You can also look for local developers or companies to help convert your WooCommerce into an app.
The developer pricing may differ based on factors like location, the developer’s level of skills, and app complexity. You can decide the timeline and cost of creating the app.
Once the app is complete, you can ask your developer to deploy it in the app and play store. After that, you can start focusing on marketing to get traffic to the app.
This is where the real magic will begin. With the proper marketing techniques, you’ll be able to increase the customer shopping experience, brand awareness, and sales.
How to Improve the Customer Experience on Your WooCommerce Store?
Besides converting your store into an app, you should also focus on improving the customer experience on your WooCommerce store. The stats have shown that 65% of customers are likely to purchase due to good experience.
You can do several things to improve the customer’s shopping experience. You can offer discounts, edit the cart, checkout, and shop pages, add custom features to your store, and more.
The Woosuite plugins will help you to boost the WooCommerce functionality and improve the customer experience to help you get more sales.
I have compiled a few guides that may be helpful for you to improve the user experience.
- How To Create a WooCommerce Checkout like Shopify?
- How to Force WooCommerce Shipping To The Customer Billing Address
- How to Combine WooCommerce Cart and Checkout Page?
- How to Skip the Add to Cart in WooCommerce
- How to Change the Add to Cart Quantity Box into a Dropdown?
- How to Customize the Add to Cart button in WooCommerce
- WooCommerce Free Shipping on Single Product
- How to Create a Tripwire Funnel (With Examples 2023)
- How to Add a Location Picker at Checkout in WooCommerce
- How to Create a Frequently Bought Together Products Section Like Amazon in WooCommerce?
- How to Create WooCommerce Bundled Discounts(Step-by-Step)
- How To Create WooCommerce Category Discounts
- How to Create Shipping Discounts in WooCommerce? (Step-by-Step Guide)
Conclusion
That’s it for today’s article. I hope it was helpful to you and you were able to turn your WooCommerce store into an app without any difficulties.
By converting your WooCommerce store into an app, you’ll get many benefits, including a wider audience, better customer experience, and increased user engagement.
I have covered all three methods you can use to turn your WooCommerce store into an app, but choosing the one that best suits your budget and requirements is up to you. Each method has advantages and disadvantages, which I have explained in this article.
No matter which method you choose, it is essential that your app is user-friendly, easy to navigate, fast, and well-designed.
Creating an app can take your business to the next level and help you achieve your business goals.


