WooCommerce product statuses (in stock, out of stock, or on backorder) work well for some products but might require a more flexible solution.
Lead Time is the solution to it, but WooCommerce doesn’t allow you to add lead times. Lead time shows the customers when an out of stock product will be back in stock.
The main advantage of showing the product lead time is that it makes it easier for customers to make a decision whether they should place the order right now or wait until it is back in stock.
So, In today’s tutorial, I’ll explain how to add lead time to WooCommerce with the help of Woosuite Lead Time plugin. But first, let’s see what is a lead time?
On This Page
- 1 What is a Lead Time?
- 2 Benefits of Displaying a Lead Time
- 3 How to Add Lead Time to WooCommerce?
- 3.1 1. Install and Activate the Woosuite Lead Time Plugin
- 3.2 2. Navigate to Woosuite Lead Time
- 3.3 3. Display the Lead Times on Single Product Page
- 3.4 4. Select the Products for Which You Want to Display the Lead Times
- 3.5 5. Change Lead Time Prefix
- 3.6 6. Set Global Lead Time
- 3.7 7. Save Changes
- 3.8 8. Final Results
- 4 Conclusion
What is a Lead Time?
Lead time is the amount of time between the start and finish of the ordering process. This time begins when the consumers place their order and ends when it arrives on their doorstep.
This will help you improve the user experience and increase the chances of customers purchasing the product.
It is the estimated number of days an out of stock product will take to be back in stock. It is also useful for store owners who have products in stock but still have a lead time they would want to tell their customers about.
For Example:
If you run an online store that sells hoodies. When product orders are high, you require a method to notify customers when the product is expected to be restocked.
Benefits of Displaying a Lead Time
The following are some of the benefits of displaying lead times for WooCommerce products:
- Customers Can Make Informed Choices
In the case your stock runs out but will be restocked soon, displaying lead times will help you inform your customers of the approximate time of arrival of those products. The customer can then decide whether or not the estimated date works for them.
- Improve Customer’s Buying Experience
Displaying the lead time allows you to provide a better customer experience and simplify the purchasing process. Furthermore, it reduces the uncertainty about your WooCommerce backorders, increases transparency, and assists in the development of trust with your customers. - Reduce Cart Abandonment Rate
Displaying lead times also allows you to reduce the cart abandonment rate as the customers will already know from the product page when the product will be restocked. So, they won’t add it to the cart if they need it urgently which will help in reducing the cart abandonment rate. - Customers Won’t Have to Contact Support for Product Availability
Customers will not need to contact your support staff because they will be able to see the lead times from the product page which will help them to know an estimated amount of time when the product will be available.
So, without further ado let’s get started.
How to Add Lead Time to WooCommerce?
Here, I’ll show you how to add lead time to WooCommerce using Woosuite Lead Time plugin. This plugin will help you setup the global lead times.
So follow the following steps to set the Global Lead Times.
1. Install and Activate the Woosuite Lead Time Plugin
Note: You can skip this step if you have already installed and activated the Woosuite Lead Time plugin.
To install the Woosuite Lead Time plugin, you will need to install the Woosuite Core plugin and activate it with the help of a license key. We have created a Quick Start Guide for you to figure out how to install and activate the Woosuite Lead Time plugin.
Once the plugin is installed and activated, now from the WordPress Admin Dashboard, navigate to Woosuite » Lead Time.

3. Display the Lead Times on Single Product Page
Now, select the pages where you want to display the lead times. You can display it on 5 pages at the same time but for this tutorial, I am displaying the lead time only on the single product page.
To select the page, click on the single product page box.
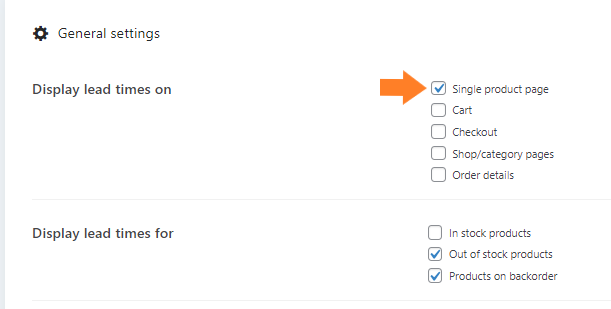
4. Select the Products for Which You Want to Display the Lead Times
Here, you can select whether to display lead times for products based on their status:
- In stock Products: This is useful for displaying lead times for custom or handmade products.
- Out of stock Products: This only displays the lead time if the item is out of stock.
- Products on Backorder: This only displays the lead time for the item on backorder.
For this tutorial, I am displaying the lead times for out of stock products only so I have selected the out of stock products.

5. Change Lead Time Prefix
To change the prefix of lead time, simply enter the prefix in the Lead Time Prefix field.
I have changed it to Available in, you can set it as you want.
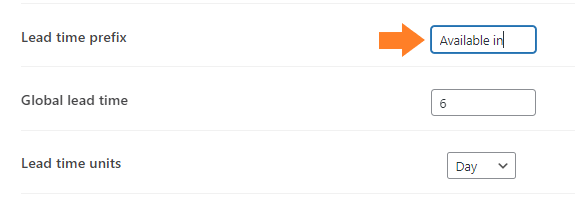
6. Set Global Lead Time
Now to set the global lead time, enter the number in the Global Lead Time field and select the Lead Time Unit. You can select the unit as:
- Day
- Week
- Month
I have selected the day as a unit and set the lead time as 6 days. You can set it as you want.

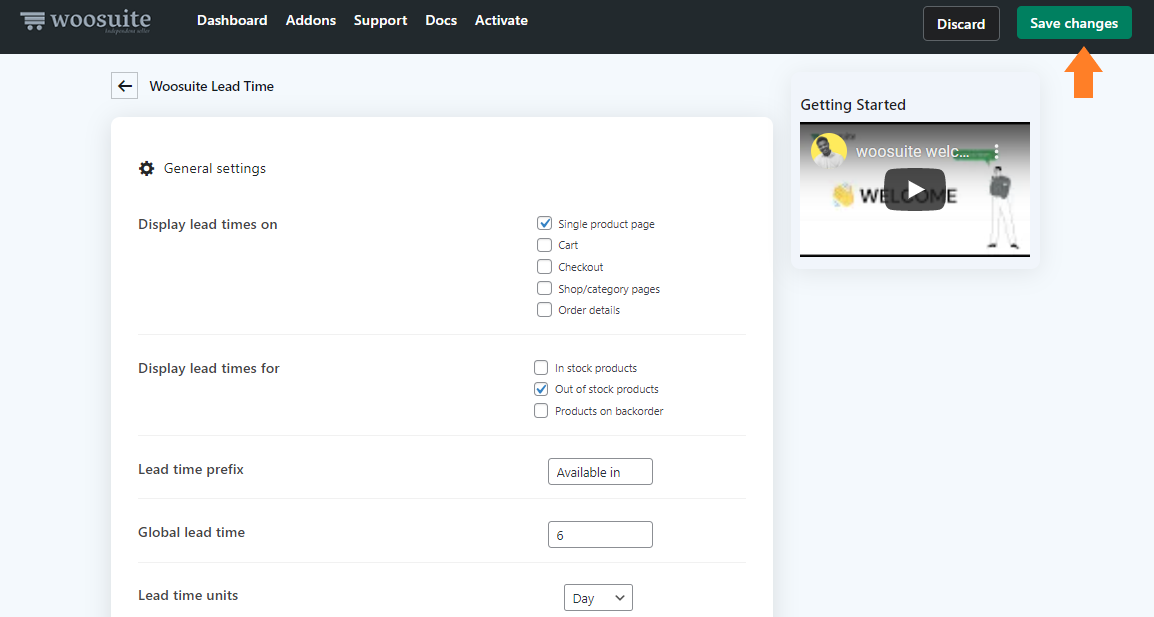
7. Save Changes
Now, click on the Save Changes button at the top right corner to save the changes.
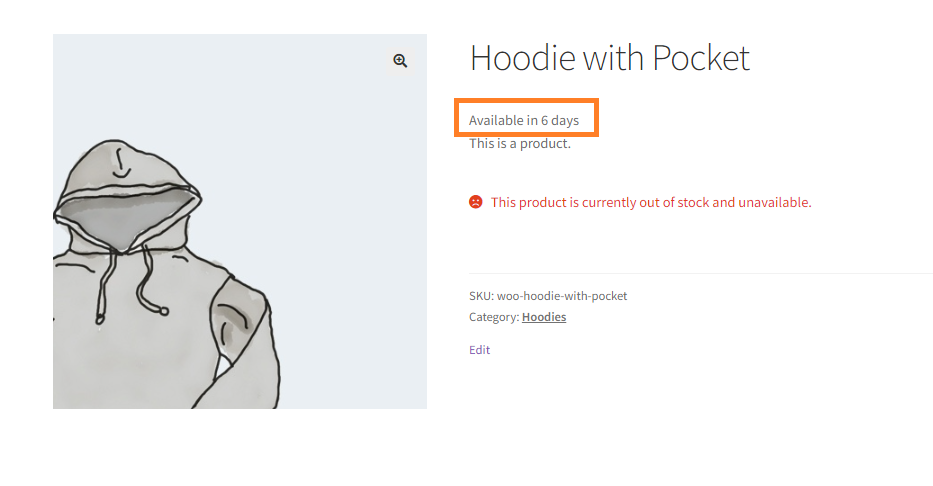
8. Final Results
Now, if you visit any of the product pages on your store that are out of stock, you’ll see that a lead time has been added to the product page.

Conclusion
Now you know how to add lead times to WooCommerce. You can set the different lead times depending upon the items you sell.
Woosuite Lead Times plugin is one of the simplest solutions to add lead times to your WooCommerce store without any hustle. Displaying the lead times will increase the buying experience of customers and speed up the checkout process.
If you have any queries, you can ask them in the comments or contact our customer support. Our dedicated customer support team typically replies within 48 hours.
Download the WooCommerce Lead Time plugin today and start displaying lead times on your store!


