In this article, I will be showing you how to add ‘Login to Purchase’ button In WooCommerce. This tutorial will help you add a custom login button to your WooCommerce store products. As a result, they will need to log in or create an account to purchase the product.
Read ahead and figure out how to add the ‘Login to Purchase’ button in WooCommerce in a few easy steps.
On This Page
How to Add Login to Purchase Button In WooCommerce [Step By Step Guide]
This section will show you how to Add ‘Login to Purchase Button’ to your WooCommerce store. To carry out this whole tutorial, we will be using the Request A Quote Plugin by Woosuite. This plugin will help us Add ‘Login to Purchase Button’ from our WooCommerce store products in a few easy steps.
Step 1. Install and Activate the Request A Quote Plugin
Note: You can skip this step if you have already installed and activated the Request A Quote Plugin.
To install the Request A Quote Plugin, we will need to install the Woosuite Core plugin and activate the license. So, we have created a Quick Start Guide for you to figure out how to install and activate the Restriction Rules plugin. The Quick Start Guide will help you install and activate the plugin and its license. So, click here to check out the Quick Start Guide.
Search for the Woosuite option in the WordPress tool menu. Hover your mover arrow to Woosuite and look for the Addons section. After that, click on the Addons option. In the Addons section, please search for the Request A Quote option and click on it. It will redirect you to a new page and show some new options.
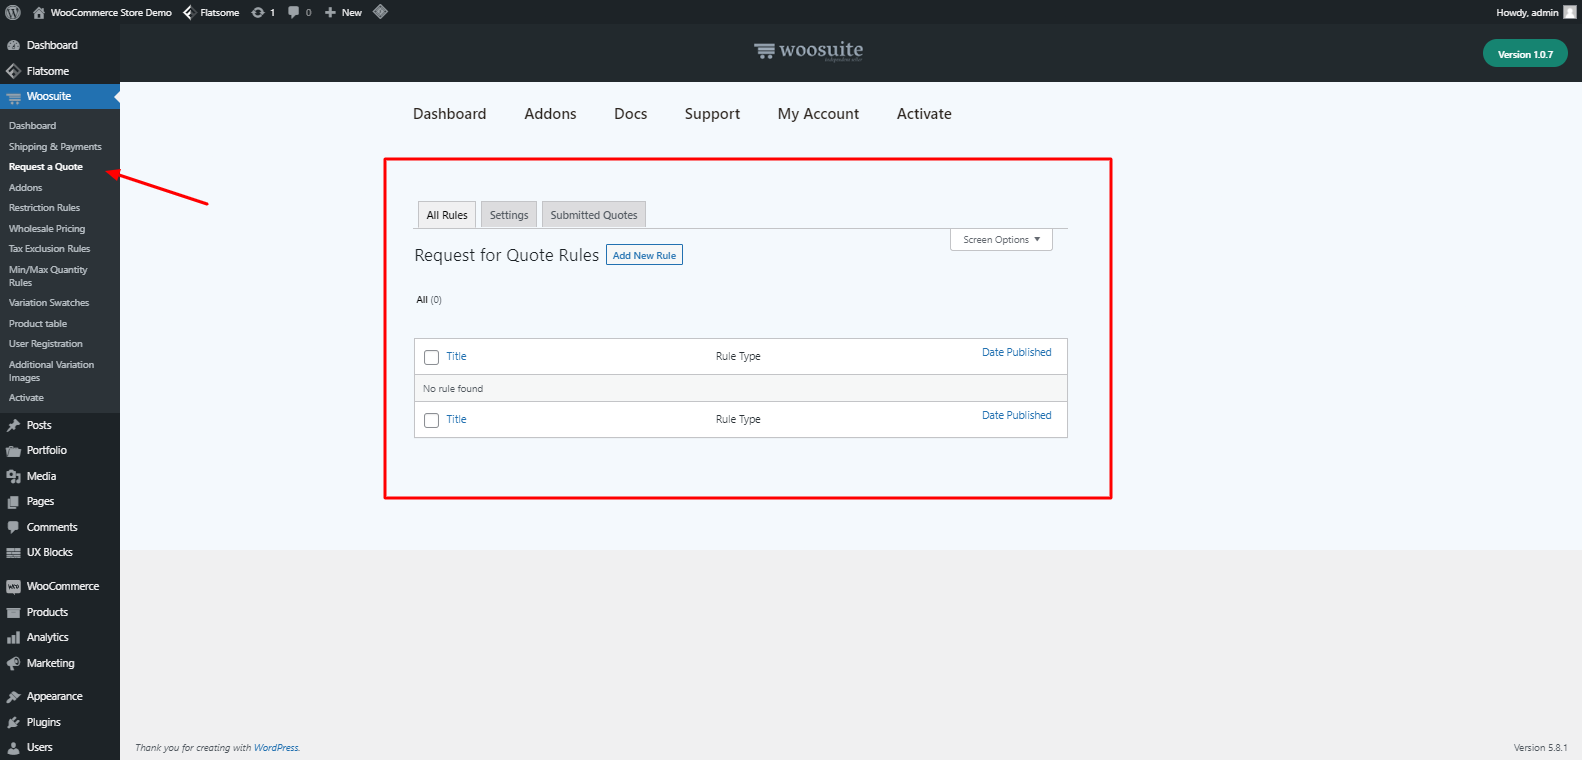
We will now start creating a new rule to remove the add the Login to Purchase Button. You will see a new button called Add New Rule on the next screen. In the All Rule section, click on Add New Rule.
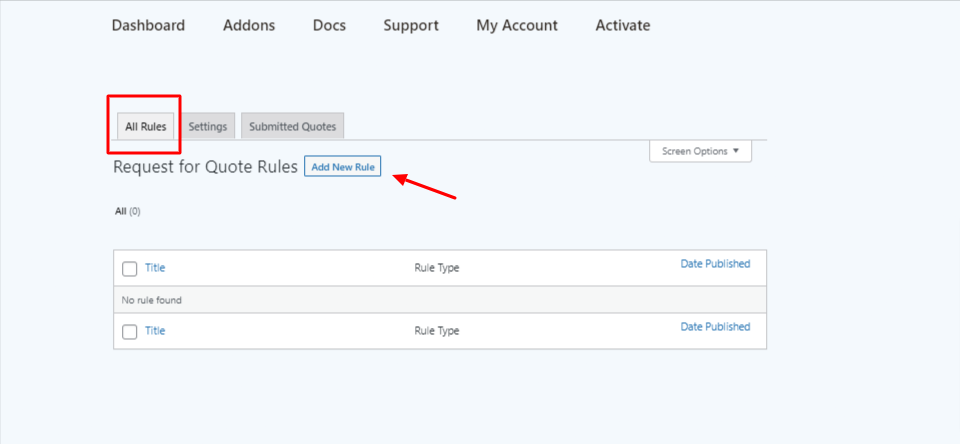
Step 3. Add New Rule
After clicking on Add New Rule, you will see some new options. We will now start configuring them to hide the Add to Cart button.

3.1 Title: In this field, write the title you want to give to your new rule. This won’t be visible to visitors. So, name it according to you. In this tutorial, I want to hide the Add to Cart button for guest users. So, I’m calling it ‘Login to Purchase Button For Guest Users.’
3.2 Rule Type: Select the option to Quote Rule for Guest User. I’m selecting this because I want to add this button for guest users only.
3.3 Rule Priority: Set the Rule Priority to 10. The lower you will set the lower the rule will be prioritized.
3.4 Apply on All Products: If you want to apply this on all products, then click on the checkbox to enable it. Otherwise, choose the product you wish to apply this rule manually.
3.5 Hide Prices: I don’t want to hide prices, so I will choose No from the dropdown. If you want to hide prices along with the Add to Cart button, choose Yes from the menu.
3.6 Hide Price Text (Optional): This is for you if you have enabled the hide prices option. In this field, enter the text you want to show on the place of the price. You can enter what you want. You can enter text like ‘Price Is Hidden. Please Log In to See Prices.’
3.7 Hide Add to Cart Button: You will see four different options in the dropdown menu. I’ll select Replace Add to Cart Button with a Custom button option from the dropdown menu. You also have to select the same.
3.8 Custom Button Link: Enter the login or registration page link in this field.
3.9 Custom Button Label: If you have chosen the Replace Add to Cart Button with a Custom button, then this option is for you. In this text box, you can label your custom button. You can add ‘Login to Purchase’ in the custom box.
After making all the changes, click on the Publish button.

Step 4. Final Results
As you can see in the below images, the ‘Login to Purchase’ button is visible on the product page. This proves that the settings mentioned above are working fine. You can apply the same settings to your WooCommerce store.

Conclusion
We finally figured out how to add the ‘Login to Purchase’ button in WooCommerce. In this article, we checked out how to add the ‘Login to Purchase’ button in a few easy steps. This was all about how to add the ‘Login to Purchase’ button in WooCommerce. We finally achieved the desired results effectively and efficiently. Do let me know whether you got good results or not.
That’s all for this article.


