WooCommerce being a flexible eCommerce solution gives you the default and powerful ways to categorize your products and add additional tags.
However, you may be selling products that require you to go beyond the default categorization so users can easily discover the items they are looking for. This is where custom taxonomies come in help.
In this tutorial, we’ll dive into the custom taxonomies and different methods to add them to your WooCommerce store. Without any further ado, let’s straight jump into the tutorial.
On This Page
What is a Custom WooCommerce Taxonomy?
A custom WooCommerce taxonomy is like a custom label or category system for the products in your online store. Think of it as a way to group and organize your products in a unique and meaningful manner.
Just like in a physical store, where you might have sections like “Clothing,” “Electronics,” and “Home Decor,” a custom WooCommerce taxonomy lets you create your sections or labels for your online store.
For instance, you could create a custom taxonomy like “Brand,” “Size,” or “Product Type” to help customers find products more easily. Custom taxonomies make it simpler for your customers to search and filter products based on specific criteria.
How to Add a Custom Taxonomy to WooCommerce Products?
To create a custom WooCommerce taxonomy, there are two different methods. We’ll discuss both methods in detail and you are free to use the one that suits best your needs.
The following are the methods to help you add a custom taxonomy to WooCommerce products.
Method 1: Using the Plugin
The first method to create a custom WooCommerce taxonomy is by using a plugin. There are several plugins available that can help you do so.
For this tutorial, I’ll use the Advanced Custom Fields plugin to add custom taxonomies to WooCommerce products. The following are the steps to do so.
1.1. Install and Activate the ACF Plugin
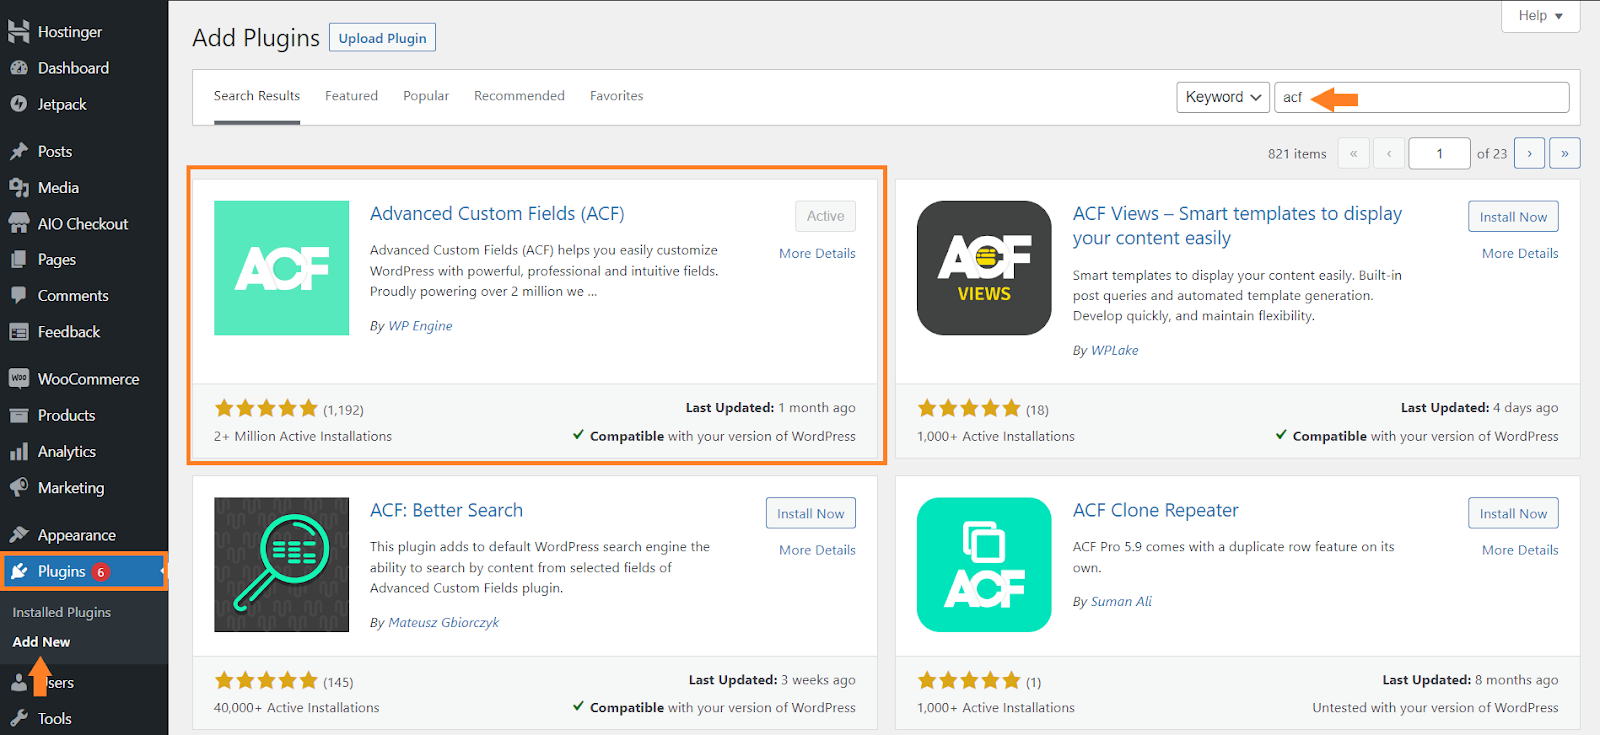
First, you need to install and activate the ‘Advanced Custom Fields (ACF)’ plugin in your store. To install it, navigate to Plugins < Add New from your WordPress dashboard and search for the plugin’s name in the search bar.
Probably, it will be the first result by WPEngine.
Click the ‘Install Now’ button to install it and once it is installed, the button will be replaced with the ‘Activate’ button. Click it to activate the plugin.
Note: I have already installed and activated the plugin which is why I see the ‘Active’ button instead of Install now and Activate buttons.
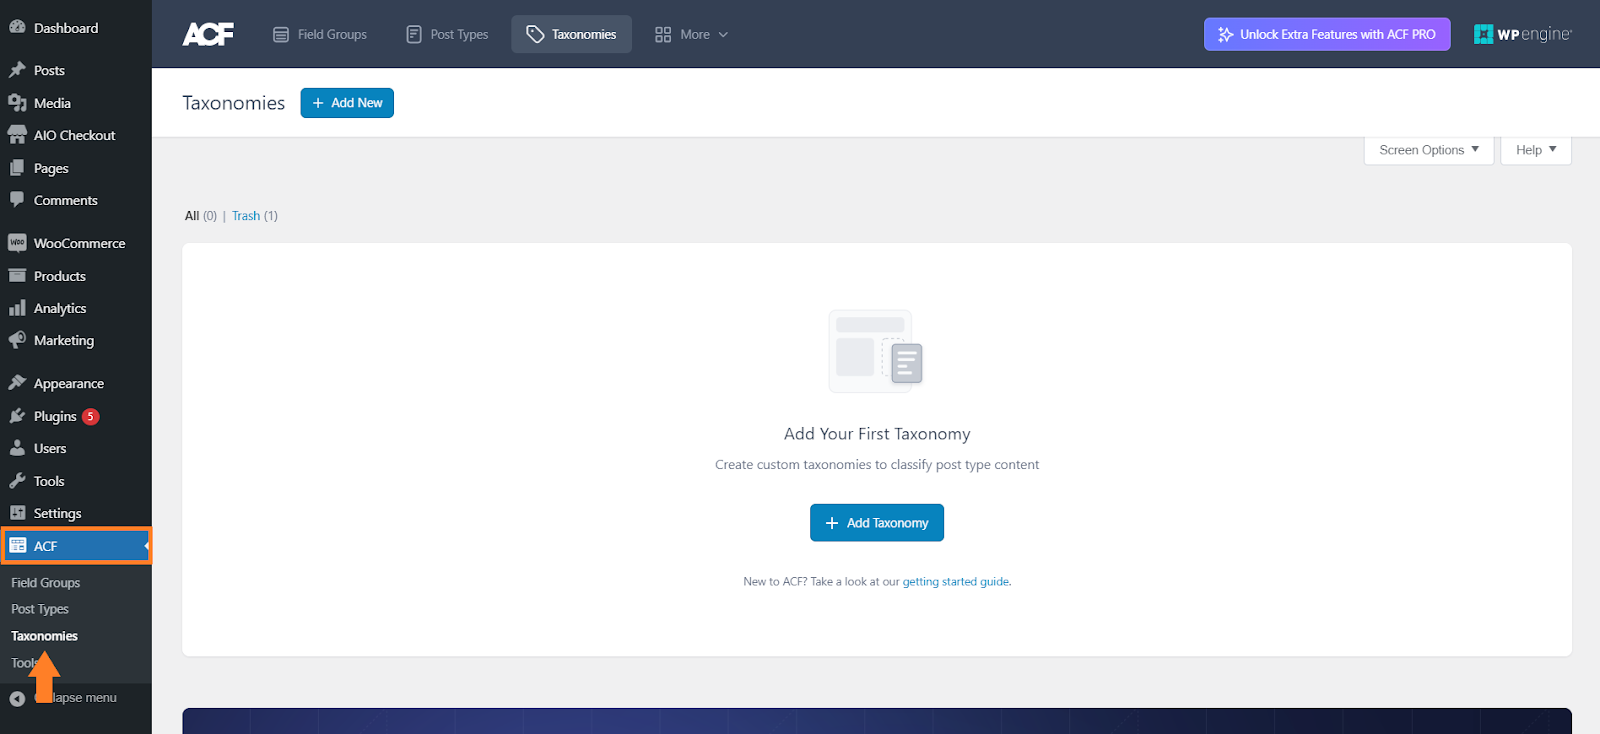
Once the plugin is installed and activated successfully, to create custom product taxonomies, navigate to ACF < Taxonomy from your WordPress dashboard.
This will take you to a page from where you can create as many custom taxonomies as you want. You can also create taxonomies for other post types available in your WooCommerce store.
1.3. Add Custom Taxonomy to WooCommerce Products
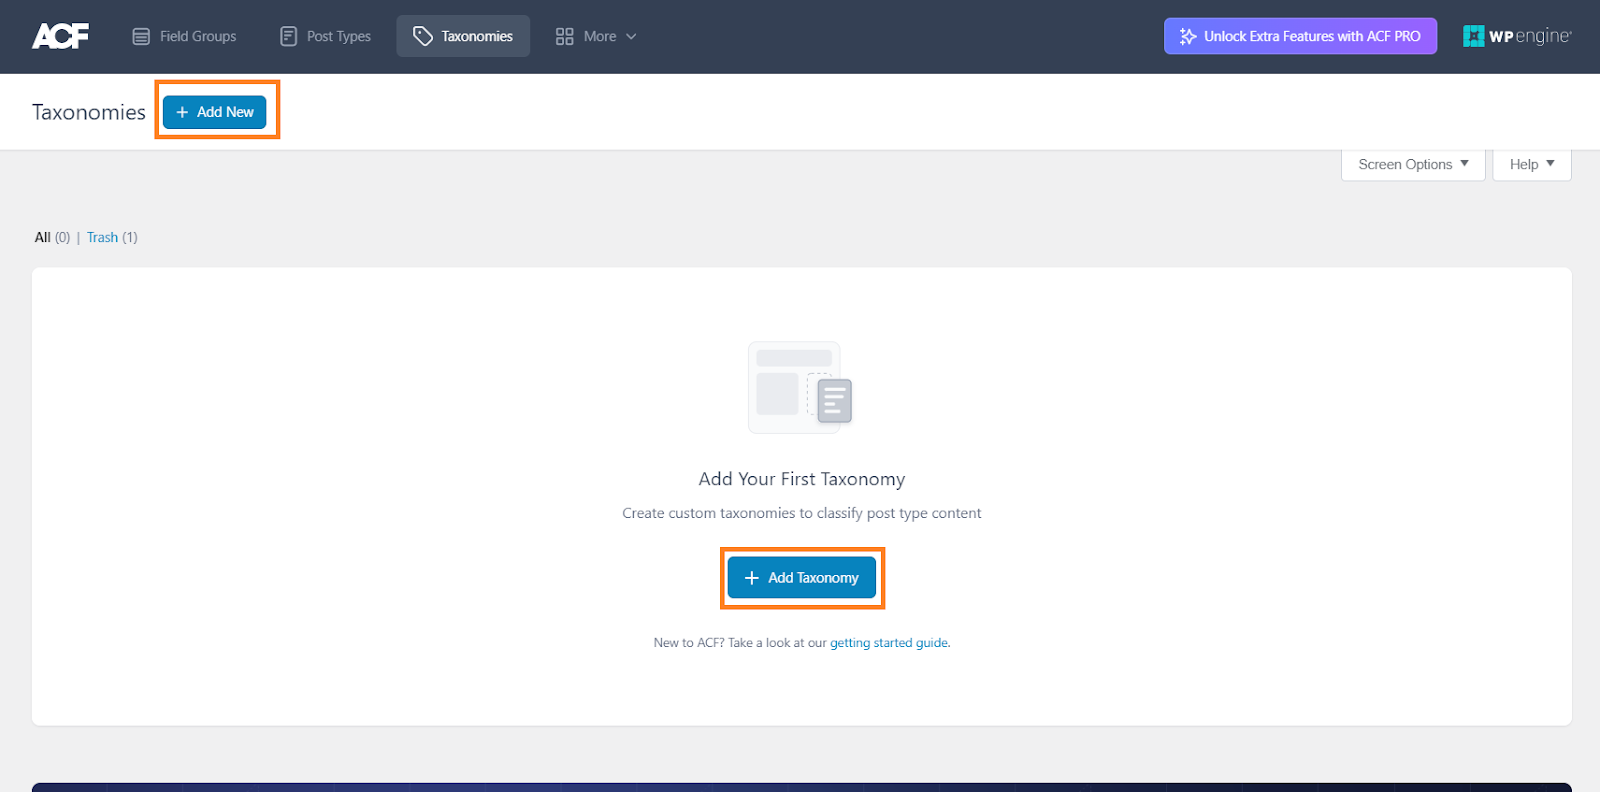
Once you are in the plugin’s taxonomy settings, click the ‘Add New’ button at the top left corner OR click the ‘Add Taxonomy’ button in the middle of the page(If you have not used this plugin before) to create a custom taxonomy.
1.3.1. Add Taxonomy Labels
After clicking it, you’ll be redirected to a page from where you can set the taxonomy name, different properties, and its location.
To add the labels, you’ll see two fields. One is for the plural label and the other one is for the singular label. Make sure to fill both fields with the taxonomy’s plural and singular labels in the ‘Plural Label’ and ‘Singular Label’ fields respectively.
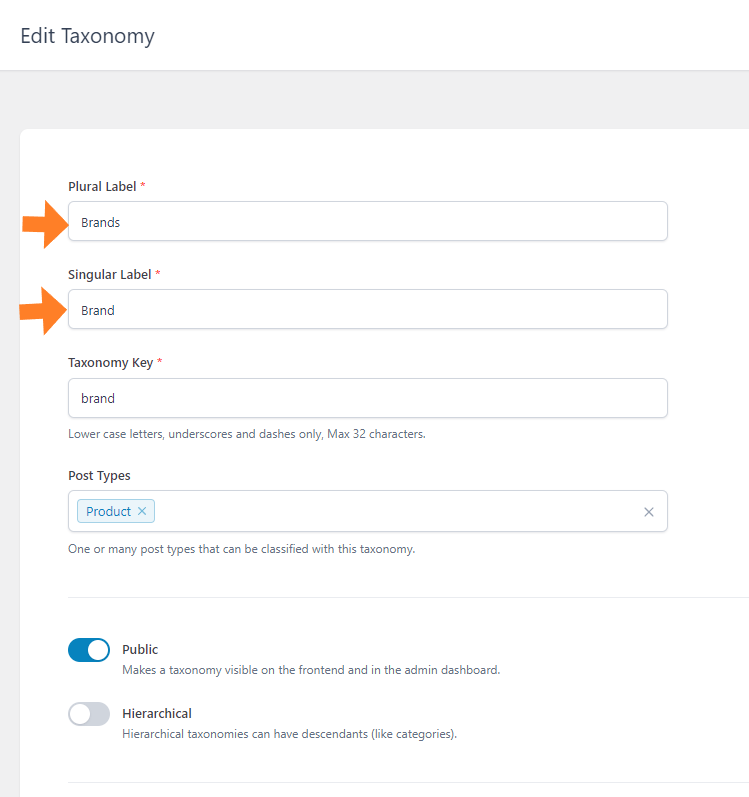
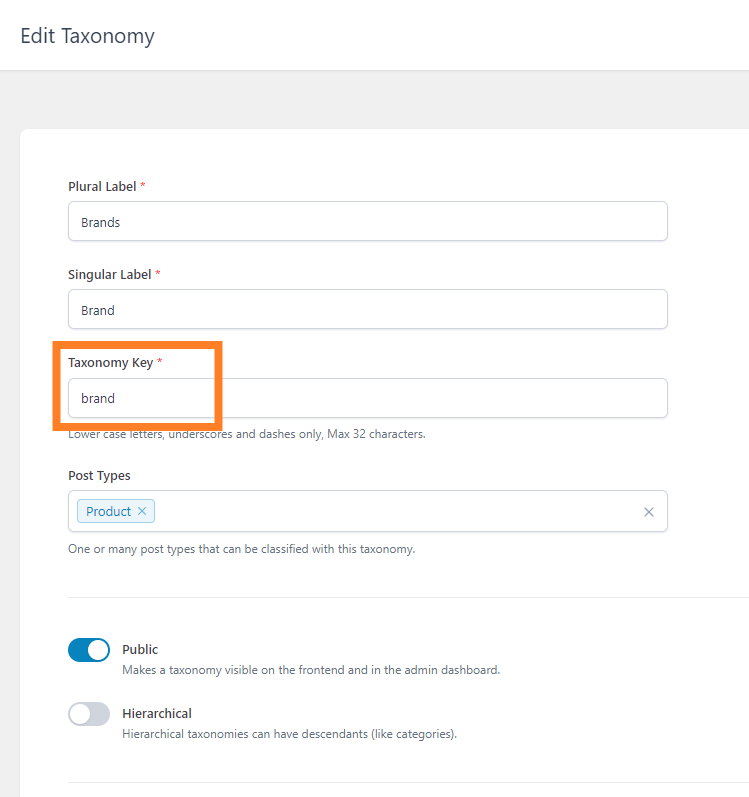
1.3.2. Set Taxonomy Key
The ‘Taxonomy Key’ will automatically be filled based on the singular label. It is the slug of the taxonomy page. You can change it if you want.
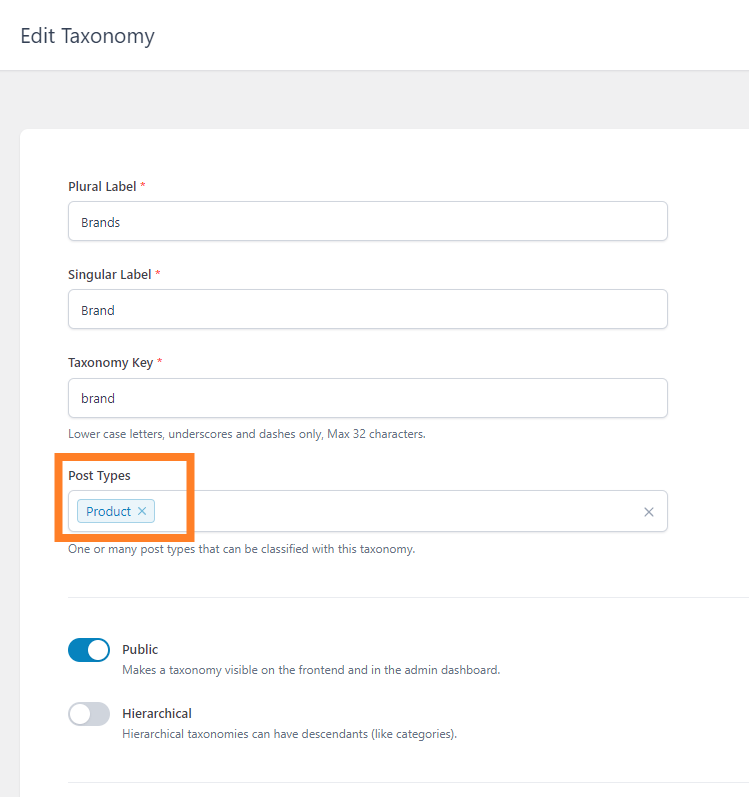
1.3.3. Select the Post Types
After that, you need to select the post types where you want to display this custom taxonomy. As we want to add a custom taxonomy to WooCommerce products, make sure to select ‘Product’ from the dropdown.
It is not a required field and if you haven’t selected a post type from the dropdown then this custom taxonomy will be visible on all the post types in your WooCommerce store.
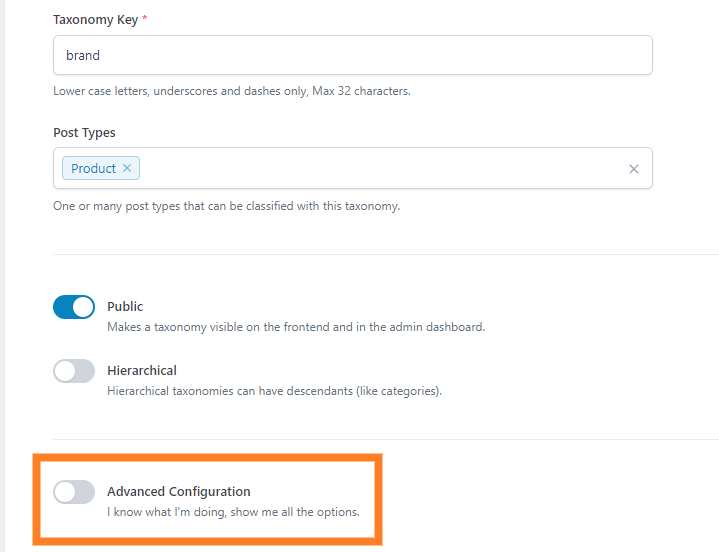
Note: You can also configure the advanced settings for the custom taxonomy but to keep this tutorial to the point and short, I’ll leave the other settings to you as in most cases you won’t need to configure them.
Also, the plugin has deactivated those settings by default but you can enable the advanced settings by toggling the ‘Advanced Configuration’ checkbox.
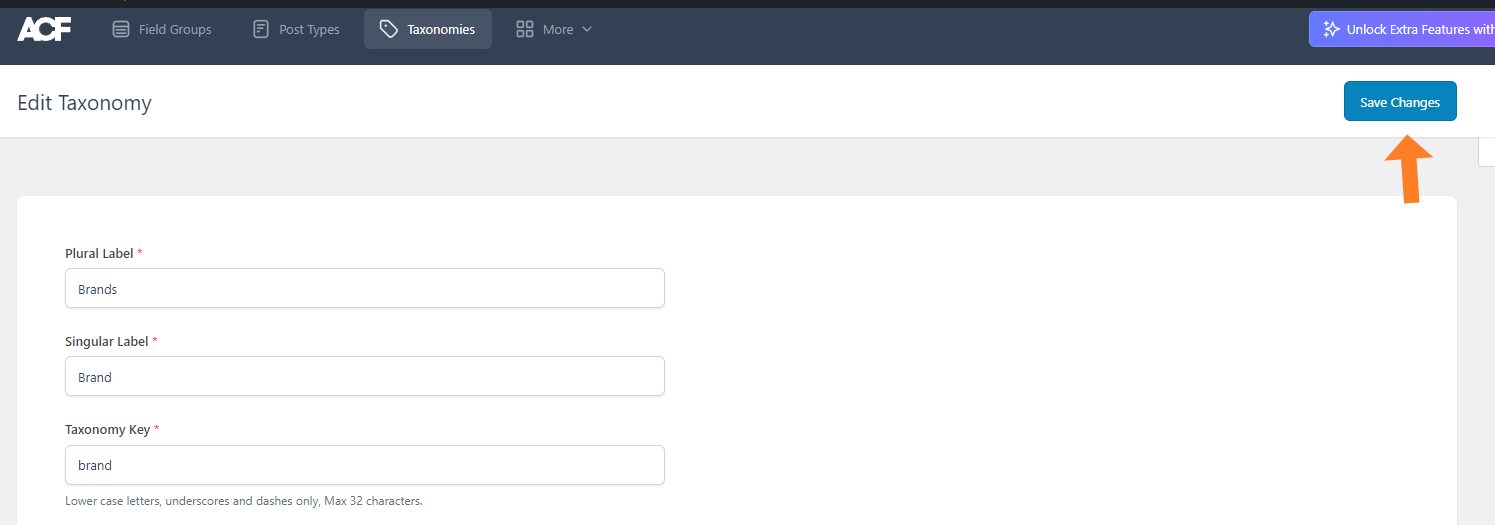
1.4. Save Changes
Once you have made the necessary adjustments to your custom WooCommerce taxonomy, click the ‘Save Changes’ button at the top right corner of your screen to save the settings and create the custom taxonomy.
1.5. Final Results
Once the taxonomy is created, let’s test it.
To test it, I first edited one of the products in my demo store by navigating to Products from my WordPress dashboard and edited the product.
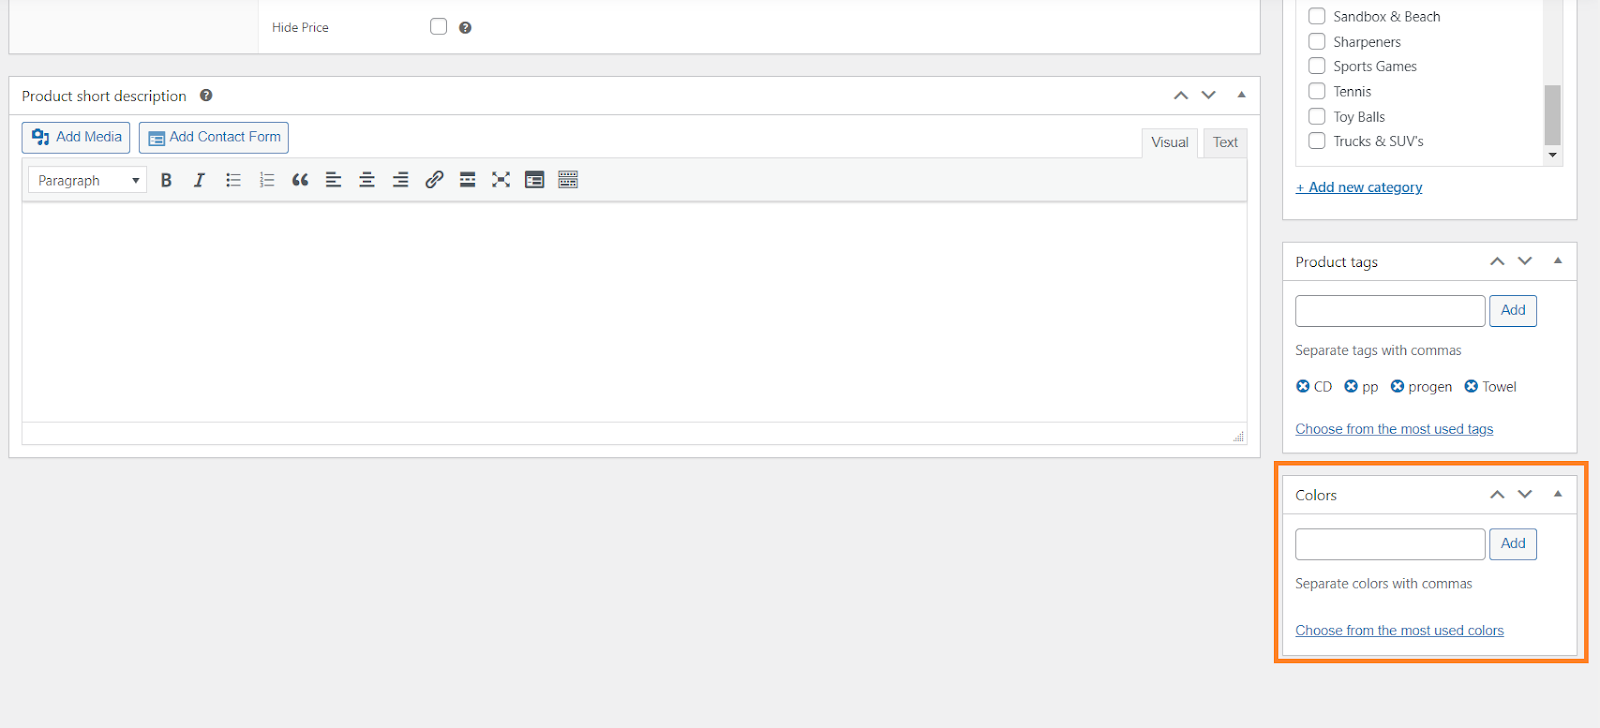
As you can see in the screenshot below, I could see the ‘Brands’ taxonomy section below the tags section. Now you can select different brands from it.
How to Add Options to Custom Taxonomy?
You can add options to the taxonomy that you created by following the above steps in two different ways.
1. Add Product Specific Options
The first way to add options is by adding the option name and clicking the ‘Add’ button on the product edit page. Remember that the options that you’ll add using this method will be product-specific.
In simple words, the options that you’ll create for one product using this method, you won’t be able to see them in other product edit pages. But you can always, add it to individual products.

2. Add Global Options
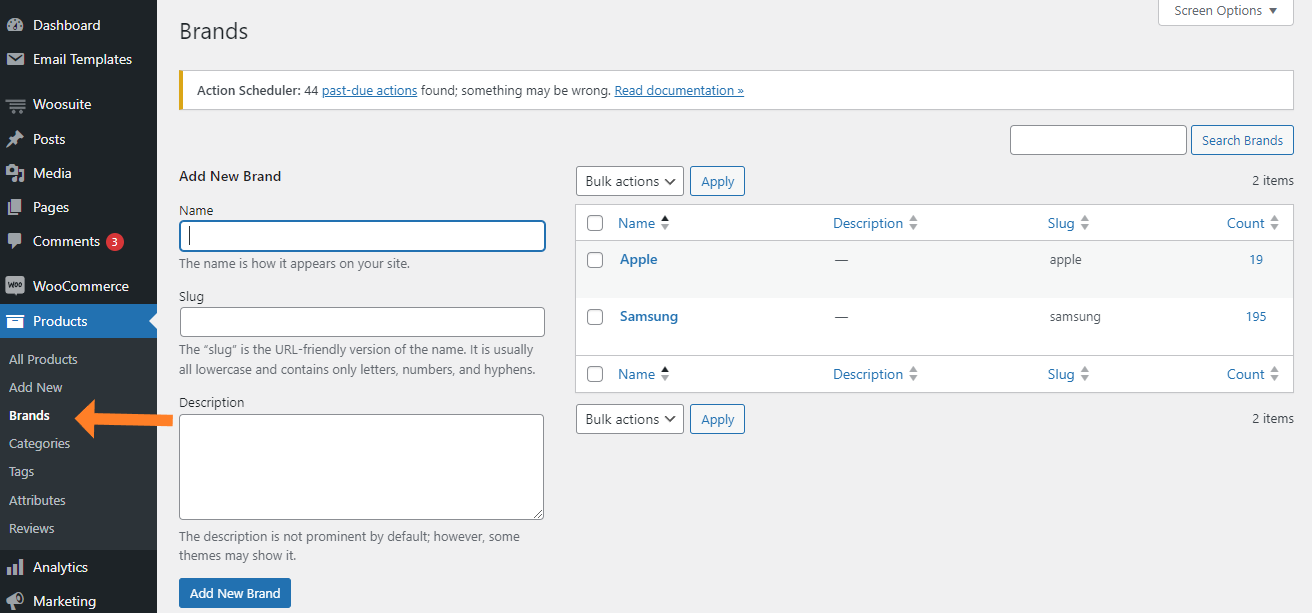
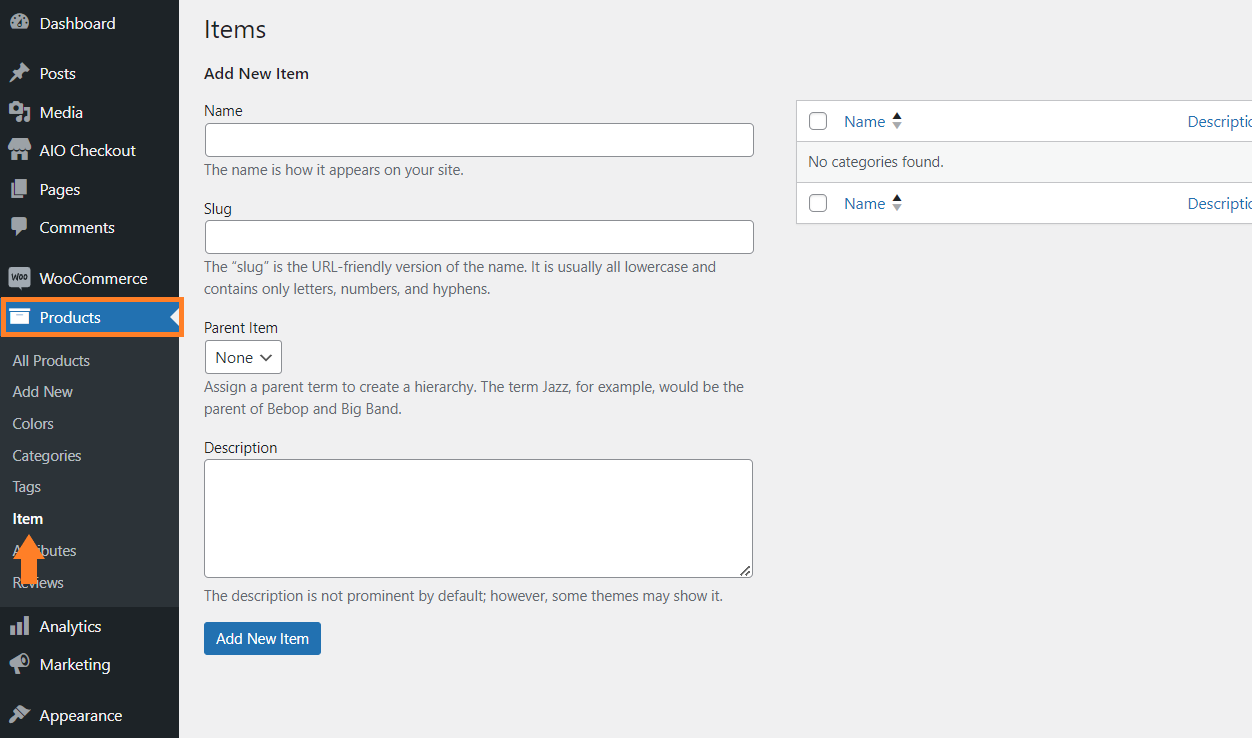
The second way to add options is by navigating to Products < Brands from your WordPress dashboard.
If you have created a different taxonomy then instead of ‘Brands’ you’ll see your custom taxonomy’s name.
The options you’ll add here will be the global options and you can use them in all your products. It works similarly to tags.
How to Display Custom Taxonomies
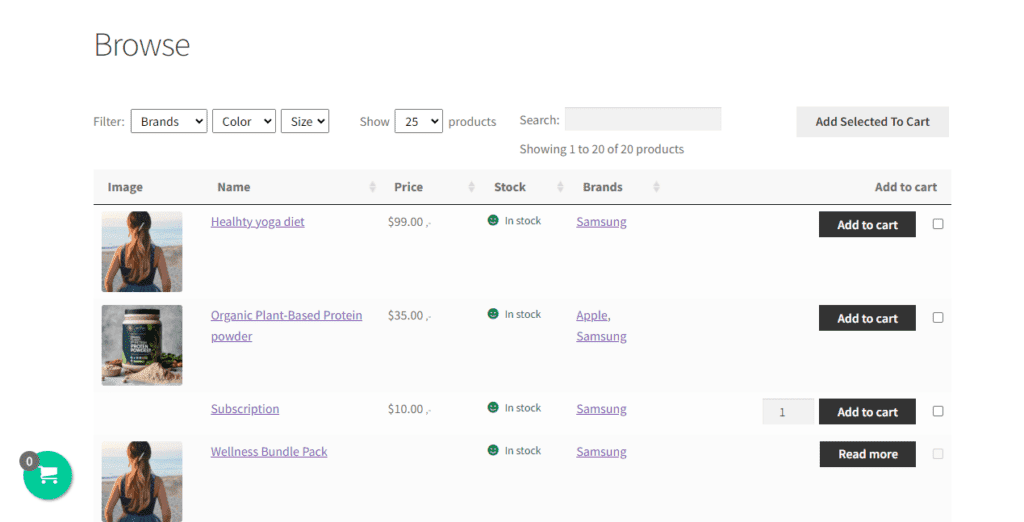
Here you can display your taxonomies by modifying your theme template if you are technical, otherwise, you can use a plugin like the AovUp product table plugin.
With the AovUp product table plugin, you can display your taxonomies in a table format like this:
Method 2: Using the Code
The second method to add custom taxonomies to your WooCommerce store is by using custom code. It may be difficult for you to use this method as it requires a little bit of code understanding.
But, I’ll try to explain the code in simple words so even if you are a beginner with no code experience, you’ll be able to understand and use it.
The following is the code and the steps to use it to add custom taxonomy to WooCommerce products.
2.1. Copy the Code to Add Custom Taxonomy to WooCommerce Products
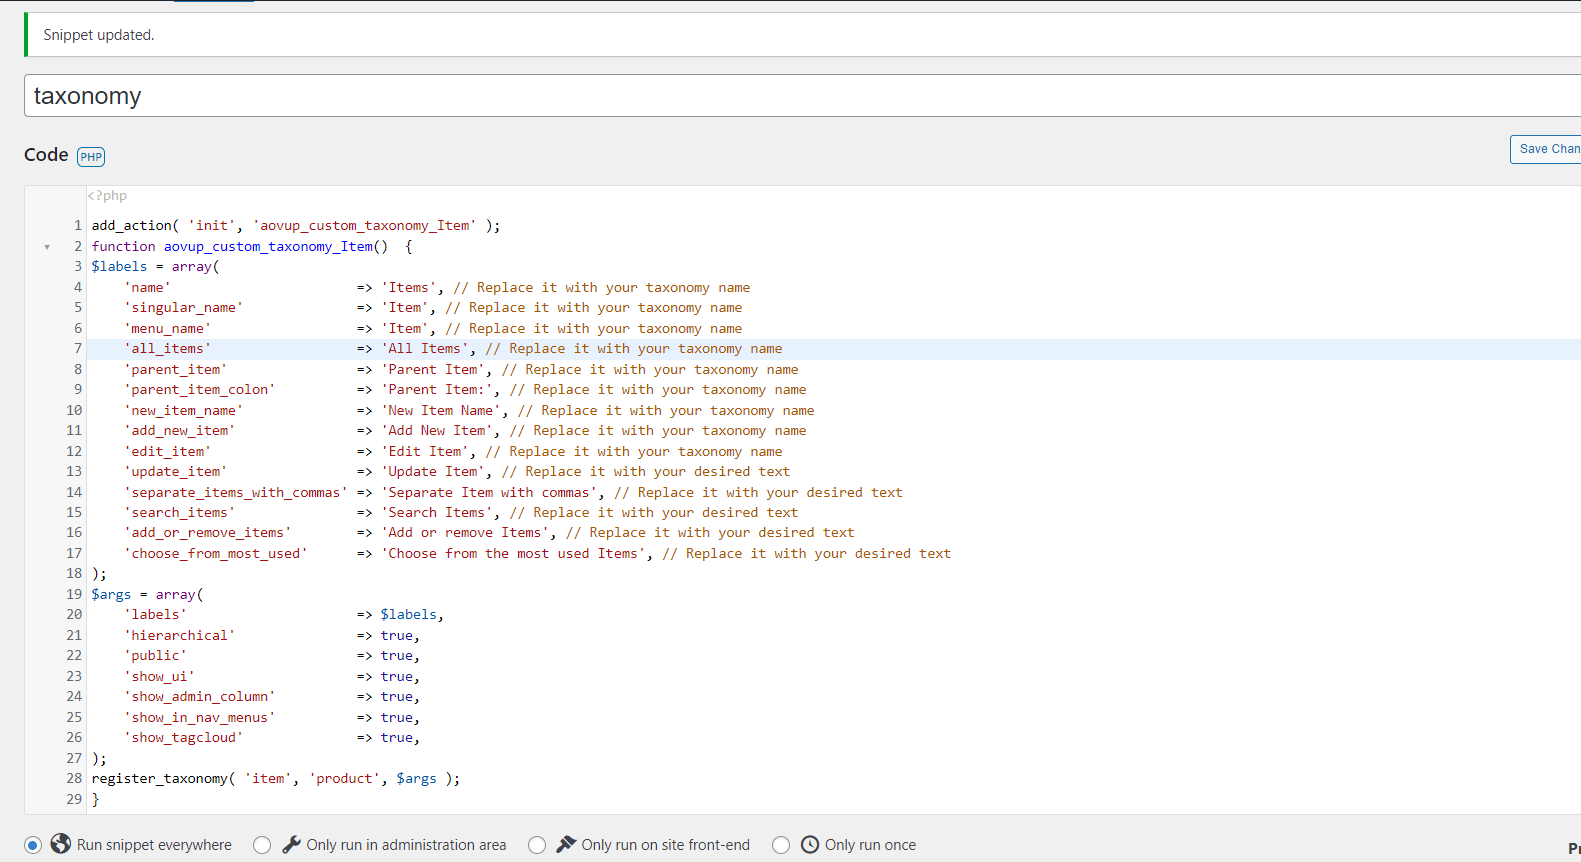
The following is the code to add custom taxonomy to WooCommerce products. Make sure to change the taxonomy name and other labels.
add_action( 'init', 'aovup_custom_taxonomy_Item' );
function aovup_custom_taxonomy_Item()  {
$labels = array(
    'name'                       => 'Items', // Replace it with your taxonomy name
    'singular_name'              => 'Item', // Replace it with your taxonomy name
    'menu_name'                  => 'Item', // Replace it with your taxonomy name
    'all_items'                  => 'All Items', // Replace it with your taxonomy name
    'parent_item'                => 'Parent Item', // Replace it with your taxonomy name
    'parent_item_colon'          => 'Parent Item:', // Replace it with your taxonomy name
    'new_item_name'              => 'New Item Name', // Replace it with your taxonomy name
    'add_new_item'               => 'Add New Item', // Replace it with your taxonomy name
    'edit_item'                  => 'Edit Item', // Replace it with your taxonomy name
    'update_item'                => 'Update Item', // Replace it with your desired text
    'separate_items_with_commas' => 'Separate Item with commas', // Replace it with your desired text
    'search_items'               => 'Search Items', // Replace it with your desired text
    'add_or_remove_items'        => 'Add or remove Items', // Replace it with your desired text
    'choose_from_most_used'      => 'Choose from the most used Items', // Replace it with your desired text
);
$args = array(
    'labels'                     => $labels,
    'hierarchical'               => true,
    'public'                     => true,
    'show_ui'                    => true,
    'show_admin_column'          => true,
    'show_in_nav_menus'          => true,
    'show_tagcloud'              => true,
);
register_taxonomy( 'item', 'product', $args );
}
2.2. Understand the Code (Optional)
This code adds a custom taxonomy called “Item” to your WordPress site, which can be used to categorize products in WooCommerce. Here’s what it does in simple terms:
- It uses the add_action function to tell WordPress to run the function aovup_custom_taxonomy_Item when the “init” action occurs. This is a standard way to add functionality in WordPress.
- Inside the aovup_custom_taxonomy_Item function, it sets up the labels and arguments for the custom taxonomy.
- ‘name’: This is the name of the taxonomy, which is set to ‘Items.’ You can change it to whatever the taxonomy name to want to set or create.
- ‘singular_name’: The singular name of the taxonomy, set to ‘Item.’
- ‘menu_name’: The name that will appear in the WordPress admin menu, set to ‘Item.’
- ‘all_items’: Text for displaying all items.
- ‘parent_item’: Text for the parent item.
- ‘parent_item_colon’: Text for the parent item when used with a colon.
- ‘new_item_name’: Text for a new item.
- ‘add_new_item’: Text for adding a new item.
- ‘edit_item’: Text for editing an item.
- ‘update_item’: Text for updating an item.
- ‘separate_items_with_commas’: Text for separating items with commas.
- ‘search_items’: Text for searching items.
- ‘add_or_remove_items’: Text for adding or removing items.
- ‘choose_from_most_used’: Text for choosing from the most used items.
- It sets up additional arguments in the $args array:
- ‘labels’: This specifies the labels for the taxonomy.
- ‘hierarchical’: This is set to ‘true,’ which means that the taxonomy behaves like a category (i.e., it can have subcategories).
- ‘public’: This makes the taxonomy publicly accessible.
- show_ui’: This enables the taxonomy to be displayed in the WordPress admin interface.
- ‘show_admin_column’: This makes the taxonomy appear as a column in the product list in the admin panel.
- ‘show_in_nav_menus’: This allows the taxonomy to be used in navigation menus.
- ‘show_tagcloud’: This enables the taxonomy to be used in tag clouds.
- Finally, it registers the custom taxonomy with the name ‘item’ and associates it with the ‘product’ post type (WooCommerce products) using register_taxonomy.
2.3. Paste the Code to Your WooCommerce Store
Once you have copied the code, you need to paste it into your store to add the custom taxonomy to WooCommerce products.
To paste the code to WordPress, there are several methods available and you can use the one that suits you best. Here’s the guide to help you learn about all the available methods to add code to WordPress.
I have used a plugin to add the code to my demo store.
2.4. Final Results
Now let’s see if the code works.
To test it, I edited one of my products and scrolled to the bottom. I could see the ‘Items’ section below the taxonomy that we added using the plugin.
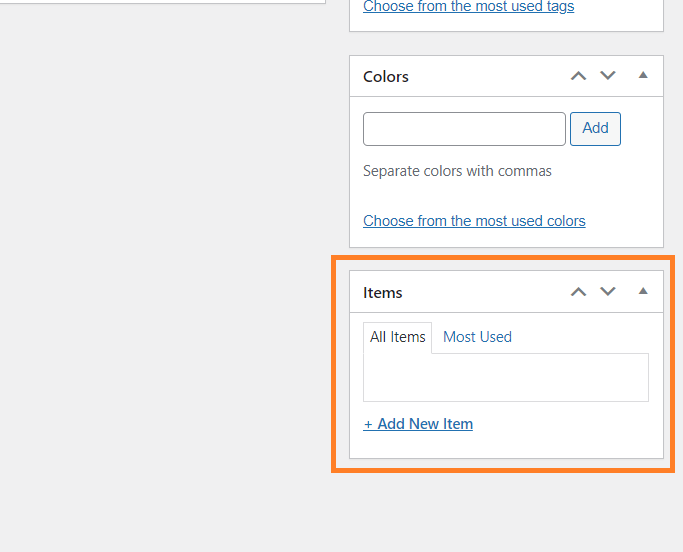
You can also add options to it in the same way we added above. The above code will also add the custom taxonomy to the product menu.
Final Thoughts
That’s it for today’s article.
I hope it was helpful to you and that you were able to add custom taxonomies easily using ACF or the custom code we provide for WooCommerce products. Adding taxonomies to help your customers search for a product is an excellent idea to improve the customer experience.
Your reason for adding custom taxonomies to WooCommerce might differ from what I mentioned in this article but you need to give an efficient way for your customers to search or sort products using custom taxonomies or fields.
This article only helps you add the taxonomies to your WooCommerce store but to give your customers a more effective way to find products based on the custom taxonomies, you can follow the sort products tutorial.


