Allowing customers to create personalized products can be an excellent addition to increasing your revenue and customer engagement. WooCommerce alone doesn’t allow you to create a user-friendly interface for customers to personalize the products.
You will need to use a third-party extension to add this feature or functionality to your store. This article will guide you through the step-by-step process to allow customers to create products as they want.
After reading this tutorial, you’ll be able to sell any sort of personalized product. No matter what you’re selling—clothes, gift sets, gadgets, home decor, or anything else—you can allow your customers to add special options to personalize their products before they buy them.
Preview:
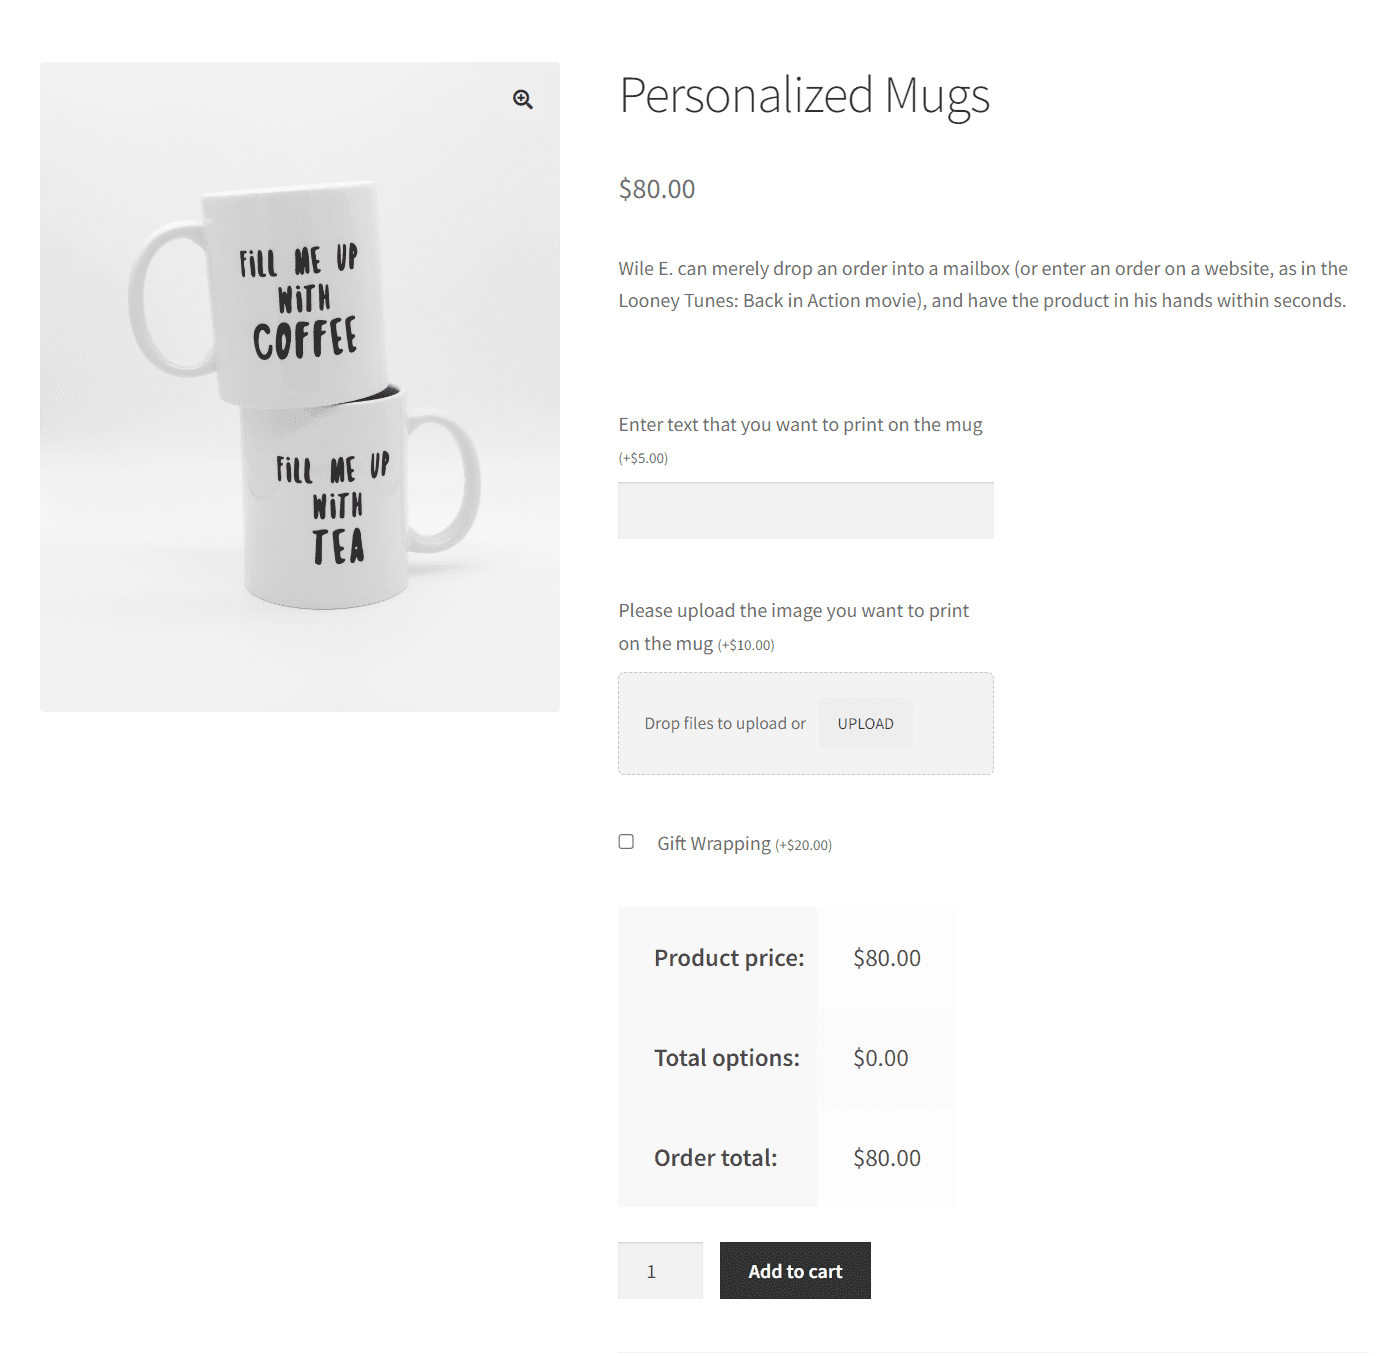
Here’s the preview of the final results.

Without any further ado, let’s jump into it.
On This Page
Common Challenges While Creating a WooCommerce Personalized Product
When creating WooCommerce personalized products, several challenges may arise. Here are the top 4 important challenges:
- Complexity of Customization: Balancing flexibility with simplicity in offering customization options is crucial. Ensuring customers can easily personalize products without feeling overwhelmed is key to a successful user experience.
- User Interface Design: Designing an intuitive and user-friendly interface for customizing products is essential. A well-designed interface can help customers navigate the customization process smoothly and increase conversion rates. You can use a plugin like AovUp Product Add-ons & Extra Options to create an amazing interface.
- Data Management: Effectively managing the data associated with personalized products, including custom text, images, or designs, is critical. This includes securely storing and processing customer-provided data while ensuring accuracy and consistency in customization.
- Quality Control: Maintaining high-quality standards for personalized products is essential for customer satisfaction. This involves ensuring accurate product printing, engraving, or customization and conducting thorough quality checks to catch errors before shipping.
Addressing these challenges requires careful planning, attention to detail, and continuous improvement to provide customers with a seamless and satisfying personalized shopping experience.
By overcoming these challenges, you can focus on getting the most out of these products, let’s dive in and see how we can create such products.
How to Allow Customers to Create a WooCommerce Personalized Product?
I’ll use the AovUp Product Add-ons & Extra Options plugin to create WooCommerce personalized products. It is a premium plugin with exceptional features and user-friendliness.
I’ll use the example of personalized mugs and allow customers to print quotes, images, or any sort of art. You can create any product you want, the process would be the same, you will just need to change the fields.
Follow the following steps to create such products and improve user engagement and sales.
1. Create a New Product
The first thing you need to do is to add a new product to your store. You can also edit one of the existing products.
But ensure the product you have added to your store is simple, and you do not create its variations. This is because we’ll use the plugin to add options and variations.
I’ll add a new product to my store. To do so, navigate to Products > Add New from the WordPress dashboard.
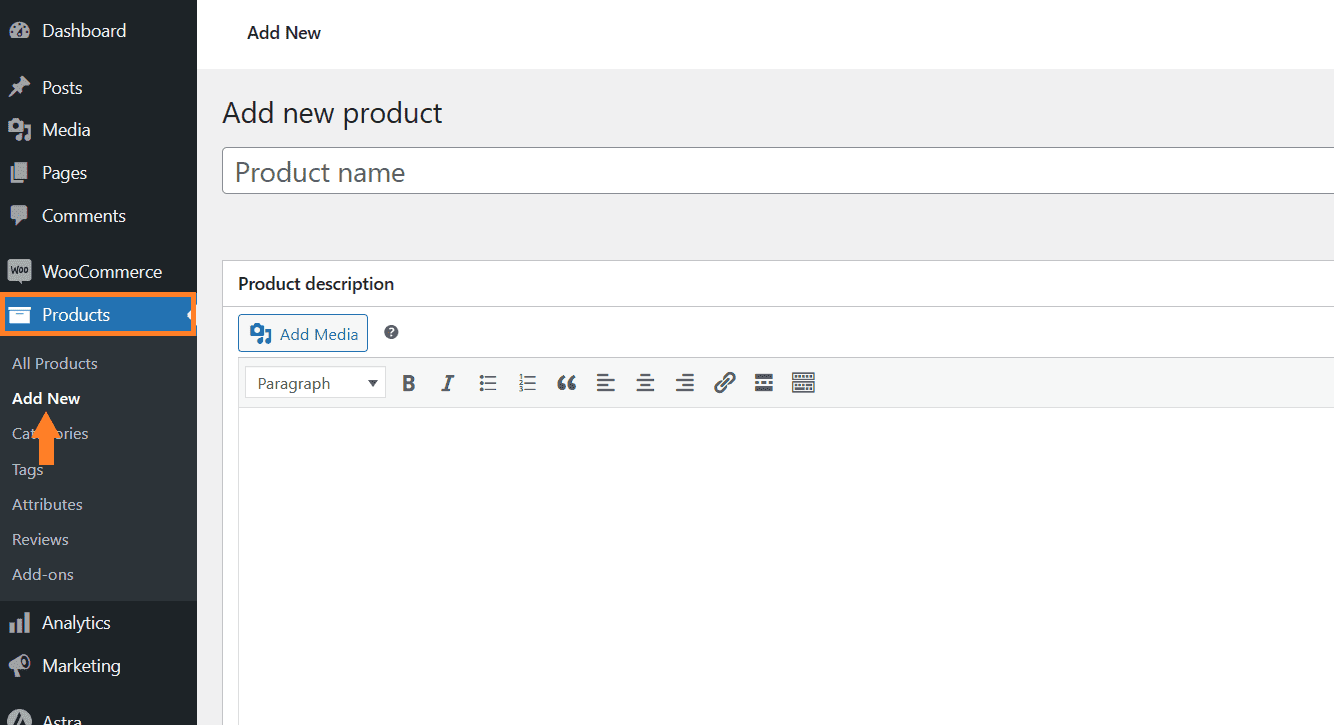
1.1. Add the Product Details
Once you click it, you’ll be redirected to the page where you can add the details and publish the product.
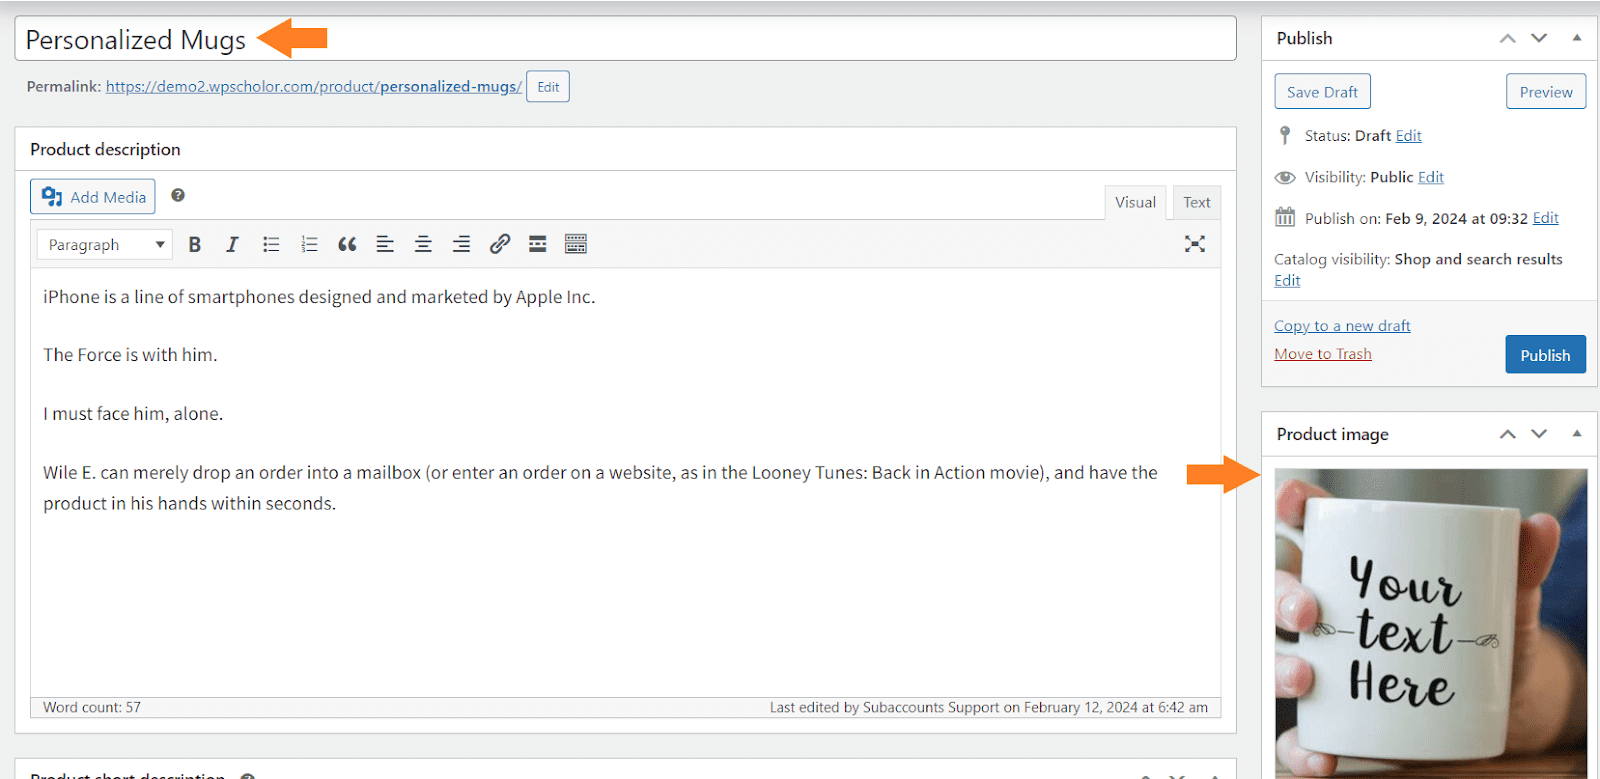
Create a simple product and add the product title, image, and price. You can also add a description if you want. There are several other options that you can configure from there.
Note: The price you’ll enter here will be the base price, and the options that we’ll create later in this article will be charged extra.
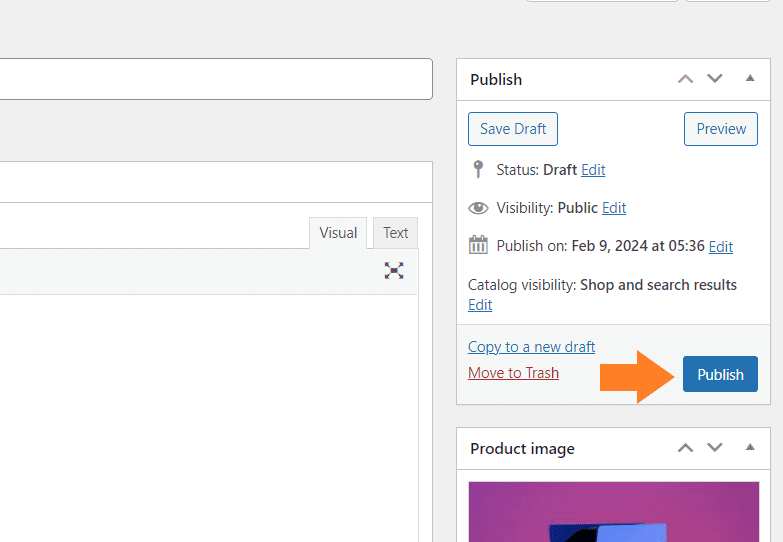
1.2. Publish the Product
Once you have added the necessary details, click the blue ‘Publish’ button at the top right corner of your screen to publish the product.
Navigate to AovUp > Product add-ons from your WordPress dashboard
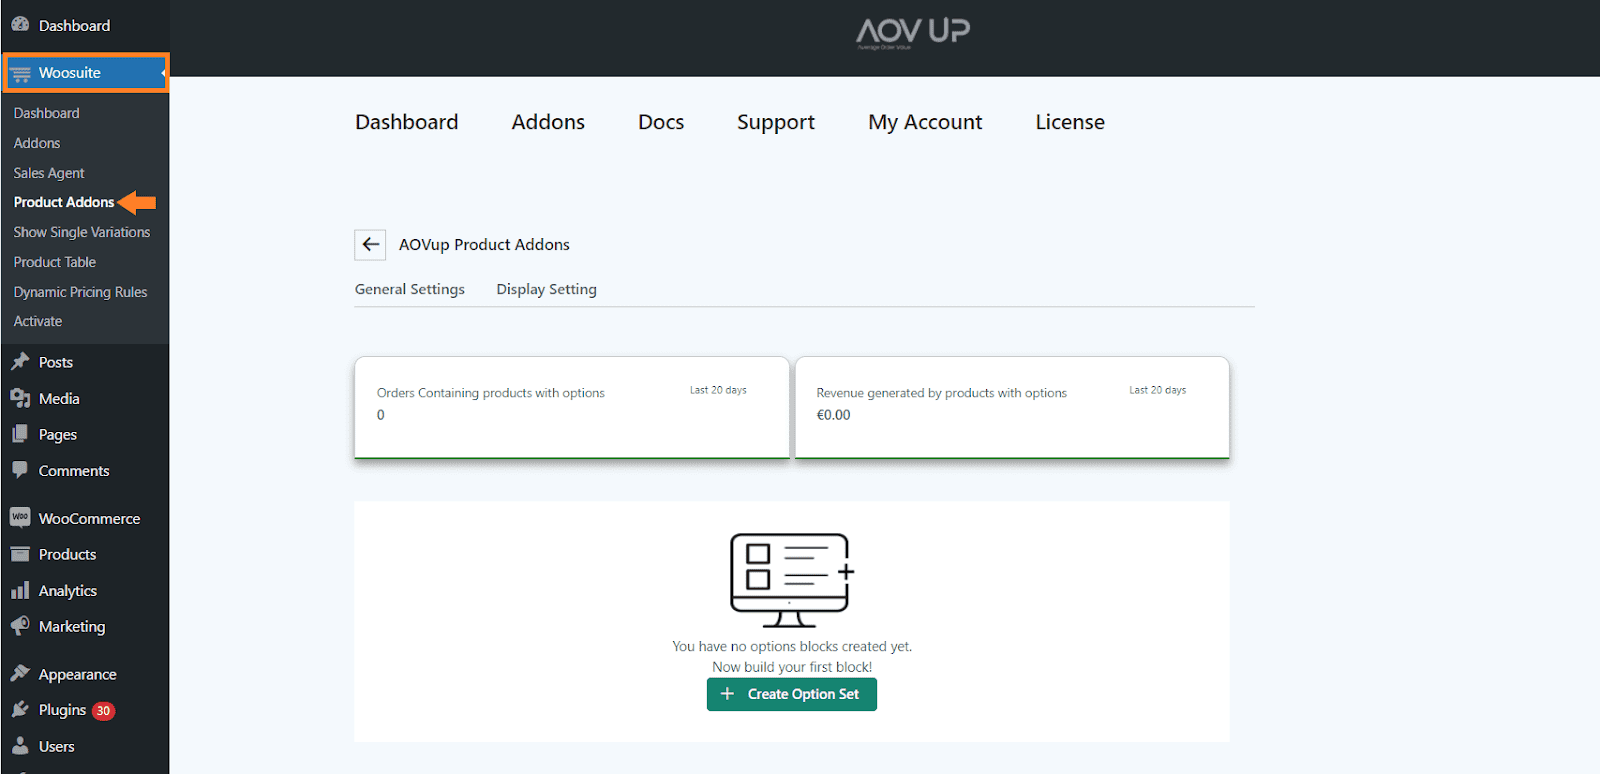
3. Create a WooCommerce Personalized Product
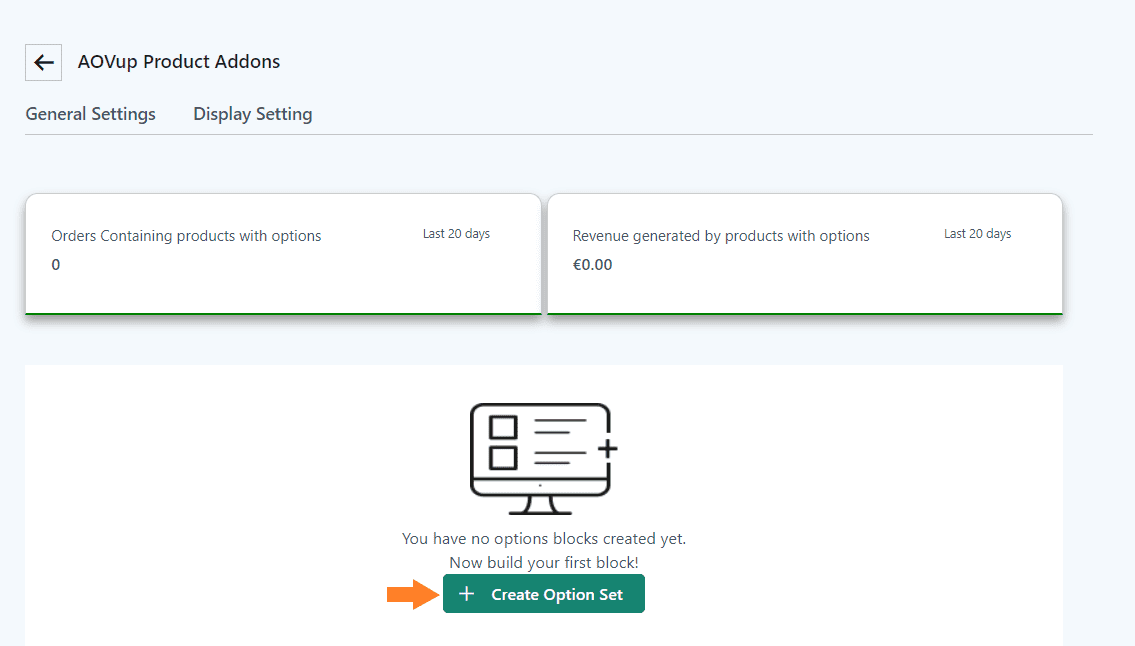
Next, we must add fields or options to the product we created above to allow customers to personalize it. For that, we will need to create an option set.
Click the ‘Create Option Set’ button in the middle of the page to add an option set.
3.1. Add the Option Set Name
After clicking it, you will see a new interface with different settings. In the ‘Option set name’ field, add the name. It could be anything you want, but you may want to keep it as descriptive as possible.
It’ll help you if you are working with different option sets.
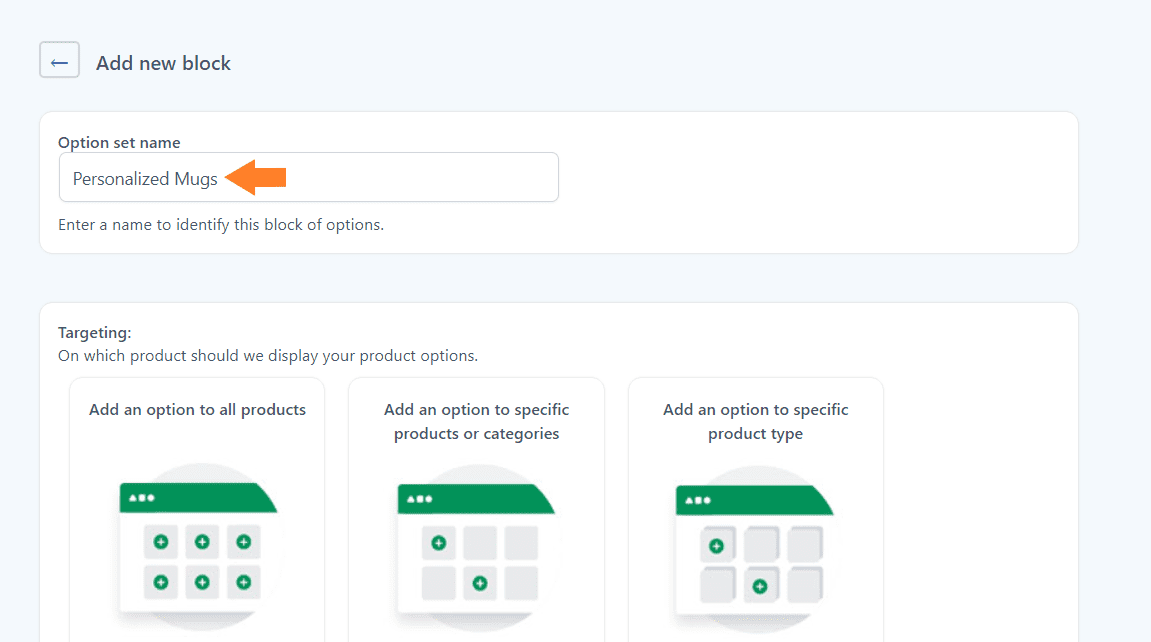
3.2. Select the Product
The next thing you need to do is select the product on which you want to display this option set. You have three different options:
- Add an option to all products.
- Add an option to specific products or categories.
- Add an option to a specific product type.
You can select any of them depending on your goals. However, I only want to display this option set for the product I added above in this tutorial.
- I’ll select the ‘Add an option to specific products or categories’ option by clicking its image.
- Once you select it, two new fields will appear below it, from which you can select the products and categories. I have selected a product from the ‘Show in Products’ dropdown.

4. Add Options to Create Personalized Products
Now that we have added an option set to a specific product, we need to add options. Users can select the option and order their personalized products. As mentioned above, I’ll allow customers to print quotes, images, or art on the mug.
So, I’ll add three different options. Depending on the product you are creating, you may want to add the options. It is also important to mention, I’ll only show you the process to add one option and you can follow the same steps to add more.
The plugin gives you a variety of options to fulfill your requirements. The following is the list of fields or options you can add using this plugin.
- Heading
- Text
- Separator
- Checkbox
- Radio buttons
- Input text
- Textarea
- Color Swatch
- Number
- Select
- Label or image
- Product
- Date
- File Upload
- Color picker
To add an option to this set click the ‘Add New Option’ button at the bottom of the page, and select the field you want to add. I’ll add an input text field to allow customers to add the quote or text they want to print on their mug.

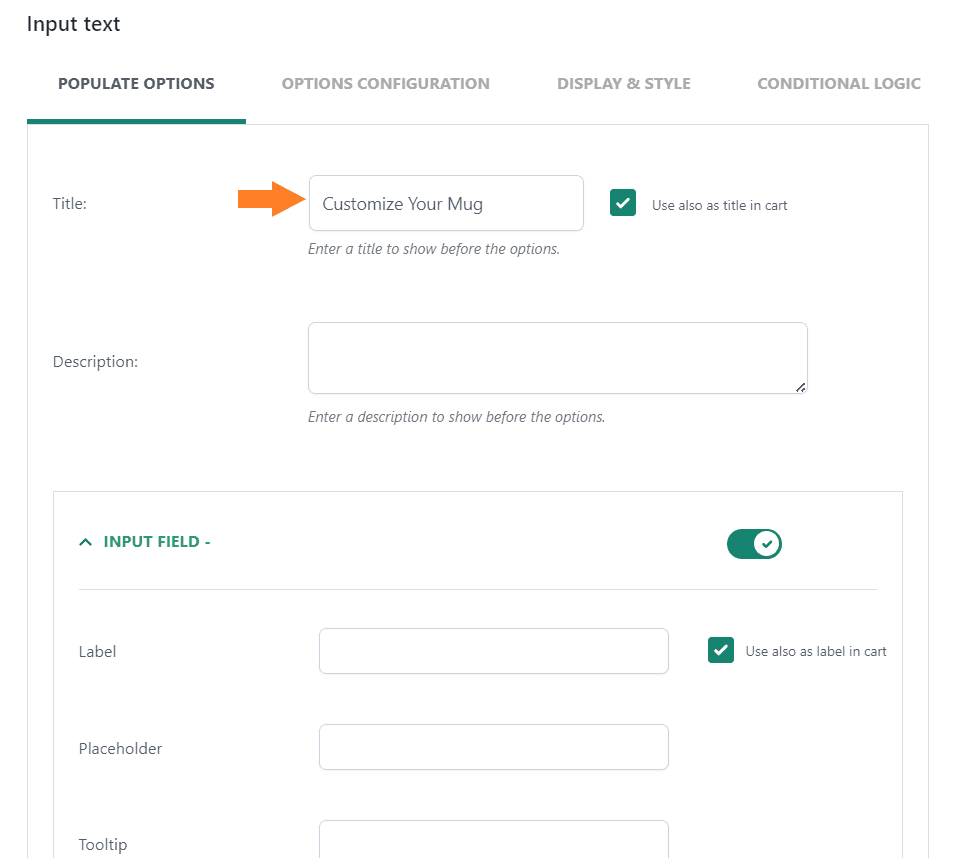
4.1. Add the Field Title
Once you select the field, a new popup will slide-in from the right side of your screen. From that popup, you can configure the styling and other options of the field.
These will be the same for most of the fields.
First, add the option title in the ‘Title’ field. It’ll be displayed on the front end. If you want, you can also add the description. It will be displayed before the option.
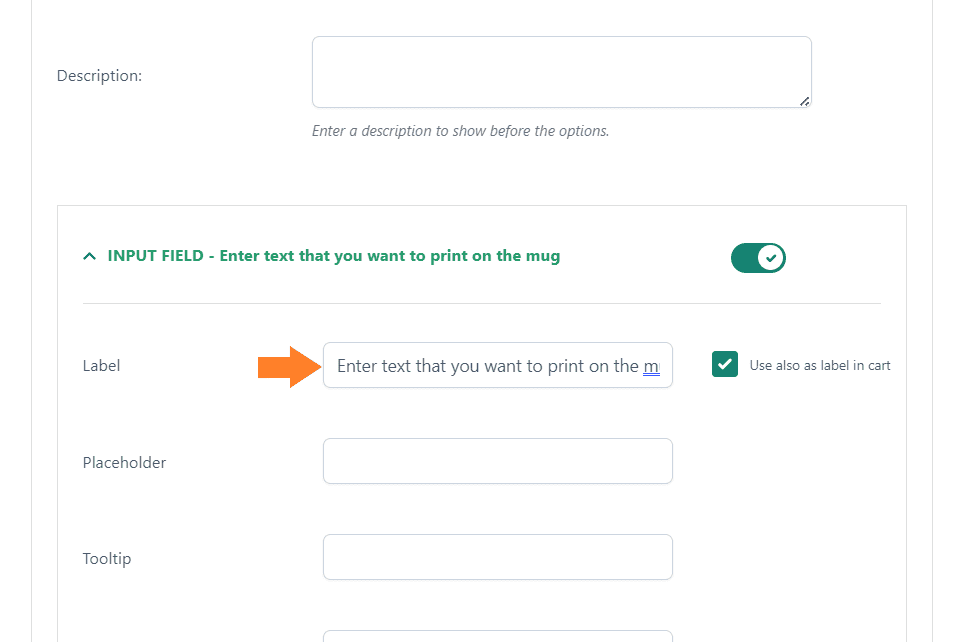
4.2. Add the Field Label
After the title, add the input field label in the ‘Label’ field. You can also add a tooltip and description.
4.3. Set the Custom Field Price
To set the price for the addon or option, you will get three options:
- Product price doesn’t change – set option as free
- Product price increase – set option price
- Product price decrease – set discount
You can select the one that best matches your requirements, but I have selected the ‘Product price increase – set option price’ option from the price dropdown.
After selecting it, You can set a regular or sales price for the option. I’ll add the regular price in the ‘Regular’ field.
Note: You also get an option to set a fixed price or percentage of the base price for this option. I have added a fixed amount.

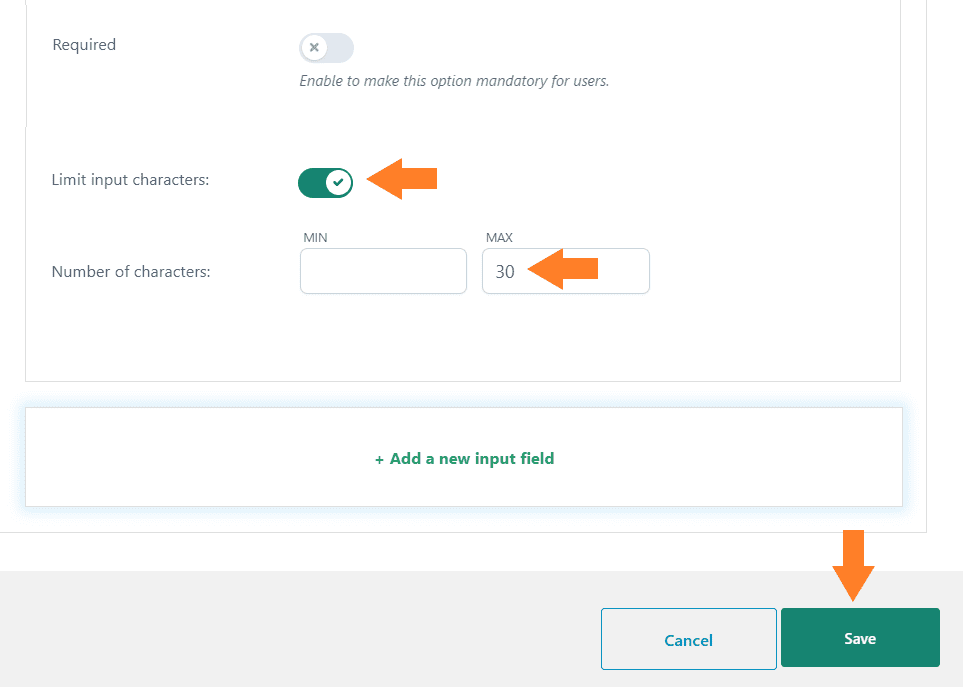
4.4. Limit the Input Characters
Next, you may also want to limit the input characters and make it a required option. I don’t want to make it a required option, so I’ll leave this option off.
And to limit the characters by toggling the ‘Limit input characters’ button. You will also need to add the minimum and maximum character numbers allowed.
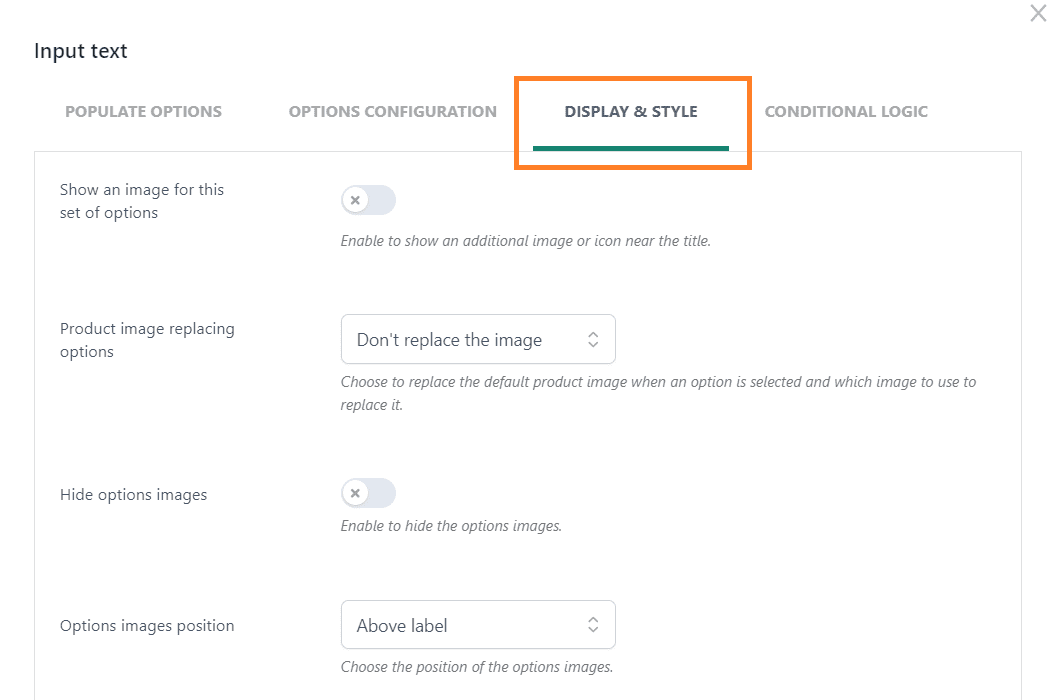
5. Configure the Option Display & Style
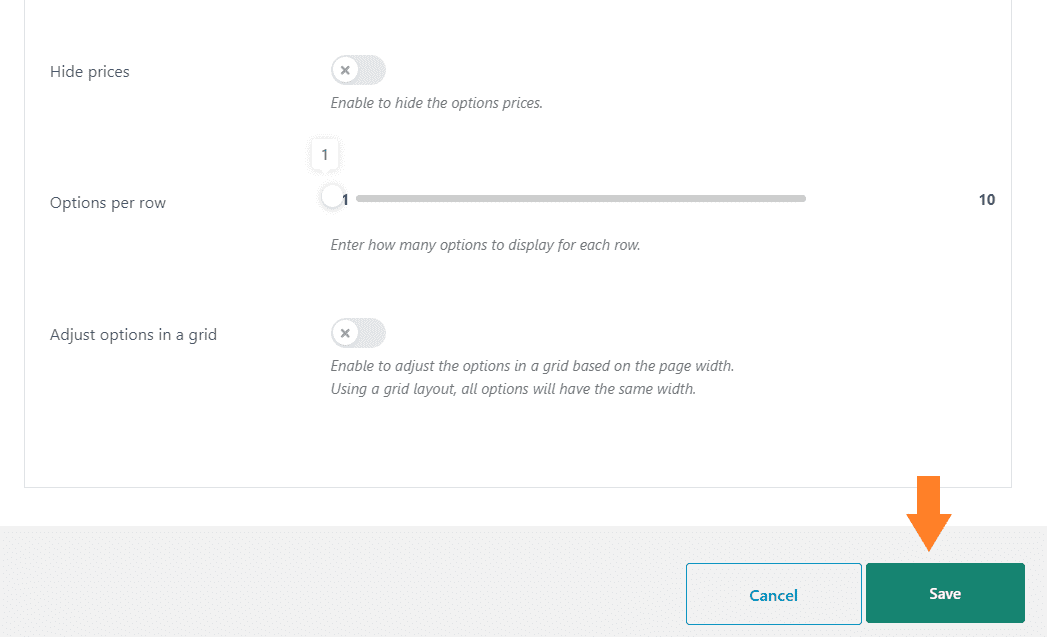
You can also customize the display & style of each field. Click the ‘Display & Style’ tab within the popup. You’ll get several different styling options.
I’ll not go into the details, you can explore them yourself.
After making the required adjustments, don’t forget to click the ‘Save’ button within the popup to save the settings.
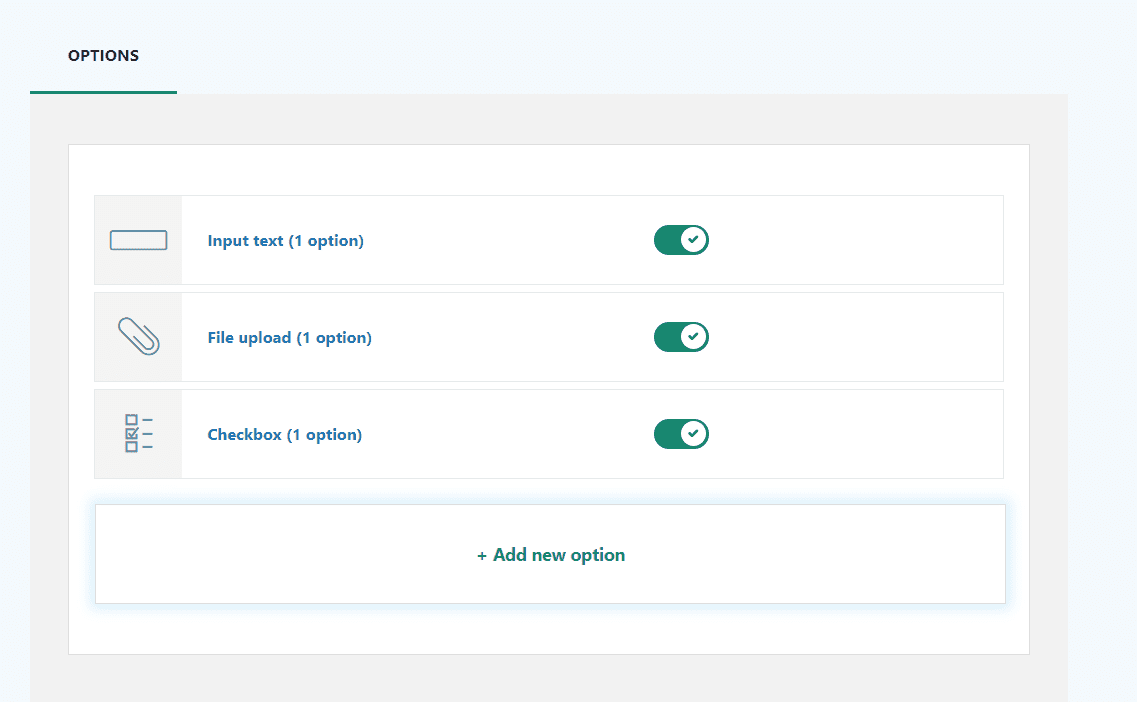
6. Add More Options
You can add more fields depending on the product you are creating and your requirements. To add more options, you can follow the above steps.
I have added different options and configured them accordingly.
7. Final Results
Let’s test the final results.
I visited the product page and as you can see the options we added at the backend are being displayed on the front. I could select the option to add its price to the product’s base price.
I could customize the mug and add the options I want.
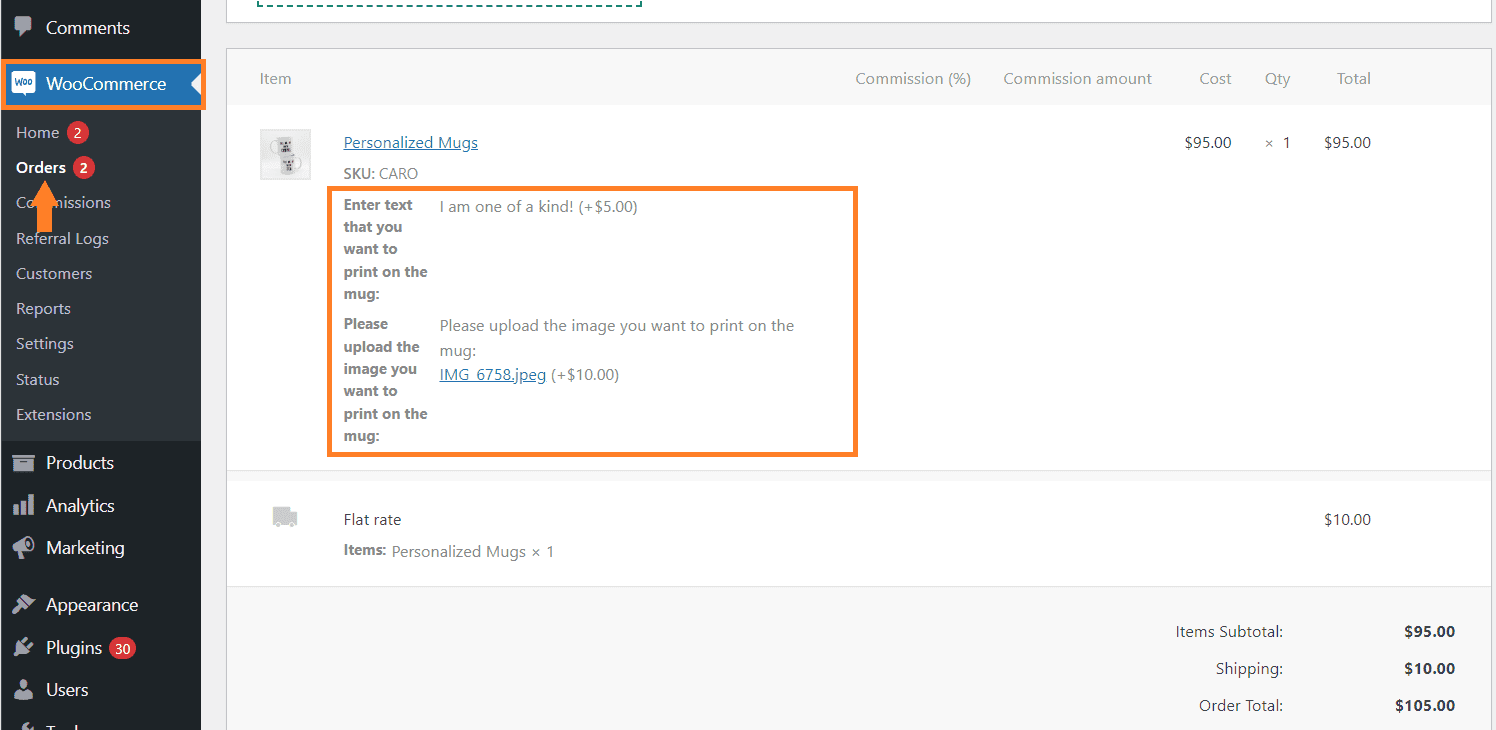
Note: You can access the user’s selected information from the backend by navigating to WooCommerce > Orders and selecting the order that the user made. At the bottom, you’ll find the information.
Conclusion
That’s it for today’s article.
I hope it was helpful to you and you were able to create personalized products in your WooCommerce store. It is an excellent way to engage users and increase your revenue.
The AovUp Product add-ons & Extra Options plugin gives you a simple and user-friendly interface to create as many personalized products as you want. It also creates a user-friendly interface for customers to personalize their products.
Ready to get started? Download the AovUp Product add-ons & Extra Options and transform your user experience!


