In today’s article, I’ll walk you through the step-by-step process to disable the quantity picker on the cart page. There are several reasons, why you might want to do this, for example, if you have a limited product stock or selling the products at a fixed price per item.
At the end of this tutorial, I’ll also share some valuable tools and guides to improve your WooCommerce cart and checkout pages.
So without any further ado, let’s jump into the tutorial.
On This Page
- 1 How to Disable the Quantity Change in WooCommerce Cart Page?
- 1.1 Method 1: Disable Quantity Picker in Cart Page Using the Code
- 1.2 Method 2: WooCommerce Disable Quantity Picker in Cart Page Using the AIO Checkout Plugin
- 1.2.1 1. Install and Activate the AIO Checkout Plugin
- 1.2.2 2. Navigate to the AIO Checkout
- 1.2.3 3. Click the MiniCart
- 1.2.4 4. Enable the MiniCart
- 1.2.5 5. Automatically Open MiniCart When the Product is Added to the Cart
- 1.2.6 6. Override the Default Cart Icon
- 1.2.7 7. Disable the Quantity Picker
- 1.2.8 8. Save Settings
- 1.2.9 9. Final Results
- 2 How to Improve the WooCommerce Cart and the Checkout Pages?
- 3 Conclusion
How to Disable the Quantity Change in WooCommerce Cart Page?
There are two methods to disable the quantity change in the WooCommerce cart page. I’ll explain both methods.
The following are the two methods.
Method 1: Disable Quantity Picker in Cart Page Using the Code
The first method to disable the quantity change in the WooCommerce cart page is by using the code. You may find it difficult to maintain if you don’t have any technical experience.
I’ll use a code snippet that you can copy and paste to your store to disable the quantity change.
Please follow the following steps.
1. Code Snippet to Disable the Quantity Change
I’ll break the code snippet so you can also have a bit of its understanding.
1.1. Filter Hook
Disabling the quantity change in the cart page requires the filter hook that refers to specific points in the WooCommerce cart page. Following is the hook that you should use.
add_filter( ‘woocommerce_cart_item_quantity’, ‘wc_cart_item_quantity’, 10, 3 );
1.2. Callback Function
We need to write the callback function to disable the quantity change on the cart page.
Please remember that the function’s name should be the same as in the above hook. If you change the function name in the hook, then ensure you also change the function name in the following code.
function wc_cart_item_quantity( $product_quantity, $cart_item_key, $cart_item ){
if( is_cart() ){
$product_quantity = sprintf( ‘%2$s <input type=”hidden” name=”cart[%1$s][qty]” value=”%2$s” />’, $cart_item_key, $cart_item[‘quantity’] );
}
return $product_quantity;
}
Following is the complete code snippet that you need to use:
add_filter( ‘woocommerce_cart_item_quantity’, ‘wc_cart_item_quantity’, 10, 3 );
function wc_cart_item_quantity( $product_quantity, $cart_item_key, $cart_item ){
if( is_cart() ){
$product_quantity = sprintf( ‘%2$s <input type=”hidden” name=”cart[%1$s][qty]” value=”%2$s” />’, $cart_item_key, $cart_item[‘quantity’] );
}
return $product_quantity;
}
2. Paste the Code To Your WooCommerce Store
There are several methods to paste the code to your WooCommerce store. I have compiled a guide to help you paste the code snippets to WordPress. You can follow the guide and add the code to your snippet by any method you want.
I have used the plugin to add the code snippet to my store.

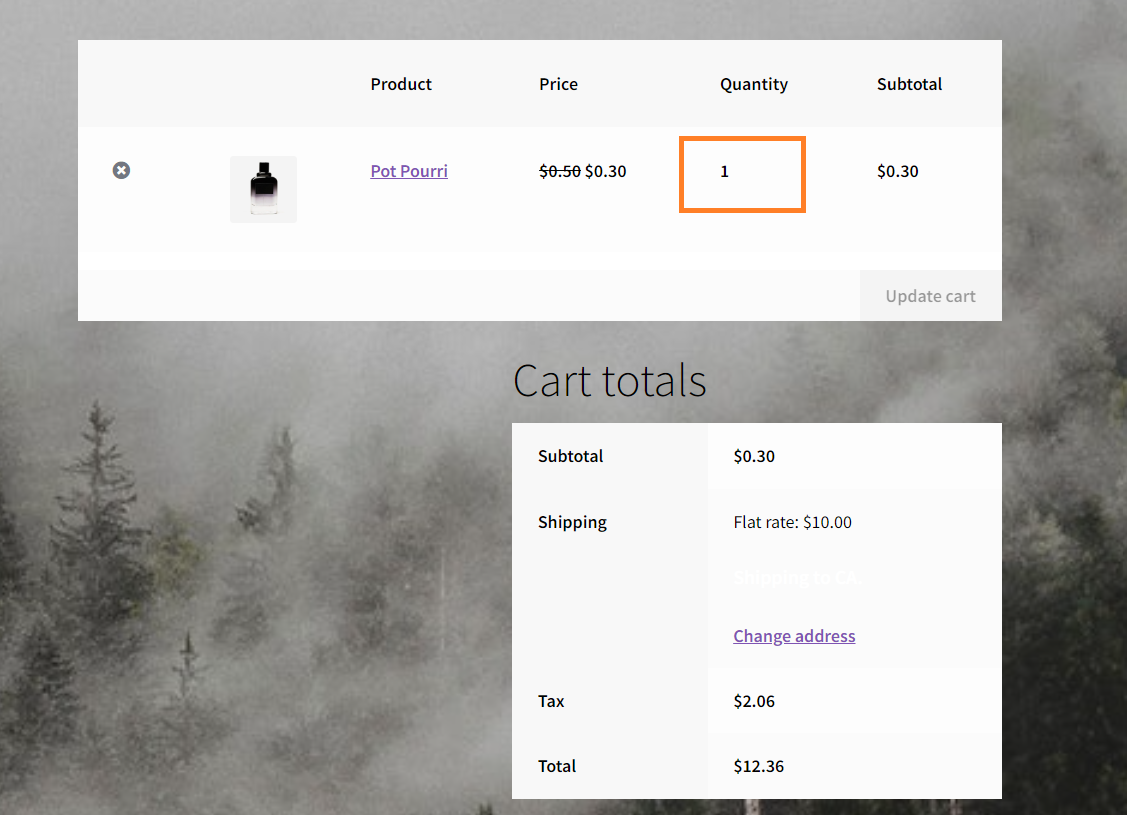
3. Final Results
After adding the code snippet to your store, if you visit the cart page. You will notice that you cannot change the product quantity in the cart.
I added a product to my store’s cart and got the following results.
Method 2: WooCommerce Disable Quantity Picker in Cart Page Using the AIO Checkout Plugin
The second method to disable the cart page’s quantity change is using the AIO Checkout plugin. With the help of this plugin, we’ll create a mini-cart and disable the quantity change in it.
This method will not only help you to disable the quantity change in the cart page, but it will also help you to improve the customer’s shopping experience by reducing the number of steps to complete the purchase.
So, let’s dive into it.
1. Install and Activate the AIO Checkout Plugin
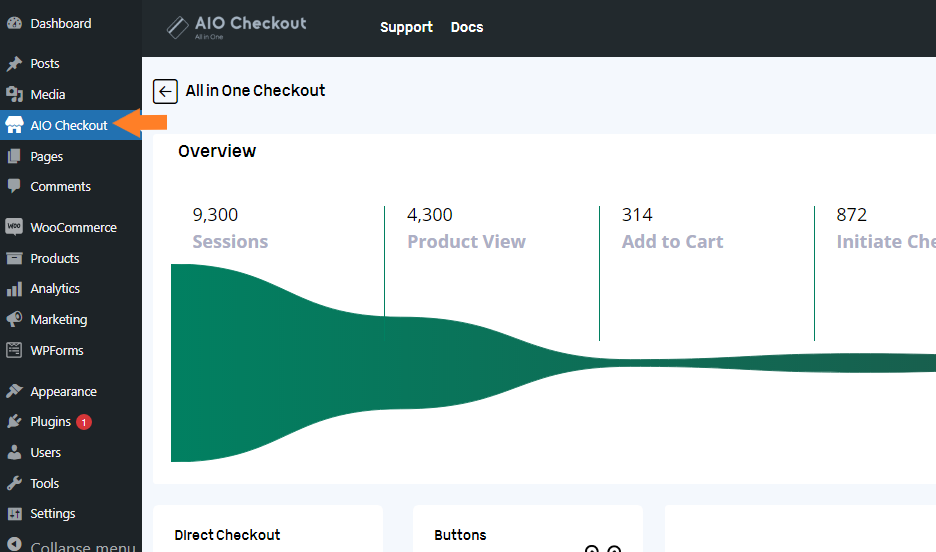
First, download the AIO Checkout plugin from the Woosuite store. Once you have downloaded it, navigate to the Plugins » Add New from your WordPress admin dashboard, and click the Upload button to upload the downloaded file to install and activate the plugin.

Once you have installed and activated the plugin, navigate to AIO Checkout from your WordPress dashboard.
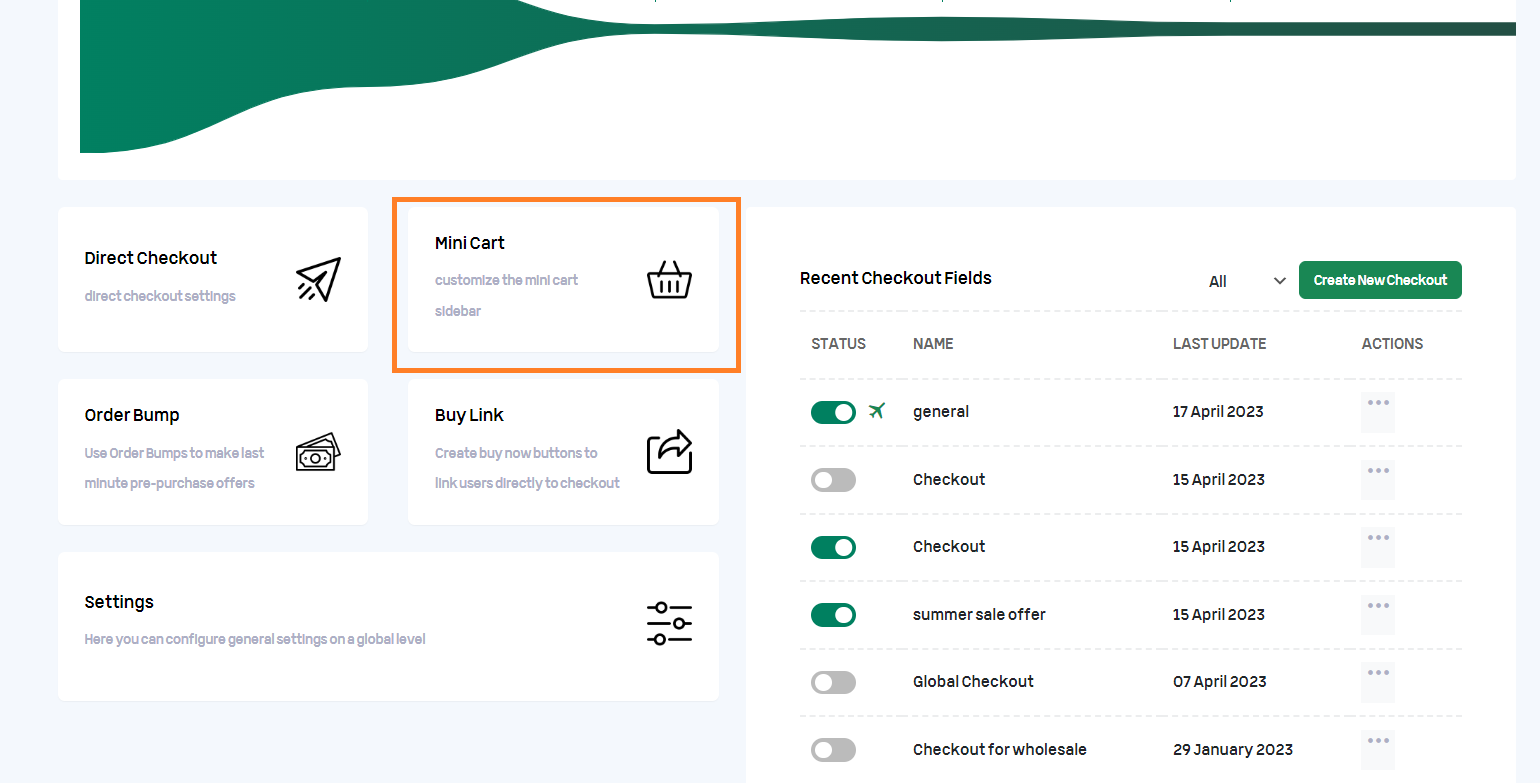
3. Click the MiniCart
We first need to enable the mini cart to disable the quantity change. So click the “MiniCart” section.
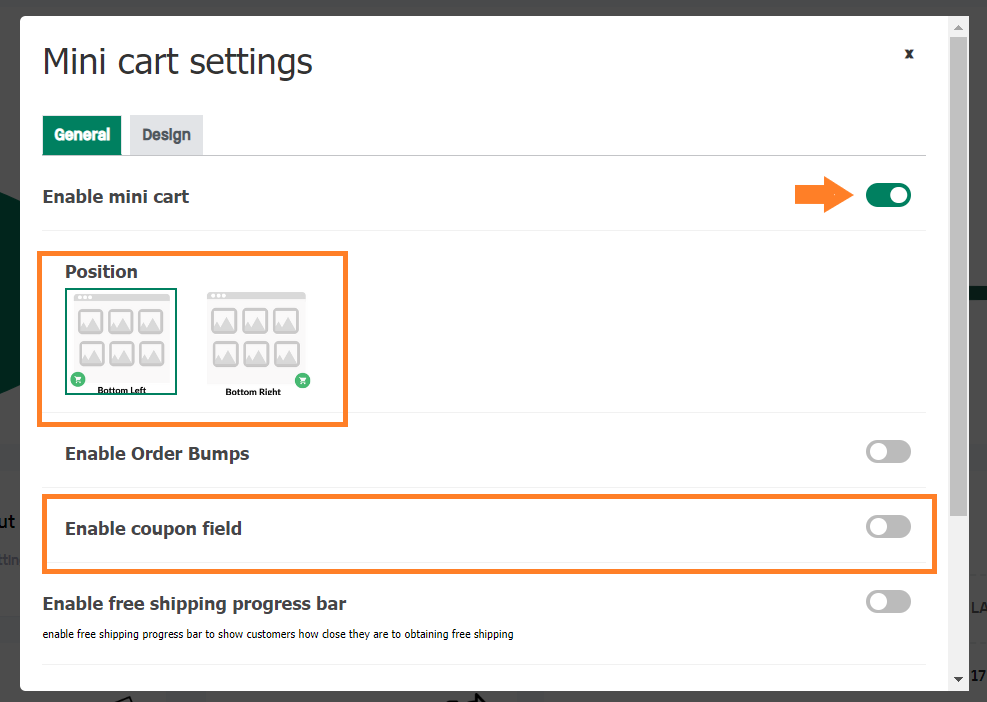
4. Enable the MiniCart
Once clicked, a new popup will appear. Click the toggle button next to the “Enable MinCart” to enable it. Select the mini cart icon position. I am keeping it to the default.
You can also enable or disable the coupon field in the mini cart.
5. Automatically Open MiniCart When the Product is Added to the Cart
After that, we need to automatically open the mini cart when users add a product to their cart. It will help them to reach the checkout fast and complete the purchase.
To enable this, toggle the ‘Automatically open mini cart after adding a new item to cart?’ option. It depends on you whether you want to enable it or not.

6. Override the Default Cart Icon
Next, we need to override the default cart icon so that when a user clicks it, it will open the mini-cart instead of going to the cart page.
Toggle the ‘Override the default cart icon’ option to enable it.

Once you enable it, a new field will appear below it. In the field, you’ll need to enter the cart icon id or class to trigger the mini cart.
6.1. Inspect the Cart Icon
To get the cart icon id or class, head back to your store’s shop or home page, right-click the cart icon, and click inspect to see the HTML code.

6.2. Copy the Cart Icon’s Class
Once you get the HTML code, the cart icon’s code will be highlighted. You need to copy the class name that is ‘cart-contents’

6.3. Paste the Cart Icon’s Class in the MiniCart Settings
After copying the class, head back to the mini cart settings and paste the class in the ‘Entering the cart icon ID or class to trigger opening the mini cart’ field.
Remember to put a dot (.) before the class name.
Note: If you use a class name, you’ll need to use the dot (.) before the class name. For example, .cart-contents
But, if you use the ID, you’ll need to use the hashtag (#) before the ID name. For example, #cart-contents
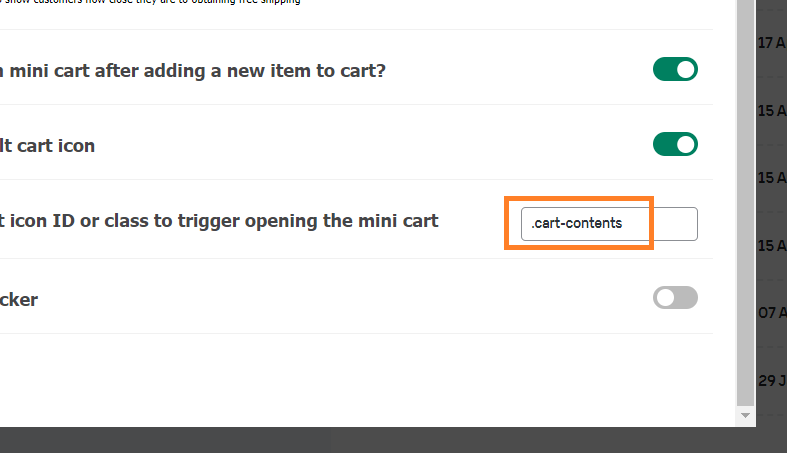
7. Disable the Quantity Picker
Next, you need to disable the quantity picker in the mini cart. Toggle the ‘Disable the Quantity Picker’ option to do so.
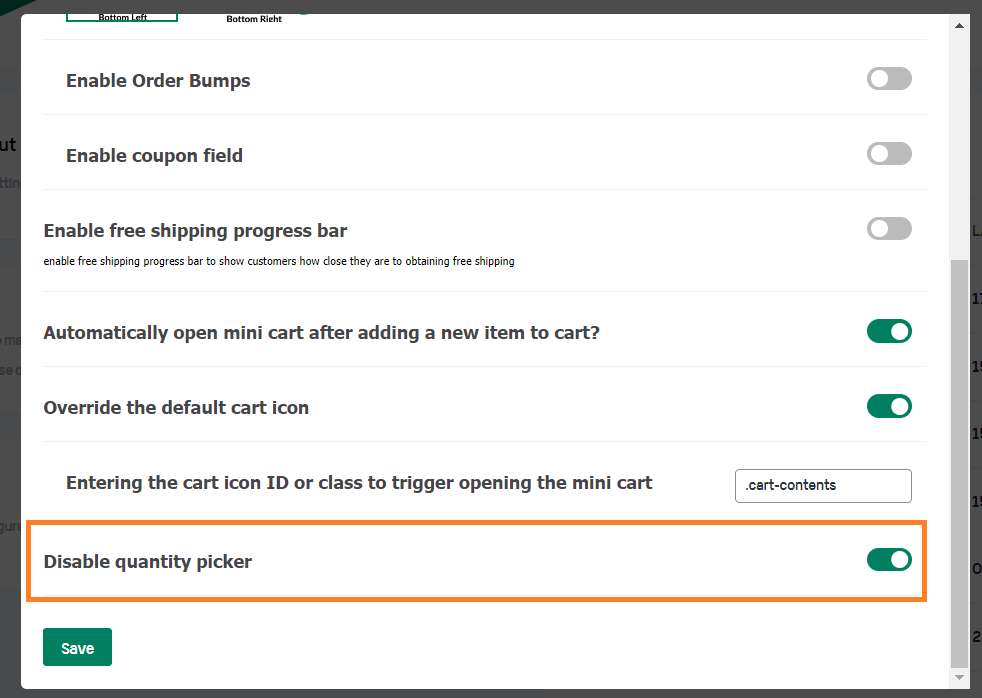
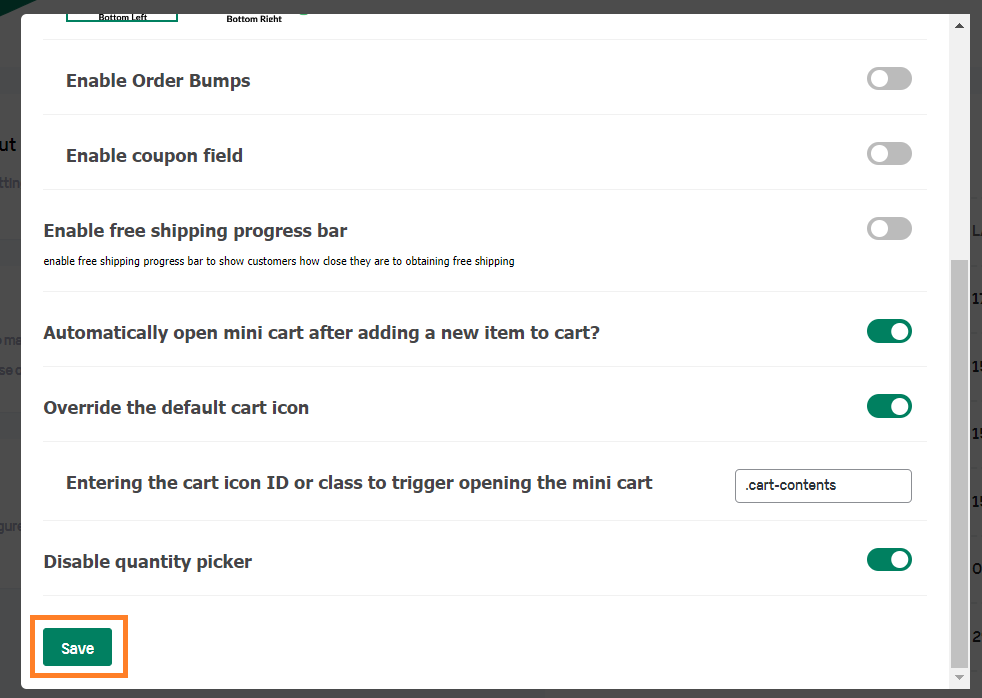
8. Save Settings
Finally, click the green ‘Save’ button to save the settings.
9. Final Results
Now let’s test the final results.
To test it, I visited my shop page and clicked the cart icon to open the mini cart. As you can see in the screenshot below, there is no quantity picker in the cart.
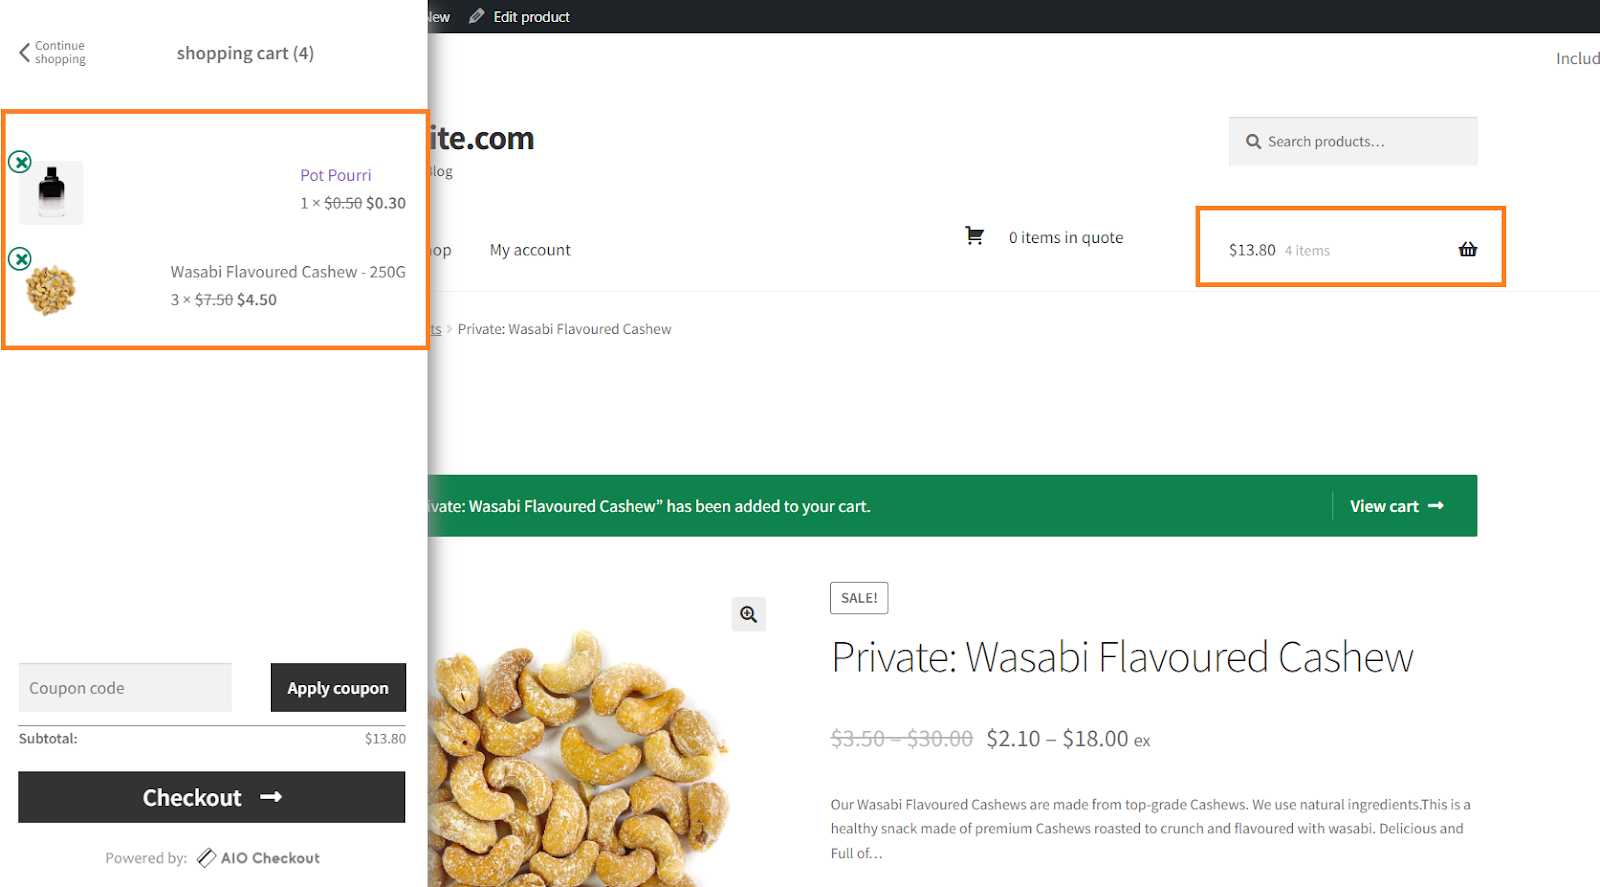
Now users can use the mini cart as the main cart page and directly go to the checkout page to complete the purchase. It will reduce the number of steps, increasing the customer’s shopping experience.
How to Improve the WooCommerce Cart and the Checkout Pages?
Woosuite is a collection of WooCommerce plugins that can help improve the functionality and appearance of your WooCommerce store. It also enables you to improve the cart and checkout pages.
To help you improve the cart and the checkout pages, Woosuite has developed the AIO Checkout plugin, an all-in-one checkout plugin that can help you take your store’s cart and checkout page to the next level.
I have compiled a few guides to help you customize the WooCommerce cart and checkout pages to improve the customer experience and increase sales.
- How To Create a WooCommerce Checkout Like Shopify?
- CartFlows vs. WooFunnels vs. AIO Checkout
- How to Customize the Add to Cart button in WooCommerce
- How to Customize the WooCommerce Product Image Size?
- How to Add a WooCommerce One-Click Buy Checkout
- How to Combine WooCommerce Cart and Checkout Page?
- How to Create a WooCommerce Checkout Countdown?
- How to Edit the WooCommerce Checkout Page
- How to Create a WooCommerce 2-step Checkout
- How to Create a Tripwire Funnel (With Examples 2023)
Conclusion
That’s it for today’s article. I hope this article was helpful to you and you were able to add the ‘WooCommerce disable quantity change in cart page’ feature to your store and achieve your goals.
This feature benefits business that sells limited edition or rare items, where there may be high demand and limited supply.
By limiting the number of products that customers can add to their cart, businesses can ensure that their products are sold relatively and equitably and that all customers can purchase them.
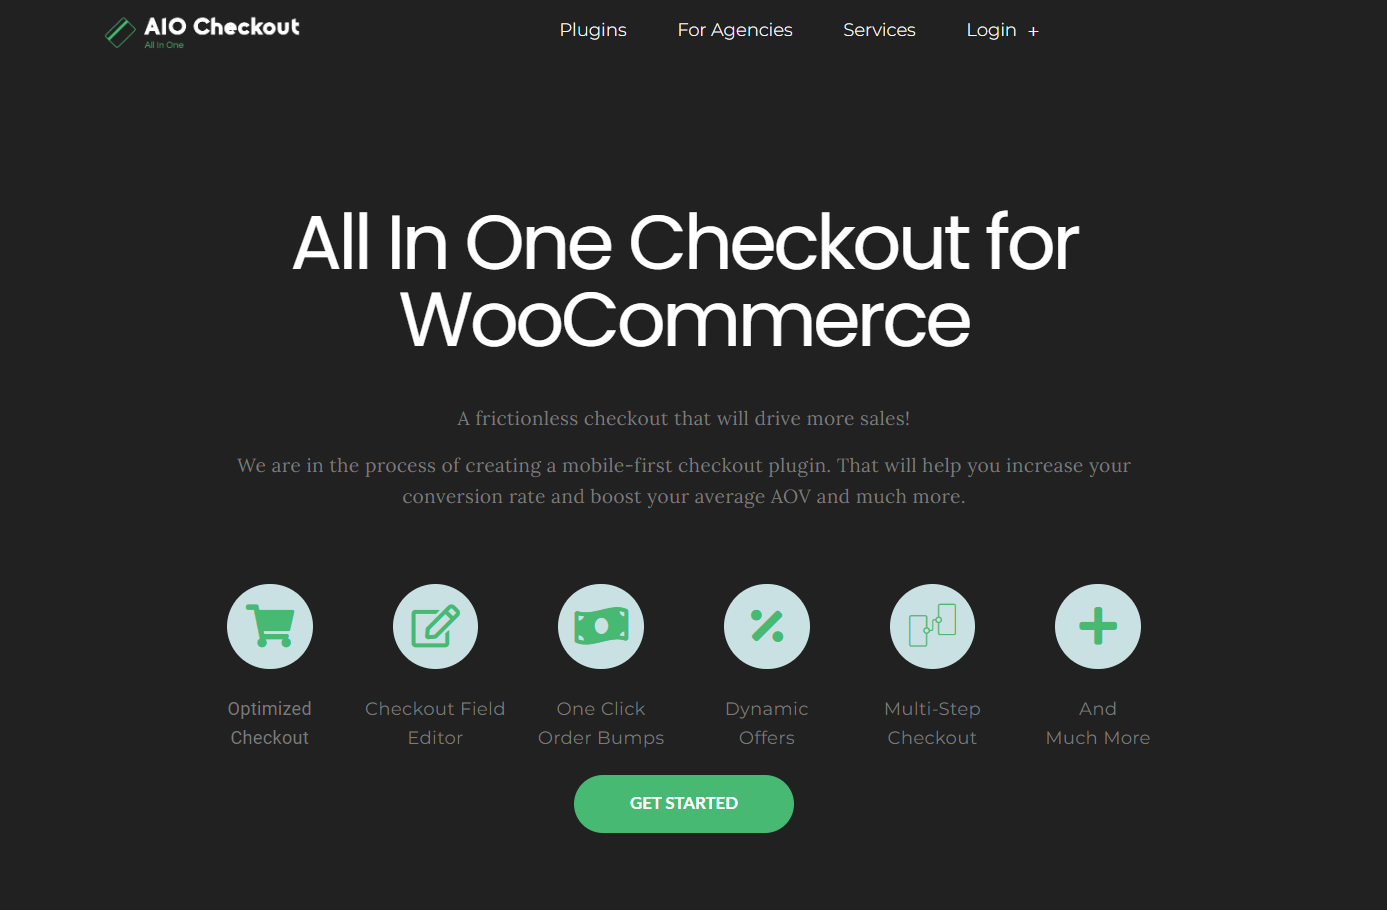
Ready to get started? Download the AIO Checkout now to take your WooCommerce store to a new level!


