Sometimes, you must temporarily close the store for various reasons, including seasonal closures, inventory changes, or unavoidable situations.
Ensuring a seamless customer experience and a professional transition at these times is crucial for reducing potential disruption and preserving their faith in your company.
In today’s article, I’ll walk you through the process of temporarily closing your WooCommerce store in a few simple steps. We’ll also discuss a few more things about the closing of the WooCommerce store.
Without any further ado, let’s jump into the tutorial.
On This Page
- 1 How to Temporarily Close WooCommerce Store?
- 1.1 1. Install and Activate the AIO Checkout Plugin
- 1.2 2. Navigate to the AIO Checkout
- 1.3 3. Create a New Checkout Form
- 1.4 4. Configure the New Checkout Form Settings
- 1.5 5. Temporarily Close the WooCommerce Store
- 1.6 6. Save Changes
- 1.7 7. Add a Global Message For Store Closure (Optional)
- 1.8 8. Final Results
- 2 Conclusion
How to Temporarily Close WooCommerce Store?
As mentioned above, I’ll temporarily use the AIO Checkout plugin to close the WooCommerce store. It is an all-in-one checkout plugin that helps you improve the WooCommerce cart and checkout pages and increase conversions.
Follow the following steps to close the WooCommerce store temporarily.
1. Install and Activate the AIO Checkout Plugin
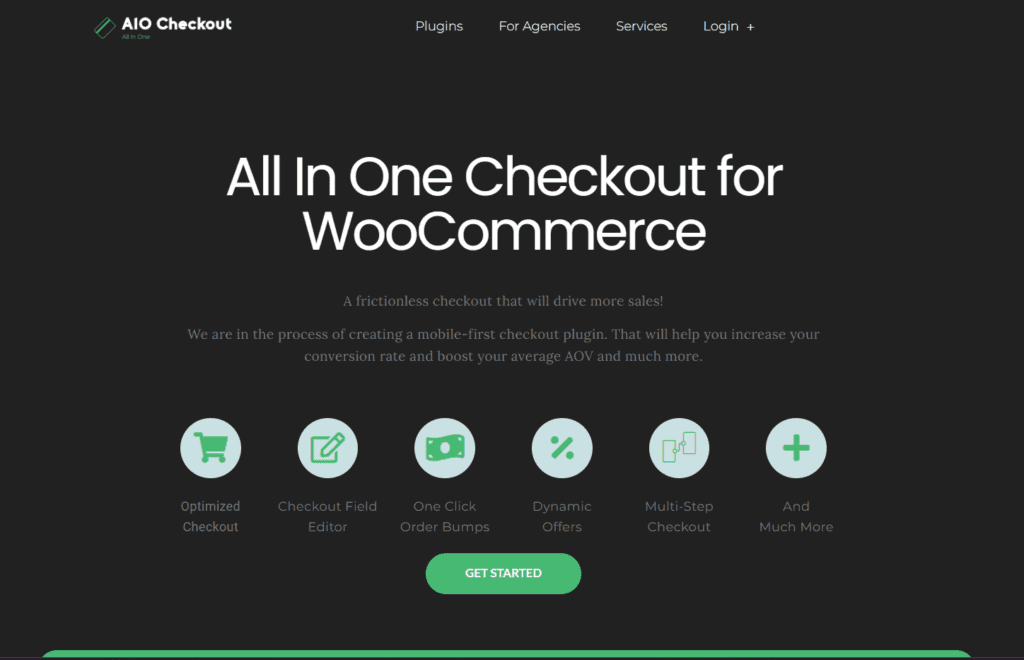
First, download the AIO Checkout plugin from the Woosuite store. It is free for now, and you can get it by submitting the form.
Once you have downloaded it, navigate to the Plugins » Add New from your WordPress admin dashboard, and click the Upload button to upload the downloaded file to install and activate the plugin.
2. Navigate to the AIO Checkout
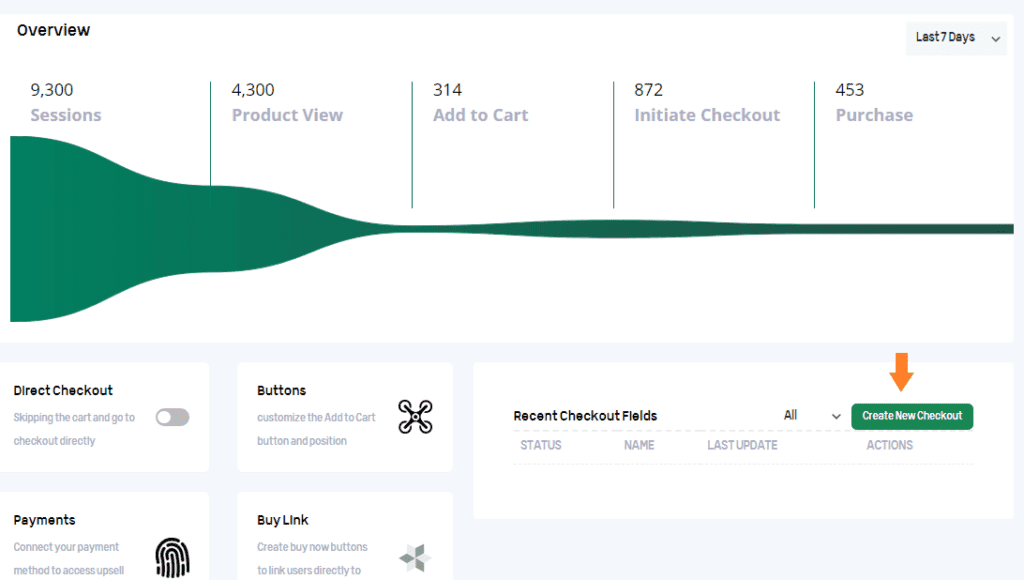
Once you have installed and activated the plugin, navigate to AIO Checkout from your WordPress dashboard.

3. Create a New Checkout Form
We need to create a new checkout form to close the store temporarily. Click the “Create New Checkout” button to create a new checkout form.
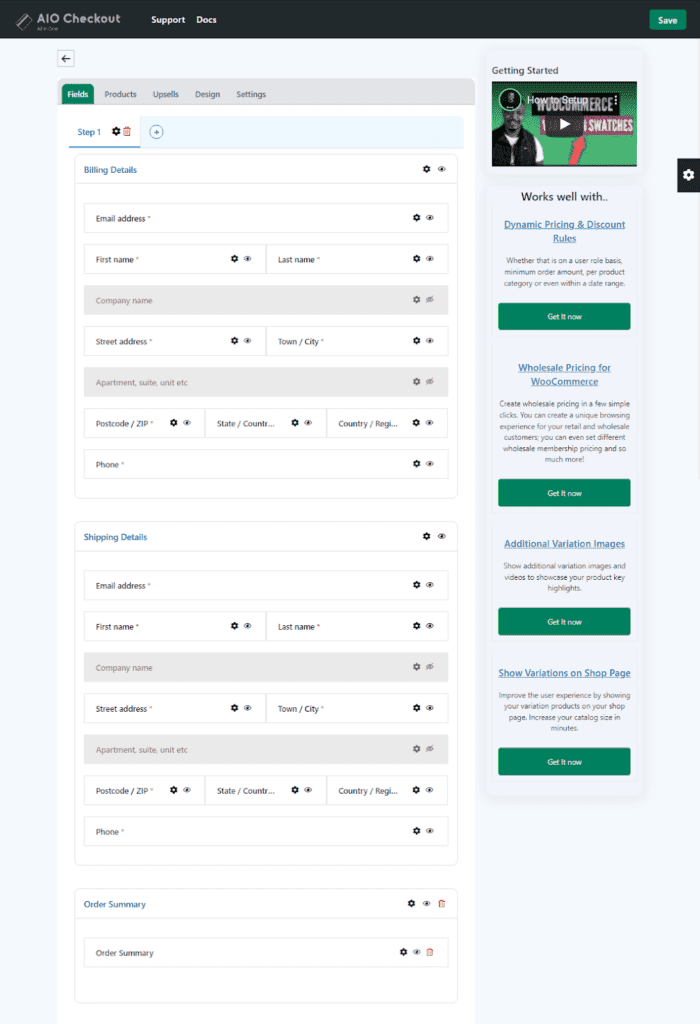
Once you click the button, a new checkout form is created. It’ll be the default WooCommerce checkout form, but you can completely customize it to improve the customer experience.
4. Configure the New Checkout Form Settings
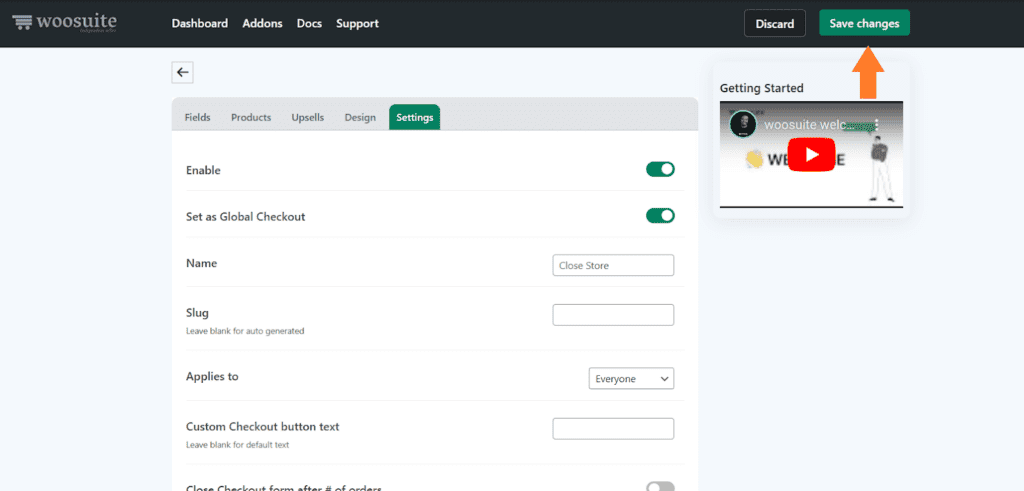
Next, we need to enable the new checkout form and configure a few more settings. To do so, click the ‘Settings’ tab. You’ll get several options under this tab.

4.1. Enable the Checkout Form
Toggle the ‘Enable’ option to enable the new checkout form.

4.2. Set it as Global Checkout
Next, we need to set this new checkout form as the global checkout. To do so, toggle the ‘Set as Global Checkout’ option.

4.3. Give a Name to the Checkout Form
You can also give a name to the checkout form. It will be helpful in case you are working with multiple checkout forms.
Enter the form name in the ‘Name’ field.

4.4. Applies To
Next, we need to specify the user roles; this new checkout form will be applied. As we want to close the store for everyone temporarily, ensure you have selected ‘Everyone’ from the ‘Applies to’ dropdown.

5. Temporarily Close the WooCommerce Store
Now to close the WooCommerce store, you’ll get two different options. The first is the ‘Close Checkout form after X of orders’ option.
It will allow you to close the store automatically after a specific number of orders. For example, if you set the number of orders as 50, then after receiving 50 orders, your store will automatically get temporarily closed.
The customers won’t be able to add products to their cart, nor can they get to the checkout page.
It is helpful if you sell limited-stocked products or exclusive products.
The second way to temporarily close the WooCommerce store is the ‘Close Checkout form after a specific date.’ For this tutorial, I’ll use this method to close the store.
It will allow you to set a date after which the store will be closed temporarily. To enable the close store mode, toggle the ‘Close Checkout form after a specific date’ option.

5.1. Select the Date to Close the Checkout
Once you enable it, you’ll see some new fields below it. The first field will be ‘Close Checkout on.’ You can select the date you want to close your store from that field.
I have selected today’s date as I want to close the WooCmmerce store right now.

5.2. Choose Checkout Restriction Type
Next, you need to select the checkout restriction type. You can set two different restrictions.
- Show Message
- Redirect to Link
You can choose the option you want. For this tutorial, I selected the ‘Redirect to Link’ option to redirect customers to a different URL if they try to access the checkout directly.

5.3. Add Redirect URL
Next, we need to add the redirect URL in the ‘Close Checkout redirect URL’ field. The users will be redirected to the specified URL if they try to access the checkout directly.
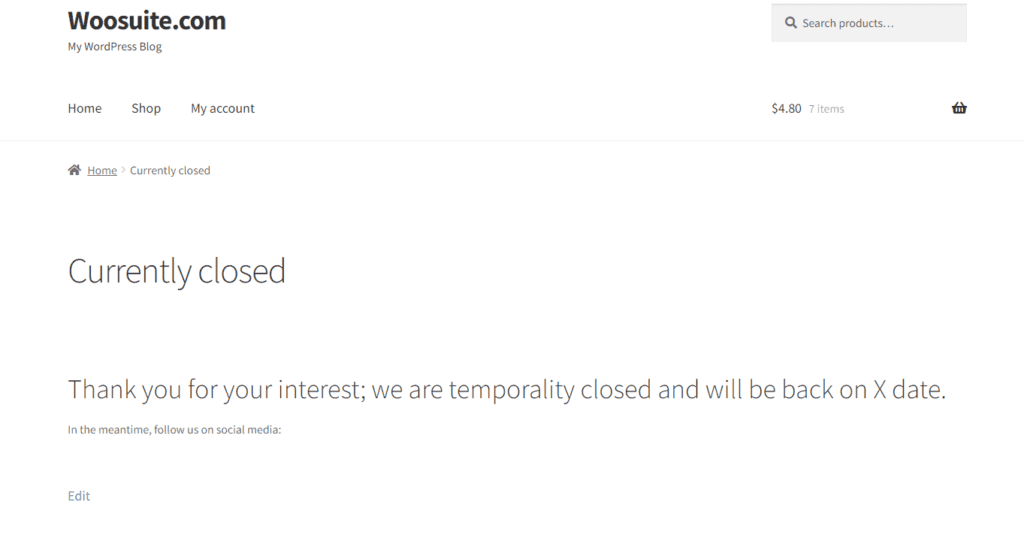
I have created a custom page telling the customers they are redirected to this page because the store is temporarily closed.

6. Save Changes
After that, scroll to the top and click the green ‘Save Changes’ button at the top right corner of your screen to save the settings.
7. Add a Global Message For Store Closure (Optional)
Now, the store is closed temporarily, but we also need to notify customers to let them know it is closed temporarily.
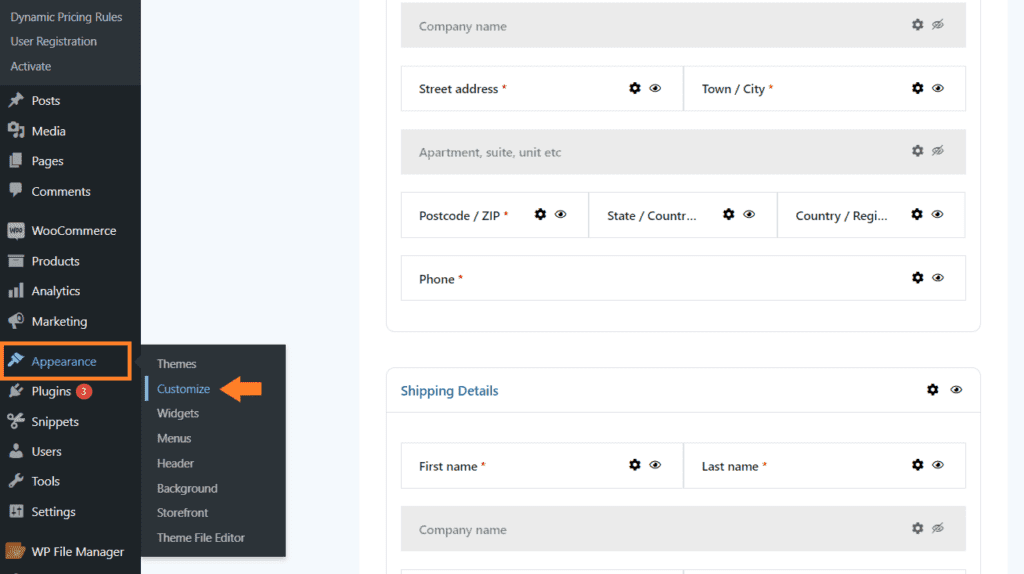
To do so, navigate to Appearance » Customize from your WordPress dashboard.
7.1. Click the WooCommerce Tab
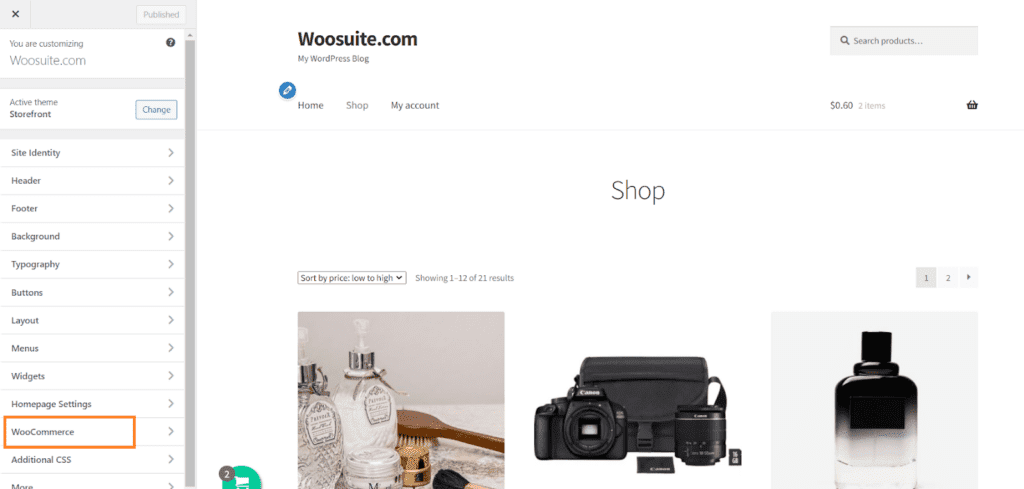
On the customize page, click the ‘WooCommerce’ tab from the left sidebar.
7.2. Add Store Notice
After clicking it, you’ll see a few different sub-options. Click the ‘Store Notice’ option to add the notice to inform customers that the store is closed temporarily.
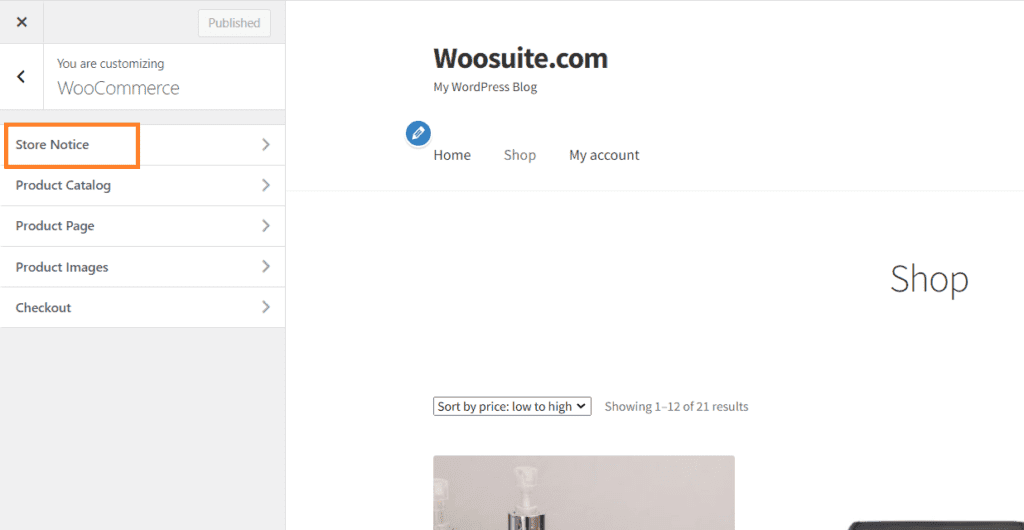
Once you click it, you can add the store notice. You can add whatever information you want. As this tutorial is about temporarily closing the WooCommerce store, I have added a note about it.

7.3. Enable Store Notice For Entire Store
Next, we need to enable the notice for the entire store. To do so, check the ‘Entire Store Notice’ option.

7.4. Publish the Settings
Finally, click the blue ‘Publish’ button at the top of the page to save the settings.

8. Final Results
Now let’s see the results. To test it, I visited my store, and as you can see in the screenshot below, I saw a notice bar at the bottom of the page saying the ‘store is temporarily closed.’
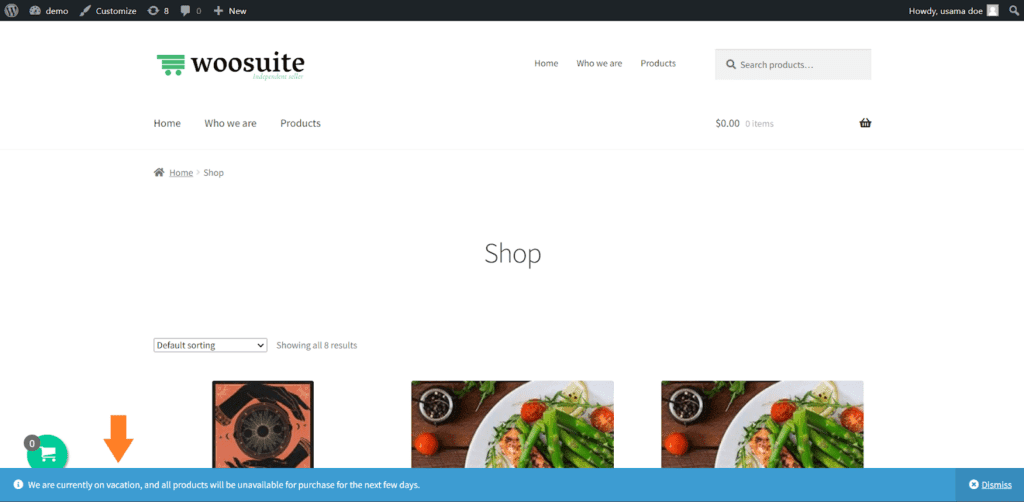
Also, I could not add any product to the cart, and when I tried to visit the checkout page using a direct link, I was redirected to the custom URL I specified at the backend.
Conclusion
I hope this tutorial helped you close your Woocommerce store temporarily.
AIO Checkout plugin will not only help you close your WooCommerce store temporarily quickly, but it will also help you improve your store’s cart and checkout page, ultimately improving the customer experience and getting you more conversions.
Ready to get started? Download the AIO Checkout plugin now and conditionally close your store!


